One Stamp Five Ways: Magnolia Apple Blossom

Hi friends! Happy Sunday!! Can you believe it’s the last day of July?! I sure can’t!! We are delighted to welcome back special monthly guest Suzy Plantamura with her latest edition of Suzy’s One Stamp Five Ways series! Read on and enjoy!
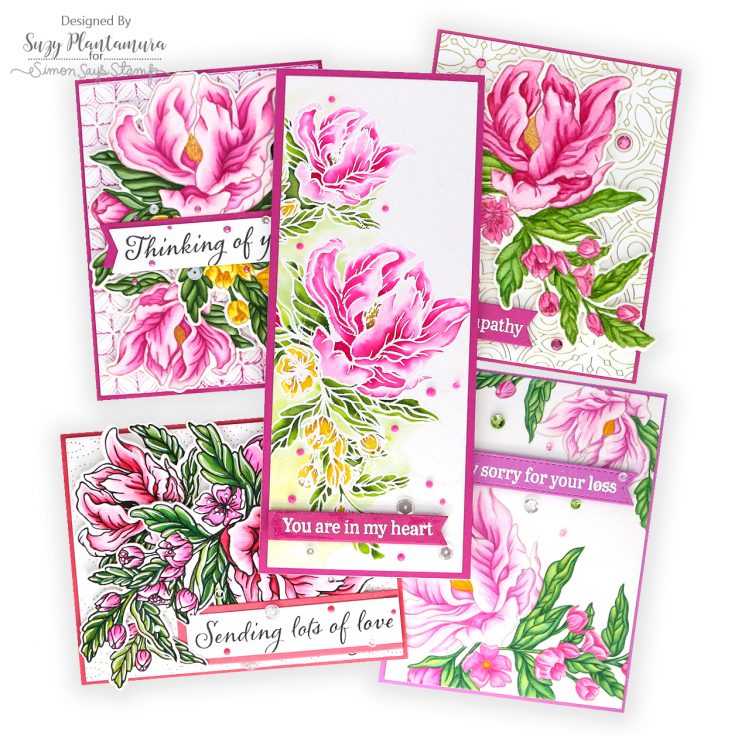
Hello friends! For today’s “one stamp, five ways” post, I picked a stamp set that is part of the Dream Big release called Magnolia Apple Blossom. I love floral sets and I really wanted to try this gorgeous arrangement with every one of my coloring options! I colored it with colored pencils, watercolors, Karin Decobrush markers, Karin Brushmarkers, and Copic markers. I can’t wait to show you all these labors of love (haha) and see which coloring method is your favorite!
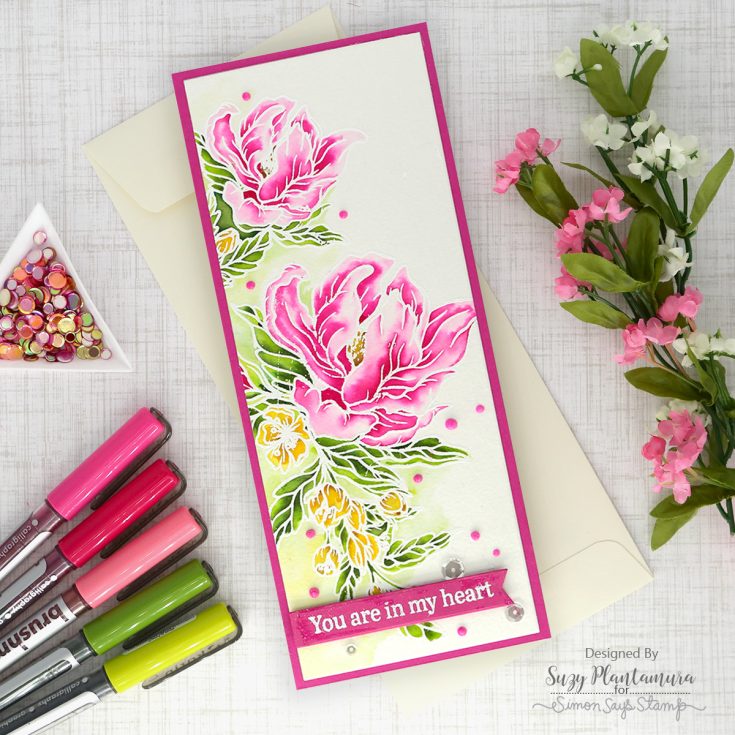
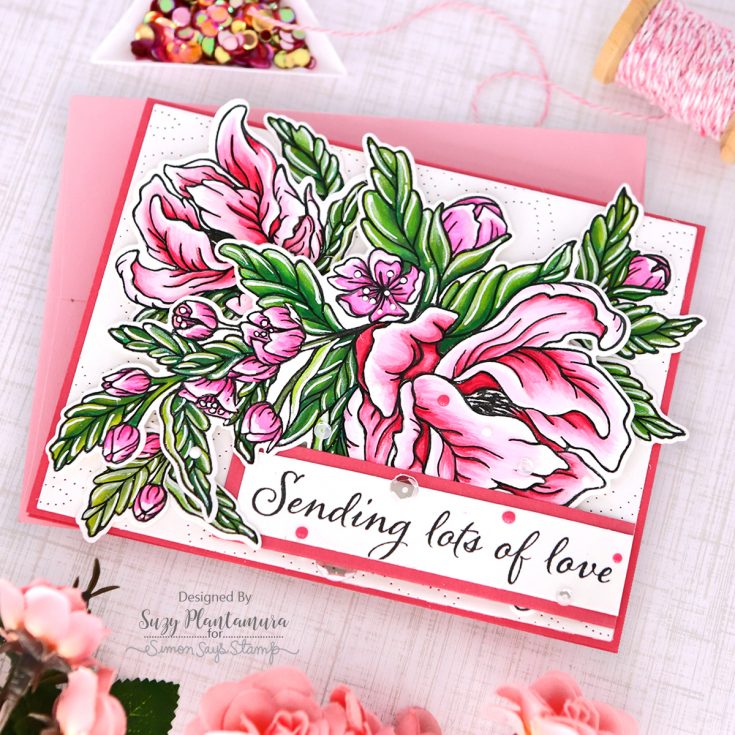
My first card is a slimline card using my Karin Brushmarkers as watercolors. I die-cut a piece of Arches watercolor paper with the largest rectangle in the SSS Slimline Rectangle Dies. I then embossed the floral designs on the side of the card so it would run vertical with white embossing powder. I used the largest floral group, the second largest flowers, and a couple of the smaller leaves on the inside of that flower to fill the space. I painted all of the stamped images with Karin Brushmarkers. I like using these markers with embossing powder so they don’t stray outside of the lines!
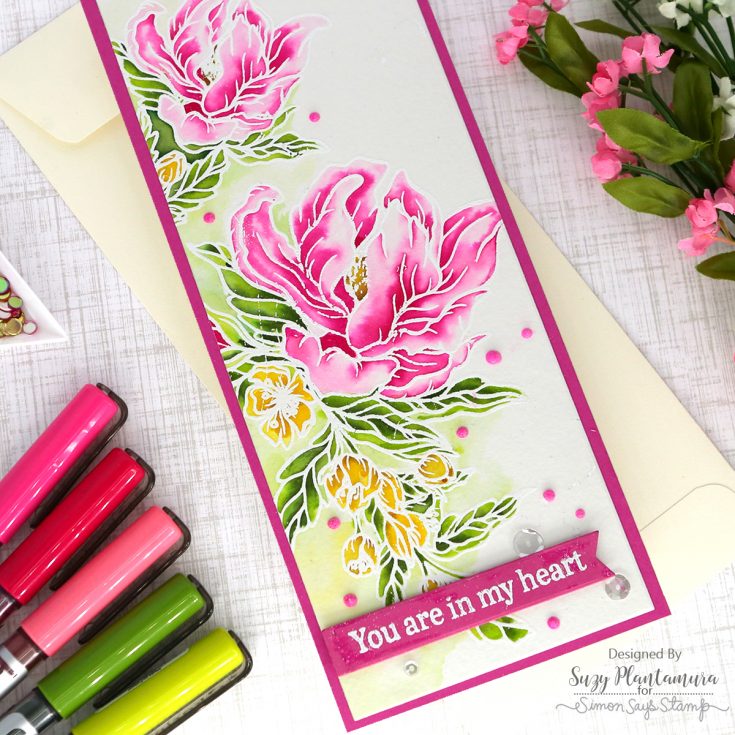
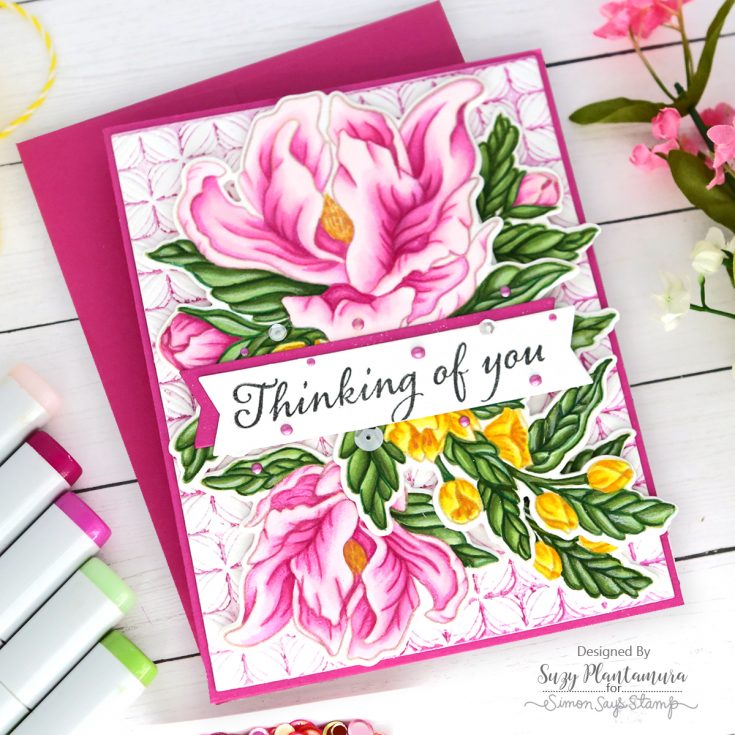
I attached this piece to a SSS Doll Pink cardstock card base. I then embossed a sentiment from the stamp set with white embossing powder on a small sentiment banner I had in my stash. I attached that to the bottom of the card with foam tape beneath it. I added some sparkling clear sequins and some Party Pink Nuvo Drops around the sentiment banner.
This time I stamped all of the images (and two of the small leaf) with Intense Black Ink on Neenah 110 lb. white cardstock. I’ve tried them on watercolor paper as well, but I prefer how they mix on this cardstock. I then colored them all in with Karin Decobrush markers. I recently purchased these markers which are more opaque like acrylic paint in a marker (so cool!). I love using them on stamped images. I go back and reoutline them once they are painted with a fine tip black marker though as the outlines get paint on them. It works best to paint just a small area starting with the darkest color and moving to the lightest on the petals. You need to work fast so the paints stay wet as you blend them. I used a white Uniball gel pen in the center of the smaller flowers.
I die-cut all of these pieces out. Then I made a background using the SSS Mandala Paint Wafer Die and white cardstock. I die-cut it to be smaller using the largest frame die in the SSS A2 Thin Frame Dies. I then attached it to a Lawn Fawn Guava cardstock base. I attached all of the die-cut floral images with foam tape behind them. I stamped one of the sentiments in the stamp set with Intense Black Ink on a white banner die-cut with the SSS Sentiment Label Dies. I also die-cut one that is one size bigger with the same Guava cardstock. I layered them over the bottom of the card. I added some sparkling clear sequins and Party Pink Nuvo Drops around the sentiment banner.
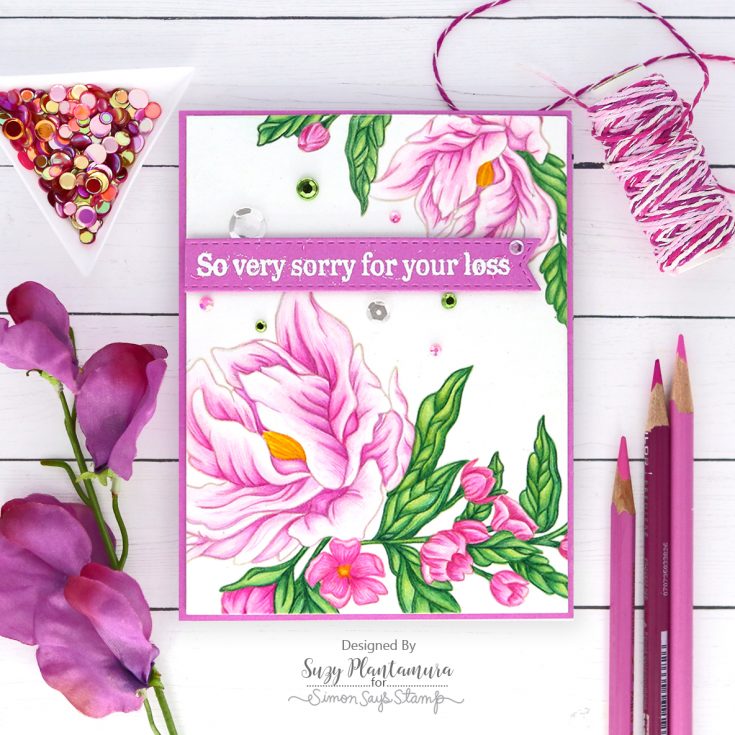
This is my colored pencil version and I believe it is MY personal favorite. Pencils are times consuming to use, but I love how soft and pretty they are when finished. I stamped the floral images on a piece of A2 white cardstock with Latte Pawsitively Saturated Ink. It’s the perfect color for no-line stamping! After I finished coloring, I die-cut this piece with the largest rectangle in the SSS A2 Thin Rectangle Dies and attached it to a pink card base.
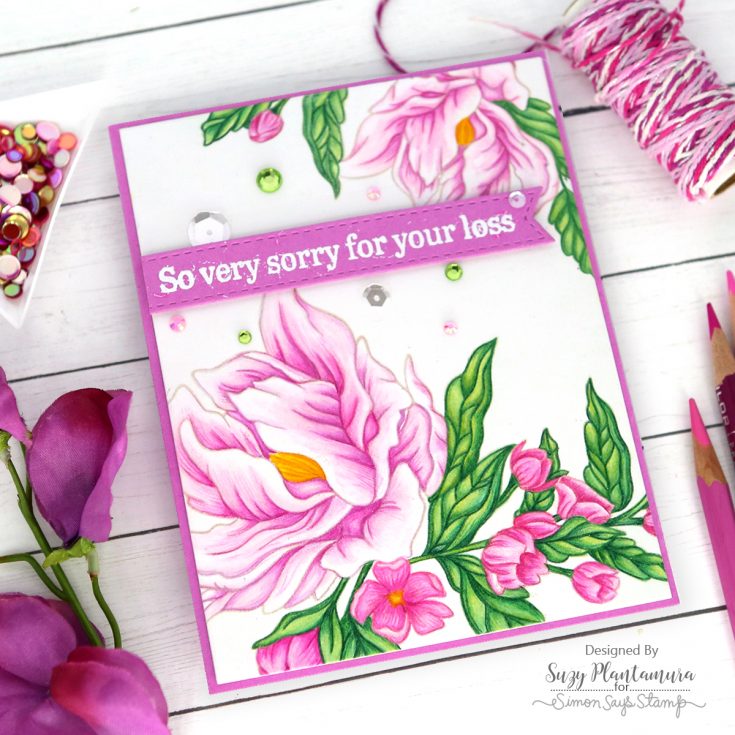
I also die-cut a banner from my stash with the same Doll Pink cardstock. I embossed another sentiment from the stamp set on it with white embossing powder and attached it to the top of the card with foam tape. I overlapped the left side of the banner on the front of the card and cut the edge of it off. I used some sparkling clear sequins and jewel stickers around the sentiment banner.
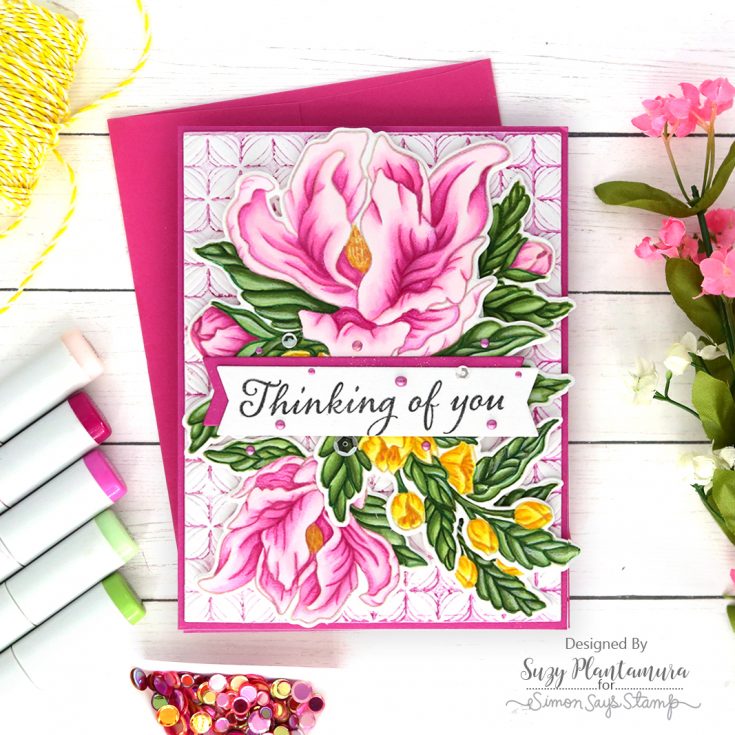
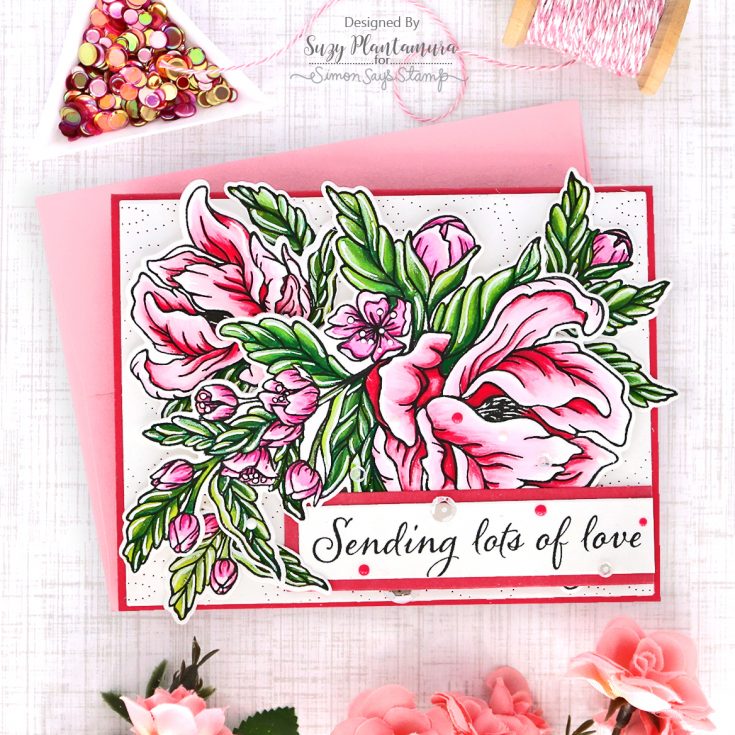
This card uses Copic markers to color all of the stamped images in. It is a favorite too. I stamped all of the images in the stamp set with MFT Natural Ink and then colored them in with the Copic marker colors I put in the supply list. I can’t help myself, so I added a little dark shading on the inside areas of the flowers with a colored pencil. It’s an addiction I tell ya! I used a white Luminance pencil to lighten areas that I felt were too dark on each leaf. I die-cut all of these images out with the matching dies.
I made my background for this one with the SSS Luman embossing folder. I rubbed SSS Hot Mama Ink on the inside of the flat part of the embossing folder before running it through my die-cutting machine. I die-cut this piece with the largest rectangle in the SSS A2 Thin Frame Dies and attached it to a Doll Pink card base. I attached all of the floral images with foam tape behind them. I stamped a sentiment from the stamp set on a white banner with Intense Black Ink and also die-cut another banner out of the fuchsia color of cardstock. I then attached both layered to the center of the card. I added some Nuvo Drops and sparkling clear sequins around the sentiment.
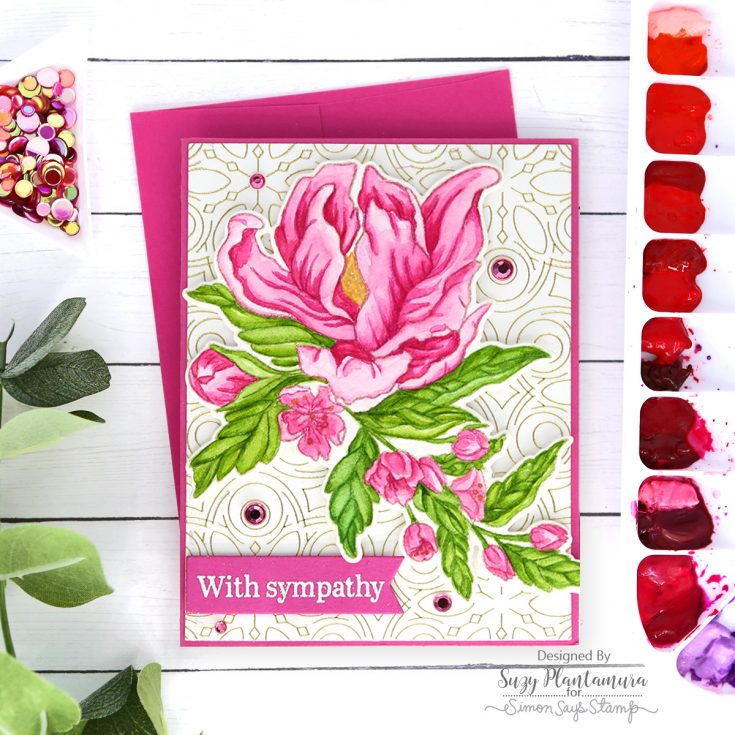
My last card uses my Daniel Smith watercolors. I first stamped the large floral group only with MFT Natural Ink on a piece of Arches watercolor paper. I ended up outlining all of the images with matching colored pencils as I just need things to have edges! I die-cut this piece out.
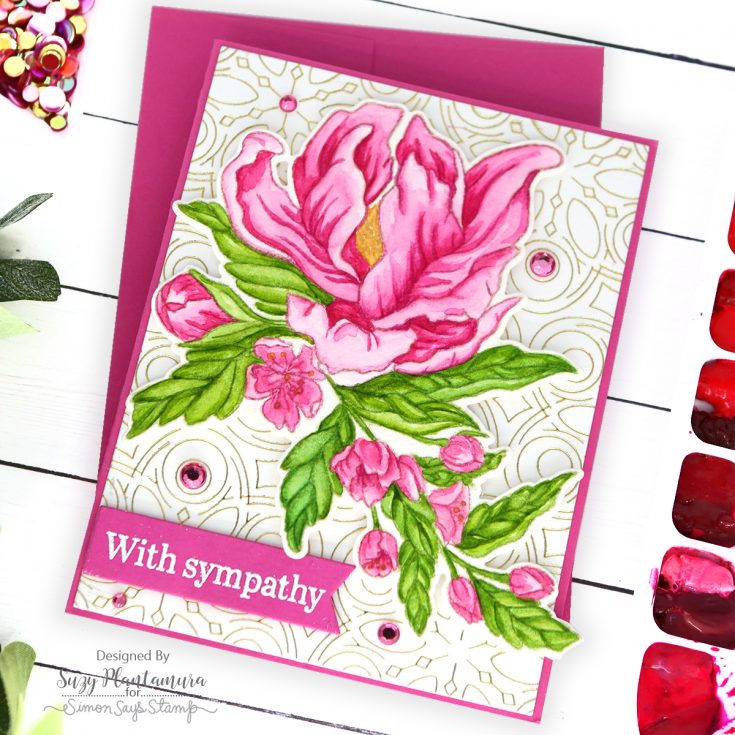
I made the background with the new SSS Bohemian Background hot foil plate. I used my Glimmer System and gold glimmer foil and white cardstock. I cut it down with the SSS A2 Thin Frame dies and attached it to a piece of fuchsia cardstock. I then attached the floral image over it with foam tape beneath it.
I die-cut a banner with the same color of cardstock and embossed the last of the 5 sentiments in the stamp set with white embossing powder. I attached that to the bottom of the card with foam tape behind it. I added some Doodlebug Retro Mini Jewels in bright pink around the sentiment.
I think everyone that knows me knows I love to color! This means that large floral images are usually my favorite type of stamp and this Magnolia Apple Blossom did not disappoint! I would love to hear which of my 5 coloring methods is your favorite. The Karin Brushmarkers were the fastest by far, so if you are looking for quick I highly recommend them with embossed images! I love having so many different coloring options to use on stamps and it really encourages me to use my stamps more! I hope you enjoyed this “one stamp, five ways” post and remember I do one on my blog using a SSS stamp weekly. Thanks so much for visiting today! Suzy
SUPPLIES:
|


Thanks so much for stopping by, and thanks to Suzy for being our guest!


GASP! These are breath-taking!!
Wow!!!!! Absolutely Stunning!!!!! I love the way you make each card look like you used a different stamp!!!!
Just gorgeous … and as always, one of my favourite blog features!
Wow!!!!! Amazingly beautiful!!!!! I adore how you make each card appear as though a separate stamp was used!
Thank you for showing how one stamp can look different by using different techniques and mediums. These cards were lovely. The stamp is lovely, also.
Wow!! Your cards and colouring is fantastic. I love them all. Thanks so much for sharing. Have a good day!:)
One Stamp Five Ways: Magnolia Apple Blossom is a one-of-a-kind stamp set created by Alyce Kendig. This 4×6 stamp set features images of sweet magnolia blooms nestled amongst apples, carrots and more. Embossing and enrobing was used to create a rich patina. One Stamp Five Ways: Magnolia Apple Blossom uses the following standard dies.
I can now play the dino game!
Thank you for the article! I have studied about similar subjects! Unlike other submissions, however, I have a very unique impression of yours. I hope you will continue to share articles of this caliber with the public.
gorgeous cards
The unsung champions of adaptability are cotton coats; they look elegant with any ensemble and blend in smoothly. For buy high quality of cotton jackets visit our website Iconic Jacket
AMAZING
Both full size sex doll
and single-piece sex doll torsos have their own advantages and considerations, and the right choice depends on factors such as desired functionality, budget, storage space, and personal preference.
cheap sex dolls represent a form of self-care and self-expression for their owners. By investing in a doll that caters to their preferences and desires, individuals can prioritize their own pleasure and well-being. Whether used for relaxation, stress relief, or simply indulging in personal fantasies, these sex dolls cheap allow their owners to prioritize their own needs and desires in a fulfilling and empowering manner.
those flowers are gorgeous
This isn’t just a toy — it’s a full-size, beautifully made silicone companion. I was especially impressed with how balanced her weight is. The skin is soft and odor-free. The assembly took 10 minutes, and this robot sex doll’s perfect. This store deserves all the praise it’s getting.
Sprinkle clear embossing powder over the stamped image, shake off excess, Bloodmoney Game and heat-set with a heat gun for a raised effect.
five unique coloring techniques transforming one flower stamp into a bouquet of creative possibilities
I love your creative stamp ideas! It reminds me of how I get creative in games like blood money game clicker to pass the time. Thanks for sharing!
I love your creative stamp ideas! It reminds me of how I get creative in games like blood money game clicker to pass the time. Thanks for sharing!
The billing from absolutesexdoll.com was completely discreet – just showed up as a regular company name. No embarrassing descriptions on my credit card statement.