One Stamp, Five Ways: Love You, Mama

Hi friends! Please join me in welcoming back special monthly guest Suzy Plantamura with another fun rendition of “One Stamp, Five Ways” featuring our newly released Love You, Mama set! Read on and learn more! Enjoy!

It’s that time of the month for my “one stamp, five ways” post! I used the new DARLING Love You, Mama stamp and die set as well as a few other products from the You Are My Favorite release. I always love the stamps that this illustrator designs, so I end up using them for my guest post often. Who can make only one card with these cute little stamps? Here they are!

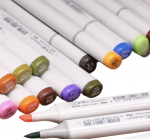
I stamped all the images in the Love You, Mama stamp set with Versafine Ink and colored them all in with Copics. I die-cut them all out with the matching dies. I always do this step before I think of card ideas! These images are large enough that you can use only one on a card if you prefer.

I made the background with Tim Holtz Heavyweight black cardstock using the Dibble Tile embossing folder, I rubbed some SSS white ink over it very lightly to the raised portions. I cut it down a little and attached it to a white card base. I die-cut one of the new Petal Tipped Label Dies from white cardstock. I applied a little bit of Sprout Ink to the bottom and Marine Ink to the top and attached it to the black background. I added the bears (making them pandas for this card) over the background with foam tape behind them. I stamped a sentiment from the set and added that to the bottom.

I wanted to make a CAS card because it’s so not my style, but I admire them so much. I attached a piece of removable tape to the bottom 1/3rd of a white card. I rubbed Seafoam Ink over the top of it for a sky. I left the edges white and only applied ink to the inside area.

I attached the dog images to this one a little below the sky line. I stamped a few more of the butterflies (from the dog stamp, but die-cut out separately) and colored them to match. I attached 5 butterflies to the sky. I stamped a sentiment with Versafine Ink and attached that to the bottom of the card. Does this count as a CAS card???

I used the new Sqouvel Dies for the base of this card. I attached the largest die to a white A2 card base, keeping the left edge of the die over the edge of the card so it wouldn’t cut through. This gave me a sqouvel shaped card base. I die-cut another one the same size and then embossed it with the new Hopping Hexagon Embossing Folder. I attached the embossed background to my card base. I rubbed some Cabbage PSInk to the top center and right edge.

I attached the elephant stamp that I had colored to the right side and slightly trimmed some off the neck area so it would fit on the edge of the card. I stamped and die-cut a few more of the leaves from this same stamp and tucked them under the others so it was “leafier”. I die-cut another one of the Sqouvel Dies that is smaller for a sentiment. I rubbed some Cabbbage Ink around the edges and stamped two sentiments from the stamp set with Versafine Ink. I tied some twine to the left side attaching it with glue on the top and bottom of the inside of the card so it would stay in place.

I cut a piece of white cardstock to be 3.5” x 8.5”. I applied Marine and Seafoam PSInk to the top 2/3rds and Sprout and Fairway Ink to the bottom1/3rd. I stamped another set of the bears and this time I turned them into brown bears.

I used three of the stamped/colored images on the front of the card with foam tape underneath their heads. I stamped and colored a few of the hearts in the stamp set and glued them around the sky. I also stamped a sentiment from the stamp set and die-cut it out using the matching dies.

This new Scalloped Floral Tag set might be my favorite item in the new release! I die-cut two of them for my last project. I applied Sprout and Fairway Ink for the grass and Marine and Seafoam Ink for the sky on both. I glued the scalloped tops to the two tags leaving them white. I added a bunny, and a kitty set of stamps to each tag and trimmed off any that hung over the edges. I added some stamped hearts as well. I added a straight sentiment to the bottom of each. Last, I tied some ribbon and twine in the top. These are perfect to tie onto a treat bag!
Thank you for visiting today. I hope you enjoyed this “one stamp, five ways” post using the Love You Mama stamp and die. Too bad I don’t have more than one mama to send cards to as I have quite a few made now. I guess my daughter’s will be mama’s soon enough! Have a great May friends! -Suzy
SUPPLIES:
|


Thanks so much for stopping by, and thanks to Suzy for being our guest!


Dear SSS & Suzy P –
I love these! They’re super-sweet! I esp love the panda and elephant cards! Their backgrounds in particular are superb.
Lori S in PA
such fun cards
Beautiful projects
Such creative and heartfelt card ideas—perfect for celebrating moms in a meaningful way!
Such a sweet and creative set of card ideas! I really admire how you showed different ways to use the same stamp. As a trans woman who enjoys crafts, it’s inspiring to see how versatile these designs can be for making heartfelt cards for loved ones.
Discover the finest collection of adult dolls online, crafted with lifelike details and premium materials for an unforgettable experience. Whether you seek realistic companionship or artistic expression, trusted platforms offer quality and discretion. Visit https://www.zelexdoll.com/pages/terms-of-service to understand purchase guidelines and user policies before ordering. Enhance your lifestyle with customizable features, diverse designs, and safe shopping options, ensuring satisfaction and confidence with every choice you make.