One Stamp, Five Ways: Hello There
Hi friends! Happy Thursday! Welcome to a brand new installment of Suzy Plantamura‘s “One Stamp, Five Ways” feature – where, this month, she got SO EXCITED- she ended up making a 6th card!! This sweet stamp set named Hello There is from our brand new Sending Sunshine collection! Read on to find out more information and enjoy.
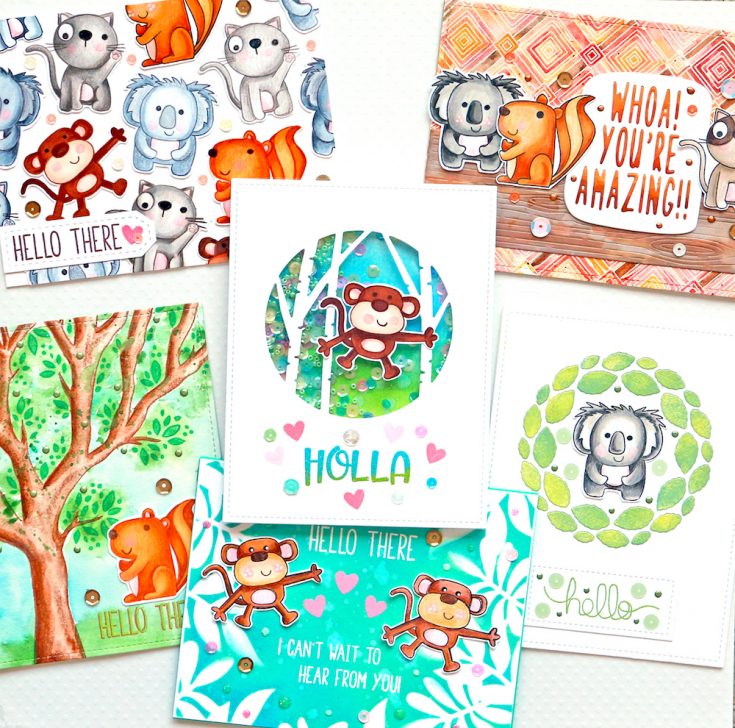
Today I get to share another “one stamp, five ways” post with you using a stamp set from the brand new Sending Sunshine product release called Hello There. My two favorite type of stamps are flowers and animals, so this one definitely jumped out at me! There are four cute critters in it as well as accessories and four sentiment choices. I actually made six cards today using the stamp set, so I’ll be including a bonus one at the end!
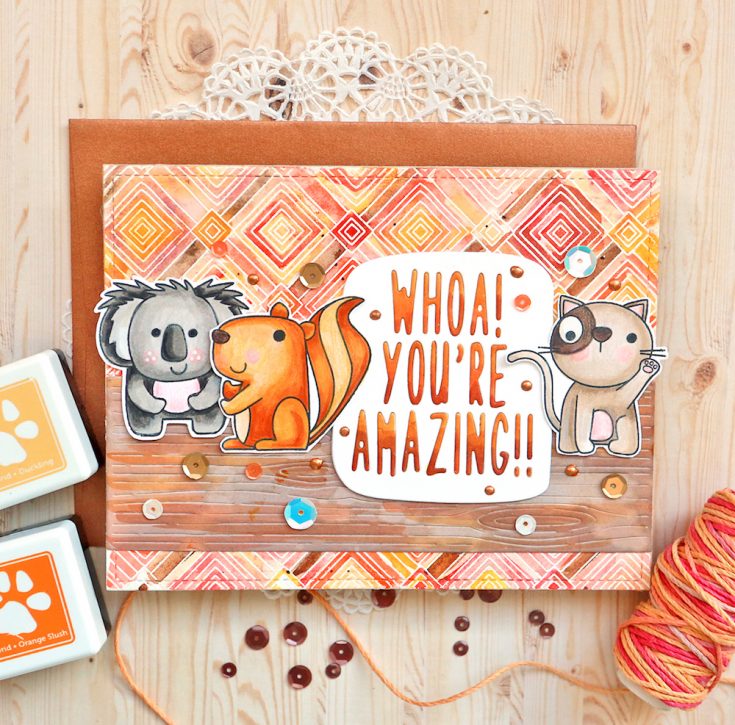
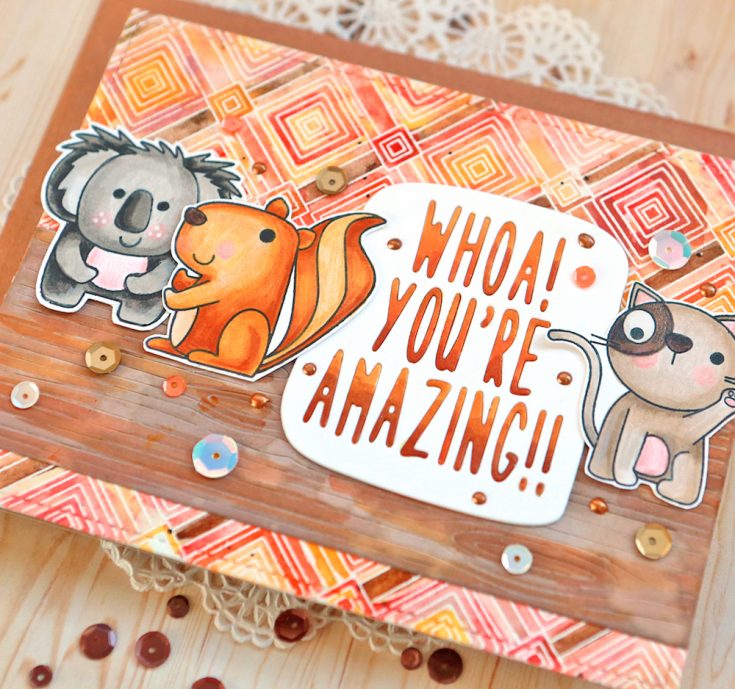
For this card, I started with a cling stamp called Deco Diamonds from the new Sending Sunshine Release watercolored in reds, yellows, and browns. I thought it would make a good background for some of these critters I also used two other SSS dies including the Woodgrain Block Die and the Whoa! You’re Amazing Die.
Here are some tips I used when creating this card:
When watercoloring the background, use a fine tip paintbrush for some of the areas keeping the color inside the lines, but then use a larger paint brush for other areas with lots of water so the colors blend together and look messy
Color the letters inside of the “Whoa! You’re Amazing” Die with Copic Markers to match your card and then when attaching the die, use the colored letters inside it
After you watercolor, the Woodgrain border die, add some shading with Copic Markers to give it more of a wood look
Color the critters with Copic Markers and then add shading with colored pencils – mixing coloring mediums is my favorite way of coloring!
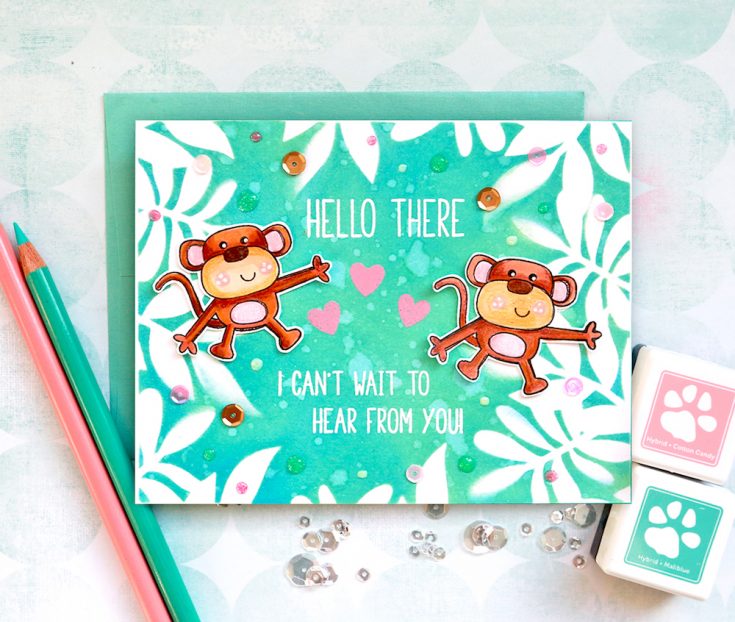
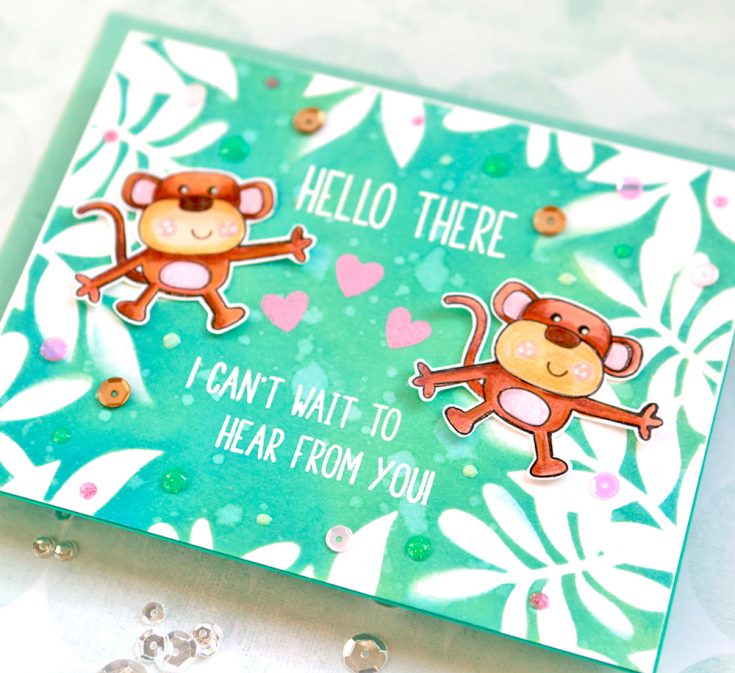
I created the background of this card using the Leafy Frames stencil from the new Sending Sunshine release and Distress Oxide Inks. I thought it made the perfect little jungle setting for the monkeys in the stamp set!
Here are some tips for this card:
Attach the stencil to the card front with removable tape so it doesn’t move around while you work with it; rub the inks over the stencil from the outside to the inside so the leaves stay put (you can see some spots where I rubbed ink under the leaves because it moved on me – oops)
When working with Distress Oxide inks, rub the darker color on first (I used Salty Ocean) to cover the entire area, then rub the lighter color (Cracked Pistachio) over it as it covers the layer underneath
Flick some water drops on the background and wipe them up for bleached areas in the background
Emboss some hearts in the center of your card to fill in that space and add some texture and “love”
Cut stamps apart when you stamp your sentiment so they fit into the space you have perfectly (is this terrible? I cut my stamps apart all the time!)

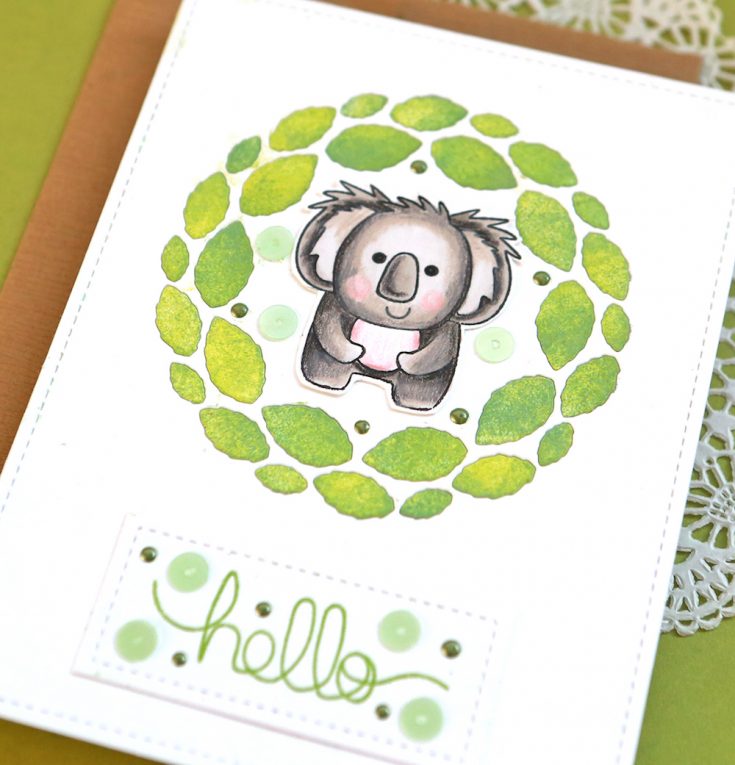
This new Leafy Circle Wafer die was perfect for a background for a koala bear! I rubbed ink on each of the leaves and replaced them into the wreath.
Here are some tips:
When rubbing ink over the leaves use a stipple brush for the darker color so they are speckled (I used Twisted Citron first and then Lucky Clover over it)
Apply adhesive to the entire card front so that when you are layering the leaves inside the wreath they will adhere without applying more adhesive!
Use a stitched rectangle for your sentiment (white on white) if you are trying to cover a mistake as I was (I got ink on my card front!)
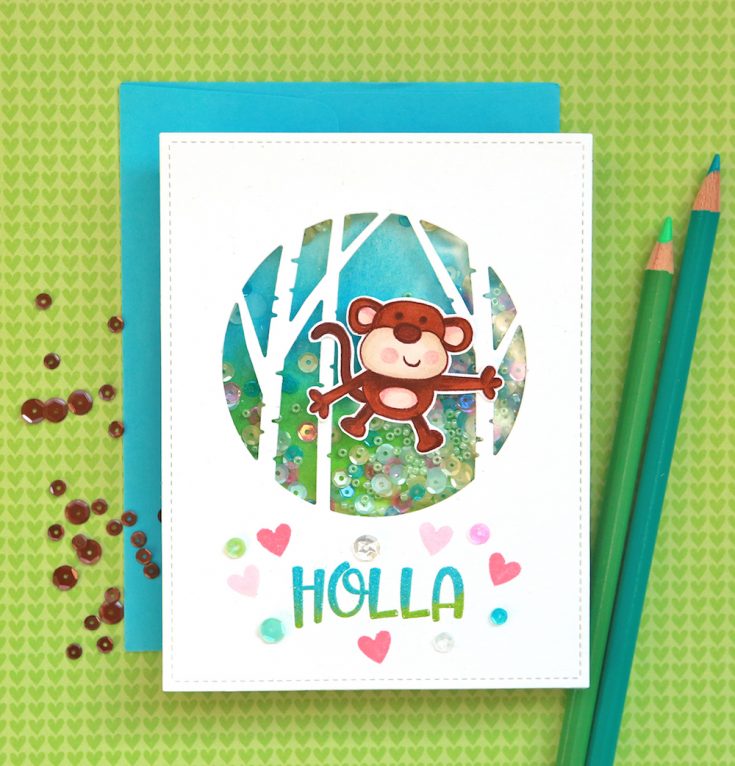
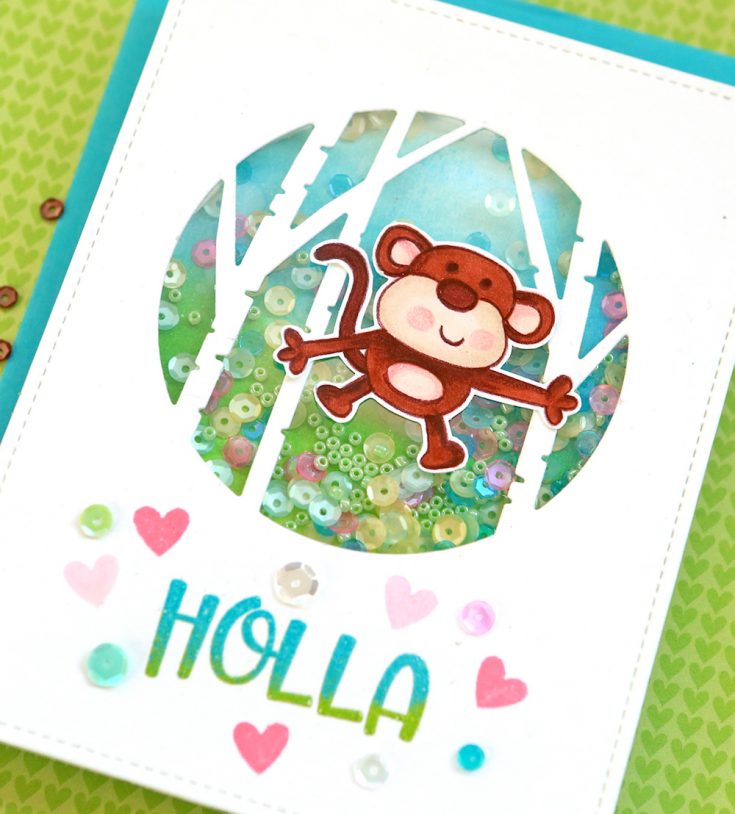
I always make a shaker card when doing a “one stamp, five ways” post. The new Pool Party sequin mix from the new release was so pretty I used it as inspiration for my card colors. I painted a watercolor piece for inside the shaker with blues on the top and green on the bottom. I stamped pink hearts on the front of the card to match the pink sequins in the shaker window.
Here are some tips for this card:
I love watercolor for soft card backgrounds under shaker windows – they are soft and don’t look too busy with sequins on top of them
The SSS circle dies are perfect for shaker windows on cards! This one with the trees worked so well with the monkey arms!
Use two colors of embossing powder on your sentiment by pouring some on the top of the letters and then another color on the bottom of the letters
I left the background of the card white so the monkey would really pop and be the focal point of the card.
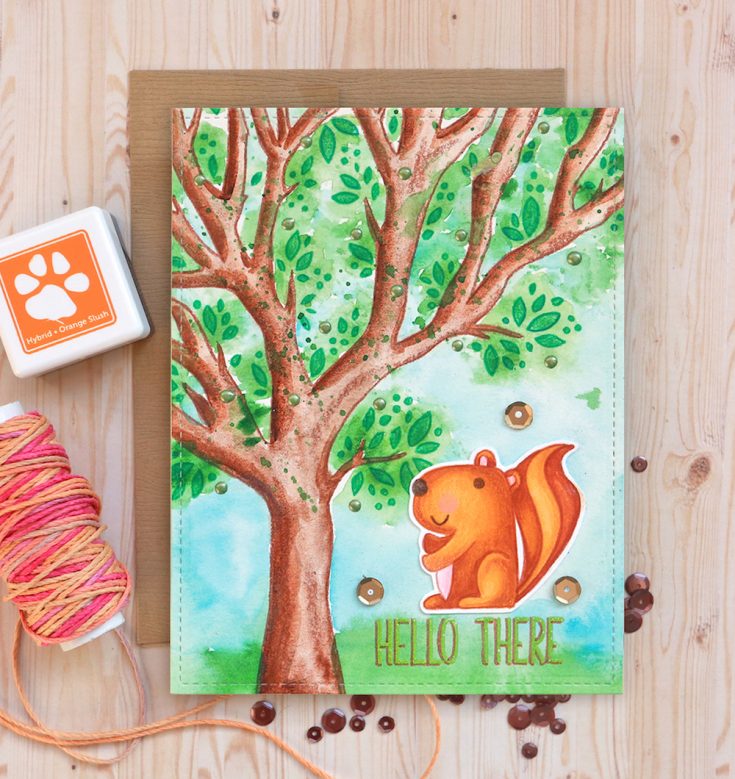
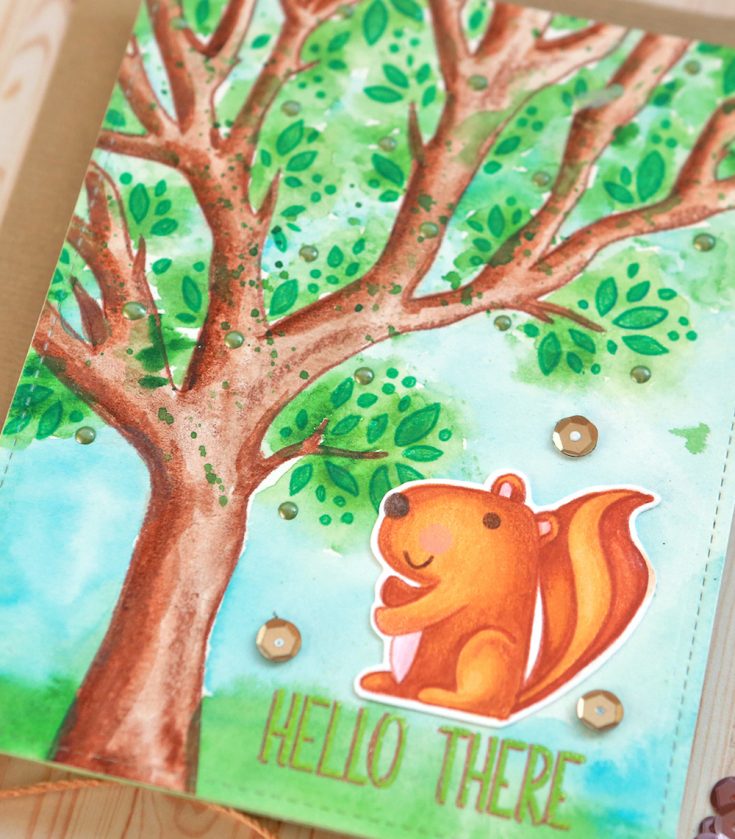
I used the New Beginnings tree stencil for the background of this card. Think of out of the box ways to use your stencils so you get more use out of them. I placed it on a card size piece of watercolor paper and traced inside all of the openings with a pencil. Then I outlined those lines with colored pencils in brown for the tree trunk and green for the leaves. I colored inside the lines with watercolor for the tree and colored pencils for the leaves to create my background.
Here are some tips:
When creating a background such as this tree one, outlining the areas of the stencil with colored markers or colored pencils instead of a black marker keeps it a bit more subtle so it doesn’t overwhelm the card (it is a background!)
Add shading to your watercolored tree trunk with colored pencils to make it look more realistic
Add watercolor (green) around the leaves with a wet on wet technique so it is very messy and looks like a group of leaves
Paint the background behind the tree blue white it is still wet so the colors run into each other and the ground green – I used LOTS of water on this
Stamp your critter with a natural colored ink that won’t show after you color it – I used MFT Natural Ink and colored him in with Copic Markers
Apply a marker (I used a Kaiser Kraft brown glitter pen) as shadows behind your embossed letters so they stand out more.
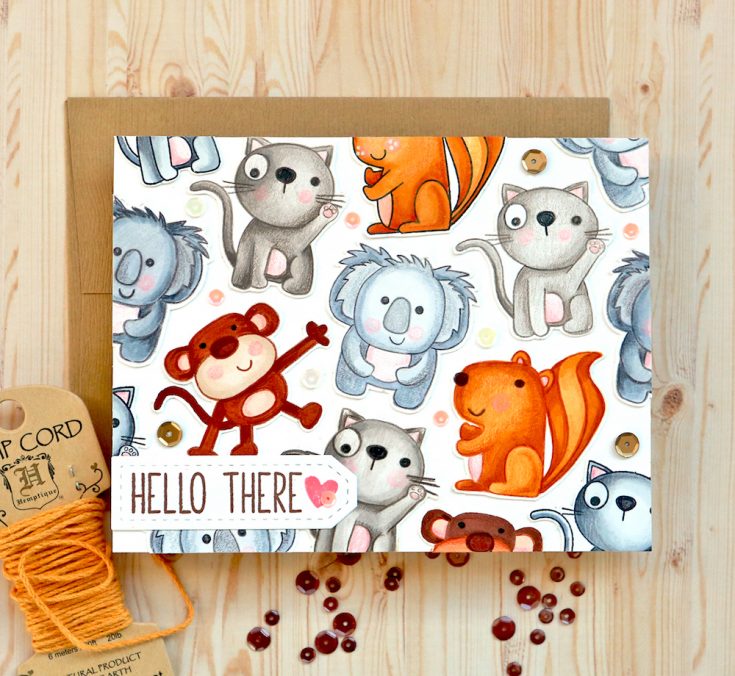
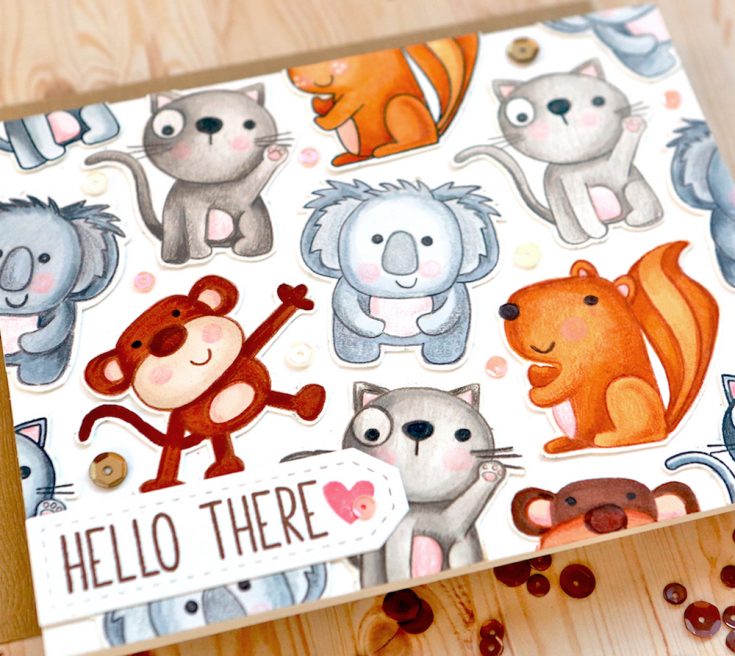
This is my bonus card today! I actually stamp and color all of my images for a “one stamp, five ways” post before I start making the cards. This means I usually have some extra images when I am done. This time I had quite a few extra and I didn’t want to throw them away, so I put a random stamped card together – which is just like last months so the tips may be the same!
Here are some tips for random stamping cards:
To create a background of critters like this, you don’t need to die-cut the images out first (or fussy cut them as I did) – just use a Misti to line them up like a puzzle and stamp several at one time
Let some of your critters overlap the edge so the entire card area is full
Add some of the embellishment stamps in between your main stamps to fill in areas – I could have used the heart or the marshmallows for this; if you don’t do that fill in the areas with sequins like I did
If your sentiment doesn’t fill all of the space on a banner like this one, fill in the extra space with another embellishment stamp or a sequin (I used both!)
Thank you so much for joining us on the SSS Blog today. I had such fun creating these cards and I hope they inspired you to create yourself. I always love to share ideas that will get others thinking of out of the box ways to use their supplies! Have a great week! Suzy
SUPPLIES:
|


Thanks so much for stopping by, and thanks to Suzy for being our guest!


Love all of these cards! :) Those little critters are so adorable.
all are absolutely amazing and those critters are so cute!
I love all the variety you’ve shown on how to use one set. I think my favorite is the bonus card! I love the effect of Copic coloring embellished with some colored pencil. Have not yet tried that technique but certainly will!
Really like all the cards made with the Hello Stamp and dies! Thanks for sharing the different ways you used them.
These critters are delightful and so versatile. Thanks for sharing these card designs.
Super duper cute card!
Thanks for sharing.
These are the cutest cards I have ever seen! The backgrounds are very colorful and brilliant. I love the one using Salty Ocean and Pistachio. The little critters make me smile every time I see a card made with them. I love them!!
They are all so different, but OH SO CUTE!!! I actually like the koala in a wreath the best. Go figure….I usually like the most complicated ones. They are done so well—expertly colored.
These are cute, cute, cute!
Fantastic cards! The critters are so cute and love your copic coloring.
Your cards are adorable…. and thank you for all the tips and techniques.
Take care
Tracy
Oh these are so adorable, love them all!
These are ADORABLE!!! Fantastic designs and super cute critters. Love ♥
Fantastic cards! Love them.
Great inspiration for kids cards!
That’s an adorable stamp set, and your cards are fantastic! Beautiful coloring. My grandchildren would be thrilled to receive a card featuring these “critters.”
Each of these cards are so interesting! I especially like the background of the first card…gotta try it! Thanks for all the ideas.
Oh my goodness Suzy these are ALL fantastic and I have to say, no wonder you made a sixth one! What great sets. Out of all of them I have 2 faves that really jump out at me and those are the koala in the leafy circle (that is just too cute!) and your last one is simply adorable. However with that being said they really are all fantastic. Thanks for all of the amazing tips, they are very helpful. Well done.
Cuge cards! Thanks flr all the tips!
Using cute little animals on cards
should be outlawed. They make you
mushy when you see those sweet faces
and want to just hug them. But you
can’t ’cause they’re on paper.
Darling cards. I’m going to go
pull myself together.
thanks for sharing
txmlhl(at)yahoo(dot)com
so adorable! this set is already on my wish list! can’t wait to eventually get it. ?!
All of these cards are so fun! I really love the koala hello card :)
These are really cute cards. Colorful and fun.
Such adorable cards. Love all the animals.
Thanks for sharing…
Cute cards with adorable animals, such fun to make and receive! Love your backgrounds too.
WOW Suzy your cards are AMAZING!!!!! LOVE them all:)
Such adorable cards! Great uses of the stamp set and other supplies.
WOW So many fabulous and fun critter cards! They are all so beautifully designed and the critters are so stinkin’ cute! Love them all!
What a nice collection! Love the water coloring especially the geometric background. I have a few of these products and now some ideas to play with. Thanks!
Fabulous cards Suzy! I love those critters! My favorite is the “Holla” one. TFS!
These are the cutest cards ever!
These cards are fantastic!! The stamp set she started with is simply darling; I love the mix of animals represented! So glad she used the New Beginnings Tree Stencil and the Leafy Circle wafer die; they are some of my favorites from recent SSS releases. Suzy did a great job and I’ve really enjoyed seeing what she made!! :)
What a great set of critters and cards! I love all the creative ways you used this adorable set!
I love when you do these 5-ways posts!
love me some animals! Yes! lovely ideas TFS
Cute cards! It’s great to see stamps used in various ways, I struggle with ideas so this is helpful!
I’m always awed by your creativity & coloring, Suzy! The watercolored tree background completely amazes me, but I love all of these cards! Thank you for the great tips, too!
Wow!!! What a bunch of Super Cute cards!!
Super fun cards!
These are adorable! Love each card, so cute!
Super cute cards! Great use of the stamp set! Suzy’s colouring is always amazing!
Simply love these cards. They are so cute and so much fun!
I really enjoyed this post–thank you.
Very cute cards
The cute pals from “Hello There” were an instant favorite when I first saw them. these cards are so adorable, thanks for sharing.
Your cards are so fun. I really like how you used the stamps and then shared your tips with us. Thanks.
Adorable cards! Really inspiring me to get crafting!
these cards are adorable – love the critter images:)
Love ALL the cards and they are all so different from each other. Loved all the colors used, just great!!! Thanks for sharing!
Your cards couldn’t be any cuter! Love those critters!