One Stamp, Five Ways: Forever Yours

Hi friends! Happy Saturday, AND happy last day of 2022! What a year! Is it just me or do they some how go quicker each year?! Nonetheless, we’re delighted to share this gorgeous floral beauty by Suzy Plantamura on the last day of the year! Read on for all the details and enjoy!
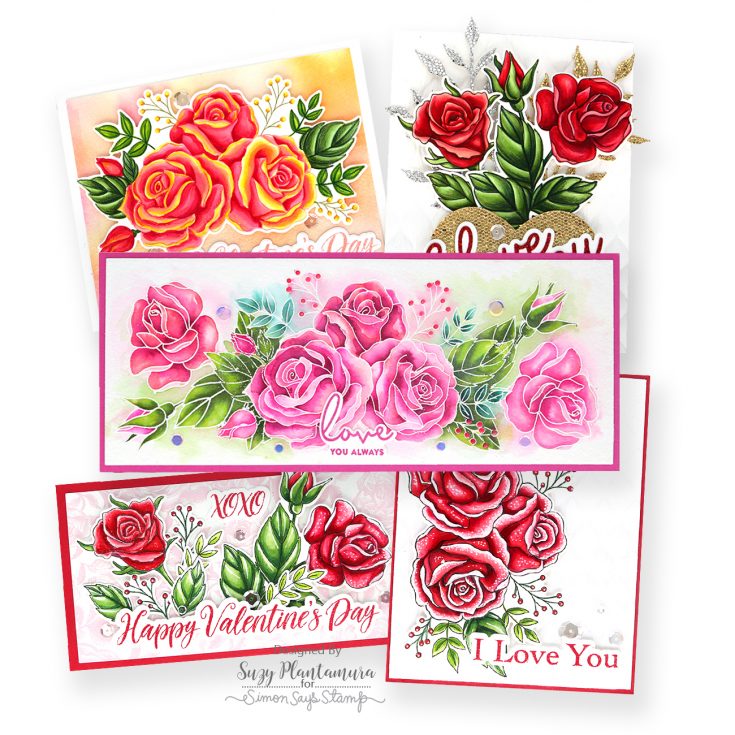
Hello friends! Well, the holidays are officially over and we are moving into a new year. I have a “one stamp, five ways” post to share with you that will get you ready for this big change! Instead of Christmas cards, I have created 5 cards for Valentine’s Day using the new Forever Yours stamp set and matching dies. What makes this post special for me, is I illustrated this stamp set too! So you are getting a lot of ME today!!! I have also used some of the other new products from the Hugs release.
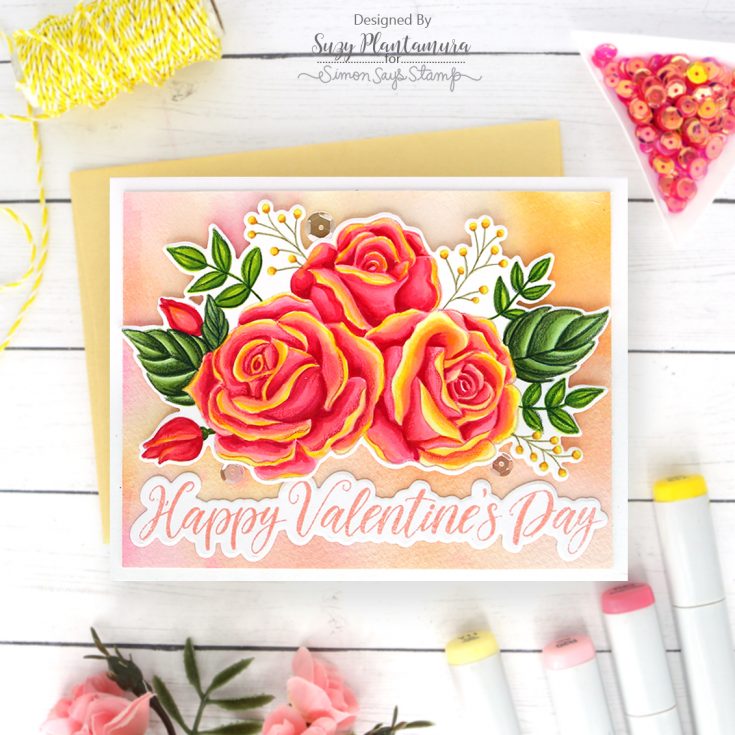
I stamped the large rose grouping from the Forever Yours stamp set with Latte PS Ink. I colored it in with Copic Markers. I wanted to make the roses look like the ones that are pink with yellow edges on the petals, but I’m not sure I did it right! I die-cut this out with the Forever Yours Dies.
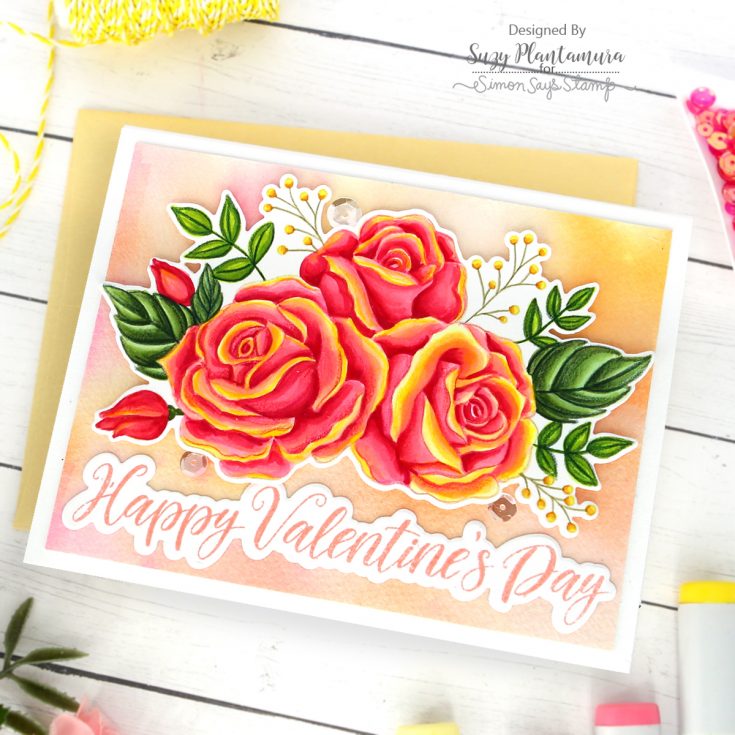
I painted a background with watercolors on a piece of Arches watercolor paper to match the flowers, but kept it a fairly light wash so it would be subtle. I attached the flowers with foam tape behind them. I embossed the “Happy Valentine’s Day” sentiment with Tim Holtz Saltwater Taffy Embossing Glaze and attached that below the flowers. I added 3 sparkling clear sequins around the flowers.
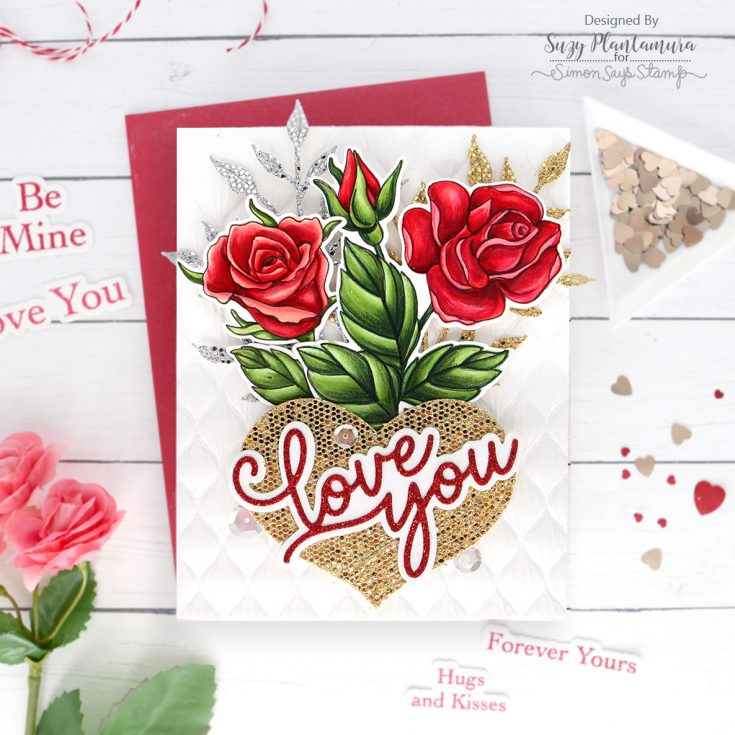
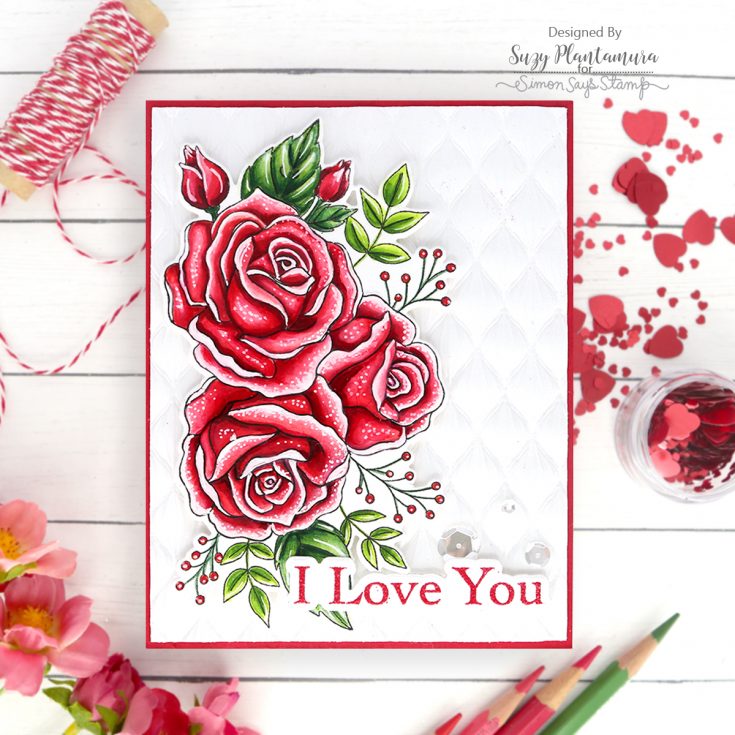
I made this card using the new Spun Glass embossing folder for the background. I like this folder so much, that I used it for two of my cards today! I embossed it with white cardstock, running it through my die-cut machine three times to get a good impression! I then stamped two of the floral images and one of the leaves from the Forever Yours stamp set with Intense Black Ink and colored them in with colored pencils. I die-cut them all out with the matching dies.
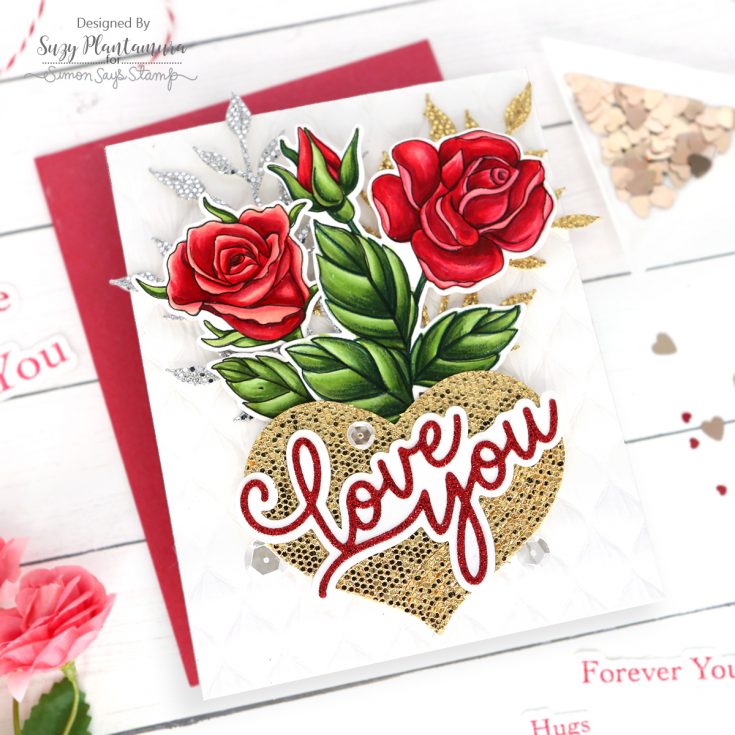
I die-cut the Highlight Heart Wafer Die from the Die-cember release from the new Gold Luxe Glitter Cardstock. I die-cut two of the Winsome Branch Wafer Dies from the Gold and Silver Luxe Cardstock (both are in the Luxe Cardstock Assortment from Die-cember). Last, I die-cut the CZ Swoopy Love You die from both white cardstock and red glitter paper. I arranged the two branch dies behind the stamped roses and then attached the heart over them with foam tape behind it. I glued the love you sentiment on top and added some sparkling clear sequins around it.
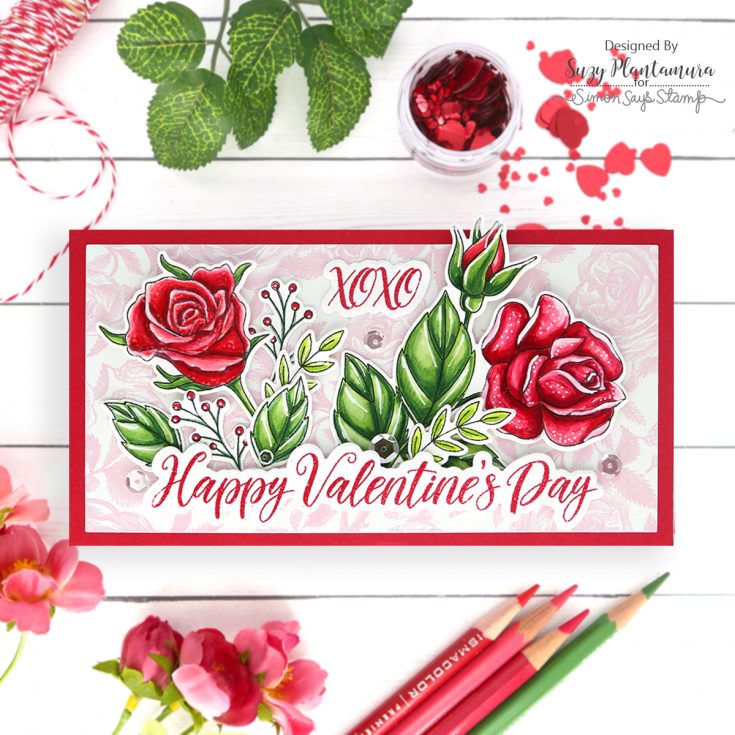
I stamped all of the images in the Forever Yours stamp set except the large floral group with Intense Black Ink and colored them in with colored pencils. I used a white Uniball gel pen around the edges and added dots to the petals and lines on the leaves. I die-cut them out with the matching dies.
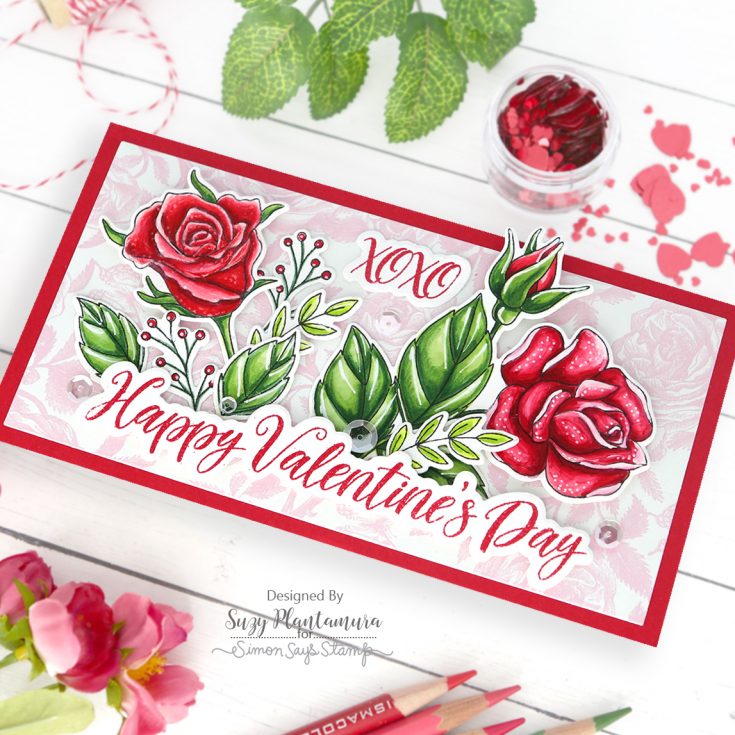
I die-cut a piece of patterned paper in my stash (from a previous February card kit) with the Mini Slimline Rectangle Die and attached it to a red cardstock card base. I embossed two of the sentiments in the Forever Yours stamp set with Red Geranium Embossing Powder and die-cut them out with the matching dies. I arranged the sentiments and the flowers/leaves around the patterned paper and added some sparkling clear sequins.
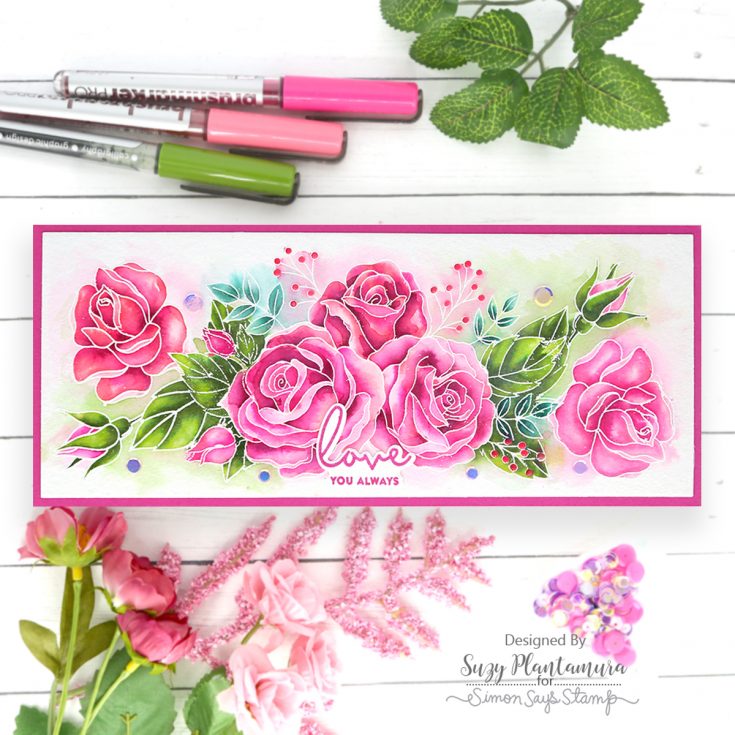
I die-cut a piece of Arches Watercolor Paper with the largest rectangle in the SSS Nested Slimline Rectangle Dies. I then stamped the large floral grouping on masking paper and cut it out. I first embossed this stamp on the rectangle with white embossing powder. I then placed the mask over it and embossed the larger single rose stamp on both sides of it.
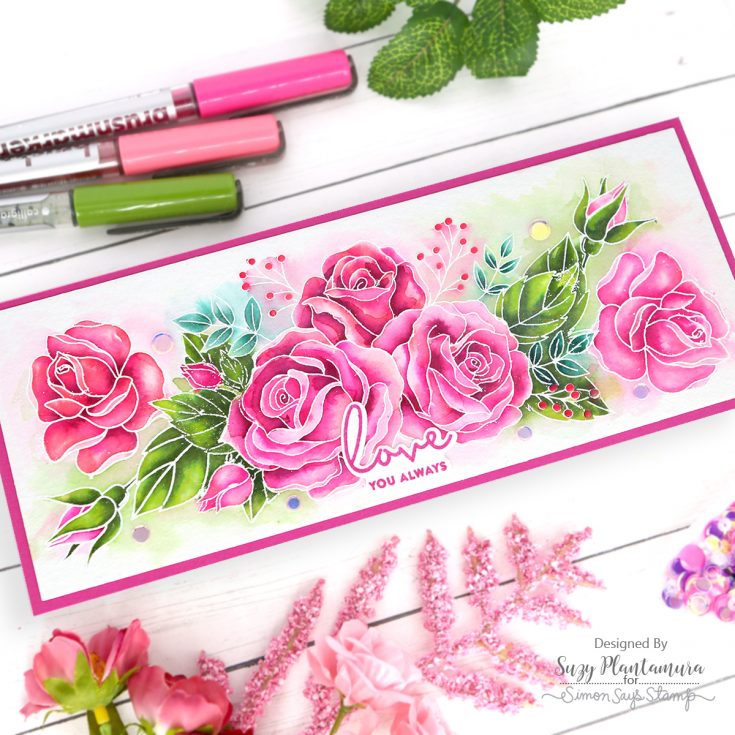
I painted the flowers in with Karin Brushmarkers. I love using these markers with embossed images as the colors stay where you want them! I used a wet brush to purposefully move some of the color around the edges for a soft background wash. I added some of the new Hugs Sequin Mix around the flowers. I stamped the sentiment from the Forever Yours stamp set with black ink and die-cut it out and added it to the bottom of the card.
I used the Spun Glass embossing folder for this card also. I cut it down to fit on a red card base. I stamped the rose grouping from the Forever Yours stamp set with Intense Black Ink. I colored it in with colored pencils. I added white lines and dots with a Uniball Gel Pen.
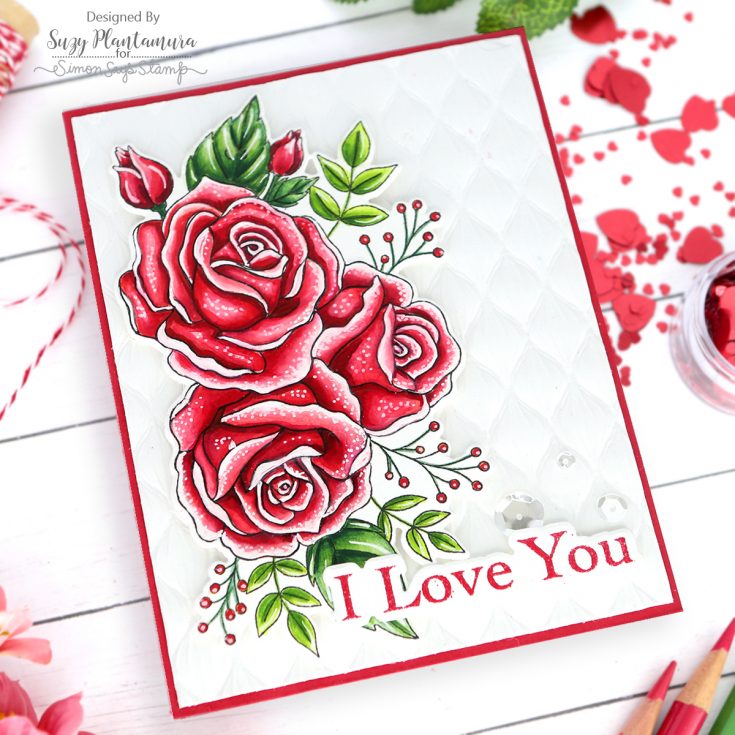
I die-cut it out and attached it over the embossed background with foam tape behind it. I embossed the “I Love You” stamp with red embossing powder and die-cut it out. I attached that to the bottom of the card also using foam tape behind it. I added several sparkling clear sequins around it.
How is that for getting you out of the Christmas mood and ready for a new holiday in a new year! Speaking of that, HAPPY NEW YEAR to all!!! I post a “one stamp, five ways” post on my blog weekly, so come visit if you like these posts! I’ll be back at the end of January! Suzy
SUPPLIES:
|


Thanks so much for stopping by, and thanks to Suzy for being our guest!


Beautiful cards! I love how you colored each one and the roses look almost real.
These are all soooo Gorgeous!!!! Your coloring is Amazing as Always!!!
Happy New Year to everyone at SSS!!! Thanks for a year filled with Fabulous products and Amazing inspiration!!!
And a Big thanks to all the behind the scenes people in shipping and customer service, you all outdid yourselves this year!!!
Suzy this new rose stamp is really gorgeous. It has a vintage feel to me. Love the colors on the edges. Nicely done! TFS
What stunning stunning cards … Suzy is a colouring master
Gorgeous cards! Such beautiful coloring! Happy New Year!
so very pretty