One Stamp, Five Ways: Beautiful Bouquet

Hi friends! Happy (second to) last day of 2021! Wow! As per usual, we are treating you to Suzy Plantamura’s monthly installment of “One Stamp, Five Ways” and what a floral assortment she has for us today! Read on and enjoy! :)
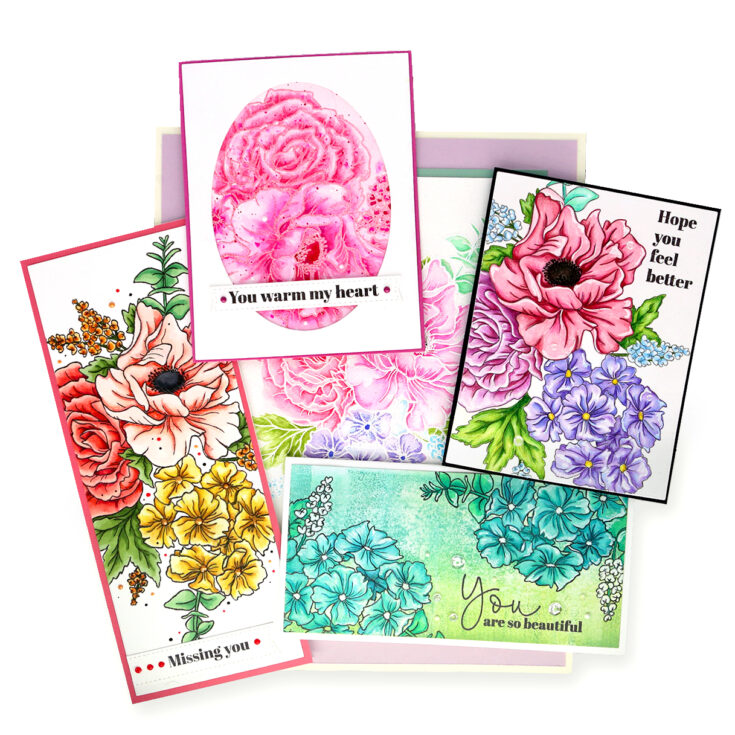
When I saw the stamp set called Beautiful Bouquet in the To The Moon release, I knew immediately I would use it for my “One Stamp, Five Ways” guest post this month. It is so beautiful, thus the name! I have 5 cards/projects to share with you today using this stamp.
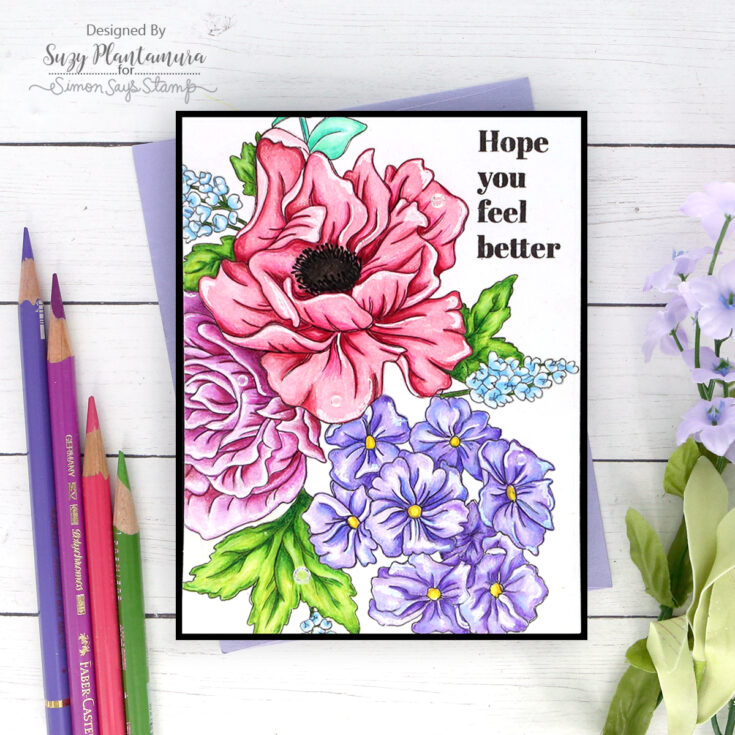
As soon as I saw this stamp, I wanted to color it with colored pencils. Pencils are so fun to use on flowers. I use a combination of several different kinds including Caran d’Ache Pablo and Luminance, Prismacolor and Faber Castelle Polychromos. I started by stamping the image with a light color ink (I always use MFT Natural Ink) on white cardstock. I stamped it on a piece of cardstock that was standard A2 card size that I had die-cut with a slightly smaller rectangle die. It hung over the edges as this stamp is rather large. So I offset it slightly to the left.
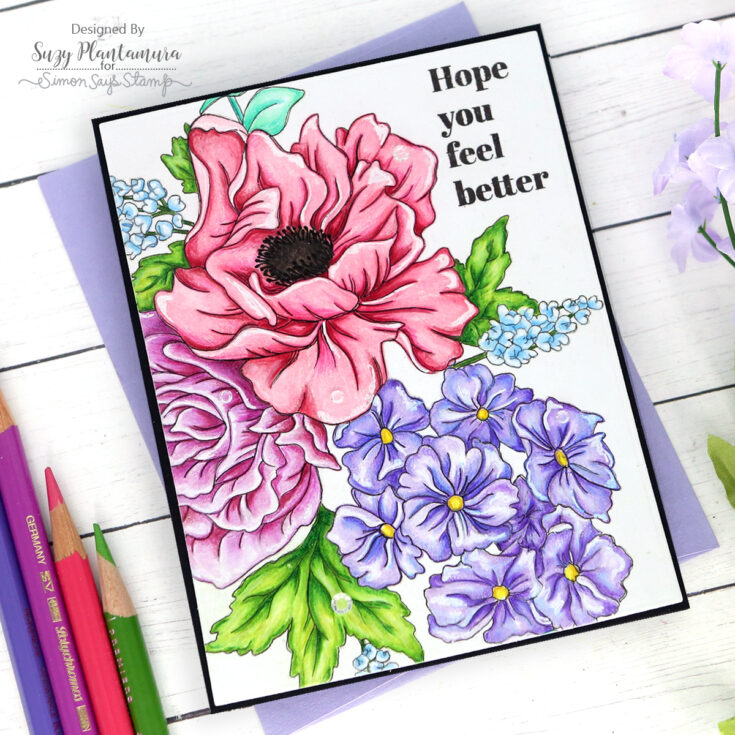
After it was colored, I ended up outlining it with a fine tip black marker. Sometimes I color images with no-outlines and then decide they need them! So stamping in black ink is probably an easier solution! I mounted it on black cardstock. I stamped a sentiment from the stamp set directly on the card front with Intense Black Ink. This card was a one layer card, so I wasn’t sure I wanted to add anything else. But I decided to add some Pretty Pink Posh clear jewels in the smallest size around the leaves.
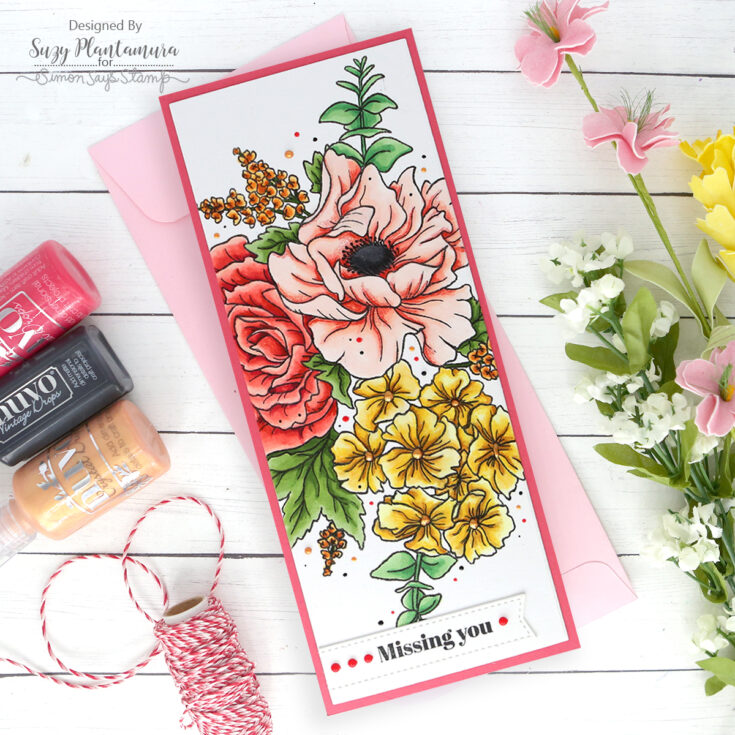
I die-cut a piece of white cardstock with the largest die in the SSS Slimline Rectangle Dies. I stamped the floral bouquet on it with Intense Black Ink. It hung over both sides and I slightly tilted it. I colored it in with Copic markers this time. I do admit to adding a little bit of shading with colored pencils afterwards (I can’t help myself!). I attached it to a slimline card base using Lawn Fawn Guava cardstock.
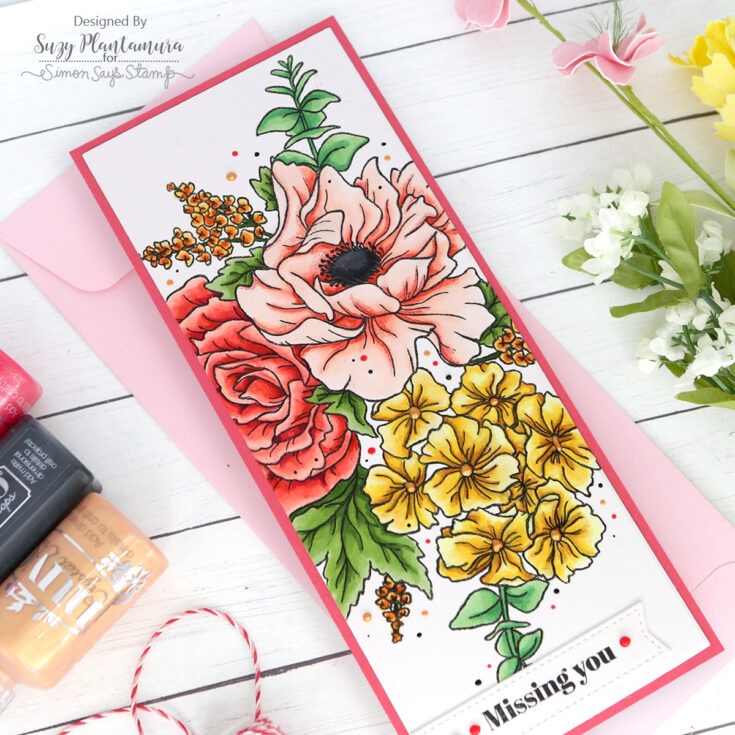
I stamped a sentiment right on the bottom of the card, but I didn’t like the way it looked (ok, I messed up!). So I restamped it on a white banner and attached it over the crooked one! I then added some Nuvo Drops in Red Berry on the sides of the sentiment. I used Auburn Pearl drops in the center of the yellow flowers. Then I ended up using both colors as well as black all around the background so it looked like perfectly placed paint splatters!
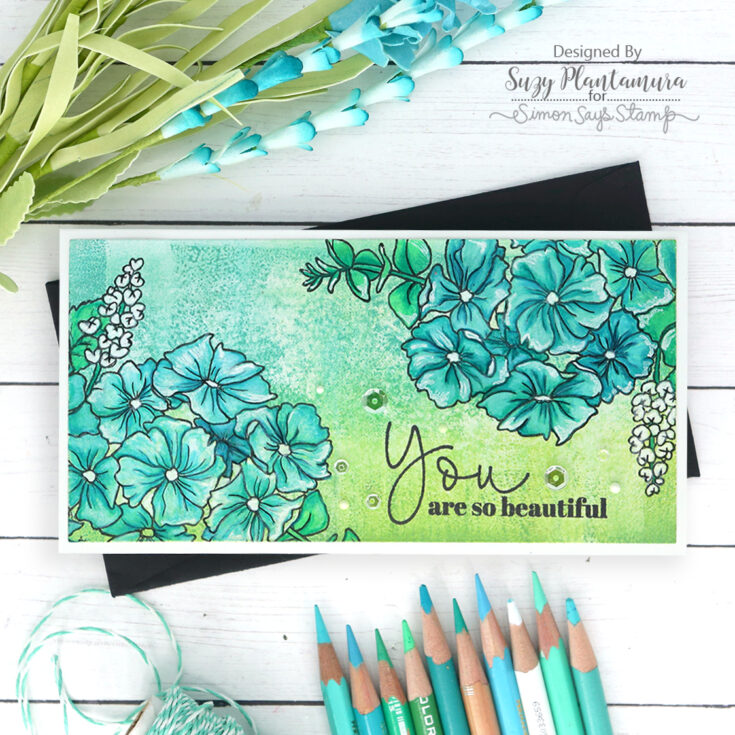
I made the background of this card with my Gel Press. I love trying new things, so I pulled out my Distress Oxide Inks, my new Gel Press, and a brayer. I watched a Jennifer McQuire video to figure out how to use it! This piece was a print made with Twisted Citron, Salvaged Patina, Peacock Feathers and Evergreen Bough Distress Oxide Inks. I die-cut it with a SSS Mini Slimline Rectangle Die. I attached it to a white card base for the background.

I stamped a side of the stamp with the small flowers on both ends of this piece with black ink. I then colored them in with colored pencils. That’s one of the things I love about pencils – you can color over colored backgrounds. I think waxy pencils work the best for this, which means Prismacolors. I stamped a sentiment at the bottom right side of the card with black ink. I added some Sparkling Clear Sequins and Clear Jewels as well as some white drops Chalk Stick Nuvo Drops around the background.
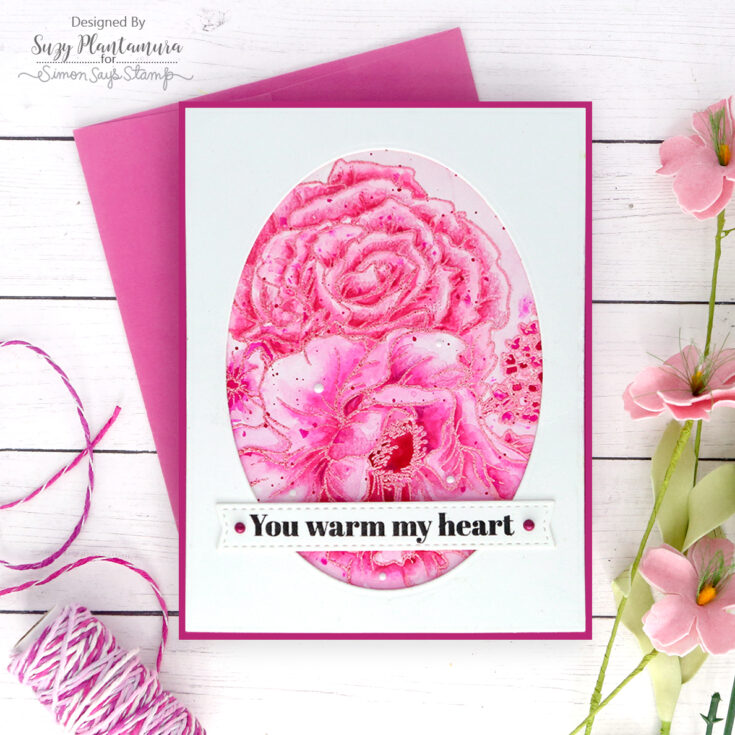
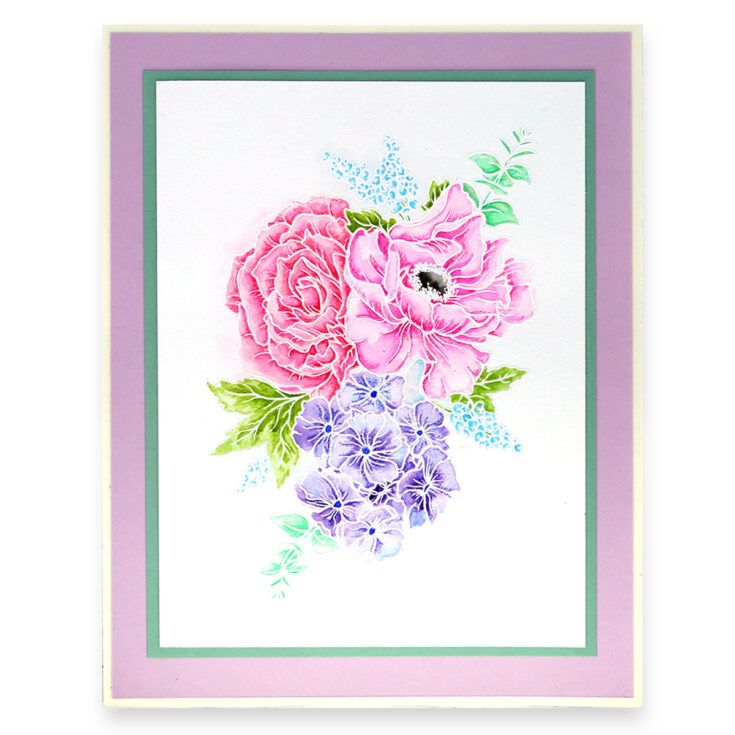
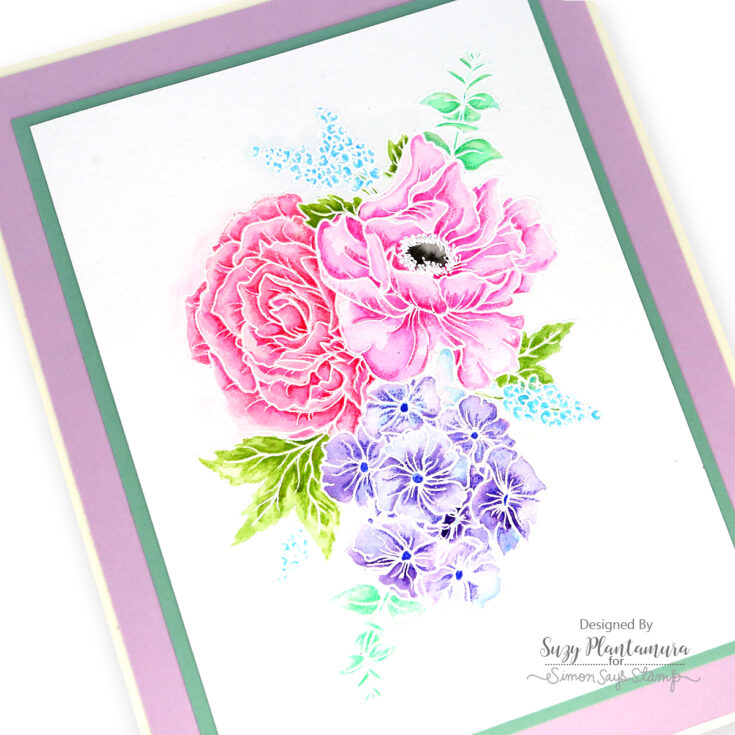
I wanted to make a card with the floral bouquet that was easier and didn’t take as long to color. I die-cut an oval out of Ranger Watercolor Paper using the SSS Nested Oval Dies. I embossed part of the stamp on it with Pink Peony embossing powder. I then painted it in with Daniel Smith Watercolors keeping it in just shades of pink. The image if fairly subtle this way since I kept it in all one color.
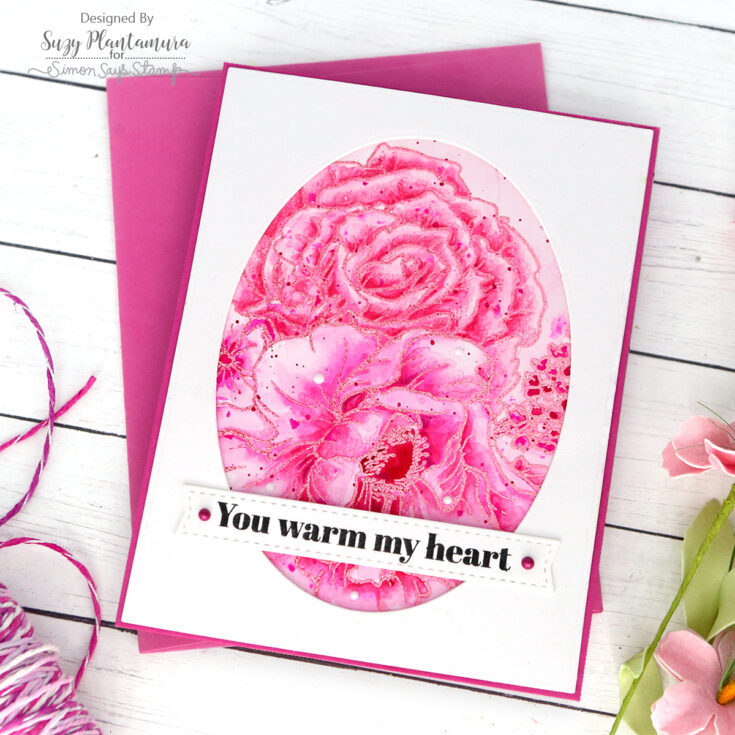
I die-cut the oval out of a piece of white cardstock and used that around the image. I mounted it on a bright pink card base. I stamped a sentiment with black ink on a white banner and attached that over the bottom of the oval. I used some Violet Galaxy Nuvo Drops on the sides of the banner and white Chalk Stick Nuvo drops around the flowes.
Because the floral bouquet image is larger than a standard card size, I stamped the full thing on a piece of Arches Cold Press watercolor paper. I embossed it with white embossing powder as I like watercoloring best when I have puffy lines to keep it where it belongs! I used my Daniel Smith Watercolors.
After I painted it, I decided I wanted to give it to my mom for Christmas (I made this post the week before Christmas!). I decided to mount the full painting with 3 colors of cardstock and attached it to some thick cardboard. I am about to put it in the mail to her. She likes to display art on easels, so I thought this would be perfect! Sometimes our stamp sets can be used for more than cards such as this one, making art for our moms!
I hope you enjoyed this “one stamp, five ways” post using the Beautiful Bouquet stamp set! I love that it is large so you can use any portion of it you want on a card. I also love that it can be colored in so I could use all of my favorite coloring tools with one stamp set! Thanks so much for visiting today! Suzy
SUPPLIES:
|


Thanks so much for stopping by, and to Suzy for being our guest! Happy New Year!!


Wow!! WOW!!!! W*O*W!!!! Absolutely Gorgeous cards!!!!
Thank you so much Maureen!
These are so pretty … please keep this blog feature from Suzy for next year!
Another awesome and inspiring post with beautiful artwork, Suzy! You are such a great colorist no matter which medium you use and I love seeing different design ideas to stretch my stamps! Happy New Year! Darnell
ABSOLUTELY BEAUTIFUL!!!
Luv the ideas..luv how the flowers POP on each of theses cards/paintings! So STUNNING
so beautiful