One Stamp Five Ways: Arched Borders

Hi friends! Happy Tuesday, and please join me in welcoming back special guest Suzy Plantamura to our blog with our latest edition of One Stamp Five Ways, which means…. another month is in the books! WOW! Read on to learn more about these 5 beauties, and enjoy!

Today, my “one stamp, five ways” post uses a new stamp set from the Yay You release called “Arched Borders”. The name of this 6”x8” stamp set is a bit misleading as it includes so much more than just borders! I am digging all these new arches that Simon Says Stamp has been releasing! I was able to incorporate the new Domed Arched Stencils and Domed Arched Dies in this post as well. I hope you enjoy!

I used quite a few products from the Yay You release on this card! First, I started with the Intricate Floral Background Hot Foil Plate. I used my Glimmer Machine and Speckled Prism Glimmer Foil to foil this background plate on white cardstock. I then die-cut it with the SSS A2 Thin Frame Die and attached it to a white card base. Using the Domed Arch Stencils, I ink blended around the inside piece of the stencil using my SSS Brushes and Guava Pawsitively Saturated Ink. I then stamped the arch from the Arched Borders Stamp set with Intense Black Ink. It was easy to line it up with the inked area below which really helped me get a perfect arch! I then die-cut it out with the Domed Arches Nested Dies (love love how these all go together!). I attached it to the background with foam tape behind it.

I hot foiled two branches from the Eucalyptus Stem Hot Foil Plate using Viridian Green foil. I then colored both in with Copics. I also stamped a branch from the stamp set and colored it with colored pencils. I added all three inside the domed area with foam tape behind the front ones. I stamped the “love” domed stamp with Seafoam Pawsitively Saturated Ink and then I die-cut that out with the smallest die in the Domed Arches dies. I attached it to the front of the card and stamped the remainder of the sentiment with black ink below it (by cutting the pieces apart). I added a stamped heart above the sentiment. I also added some Nuvo Aquatic Mist Glitter Drops to the stamped items and around the background. Last, I used some sparkling clear sequins around the dome.

I stamped all of the “images” in the Arched Borders stamp set in a random pattern on white cardstock with MFT Natural Ink. See what I mean that this stamp has way more than arches in it? I made two of my five cards with no arches at all! I colored all of these in with colored pencils. I used a gray Copic marker to add shading behind the items. I die-cut this piece with a SSS A2 Thin Frame Die and attached it to a teal card base.
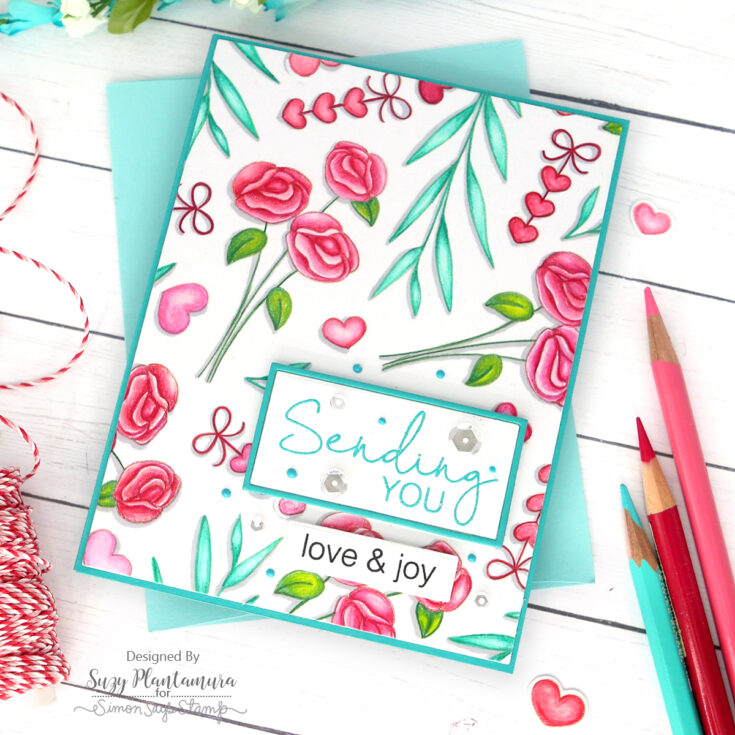
I die-cut another one of the A2 Thin Frame Dies with white and teal cardstock and layered them on the front of the card with foam tape beneath them. I embossed a sentiment from the stamp set on the white rectangle with Garden Patina embossing powder. I stamped another one of the sentiments on a white strip from the SSS Sentiment Label Dies and attached that to the bottom of the card. I added some sparkling clear sequins and some Nuvo Bohemian Teal Vintage Drops.
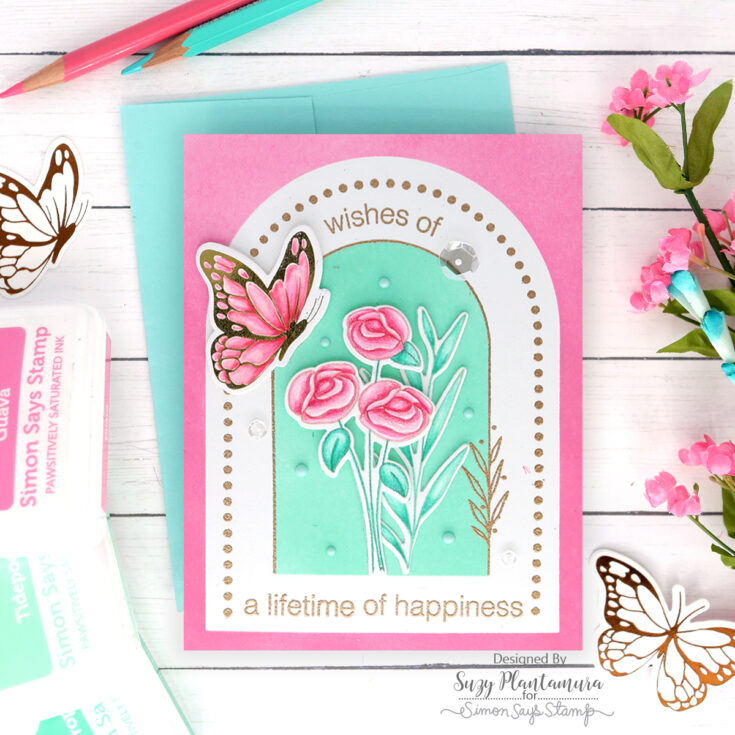
I attached the inside piece of one of the Domed Arches Stencils to a piece of A2 sized white cardstock. I used my SSS Brushes to apply Peony Pawsitively Saturated Ink around the dome. I attached one of the outside pieces of a smaller Domed Arches Stencil and inked the inside portion with Tidepool Pawsitively Saturated Ink. I then lined up the dotted frame from the Arched Borders stamp set and embossed it with Antique Gold Embossing Powder. I lined up the smallest frame stamp around the teal arch and also embossed that. I embossed a sentiment along the top of the frames (by bending it to fit with my Misti) and at the bottom to match.

I stamped the roses and vine from the stamp set on white cardstock with MFT Natural Ink and colored them in with pencils. I attached them over the teal arch. I used one of the butterflies from the Dancing Butterflies Hot Foil Plates with gold glimmer foil colored with colored pencils on the top of the card. I used some Nuvo Drops in Calming Aqua and some sparkling clear sequins to finish the card.

I made this card in the shape of an arch to really stick with the arched theme here! I die-cut two of the largest arches in the Nested Domed Arches Wafer Dies from white cardstock. I then folded a thin piece of white cardstock and glued it to the inside of both pieces to form a card shape. I die cut one of the smaller domes and used an inside piece of the Domed Arches Stencils to apply Blush Pawsitively Saturated Ink to the outside edge of this dome. I then embossed the dotted border from the Domed Arches stamp set with Hot Pink embossing powder. I attached this dome to the top of my white domed card.

I made a smaller dome with the Arched Domed dies and this time I used the inside of the Arched Domed Stencil to apply Limelicious Pawsitively Saturated Ink to the edge. I embossed the smallest frame from the Arched Borders stamp set with Ranger Rustic Wilderness Embossing Glaze. I attached this dome to the top of the other two. I die-cut the SSS Love You So Much Die from white and red cardstock and glued the red to the white so the letters would have more dimension. I attached those to the inside of the smallest dome (I didn’t use the frame). I added a preprinted sentiment banner, a few of the heart stamps colored with pencils, and some sparkling clear sequins around the domes. I also used some Carnation Pink Nuvo Drops.

I used the SSS Nested Slimline Rectangle Dies to die-cut a white cardstock rectangle for my card front. I then stamped the rose bouquet over and over on it with Intense Black Ink. See, another card with NO arches! I colored these in with Copic markers. I added a green frame around them.

I added a sentiment from the CZ Spring In My Step stamp set using Leaf Green embossing powder. I die-cut it out with the matching dies. I attached that to the bottom of the card with foam tape beneath it. I also added a pre-printed sentiment strip below it. Last, I added some sparkling clear sequins around both sentiments.
I hope you enjoyed this very long “one stamp, five ways” post using the Arched Domes stamp and matching dies. I really enjoyed using this stamp set because it has so many great sentiments and I love the arches! This is the first time I used all of these arch products that all go so well together. I hope I have inspired you to try the arch thing too!!! Thanks for visiting today! -Suzy
SUPPLIES:
|


Thanks so much for stopping by, and thanks to Suzy for being our guest!


Absolutely Gorgeous cards!!!
Awesome creations, love the arched windows!
These Arched Borders made very elegant cards. Thank you for sharing your ideas and showing five ways to use the same stamps and dies.
These are so pretty … and I look forward to your post each month! I love getting so many ideas for how to use one stamp set!
WOW, all of these cards are stunning , the layout, colours, every element. Thank you for sharing so much inspiration in this post x
It’s impossible to resist the vibrant color schemes of these pieces.
so gorgeous
I just wanted to express my sincere thanks for your wonderful content.
Your eloquent and thought-provoking insights always inspire and resonate with me.
Keep up the great work – I eagerly await your next piece! By the way, I would be very happy if you get a chance to check out my page!
The quality of our products is unquestionable. Our products have passed EN14351, AAMA, WDMA, CSA101, I.S.2, A440-17 certifications. In general, our delivery time is 25-35 days after deposit and drawing confirmed.