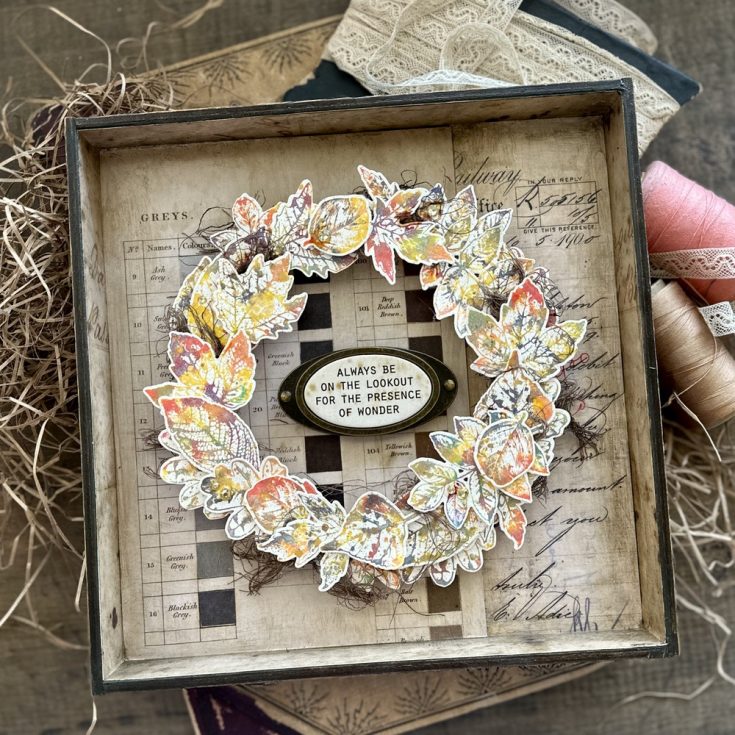
Nature’s Wonder Wreath by Paula Cheney
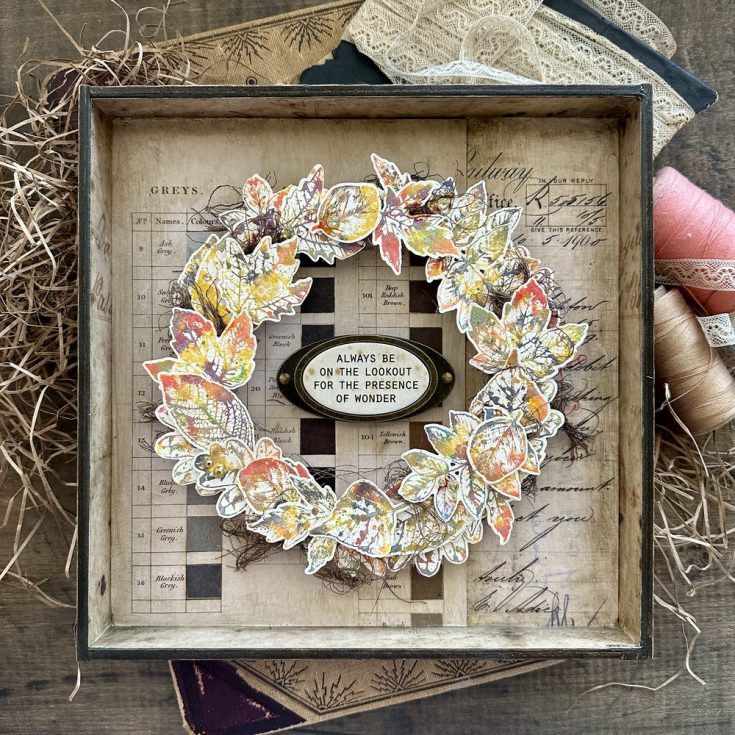
Hi friends! Happy Sunday! If you’re anything like you mean you gasped when you saw this stunning make by Paula Cheney! Such a gorgeous make with a beautiful sentiment in the center! Read on to learn all the details and enjoy!
Paint the outside and lip edge of a idea-ology Display Panel with Scorched Timber Distress Paint. Let paint dry completely, then sand the painted edges. Wipe away the dust and add a layer of Collage Medium over the painted portion for a finished look.

Cut multiple neutral idea-ology Backdrop papers to cover the inside of the Display Panel. Adhere the paper with Collage Medium. Once secure, add a layer of Collage Medium over the surface of the paper.
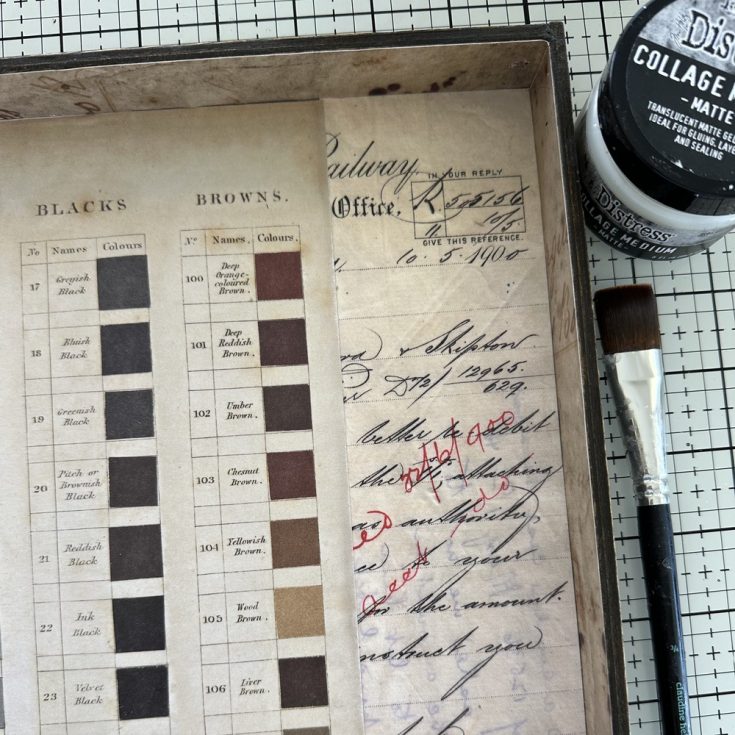
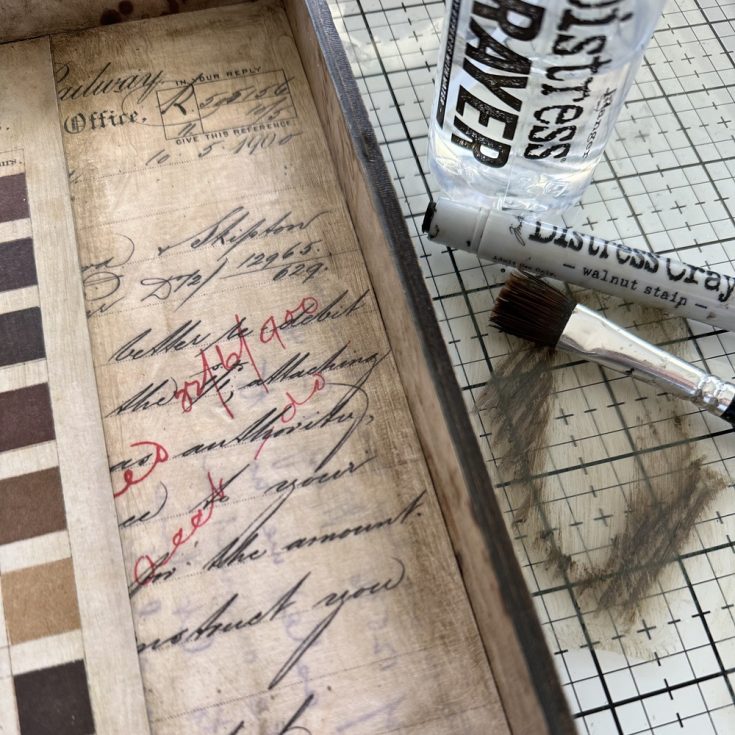
Once the paper surface is dry and sealed with Collage Medium, scribble Walnut Stain Distress Crayon on Glass Studio Mat. Use a damp paint brush to pick up the crayon and add to the edges of the paper to give it an aged look. Use as many layers of Crayon as you wish. If you get too much, just lightly pounce with a wet wipe to remove. Set aside to dry.
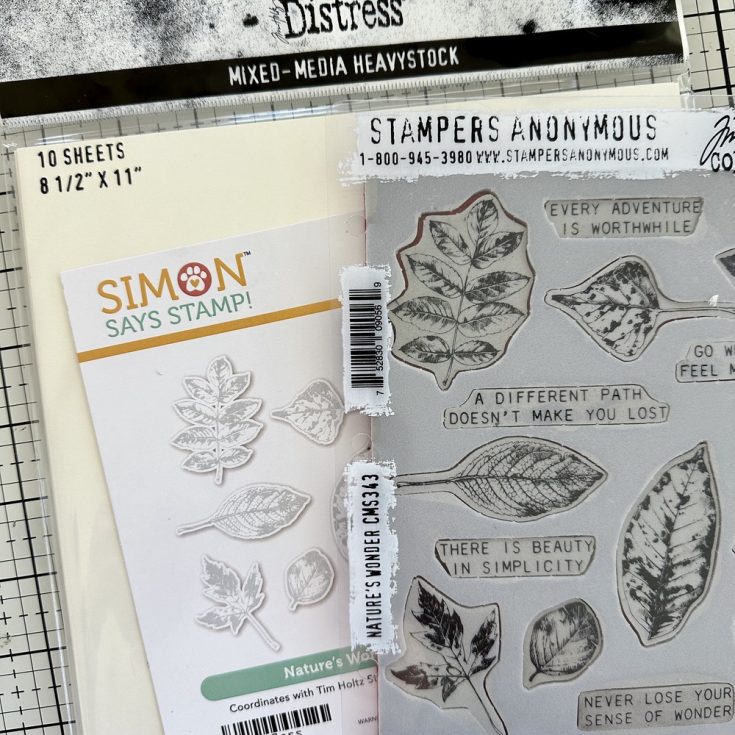
Gather supplies for the next step: Distress Mixed Media Heavystock, Stampers Anonymous Nature’s Wonder Stamp set, and the Simon Says Stamp Nature’s Wonder matching wafer die.
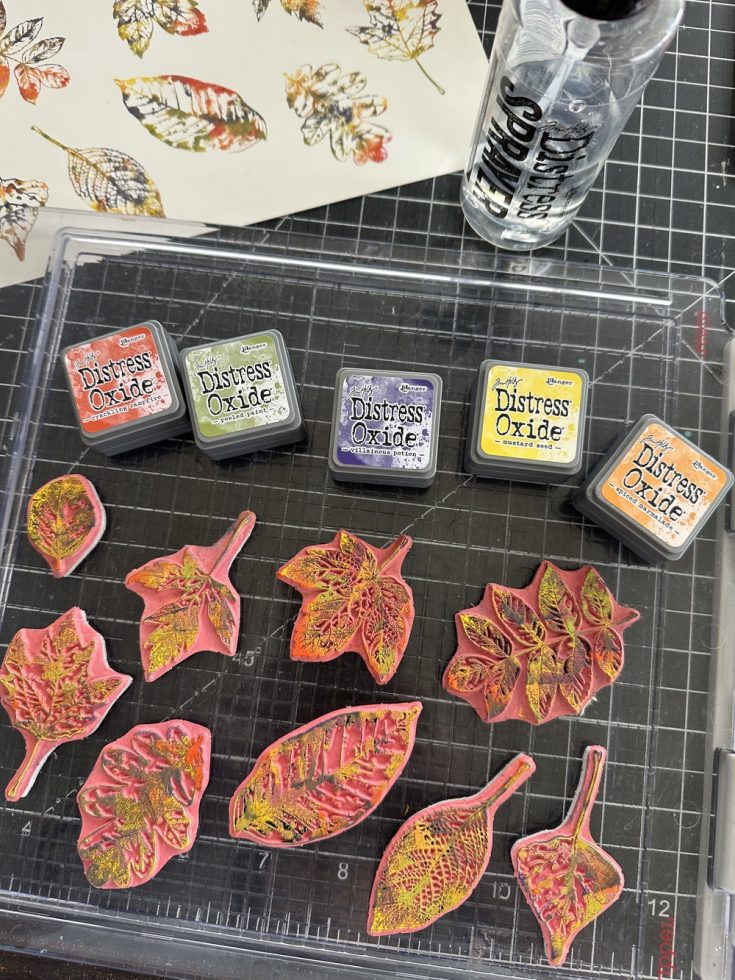
Cut two sheets of Distress Heavystock in half (5.5 x 8.5”). Use a stamping tool to stamp all nine leaves at the same time. I chose to ink the leaves with Oxide Mini’s. Because they are small, it’s easy to add multiple colors to the stamps. I used Mustard Seed, Spiced Marmalade, Crackling Campfire, Peeled Paint and Villainous Potion, but many colors combinations will work. TIP: I always start with the lightest colors and work my way to the dark one’s. If any of the ink transfers to the pad, I just wipe off the pad with a wet wipe when I’m done.
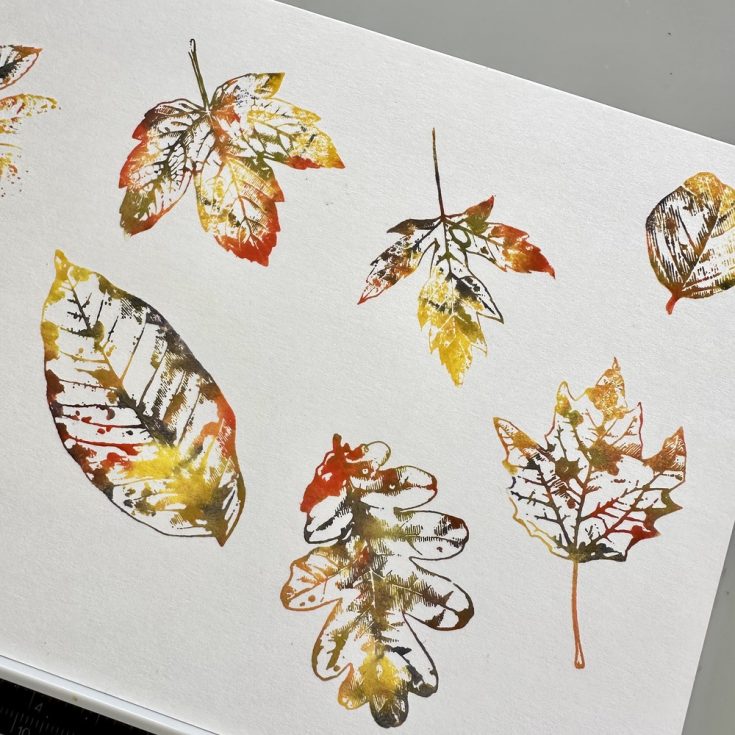
Lightly spritz the stamps with water from a Distress Sprayer, then stamp the Heavystock and dry with a Heat It Tool. I repeated this step three times so I had three sheets of images to work with.
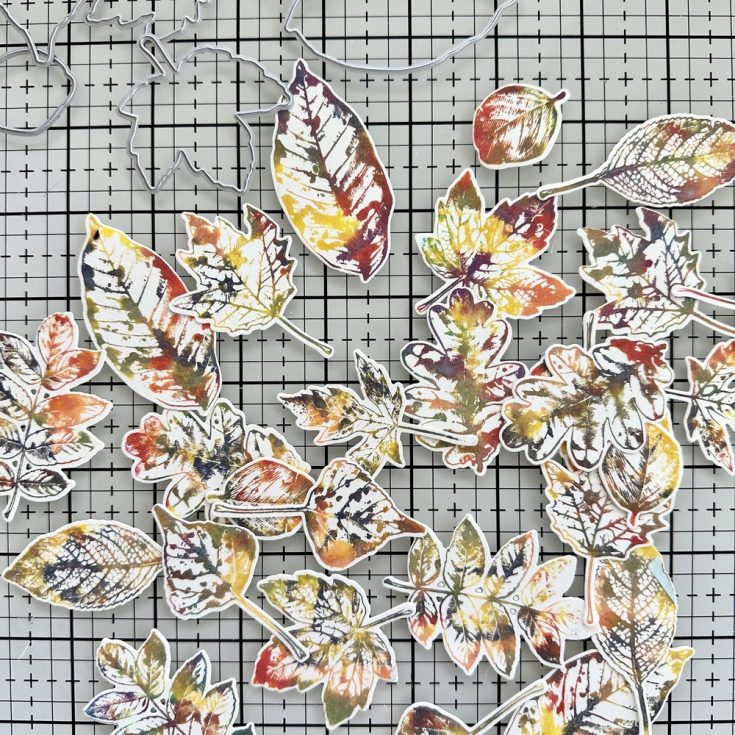
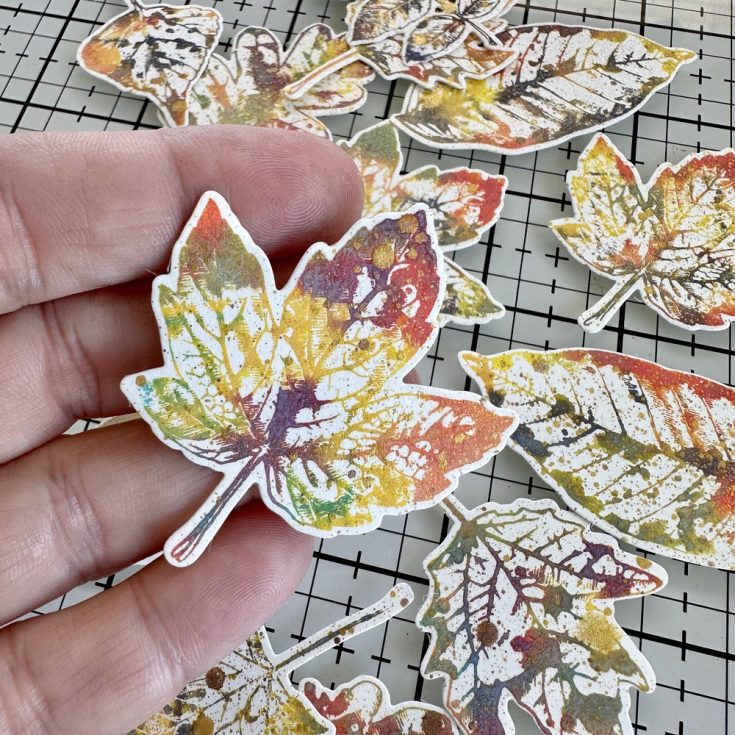
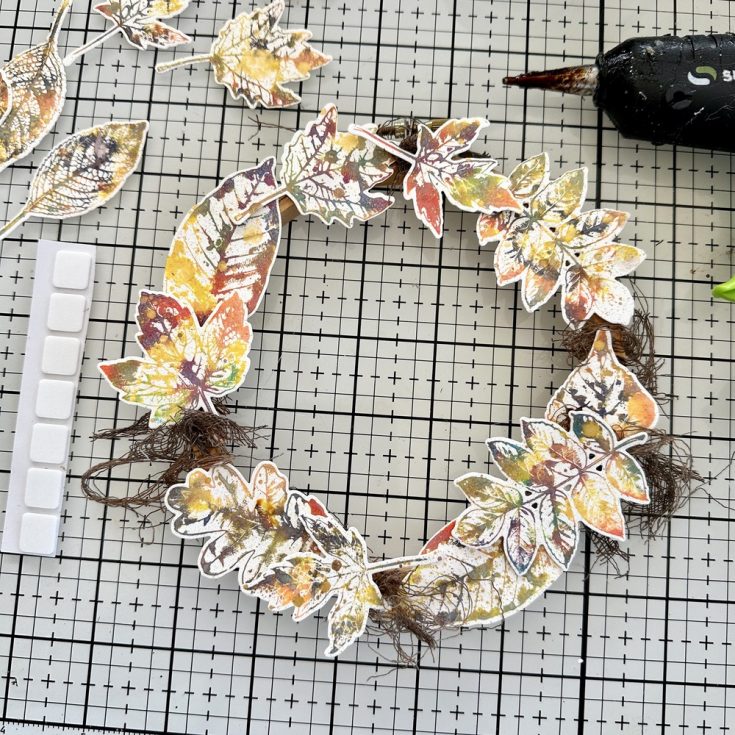
Use a die cut machine and the new SSS Nature’s Wonder Wafer Dies to cut out the leaves. So simple and easy to cut a huge pile of leaves in just three passes! Look at the result!
Place all the leaves close together on a paper towel. Shake up Distress Spritz Fossilized Amber and Vintage Photo till the the mixture its liquified. Spray from above so the Spritz falls onto the leaves. Dry with a Heat It Tool till the Spritz starts to shine. Dab off any excess.
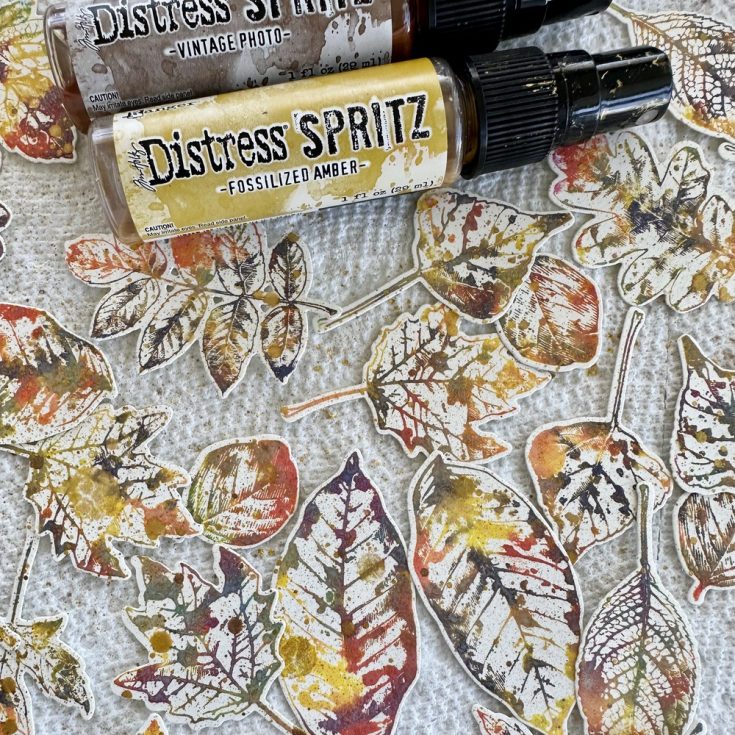
The shine of Distress Spritz is hard to capture in photos, but as soon as the light hits you can clearly see it.
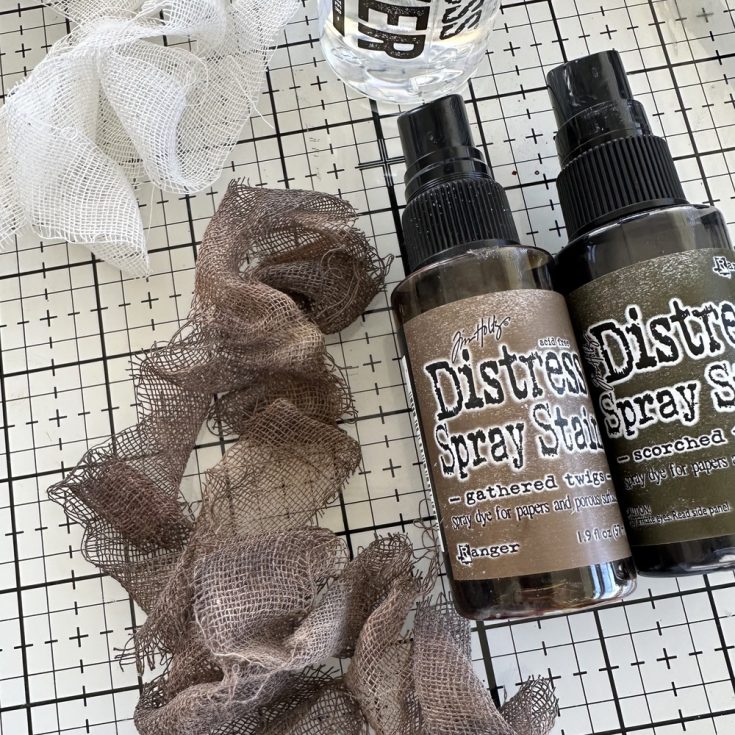
Cut off a 10” piece of idea-ology Mummy Cloth. Spray with Distress Spray Stain in both Gathered Twigs and Scorched Timber, followed by water from the Distress Sprayer to make the ink wick. Dry with a Heat It Tool, then shred into pieces.
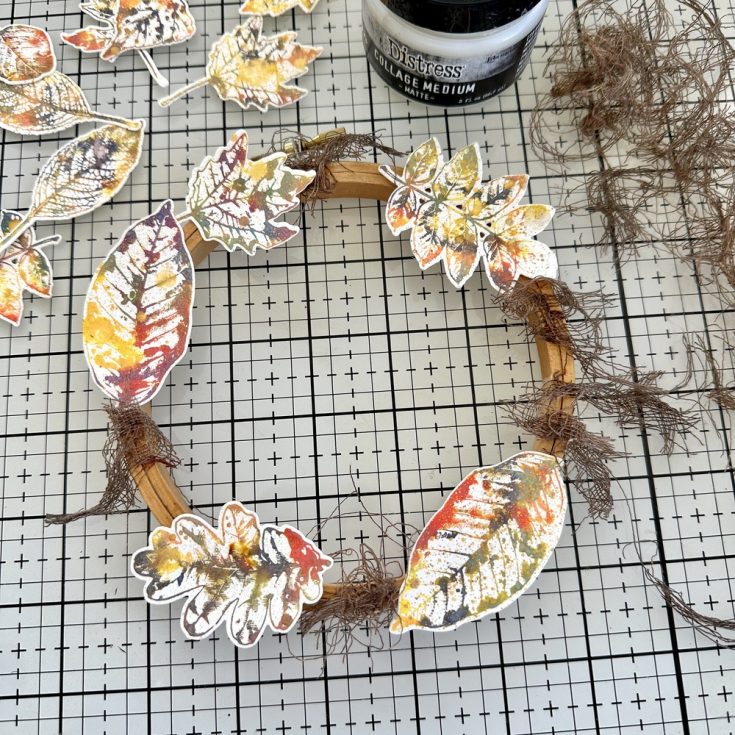
Using a embroidery hoop as the foundation (approximately 5.5”), begin glueing the first layer of leaves and pieces of Mummy Cloth to the hoop. You can use Collage Medium or a hot glue gun.
For layer two: add Thin Foam Squares to the back of the leaves and arrange them on top of layer one, filling in some of the blank spaces. I found is best to add Thin Foam squares (to create depth) but still use hot glue to adhere them to the surface.
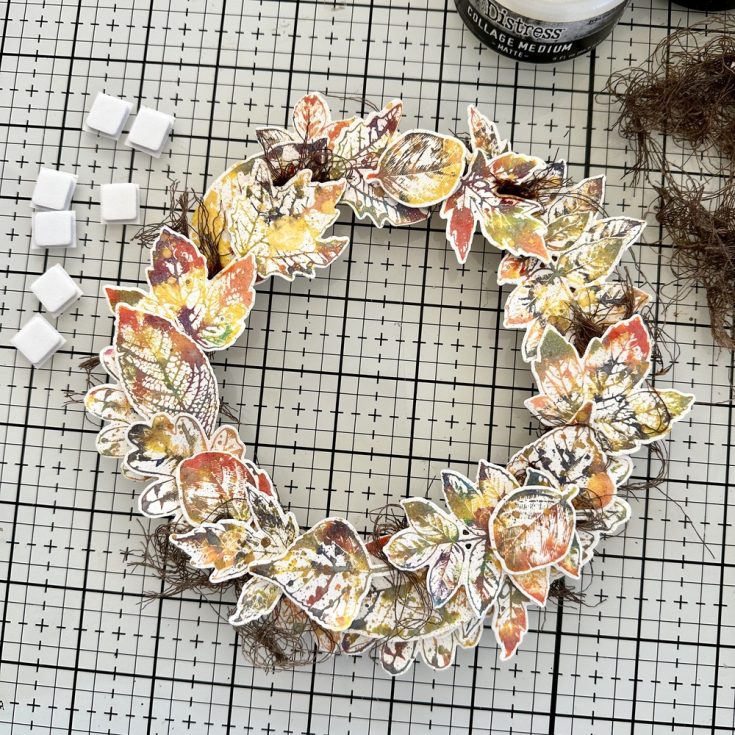
For layer three: add standard 3D Foam Squares for even more depth using the same method. I also added a bit more of the Mummy Cloth in between the layers of the leaves with Collage Medium.
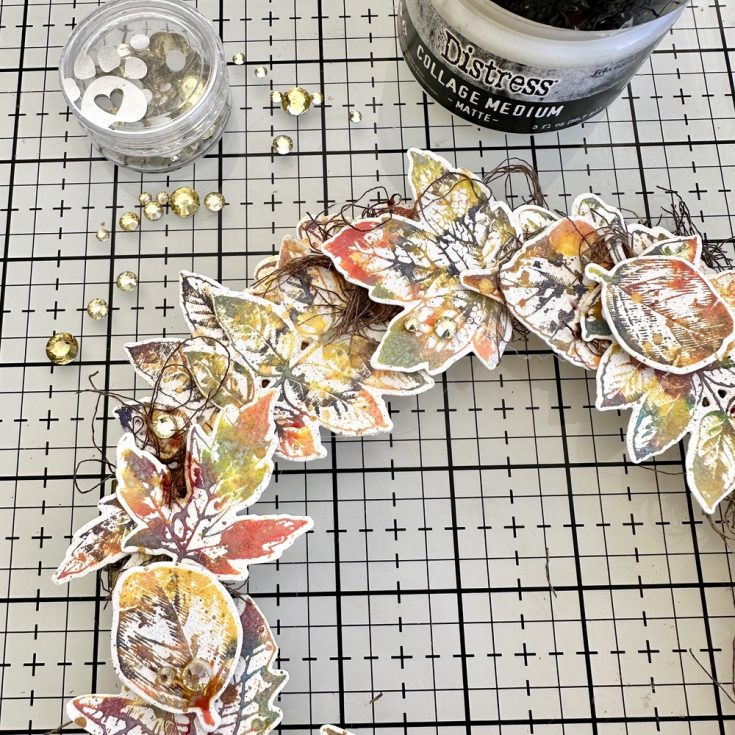
Once the wreath was complete, I added a few Pawsitively Dazzling Gems in Butter (Simon Says Stamp). So easy to add them with Collage Medium and they add to the shine of the Spritz!
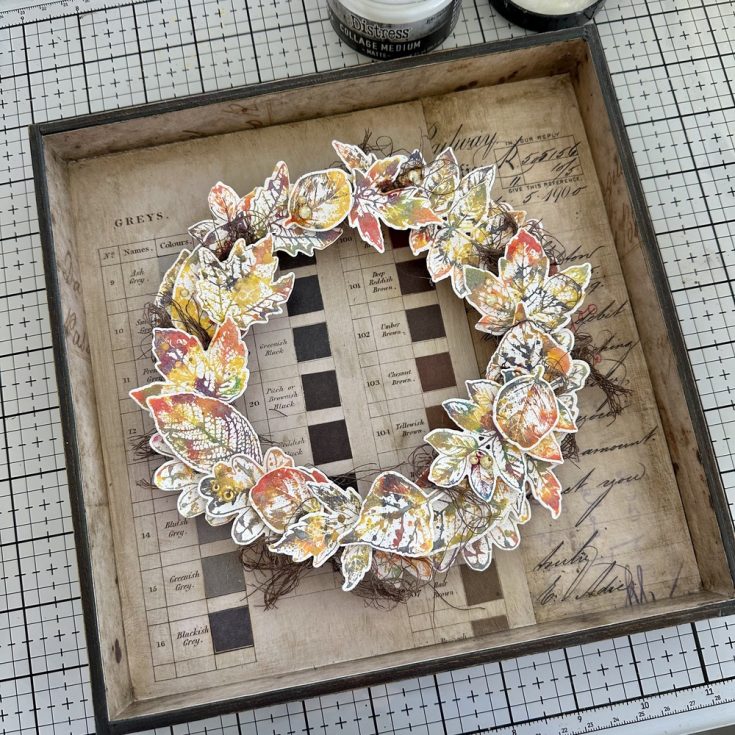
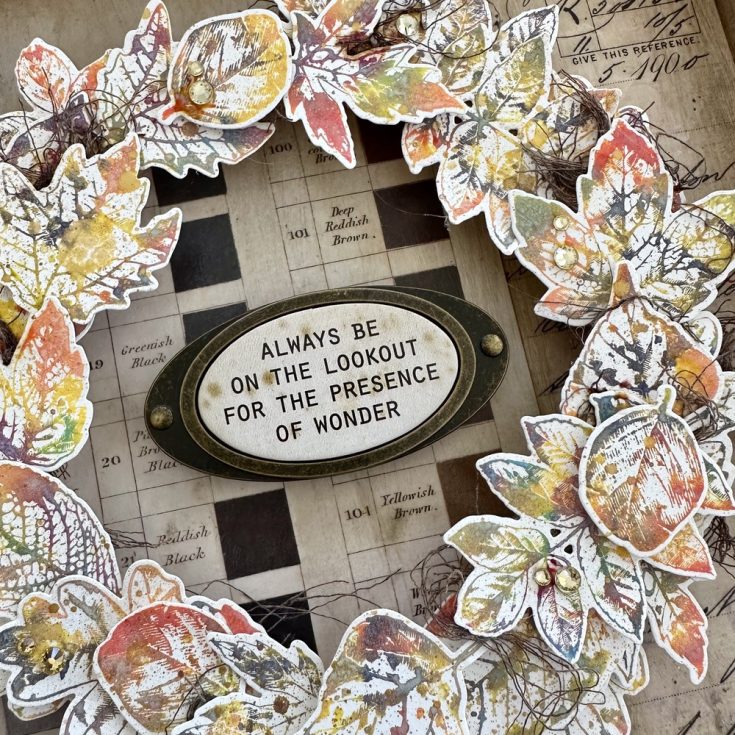
Add Collage Medium to the back of the embroidery hoop and place in the center of the Display Panel. I prefer using collage medium over hot glue, because the medium gives you more open time to get the wreath into the correct position.
Choose an idea-ology Quote Chip Label to add to a Label Frame for the center of the wreath. Add two double stacks of 3D Foam Squares to the back.
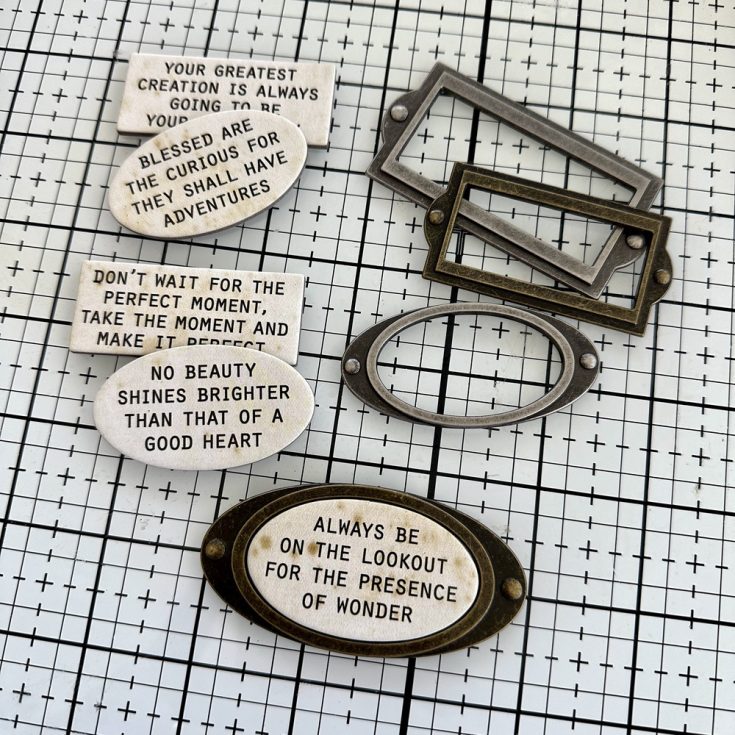
Add the quote to the center of the wreath with the 3D Foam Squares.
SUPPLIES:
|


Thank you so much for stopping by, and thanks to Paula for being our guest!


Excellent well explained tutorial and shopping list.
I have my order in, thank you for the inspo
This is gorgeous – the leaves look fantastic
It would be great if you offered a lit.
gorgeous project
Love this! Now can I do this with Distress Watercolor Crayons?