Studio Monday with Nina-Marie: Mixing Stamp Sets + Featuring Avery Elle
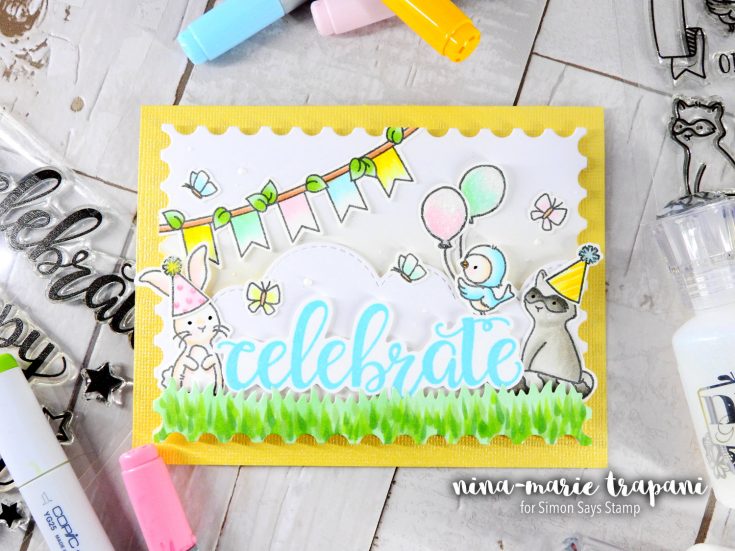
Hello crafty friends and Happy Monday! It’s Nina-Marie here with you, sharing a new Studio Monday video! This week I am featuring Avery Elle and I wanted to show how fun it can be to mix and match your stamp sets to create a custom, one-of-a-kind scene.
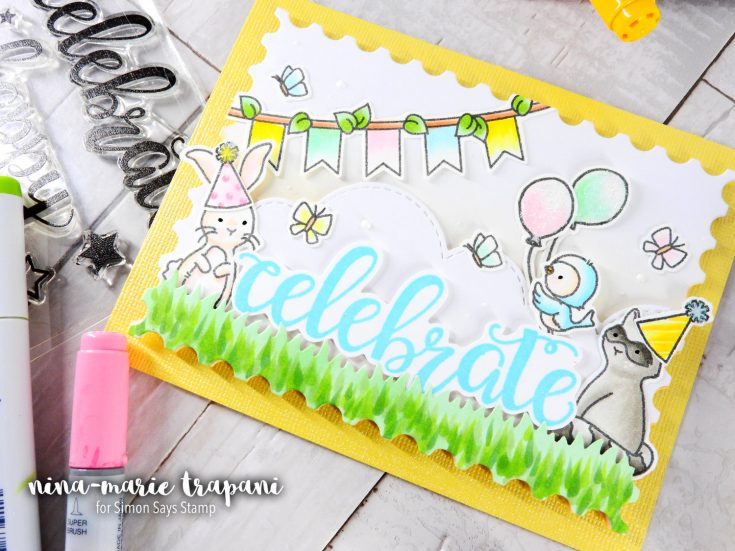
Scene cards are one of my most favorite styles of cards to make; there is something special about watching a blank card transform into a lively scene. You almost feel like you could dive into it! Many of you are probably familiar with making scenes; but if they are something new to you, this video should be helpful!
Often a company has a certain style they adhere to throughout many of their products, or in a certain line of products. By working with a particular product collection, it makes building scenes really easy; and its a great tip for those of you who might not feel as comfortable creating a scene. I worked primarily with products from Avery Elle in today’s card.
Avery Elle is a great example of working with a certain product line. Many of their stamps are sized perfectly to be used with each other. By selecting different stamp sets as I did today, you can achieve a scene effortlessly because the guess work is taken out of deciding whether or not a stamp set will work well with another.
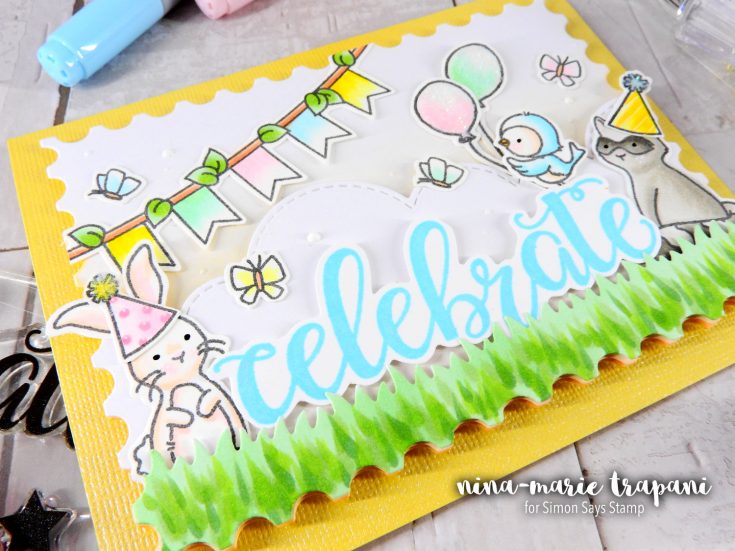
For this card, I chose to work with the Woodland Wonders, Big Greetings, Storybook and Wild Birthday stamp sets (all from Avery Elle). I also used a Postage Stamp die from Hero Arts, the Landscape Trio dies from Mama Elephant and the Grassy Hills border dies from My Favorite Things. These dies were used as supporting elements to help build the rest of the scene.
In this card, I colored all the images with Copic markers. I was going for a soft shading on everything, so I used lighter colors and did a lot of feathering. All of the colors I used are listed below for reference:
- Bunny: YR00, YR0000, RV10, T0, T2
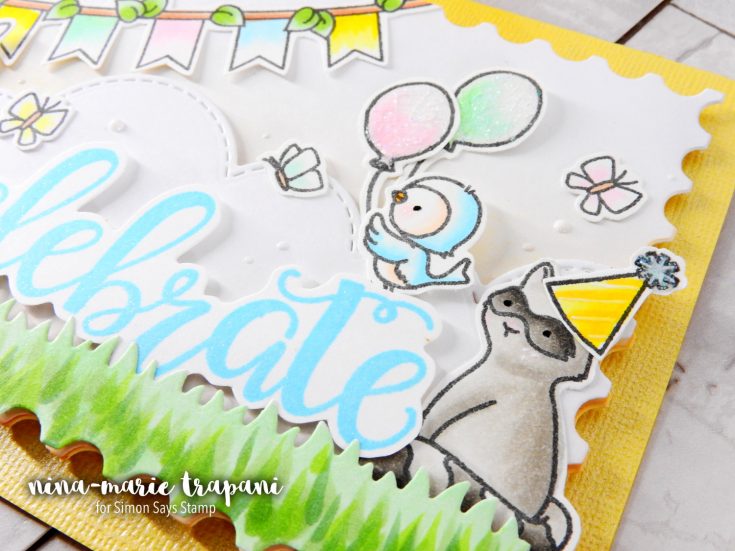
- Raccoon: W1, W3, W4, W6, W7, RV10
- Bird: B0000, B00, B01, YR0000, YR00, RV10, YR15
- Butterflies: Y11, B00, G00, E13
- Banner: Y11, Y08, G00, YG41, RV00, RV10, B0000, B00, E13, E15, YG25, G12
- Party Hats: RV00, RV10, RV13, Y11, Y08, Y35, B00
- Balloons: RV00, RV10, G00, YG41
- Grass: G12, YG25, G24, YG17, G46
You’ll notice how I created a soft blended effect on the sky and clouds in the scene as you watch the video. For this I used the Inkylicious Ink Duster brush, which is a newer product that we recently added to the Simon store! I love how these brushes are dual-ended; the brushes come in a pack of three, which means you have a total of nine brush heads to work with. They blend inks very smoothly across your paper because the bristles are a natural fiber and hold the ink better, unlike synthetic brushes. I am really enjoying working with these brushes and I encourage you to give them a try for unique blending techniques like I used in this card.
I hope you will be checking out the video below to see how this card came together! I also hope that it will inspire you to try making a scene card of your own. Whether its with the stamps I used today or a few stamps from another company, try combining sets together to build a custom scene that jumps off the card!
Thanks for visiting me today and I will be seeing you again next week for a brand new Studio Monday video!
WATCH THE VIDEO
SUPPLIES




Very sweet card – that raccoon is very cute. Love the edge of the overlay.
That bunny is too cute!
Scene cards are my favorite to make
Great job!!!
Cristina
thehouseoftheblackbirds.blogspot.it
Such a cute little scene! Nina-Marie is such a talented designer!
So lovely! I’m kind of tired of winter already and waiting for spring)
love the soft, pastel coloring!
http://www.electricart.com/links/links.html
The card is adorable. I really like that the companies do keep the stamp sets so they coordinate. Lawn Fawn is well known for doing that. Thanks for sharing.
Such an adorable and fun card! Loved it! Thank you for the inspiration!
What a gorgeously cute card! I’m hopeless at scenes – you’re very inspiring!
I Love the stamps, they´re so cute!
Soft, harmonious, and sweet as can be!