Mixed Media Misted Backgrounds
Hi friends! Happy Sunday! Please join me in welcoming back special guest Anna-Karin Evaldsson showcasing a gorgeous page and coordinating card using Distress Sprays and more! Read on to learn all the details, and enjoy!
Hi everyone! I am so happy to be here on the blog today to share a tutorial using lots of ink spray. I made a card and an art journal page, to show how easy it is to do different formats, but with the same techniques.
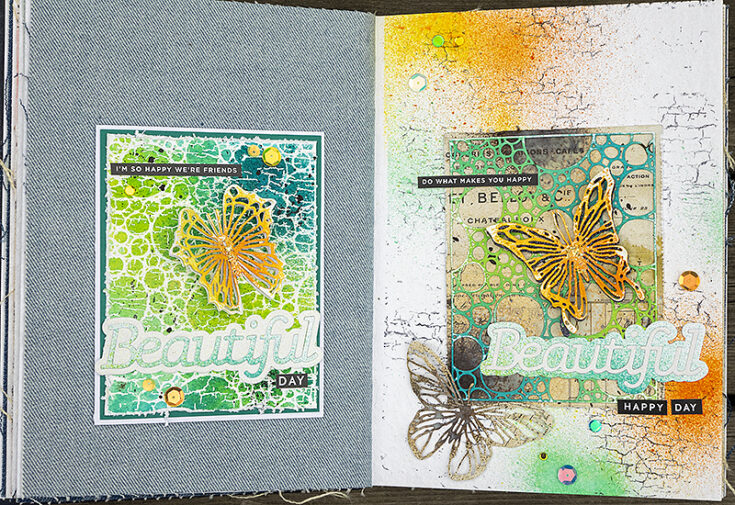
I reach for my Distress Ink pads all the time, but use the Distress Spray Stains and Distress Oxide Sprays a little less often. For this project, I challenged myself to use only mists, except for a black ink pad and an embossing ink pad. I will show you how you can quickly and easily get a whole bunch of backgrounds using a die cut combined with mists. Here you can see the card to the left and the art journal page to the right.
It is best to work on watercolor paper or on another surface that can handle a fair amount of water.
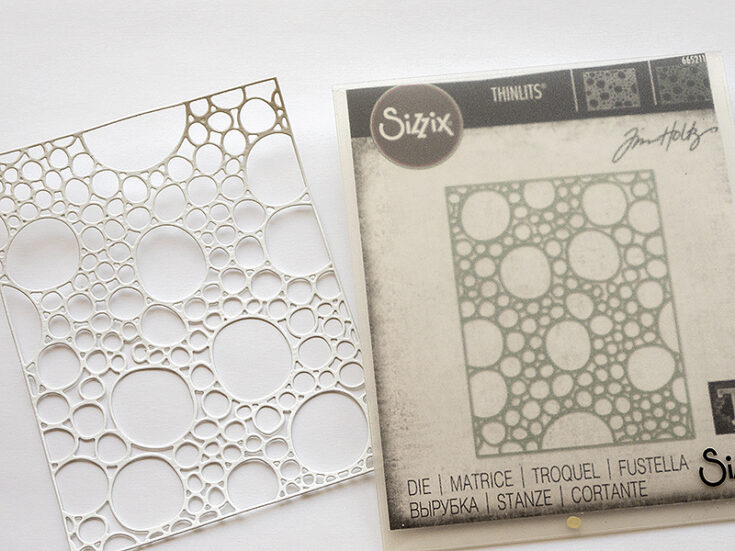
Die cut Tim Holtz Bubbling from watercolor paper. If you struggle to get a good cut, place a piece of wax paper between the die and the paper. This panel will both be a stencil and a background.
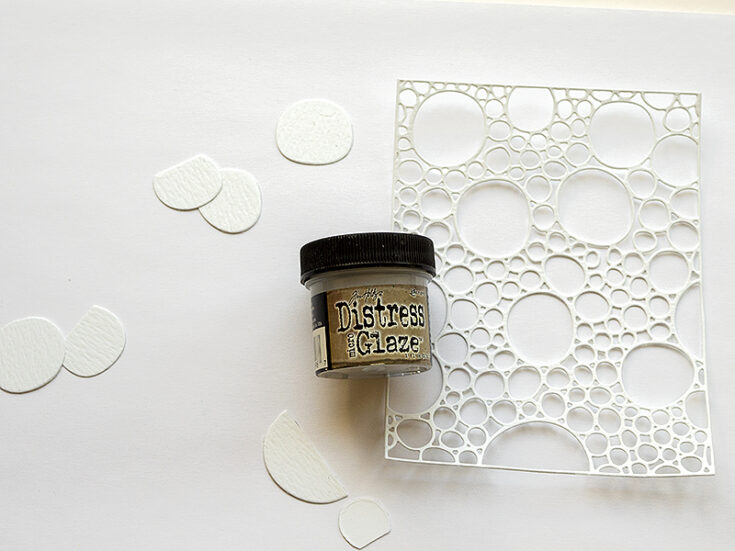
Apply a little Distress Micro Glaze around the edges and here and there on the die cut.
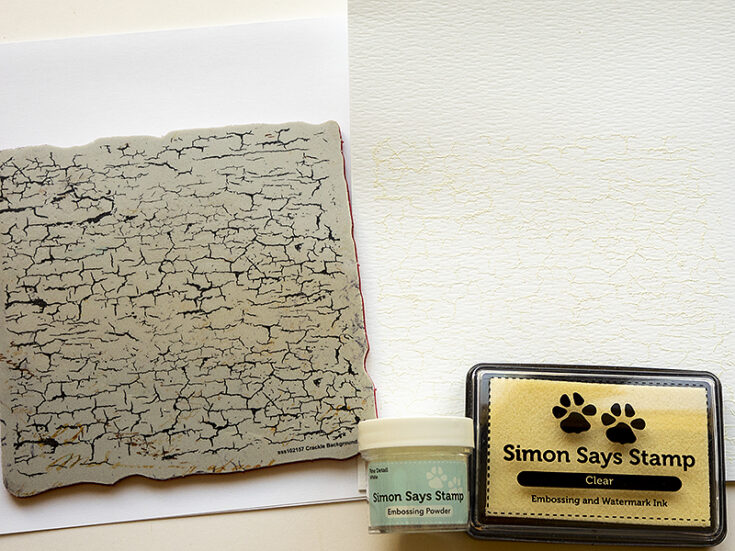
White emboss the Simon Says Stamp Crackle Background stamp on watercolor paper. Always be careful when using a heat tool.
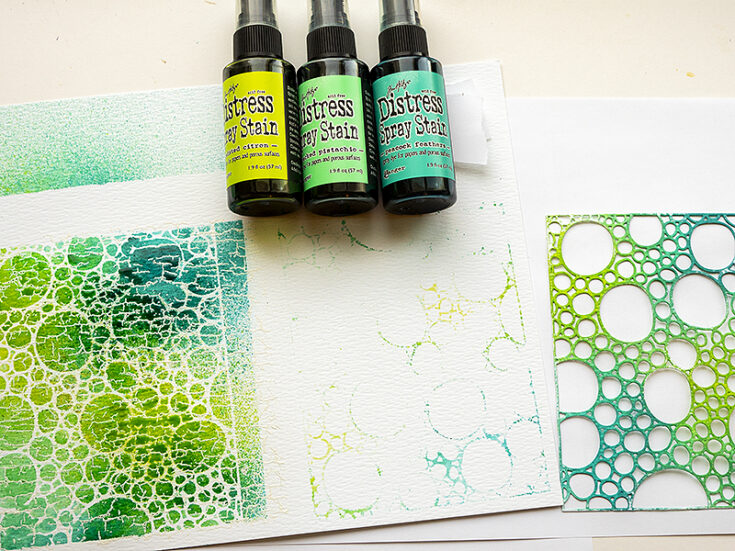
Place the die cut background on the crackle stamped area. Add pieces of masking tape around the edges to keep it down. Mist with various Distress Spray Stains. Carefully lift the stencil up. Turn it around and press on the watercolor paper. Now you have three backgrounds from just one step.
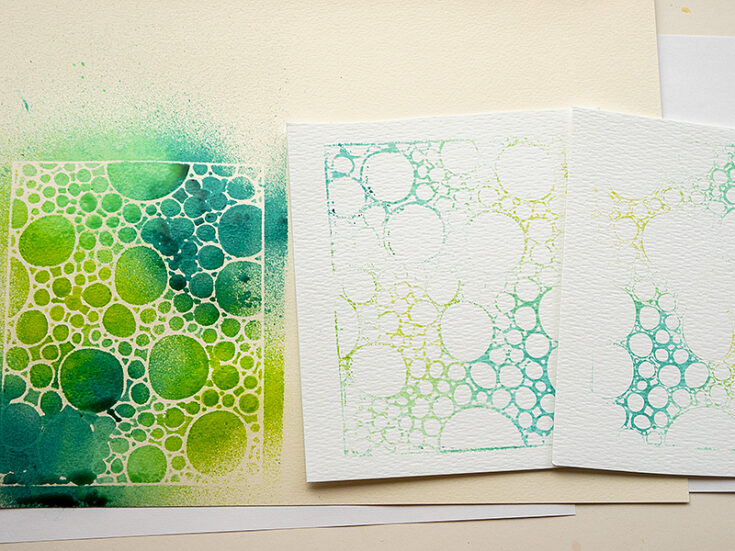
I repeated the process again, but without the crackle stamping. The inky die cut was then place between two pieces of watercolor paper to create two background in one go. I will keep these for future projects.
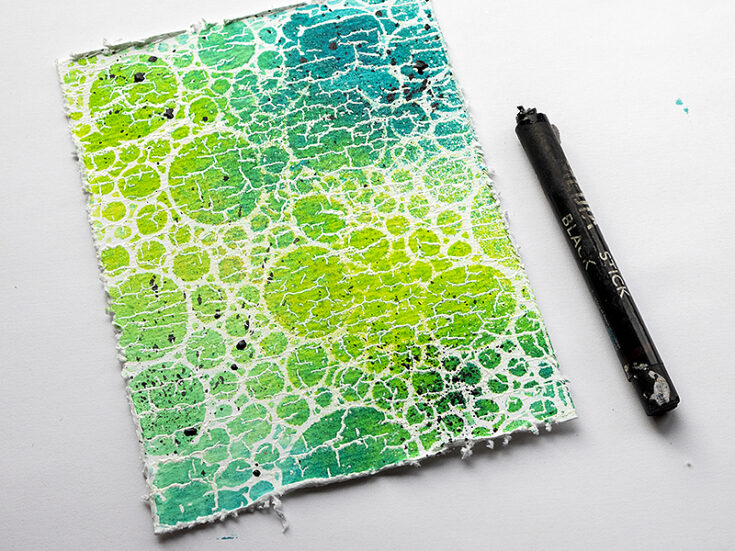
Distress the edges. Splatter a black Scribble Stick on the background. Dip the stick in water and flick a paint brush against it. You can also use acrylic paint.
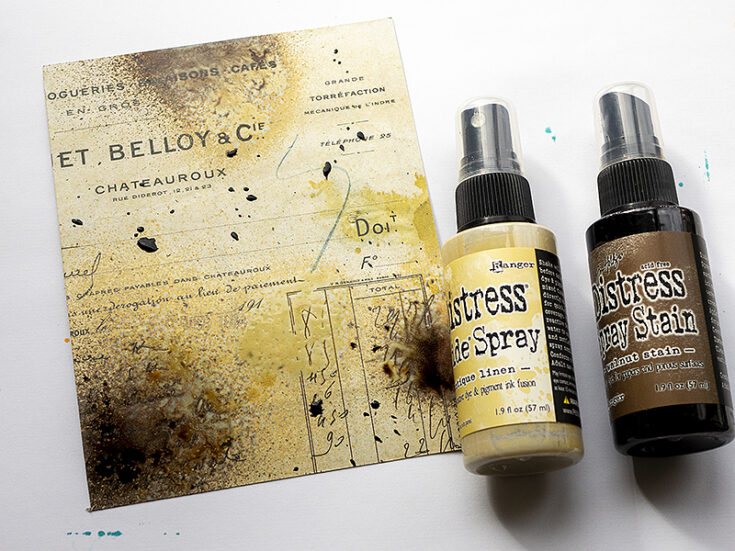
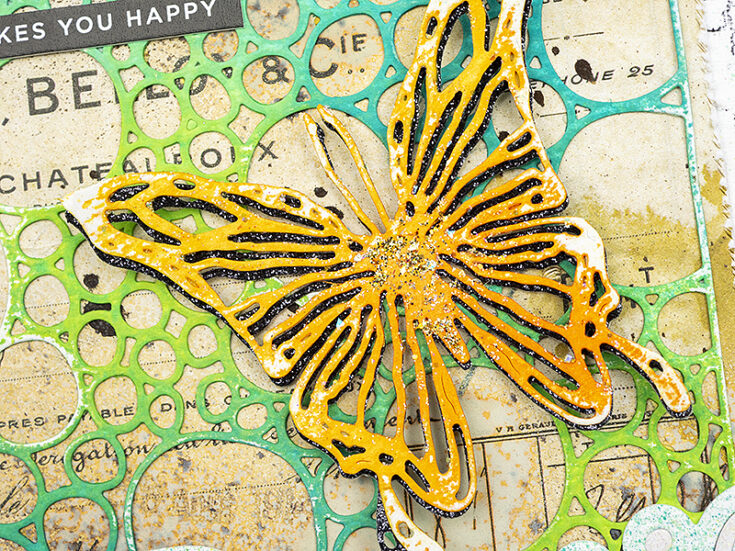
The die cut panel is placed on a Tim Holtz Backdrop Vol. 1 paper. Normally, I would use ink pads to distress the paper, but now I misted it with Distress Oxide Antique Linen and Distress Spray Stain Walnut Stain. The two mixed in a really cool way.
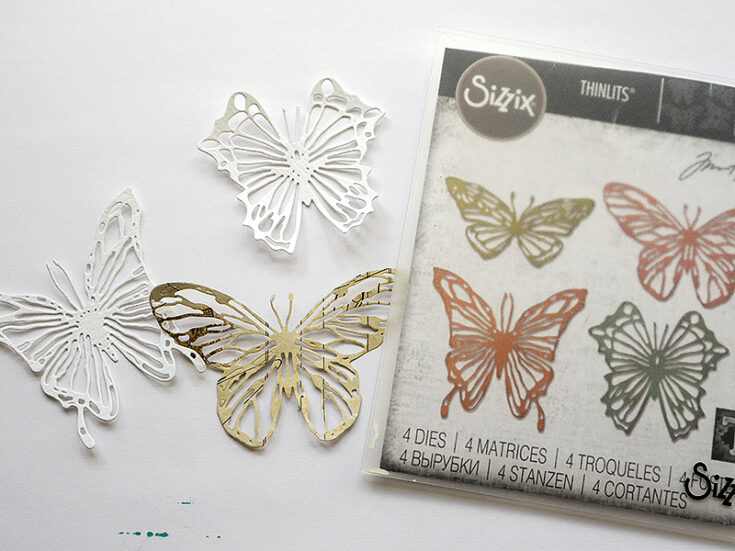
Die cut two butterflies from watercolor paper and one from left-over Backdrops paper, using the Scribbly Butterflies die set.
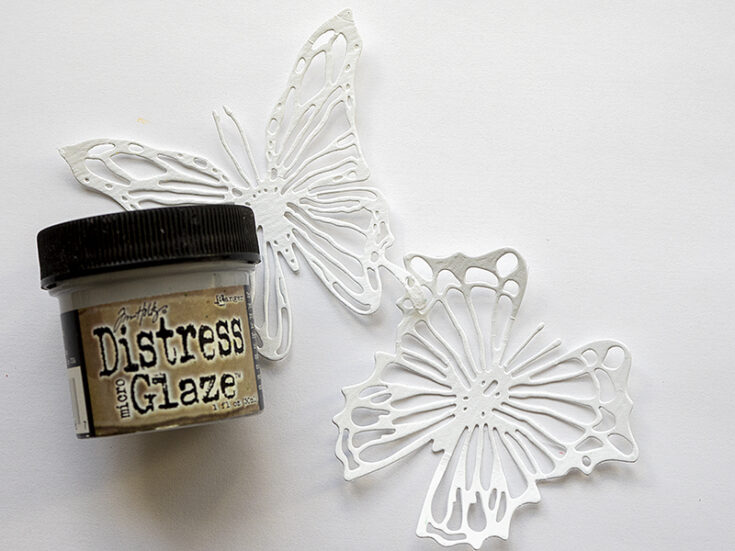
Apply Distress Micro Glaze with your finger around the edges of the butterflies.
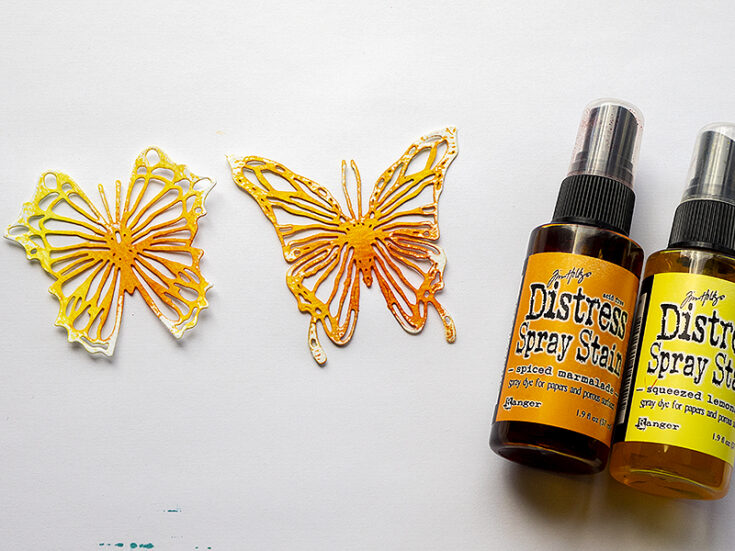
Mist with Squeezed Lemonade and Spiced Marmalade. The glaze will resist the ink. The effect is easier to see on the butterflies than on the die cut panel, since the panel was really saturated with ink which made the resist disappear slightly.
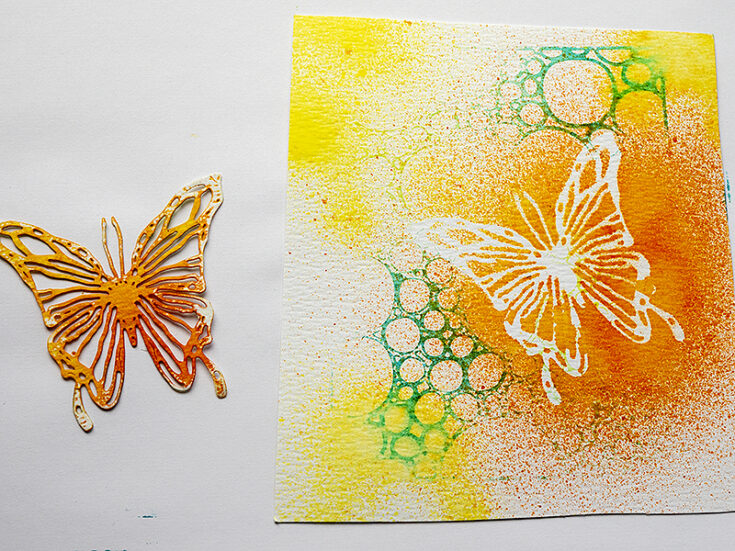
I placed one of the butterflies on one of the backgrounds when misting and added a little yellow too. One more background ready for a future project.
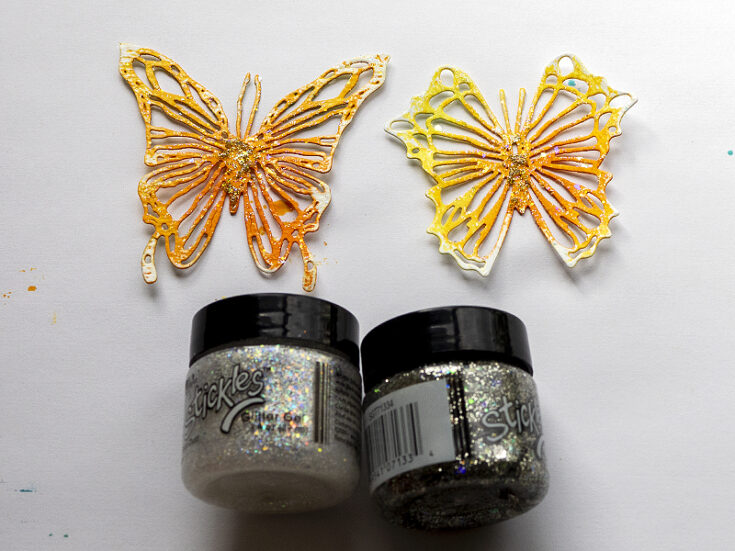
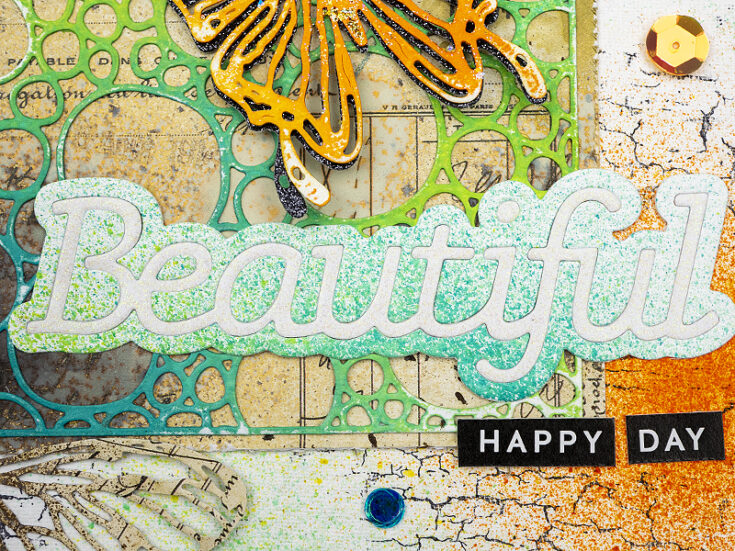
Apply a little Stickles to the butterflies. I used Moon Dust all over them and Asteroid where the body is.
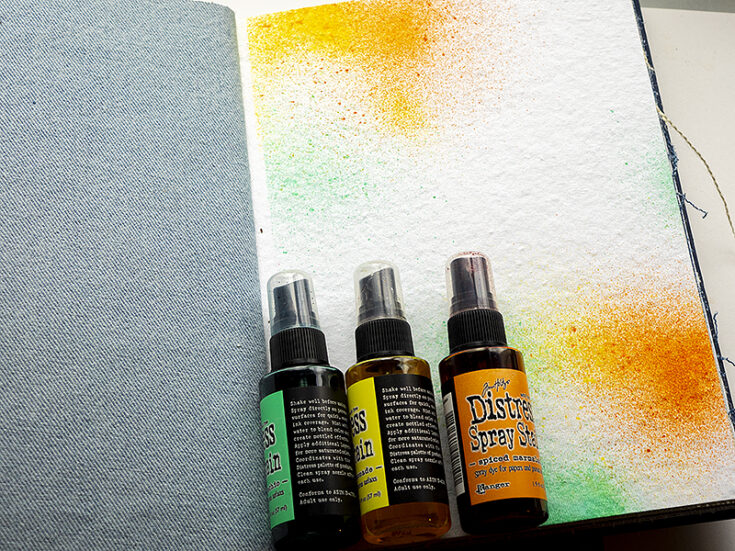
The art journal page was done on a cotton-rag watercolor page in Dina Wakley’s Blue Media Journal. Mist lightly.
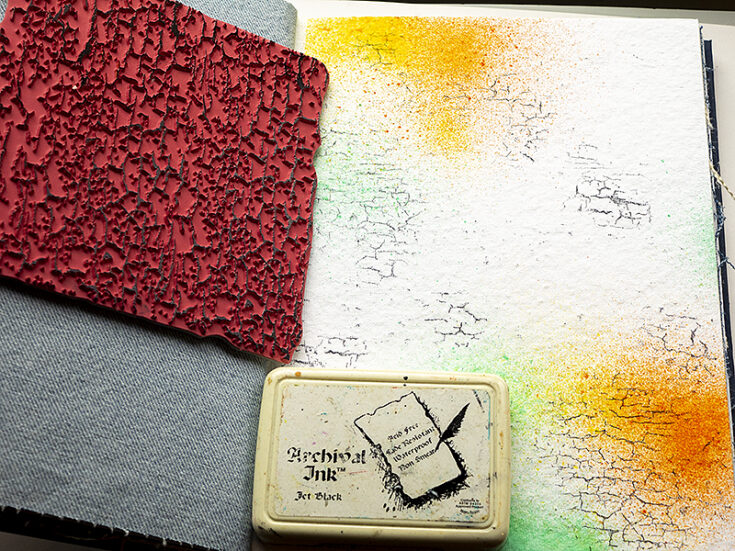
When dry, stamp randomly with the Simon Says Stamp Crackle Background using black ink.

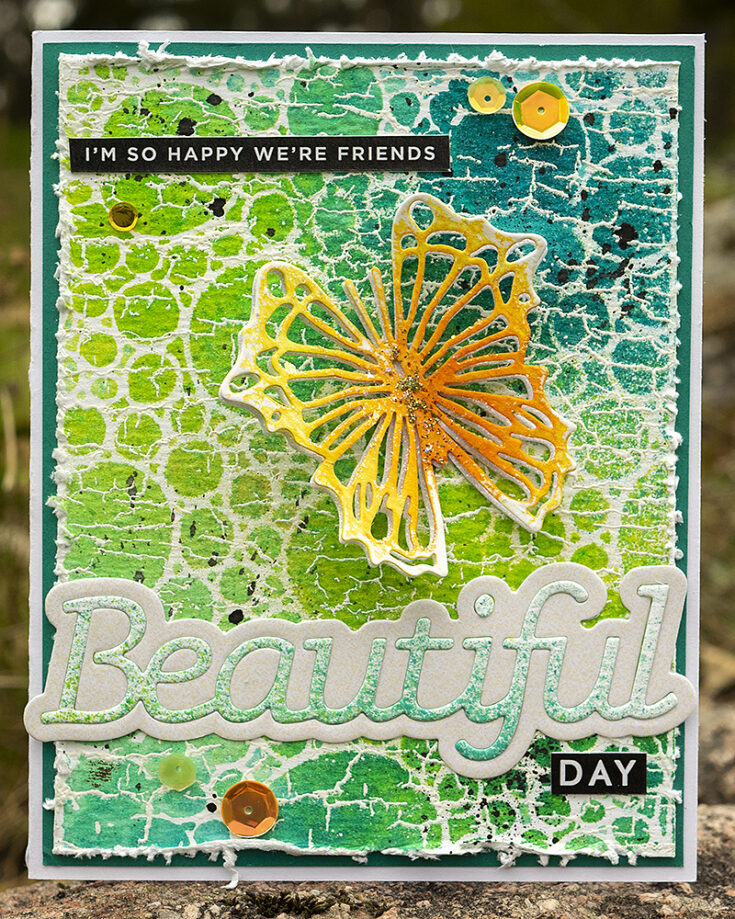
I turned the crackle and bubble background into a card. This background has a really cool texture and looks dimensional, even though it is only one layer.
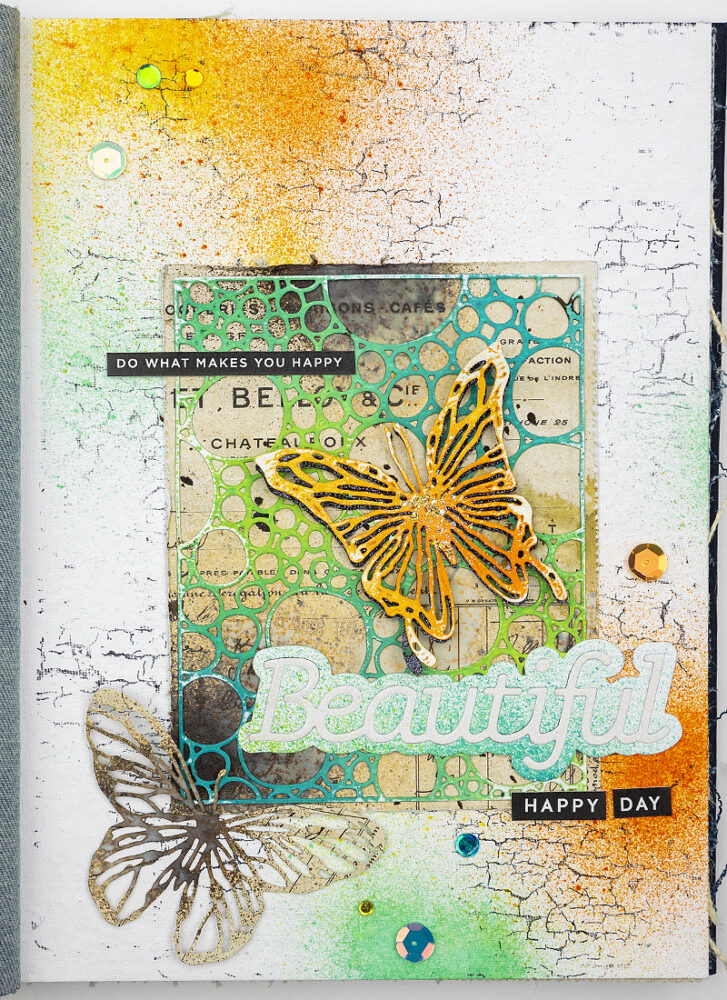
A few extra sentiments were added with Simon Says Stamp sentiment strips.
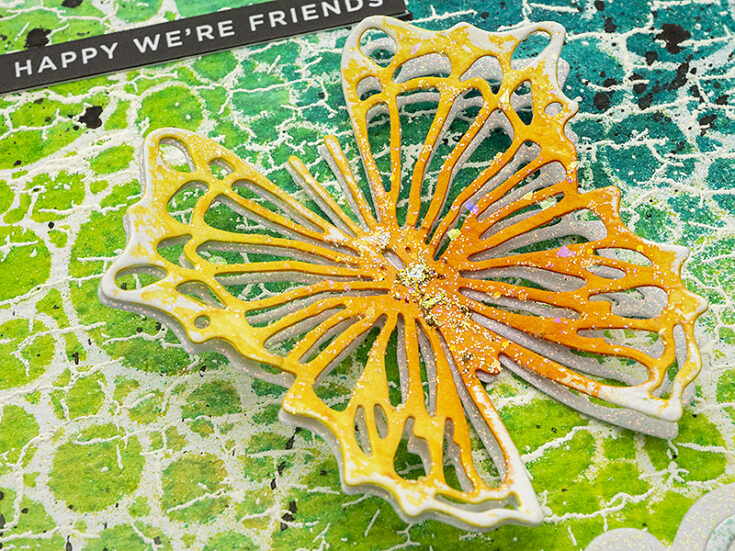
The butterfly was die cut from Simon Says Stamp White Glitter paper too and layered.
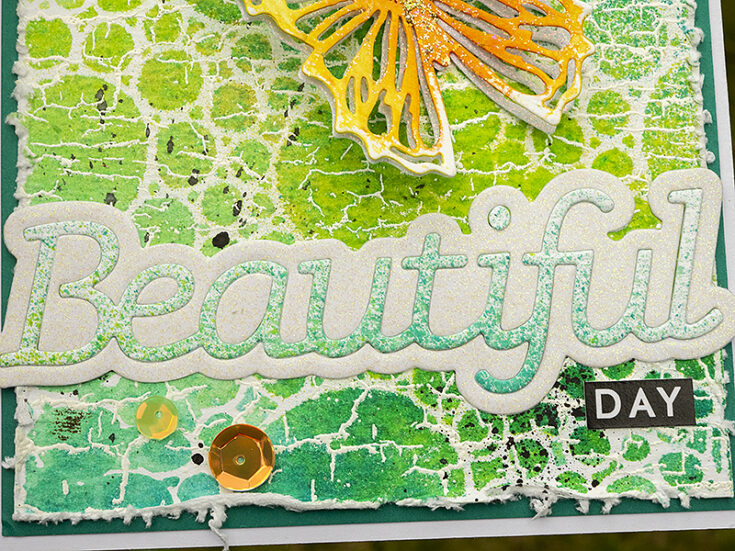
The title was die cut with the Simon Says Stamp Capital B Beautiful die, from white glitter paper and a left-over misted piece.

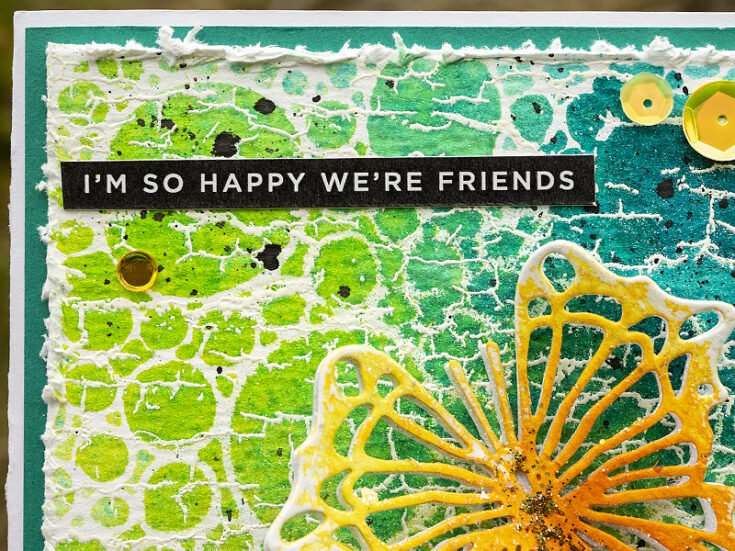
The art journal page has a similar design as the card, with the only addition being the quick misted and stamped background and a second butterfly.
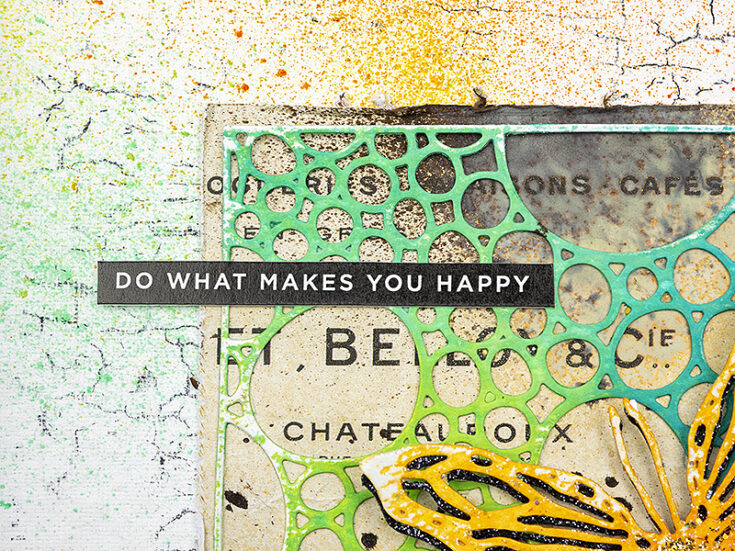
Distress the edges of the Backdrops panel slightly and glue the die cut on top.
The butterfly was die cut from Simon Says Stamp Black Glitter paper and layered.
I die cut the word die twice and used the pieces on both projects, so that they are mirror images of each other.
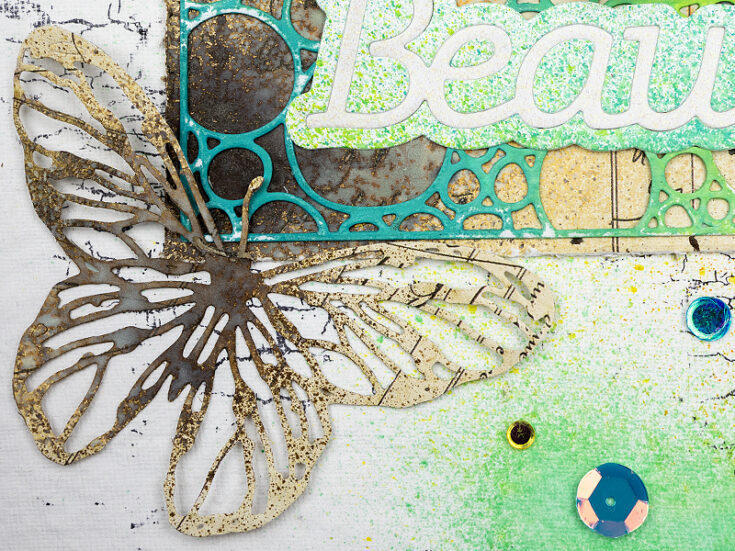
The Backdrops butterfly was misted with Walnut Stain Distress Spray Stain and a little Antique Linen Distress Oxide Spray.
I hope this tutorial inspired you to use your ink sprays and to create some fun mixed media backgrounds. Thank you so much for looking! Happy crafting!-Anna-Karin
SUPPLIES:
|


Thanks so much for stopping by, and thanks to Anna-Karin for being our guest!


amazing background!!
A work of art…very pretty.
Amazing!! Thanks so much for the photo tutorial!
Wow–so beautiful & artistic! I always love your step by step tutorials–thank you!
Really Gorgeous!!! Love all of the texture!!! And who doesn’t love a 2 fer!!
Interesting mixed media projects. Don’t you just love that crackle background stamp. It’s wonderful. Thanks for showing us your talents.
Fabulous makes Anna-Karin!
Great desing and lay out.
Thank you so much for all the time and effort to write the tutorial and share it with us.
Stay safe and have a wonderful day.
so beautiful!!
Very very cool
This was an awesome tutorial! Thank you for the inspiration! :)
So beautiful! I like it! I will join What Beats Rock