Mixed Media Fall Cards
Hi friends! Happy Saturday! I’m delighted to welcome back special guest Anna-Karin Evaldsson! As we gear towards an exciting and illuminated holiday season, we’d be remiss if we didn’t share a couple more projects celebrating the beauty of the Autumn season– present blog post included. ;) Read on and enjoy!
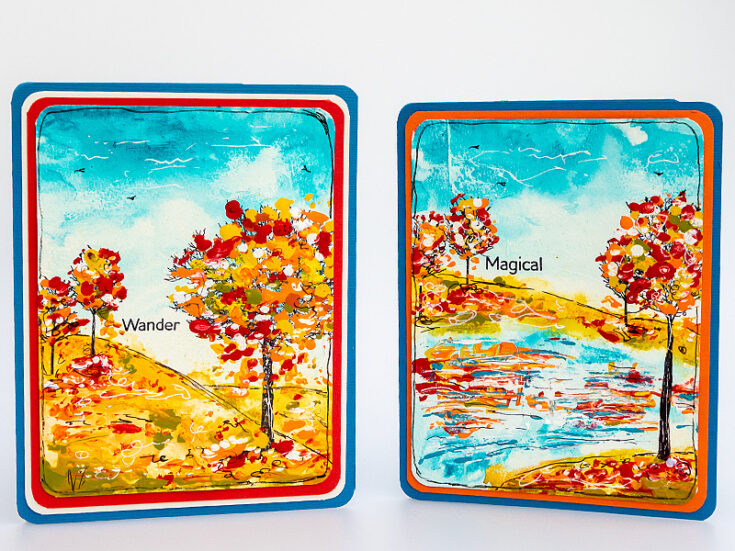
Hi everyone! I am so happy to be here on the blog today to share a fall project made with stamps and acrylic paint and a fun technique using a palette knife to apply the paint. All it requires is a bit of patience for the paint to dry.
I created two fall scenes and turned them into cards, but you can also use the techniques for other types of projects. The scenes can be altered in many ways and you can try to use different images with the same paint technique. There is no need for perfection in this project and it is a great way in which to depict all the colorful shades of fall.

Start by coating watercolor paper with gesso using a palette knife. Leave some marks in the gesso for texture.
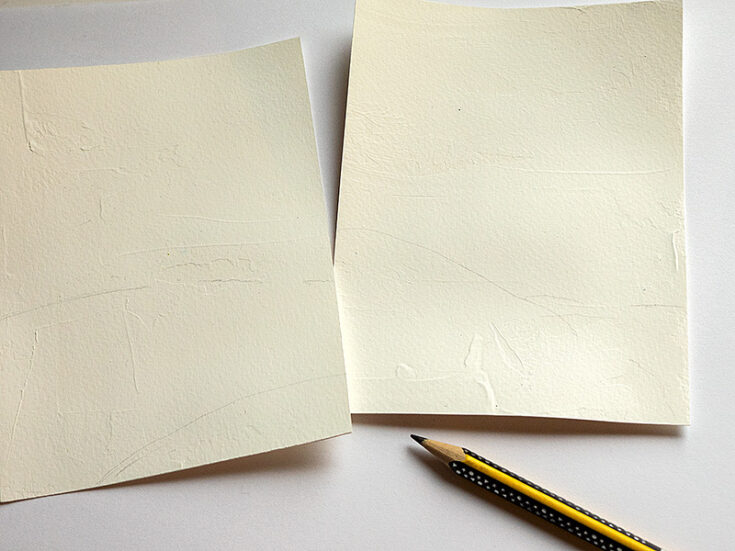
Lightly sketch outlines for the scenes with a pencil.
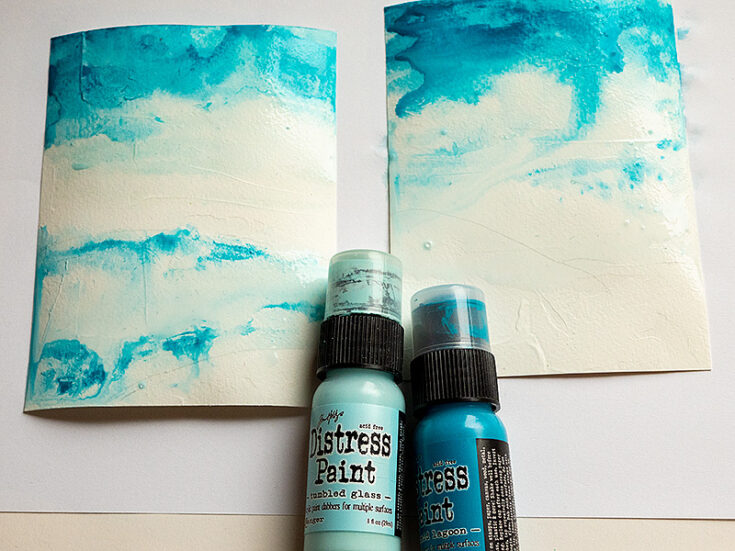
Start by painting the sky and water using Tumbled Glass and Mermaid Lagoon. Mist with water to blend. Let dry, but before it has dried completely, rub off some of the paint in the sky to create clouds.
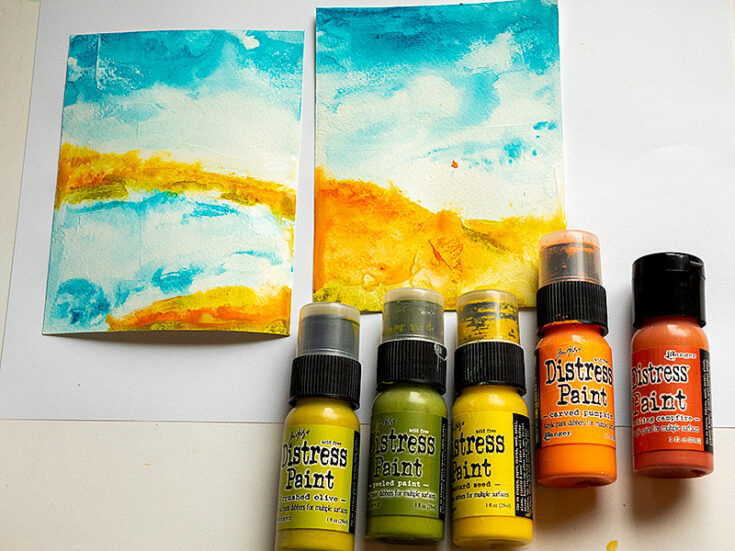
Continue in the same way with the hills and ground. Let dry.

Stamp trees from Simon Says Stamp All Seasons Tree with Archival Jet Black ink.
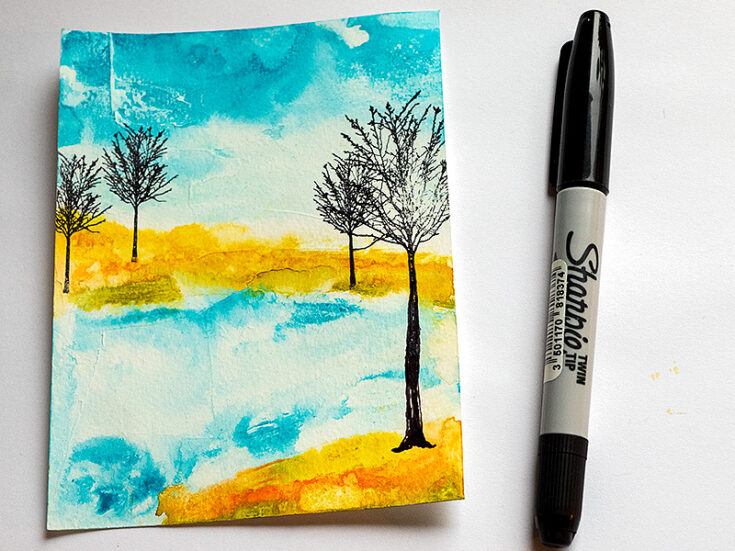
I wanted one of the trees to be taller and extended the trunk with a black pen.

Now for the really fun part. Apply dots and lines of paint with a palette knife. My dots are fairly thick, and if you want the cards to dry faster, apply thinner layers of paint. Leave to dry. This takes a while.
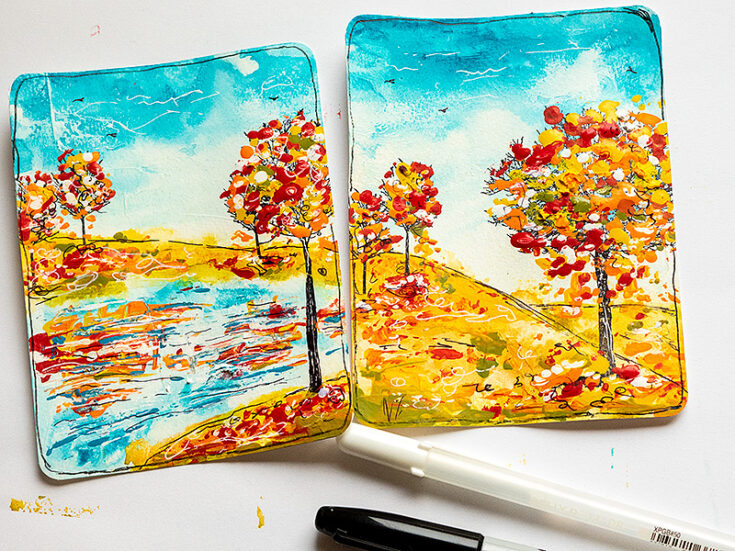
Add some white dots in the same way and when dry, scribble with a white gel pen and a black pen. Round the corners and draw a rough border.
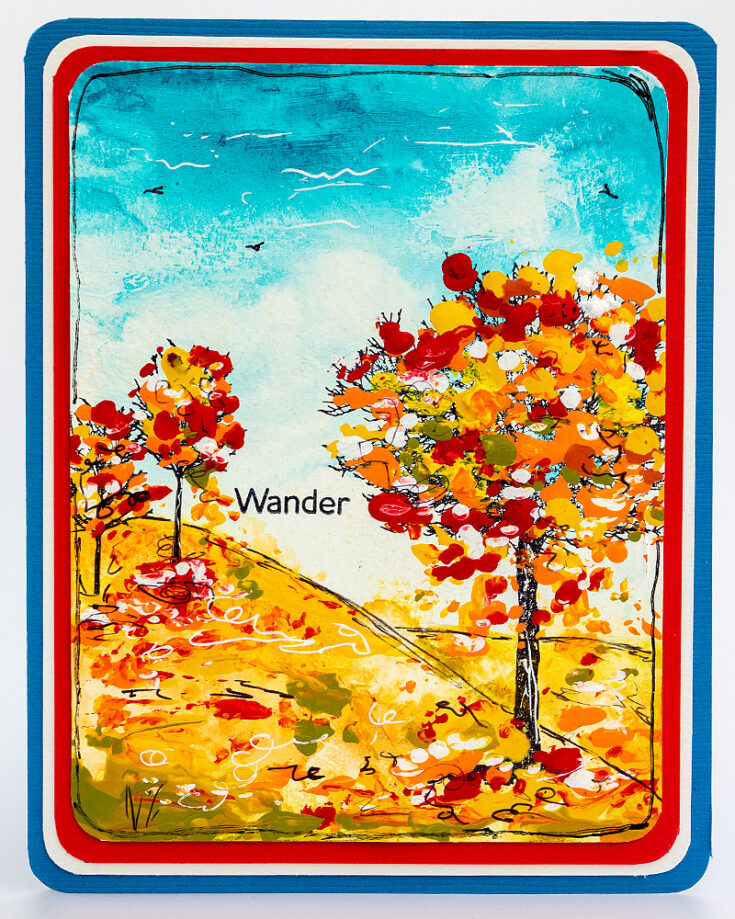
The first card has a large hill in the foreground with a smaller hill behind it. The place and size of these can easily be altered. The sentiment comes from Simon Says Stamp Forest Scenery.
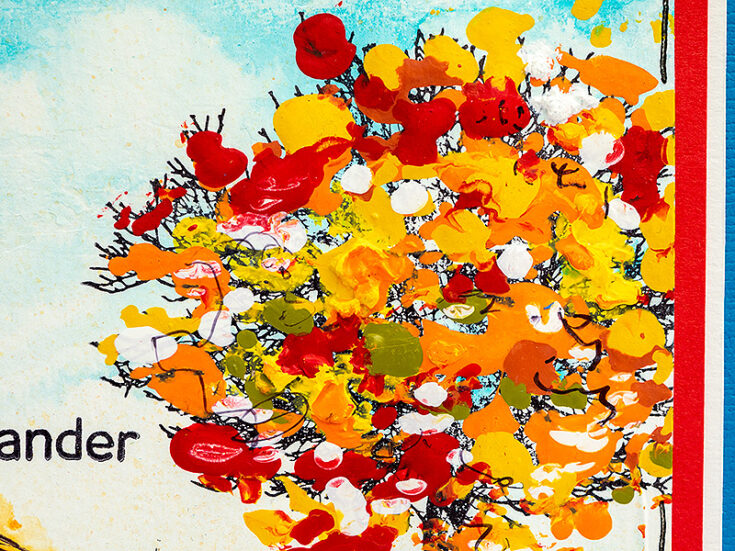
Let some of the branches of the tree show through here and there.
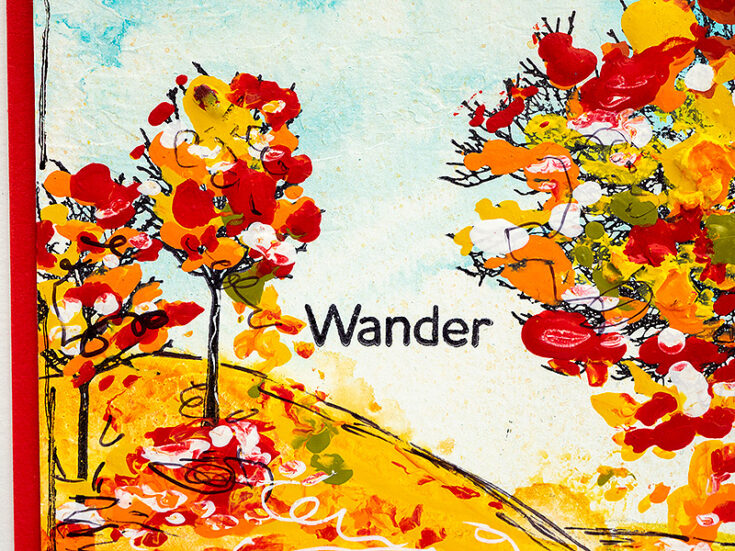
The scribbles add a playful look, but you can skip them too.
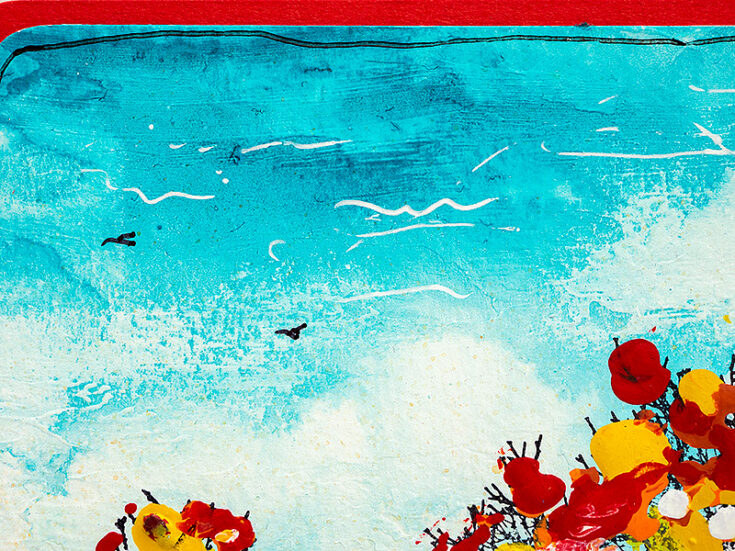
Here you can see the cloud texture in the sky, with the addition of some scribbles and a few small birds.
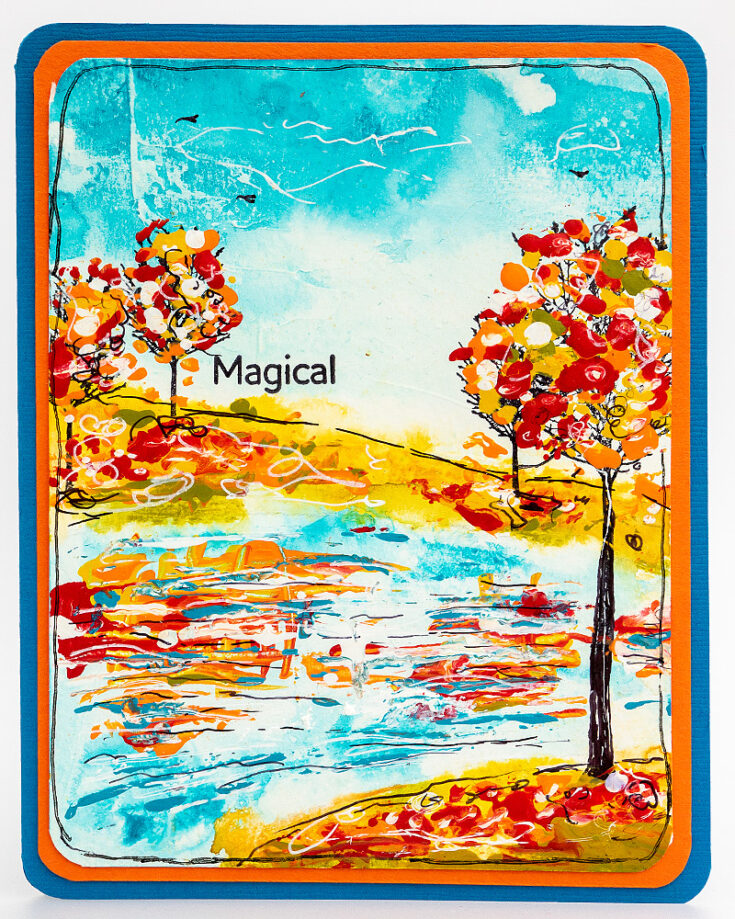
The second card is inspired by a little lake that I often pass on one of my walks. You can try to use a different color paint for each tree.

I wanted the water to be colorful, but might have added slightly too much color.
I hope this tutorial inspired you to play around with acrylic paint and a palette knife. It is a fun way to apply paint. The technique would be great for winter projects too. Thank you so much for looking! Happy crafting! –Anna-Karin
SUPPLIES:
|


Thanks so much for stopping by, and thanks to Anna-Karin for being our guest!


Beautiful cards!
Interesting technique and looked very realistic when finished. You could really see that Fall tree. Thanks for sharing your talents with us.
Wow!!! I love your Gorgeous works of Art!!!
These are so pretty