Mini Slimline Christmas Cards: Yippee for Yana

Hi friends! Please join me in welcoming back the oh-so-talented and amazing Yana Smakula! (Please note: our dear friend Yana is Ukrainian. To show support to our brothers and sisters in Ukraine, please see Yana’s post HERE.)
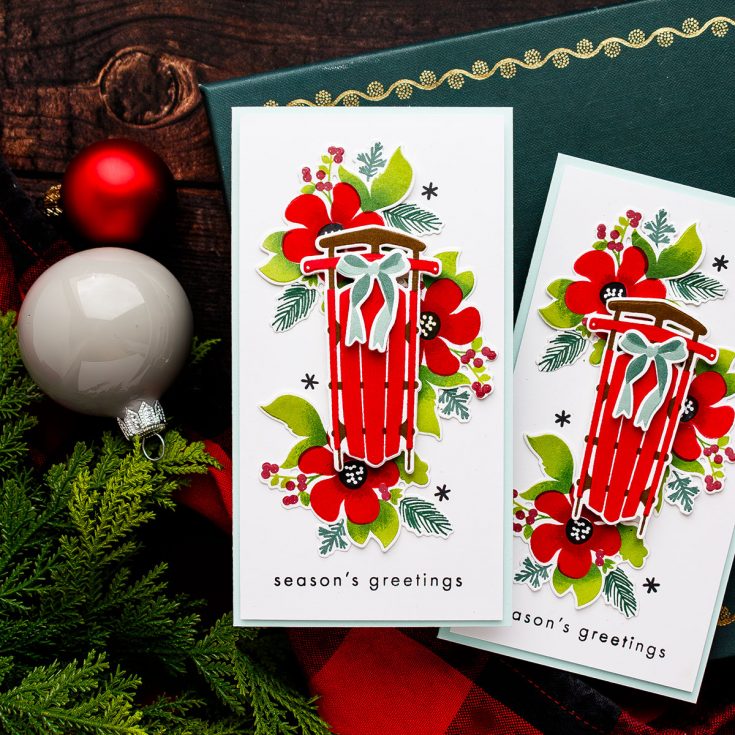
Hello, crafters, this is Yana Smakula for Simon Says Stamp! Welcome back for another Yippee For Yana video! Today, we’re diving into a festive project that brings together two of my favorite things — slimline cards and rich, classic Christmas colors.
We’ll be working with the gorgeous Warmth & Wonder stamp set — a stunning 6×8 layering set that’s just perfect for creating vintage-inspired Christmas cards. Before we jump in, I’d love to know — when was the last time you made a slimline or mini slimline card? Let me know in the comments below!
Warmth & Wonder Stamp Set
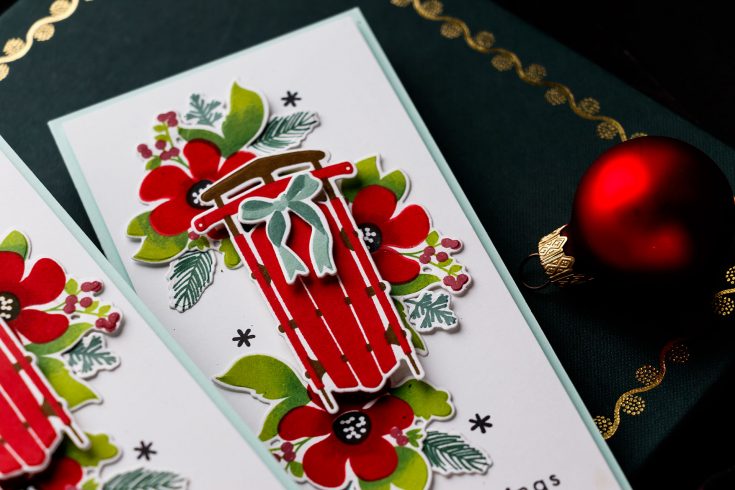
This set features five detailed layering images — all substantial in size and beautifully designed for dimensional stamping. I paired it with Tree Plate Greetings for a clean, one-line sentiment that perfectly complements the layout.
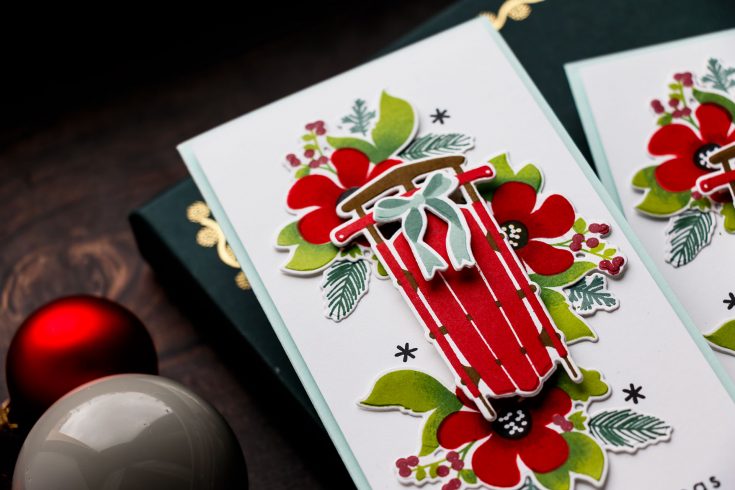
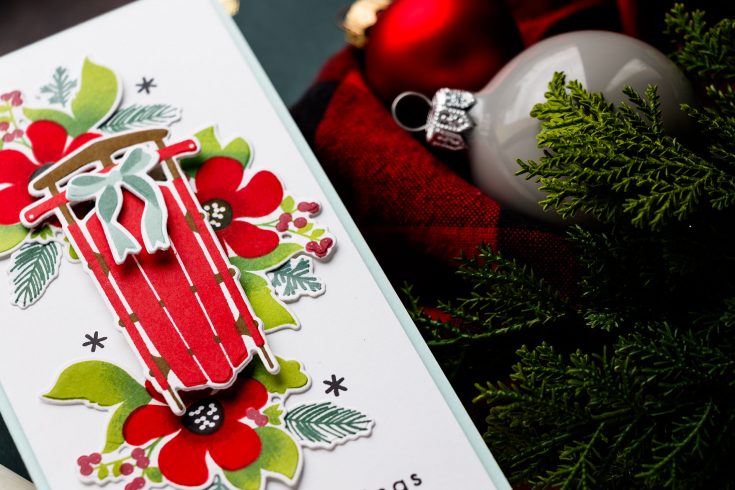
The images are clearly labeled for easy alignment, making the layering process a breeze. We’ll start by stamping the sleigh, and then move on to the bow and floral clusters that make this card so lush and elegant.
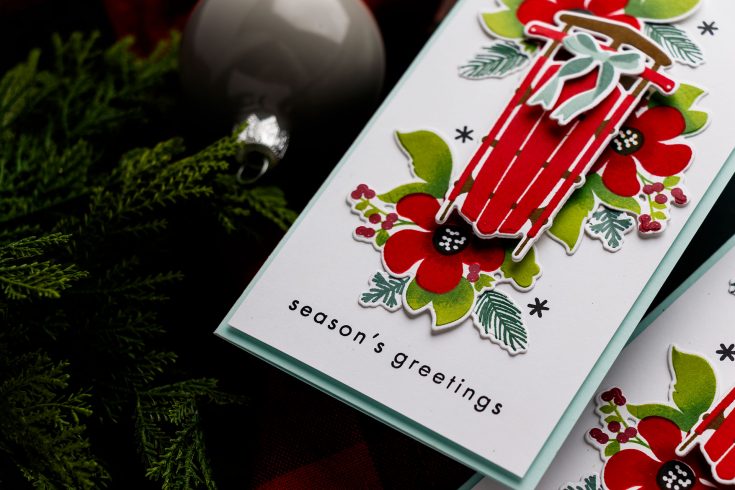
Stamping the Sleigh
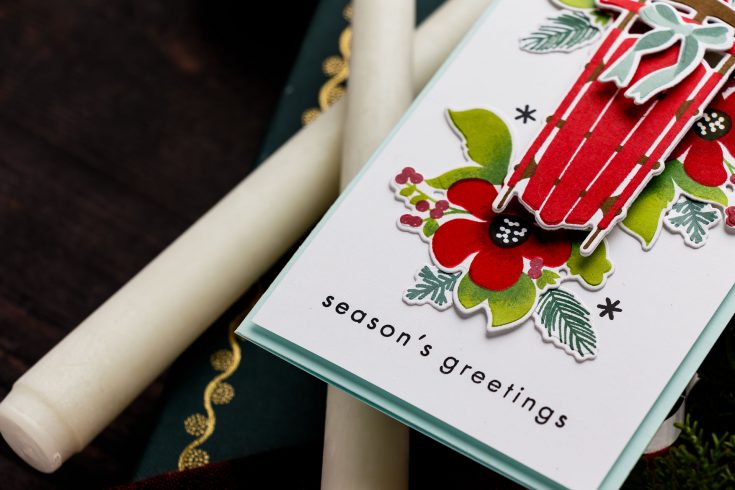
I began with C1 and C2 — the two sleigh layers.
- For the base, I used Cocoa Ink to mimic the warmth of vintage wood.
- The second layer was stamped in Cranberry Ink — that perfect, festive red that instantly says “Christmas.”
If your stamps are brand new, a quick tip: rub the surface with a pencil eraser before inking. It helps remove any residue from manufacturing, giving you crisp, clean impressions from the start.
The Versatile Bow
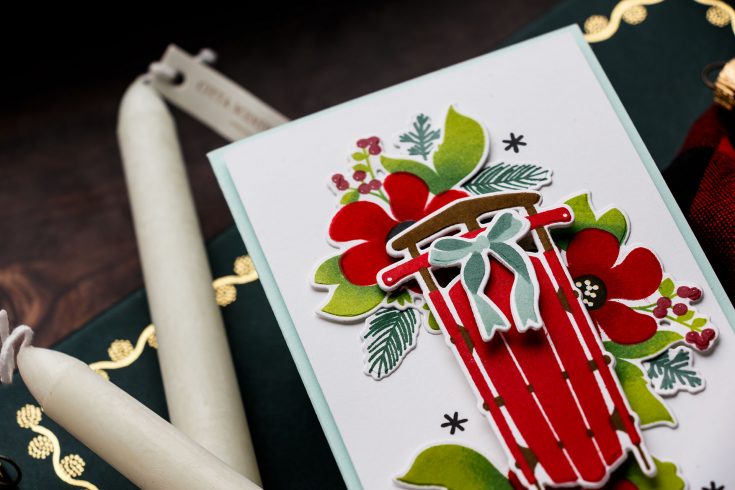
Next, let’s talk about the bow — and oh, this one’s a keeper! I stamped it in Eucalyptus (light green) and Juniper (dark green). These muted tones give it that timeless holiday charm, but honestly, this bow can work for any occasion — birthdays, weddings, or even just-because cards.
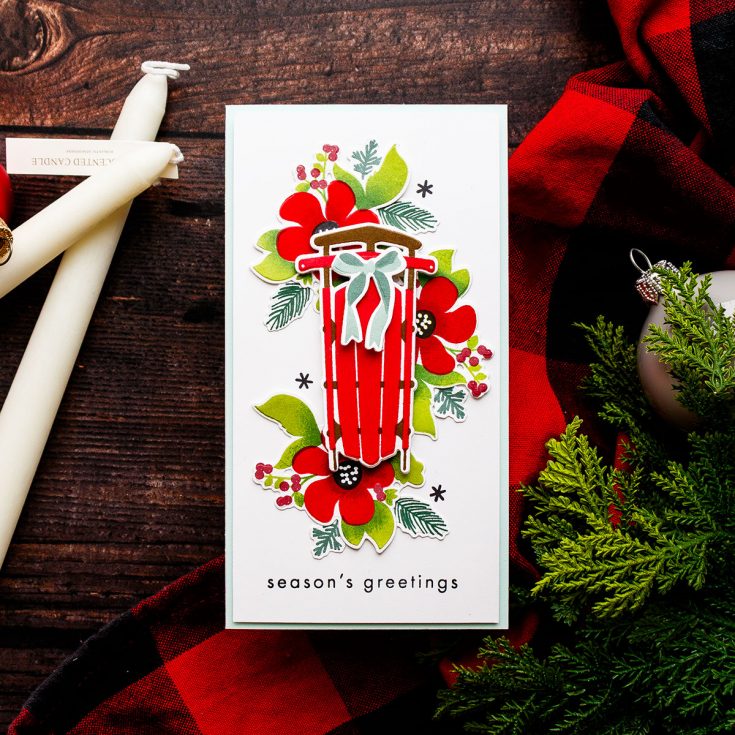
Creating the Floral Clusters
These florals remind me of anemones rather than poinsettias — soft, elegant, and perfect for layering.
Here’s how I built them:
- B2 layer – stamped in Pearfection Ink for the greenery.
- Added subtle shading with Pine Ink using a detail blending brush.
- B1 layer – stamped in Cranberry Ink for the petals.
- Deepened the flower centers with Sangria Ink using gentle dabs of a blending brush.
- Finished with B3 layer – flower centers in Versafine Clair Black and berries in Sangria for a muted, traditional red.
You’ll need three floral clusters for this design. I love how the subtle shading adds depth without overpowering the composition.
Once everything’s stamped, I used the coordinating dies to cut out each element. I also die cut a few extra blank layers to stack behind the sleigh and bow — a trick I use often for extra stability and dimension.

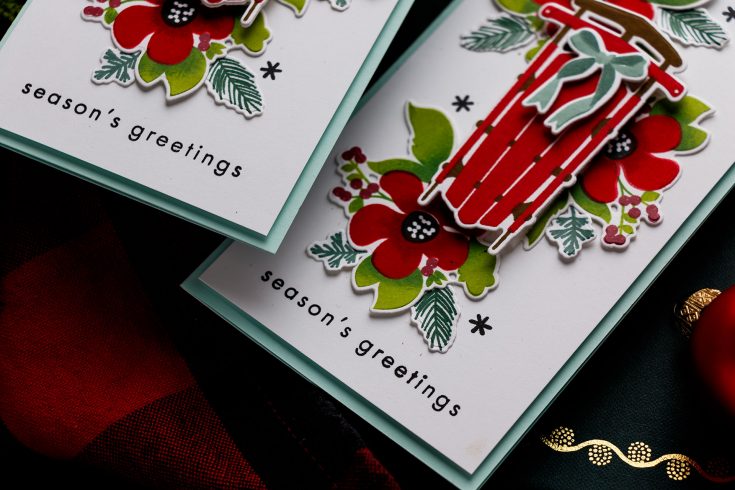
For the base, I went with Seafoam Cardstock — a soft, serene hue that pairs beautifully with red and green. My white panel (3.25″ × 6.25″) is foam-mounted on top, giving the slimline format a clean, elegant frame.
Using the Tree Plate Greetings set, I stamped Season’s Greetings in crisp black ink along the bottom of my panel. Then, I foam-mounted the sleigh, bow, and florals, layering them for fullness.
A few pine sprigs (stamped in Eucalyptus and Juniper) tucked behind the flowers add movement and a lush, wintery feel. Finally, I stamped a trio of tiny snowflakes around the sleigh — the perfect subtle finishing touch.
I opted to skip gems or sequins this time, keeping the design clean and classic — but if you love a little sparkle, go for it!
I hope this inspires you to create your own slimline or mini slimline cards using the Warmth & Wonder stamp set or any other set you have in your stash!
Happy stamping, friends — and I’ll see you soon in the next Yippee for Yana episode!
WATCH THE VIDEO:

SUPPLIES:
|


Ways to support Ukraine:
If you are looking for ways to support Ukraine, we encourage you to visit this page on Yana’s blog:

A big thank you to YOU, our reader — and to Yana for being our guest!


These are so pretty
Like how you made a slimline card with the sled. It coordinated well, as the sled itself has length. Love all the florals dressed around it too. Beautiful card!
Love your slimline card; so festive. I love making mini slimline czrds and made a few of my Christmas cards that way .
Your sled cards are absolutely beautiful.
The cards you made yourself are so beautiful and meaningful, I always prefer handmade items.
Those soft green shades really elevate the design, almost like the understated elegance you see in celebrity lifestyle trends pål jonson längd. It’s versatile too, perfect for occasions where people love adding thoughtful, stylish details.