Layered Stamping with Distress Paints!
Hi there bloggers! {Stephanie} here with a quick intro to our special guest artist today, Britta Swiderski! If you follow our blog, I’m sure you’re familiar with her and her work and we’re pleased as pie to have her back for a fabulous new technique tutorial. Enjoy!
————————————————————————————————————————
Hey there! I’m pleased to stop by today to share a technique that I’ve been experimenting around with a lot lately – Layered Stamping with Distress Paints. When playing with these hot new products, I wanted to use their main distinct properties – their opaqueness and that they can be layered without interacting – to really experiment with these fabulous paints. That’s how I started Layered Stamping with them. Watch the video to see the whole process:
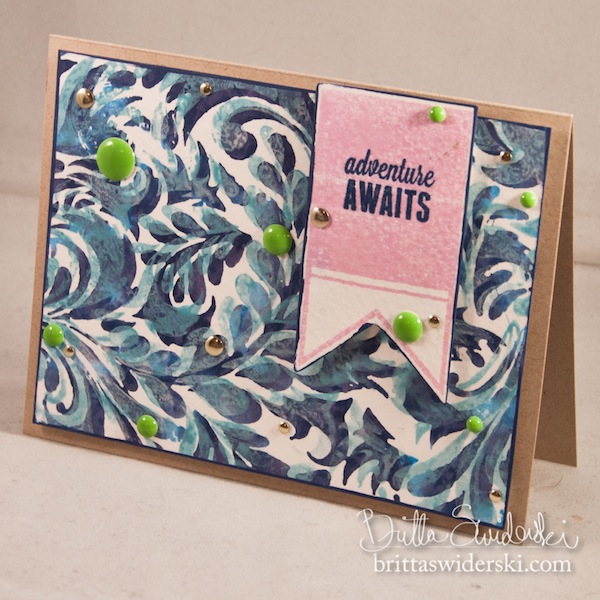
Here’s a better look at the finished card. Note how using sprays of water diluted the top layer to make it a little more transparent, but you can still clearly where both layers were stamped. There’s so much dimension and texture here!
Another of my favorite parts of using these paints is the many applications. In the video, we used the Chipped Sapphire paint around the edges of each of the white pieces, and it adds so much dimension and a real sense that everything belongs together on the card. There are so many possibilities with these paints.
Plus, you can’t forget about the enamel dots as a finishing touch. Try adding in some Metallic Decor dots from Hero Arts for another fun look. Metallics are a huge trend right now, and gold is here to stay. Embrace it by adding it to your smatterings of fun embellishments!
I hope you enjoyed the tutorial today and will give it a try with your set of distress paints. Thanks to Simon Says for having me stop by today!
Supplies:
Blog Candy Alert! Join our following and comment on this post for a chance to win a special blog candy!


There are no comments.
Leave the first?