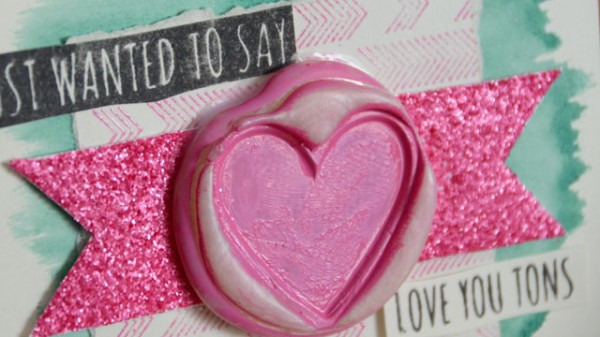
Just Wanted to Say: Love You Tons!
Hello! May Flaum here to share some ideas for stamping with the cute new Dear Lizzy stamp set! A basic heart is always a welcome stamp in my collection and I had some fun with it making both a card and a scrapbook page.
Now I know I could have simply stamped with it – but I thought I’d pull out some UTEE and make myself a seal. Doing this is really easy – especially if you have a meltart pot!

Steps:
1. Heat some clear UTEE and a little white UTEE in the pot. Pour out into a circle (it’s ok if it isn’t perfect!) and squirt with perfect pearls in pearl to add some pearlized color to it.
2. Set the stamp on the center of the hot UTEE and leave it for a few minutes. Once it starts to cool, you should be able to lift the stamp right off. This works best with a simple design.
3. If you’d like to color it, you can use paint or other liquid mediums. If it won’t set, just use a heat tool for a moment which will warm up the UTEE and help the color soak in and set.
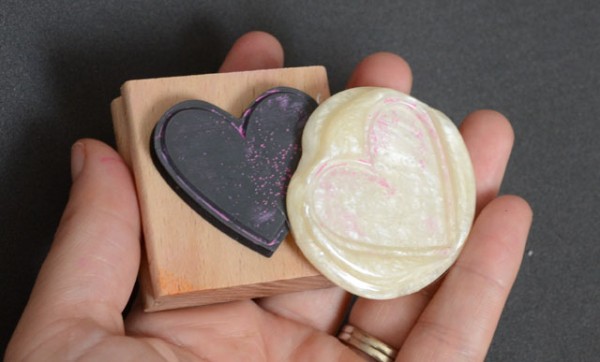
It can be a lot of fun – and using a non-stick craft mat you can make a lot of these at once then save them for future cards and projects.
Speaking of cards – I made this one with my heart seal.
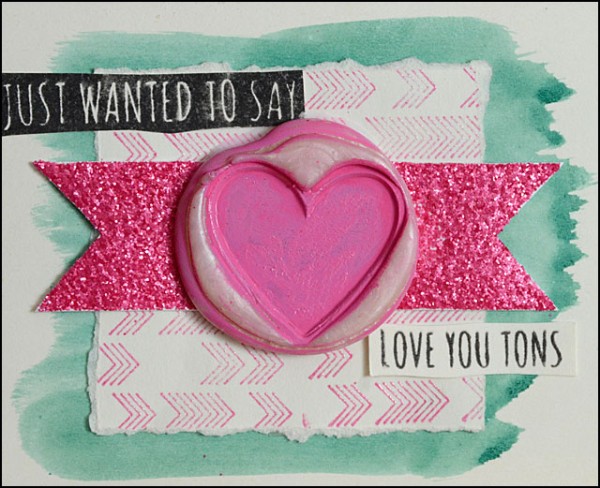
I paired the heart and chevron stamp set with some distress ink, a Simon stamp set, and in a few minutes I had this card. Such fun!
The rest of the how-to for the card is:
- Cut a strip of white cardstock on the ends so that it is like a banner. Then coat with liquid adhesive and distress glitter.
- Stamp a square of cardstock with the chevron stamp and tear the edges.
- Use distress stain on a piece of 4×5 cardstock, leaving the edges white.
- Adhere that stamped square, the glittered banner, and the seal to the 4×5 cardstock.
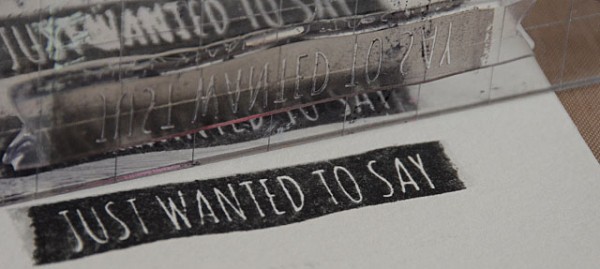
- To finish the card, stamp the ‘just wanted to say’ and ‘love you tons’ stamps on cardstock and add them to your card.
I had so much fun making this card – I decided to keep the glitter and stamps out, and make a layout!
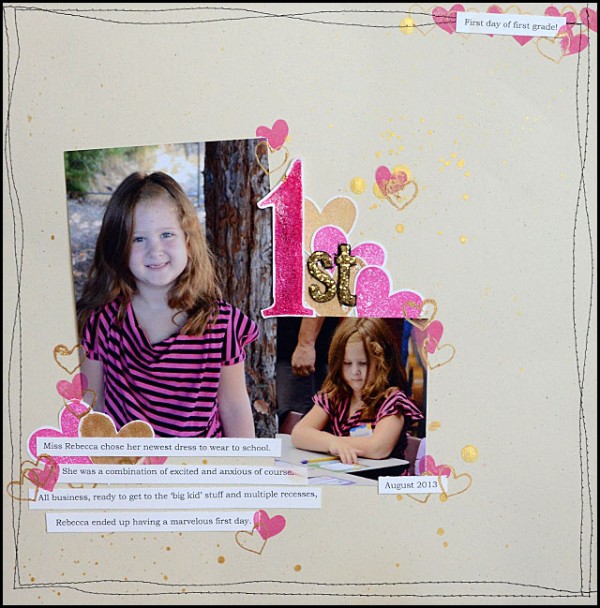
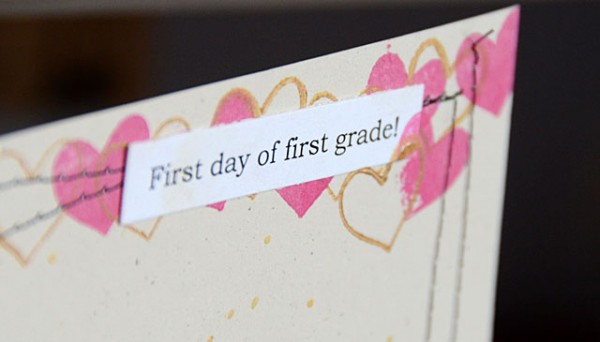
First day of school definitely deserves a layout – and combined with some more Simon exclusive stamps and my big #1 stamp (Tim Holtz) I knew I could make a layout where stamps were the star – and only embellishment needed!
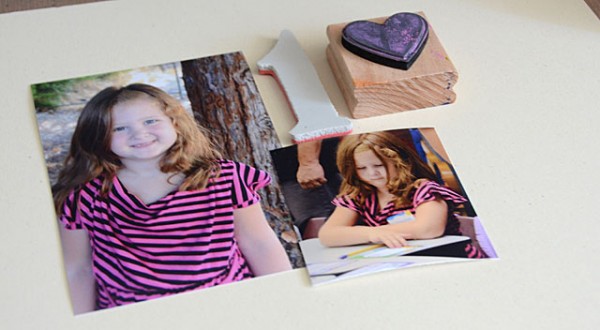
First I took a 4×6 and 4×3 photo, some cardstock, and my main stamps and made a plan.
Some notes on how-to for my page:
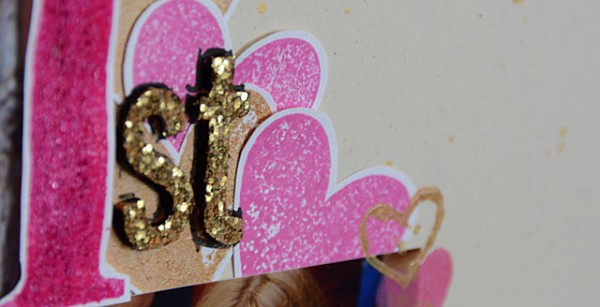
- I stamped (with picked raspberry distress ink + gold paint) multiple hearts and cut them out.
- I used pink ink (Memento Luxe) + gold paint for the small hearts (from Simon stamp set).
- I used Heidi Swapp gold mist flicked onto the background paper.
- I stamped the #1, embossed it with clear powder, and while still hot I coated with distress glitter.
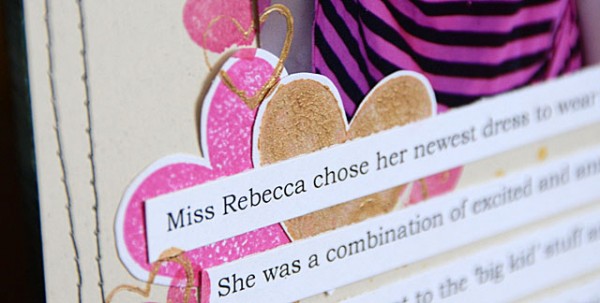
The layout is finished off with black stitching, and some computer printed journaling on thick white cardstock. Simple – and my stamps were my embellishments which I love!
I had a lot of fun being a part of this celebration here at Simon! Please do pop by my blog today for a post featuring more of the new Simon exclusive stamps.
Supplies:
|
|
|
 |
 |
 |
|
 |
|
|
 |
 |
 |
|
|
 |
 |
 |
 |
|
Blog Candy Alert!! Follow our blog via email and comment on this post for a chance to win a special blog candy!


Beautiful Project!
Beautiful! Thanks for the reminder to get my melting pot out and actually USE it!! I get overwhelmed by how many products I have, and sometimes even forget I have things (read: purchase things I already have, like the Tim Holtz mini-snowflake rosette die, sigh)!! I just LOVE both of these, but especially the card!
That is such a sweet back to school layout. Love the pink heart.
Great projects! That is a good heart stamp.
I like to make similar seals with hot glue, embossing powders and a stamp. I follow the blog by email.
Such a cool technique for embellishments :) this is why I love blogs like this. I’m in a creative rut right now and this post has given me some creative inspiration.
Adorable page for an adorable girl ^^
Hugs from France
Lunea
Gorgeous project love the heart embellishment! x
Love, love your scrapbook page! And thanks for sharing how you used the utee! Great work. Thanks for sharing.
Katie B.
I really enjoy seeing May’s creations. I so admire her spirit of fun and adventure when it comes to crafting.She is a pure delight.
Oh WOW!!! What a beautiful card and a beautiful layout page!!!
Great layout and card. Love all the dimensions and elements
Love this :D
wonderful layout! thank you for sharing!
Love this. TFS.
Crafty hugs,
D~
designsbydragonfly.blogspot
*email follower)
Love your layout. Fun and vibrant!
Such a pretty layout!!!! Thanks for the how to! I don’t use my melting pot enough! Your daughter is beautfiul.
I never thought of doing that with a heart stamp. When I first saw it, it reminded me of icing on a cupcake. Thanks!
Love the card and layout. Thanks for explaining how to use the same elements on both.
That seal is so cute! I used to make wax seals on snail mail letters.
Wow – I love your seal – I’ve never used UTEE before – I’ve heard of it but didn’t know what it was – it’s neat! And the page on your daughter is fabulous – what an exciting day for her!
Never used UTEE before…now I do want to try it! Great layout—and card!
What a fun idea. It looks like those wax seals.
Adding UTEE to my shopping list, what fun!
Congrats winners!
Great project. I will have to try UTEE sometime.
I will have to try it!
A lovely bright project!!
Great idea for the heart. Usually you try to have it so neat and the edges clean – but it looks good with the rough edges and painting. thanks for the idea.
great idea!
Love the heart, it’s so gorgeous looking!
Awesome card and layout!! That heart stamp is perfect!! Definitely going in my cart!!
I love the wax seal look!
This is just lovely — thanks for the tutorial!
I love how you create new embellishments from supplies you already have, May! Truly creative and wonderful! TFS!
Is a fantastic idea!
Great ideas!
thanks for the technique deets on the seal
idea!!
It’s a wonderful idea, you can make a personalized card with that seal.
Great projects, Just love the utee idea.
This is so pretty and I love the heart on the card!
This turned out the sweetest card. Love your idea!
<3 J
such a beautiful layout
Some really great techniques … thanks so much for sharing!
Such a gorgeous layout, and I love your embellishment! Thanks so much for the “How To”!
What great techniques! Love the seal on the card and also all the texture on the layout. Thanks for the inspiration. :D
Very cool technique, thanks for sharing
I think I need a melting pot….this is awesome!
wow, love this idea! scraplifiting
thanks for the inspiration