How to: Winter Magic Shaker Box!
Hi friends! Happy Sunday! I’m delighted to share this GORGEOUS mixed media project by Anna-Karin Evaldsson! Read on for all the details, and enjoy!!
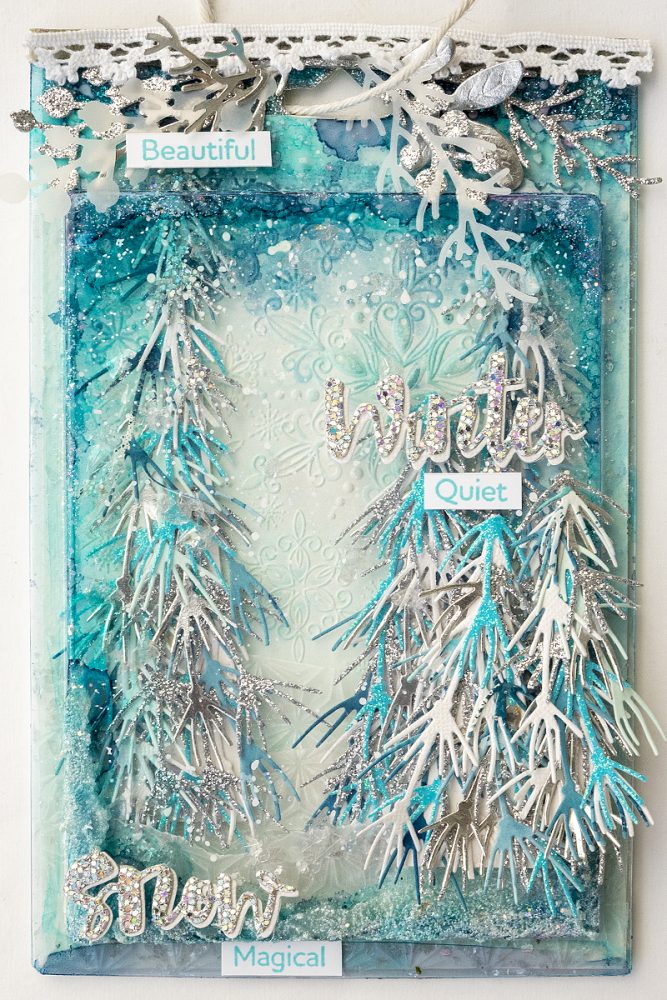
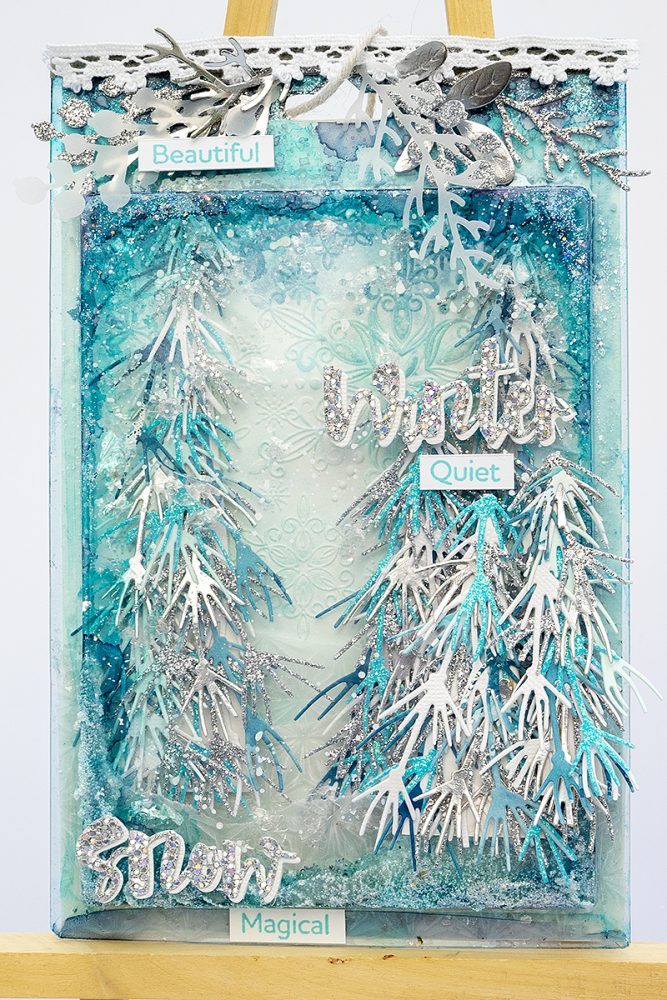
Hi everyone! It is winter and we got our first snow last week. Lots and lots of snow! I am so happy to be here on the blog today with a project which is inspired by the winter weather. It is a combined shaker and shadow box, with a winter scene built inside the packaging of a Simon Says Stamp embossing folder.
Packaging can form a great base for a project and it is fun to recycle packaging in different ways. The Simon Says Stamp embossing folder packaging is sturdy and here I used both the plastic part and the cardboard back. This project would work great as a Christmas gift or you could make a smaller version and turn it into a Christmas tree ornament.
A couple of weeks ago I made 3-D trees using Simon Says Stamp Fir Branches die and I had an idea of using the same die to create trees for this project.
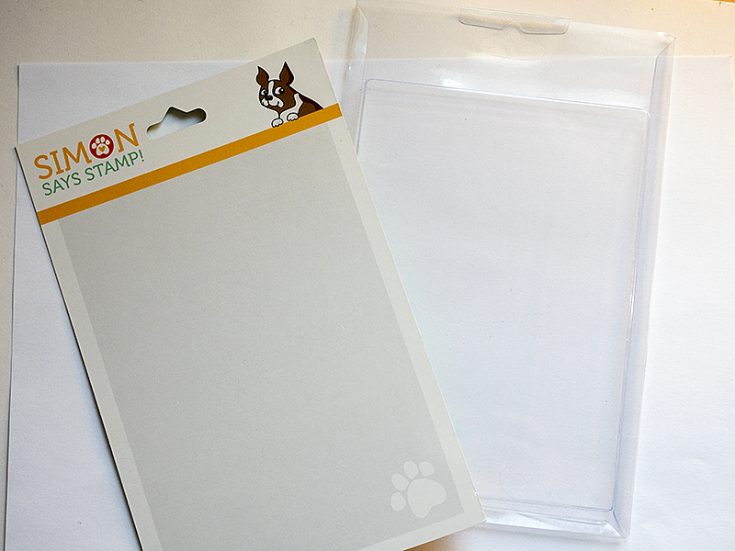
Start by finding a piece of packaging to use. I used packaging from a Simon Says Stamp embossing folder. You might need to trim the edgers of the cardboard slightly.
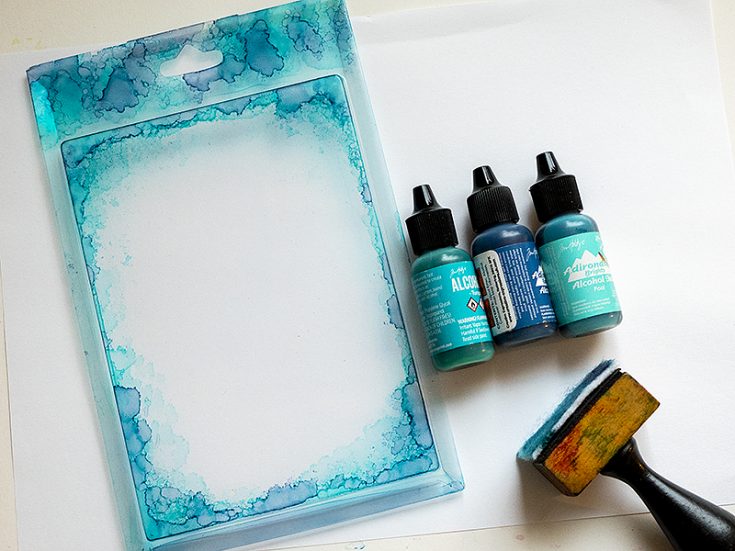
Color around the edges with alcohol ink and an ink-blending tool with a felt applicator.
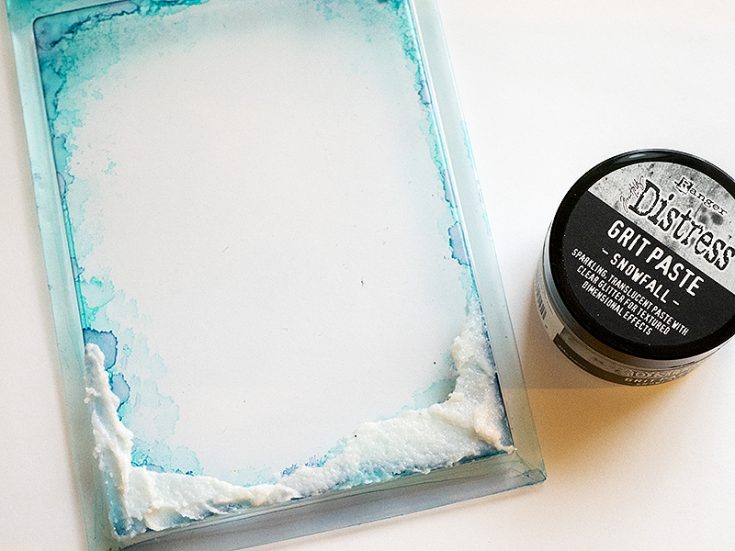
Apply Distress Grit Paste Snowfall to the ground area as snow. Leave to dry.
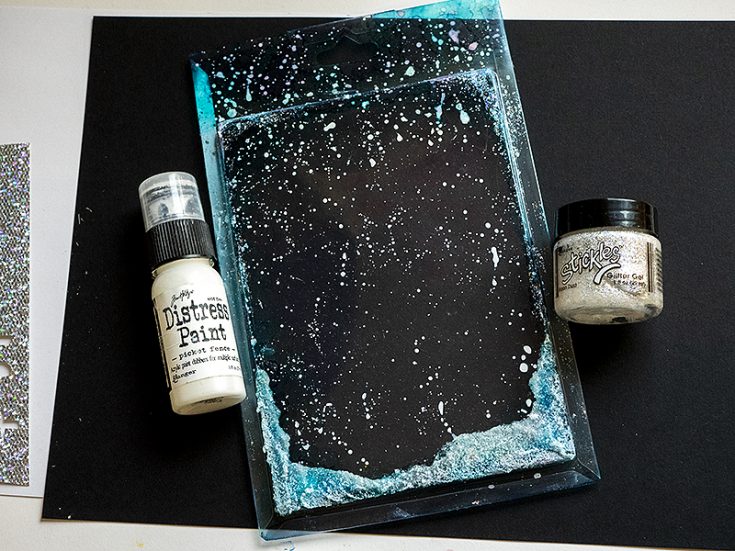
The Grit Paste will pick up some color from the alcohol ink. Dry-brush it will a bit of white paint and splatter white paint on the background. When the paint was dry, I also applied a Ranger Moon Dust Stickles Glitter Gel on the snow and around the edges.

Smear Speckled Egg, Salvaged Patina and Uncharted Mariner Distress Ink on the Simon Says Stamp Filigree Snowflakes embossing folder. Mist watercolor paper with water and dry emboss. This embossing folder has such beautiful details.
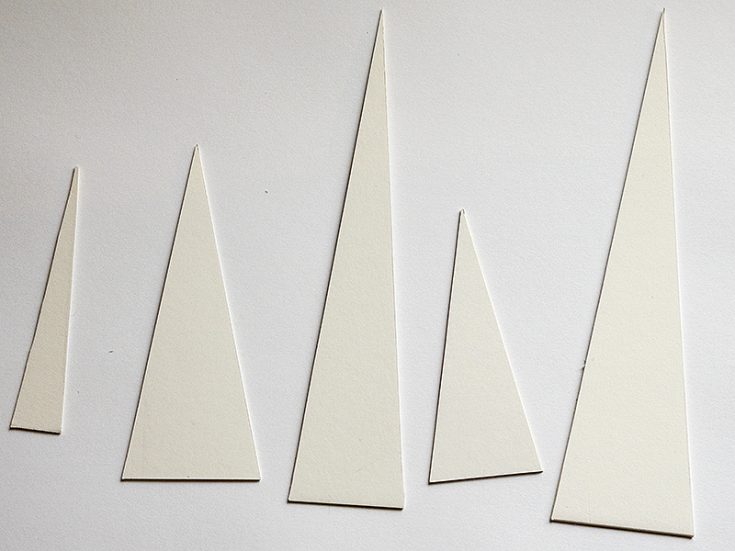
Cut narrow triangles from Sizzix Little Sizzles White Mat Board. These will form the base for our trees.
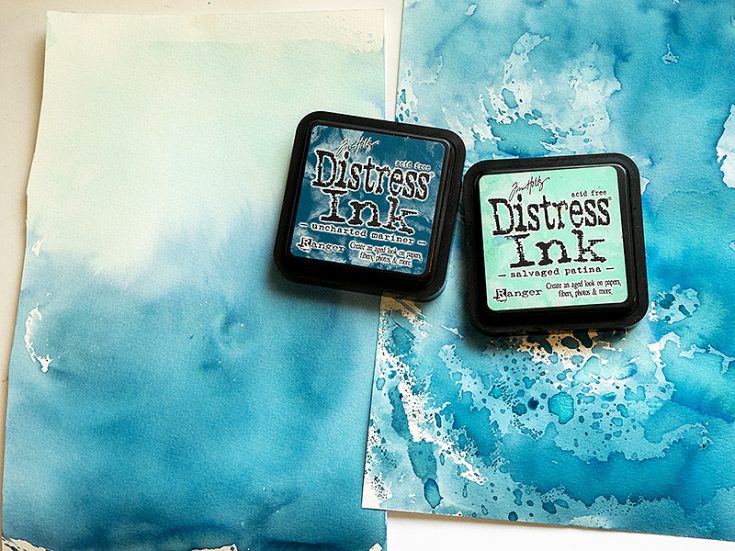
Smear Distress Ink on a non-stick craft sheet and mist with water. Press watercolor paper into the ink. Let dry.
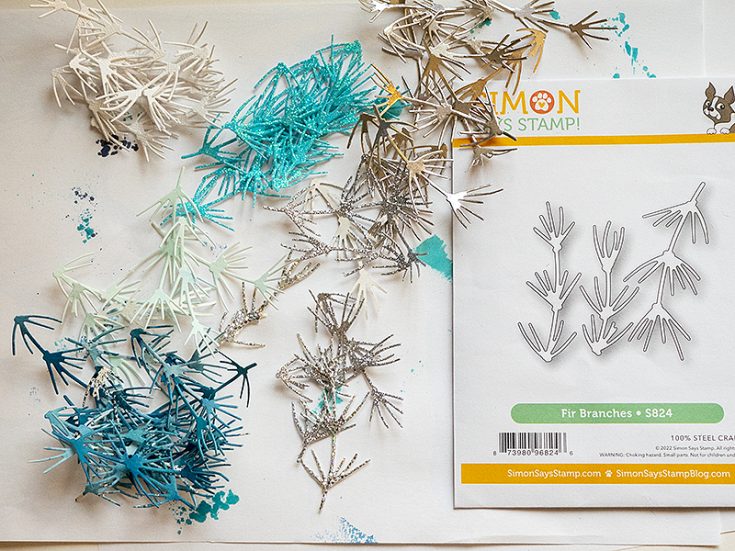
Die cut Simon Says Stamp Fir Branches from the inky papers from the previous step, Tim Holtz metallic kraft stock, and from Simon Says Stamp Aqua and Silver Glitter Cardstock, White Diamond Glimmer Cardstock, Vellum and Luxe Glitter Cardstock.
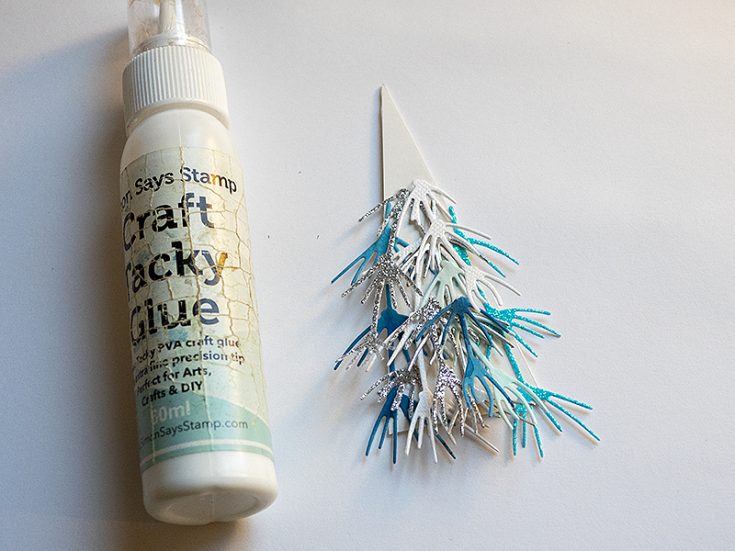
Start gluing the Fir Branches on the mat board trees. You can also cut them apart to add just one or two sets of pine needles here and there.
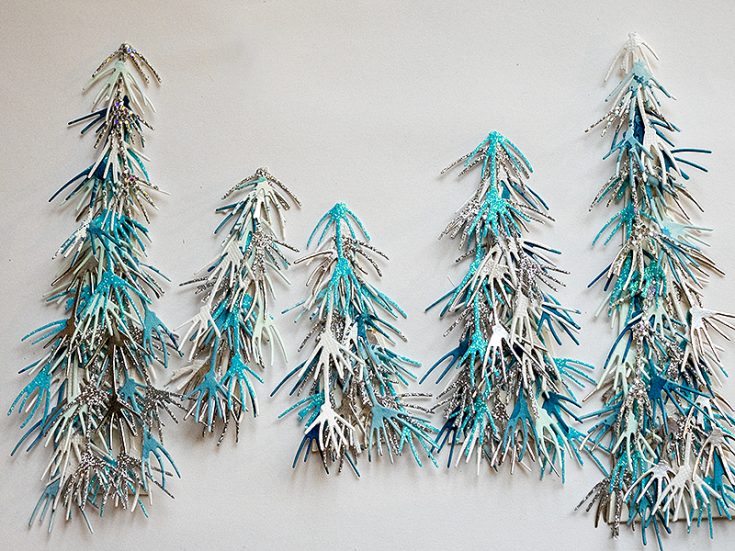
Continue until you have covered all the trees.
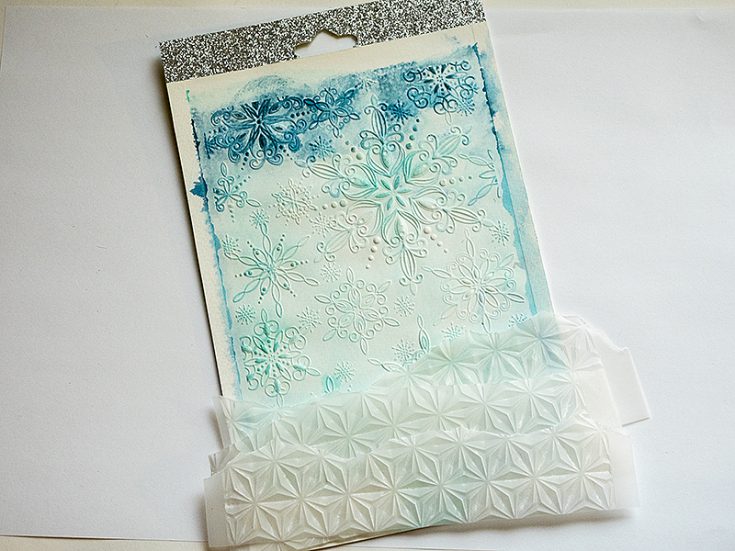
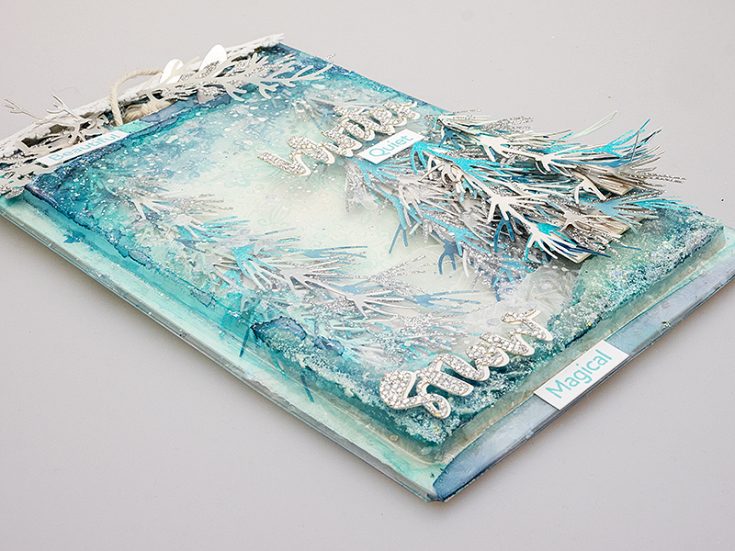
Adhere the dry embossed paper to the packaging backing cardboard, place a piece of Silver Glitter paper at the top. Tear three pieces of Simon Says Stamp Vellum into hills and emboss in Simon Says Stamp Magnetic embossing folder.
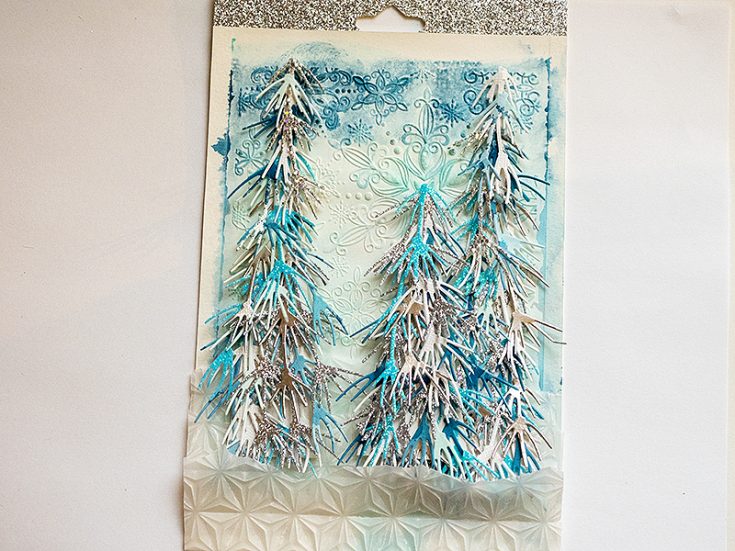
Tuck three of the trees in between the vellum hills of snow. You could also use this as the design of a card or on a home décor piece without the plastic top.
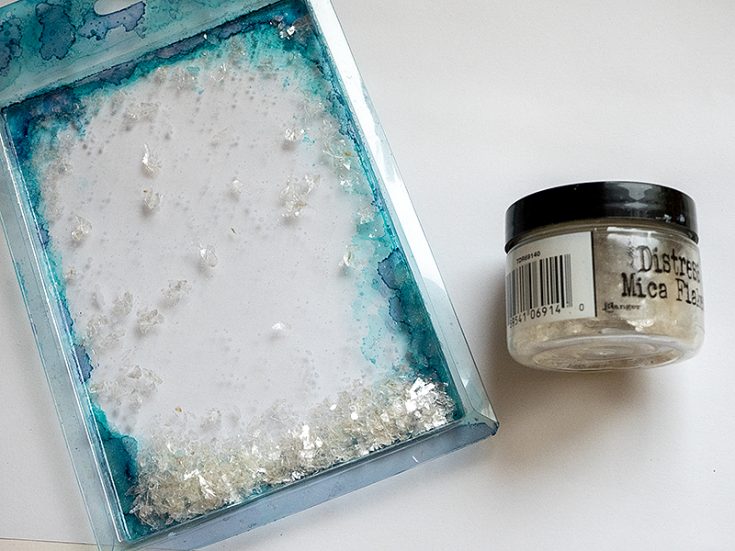
Add dots of Glossy Accents to the inside of the plastic packaging and cover with Mica Flakes, for even more sparkling snow. Add a pile of Mica Flakes at the bottom, as a shaker element.
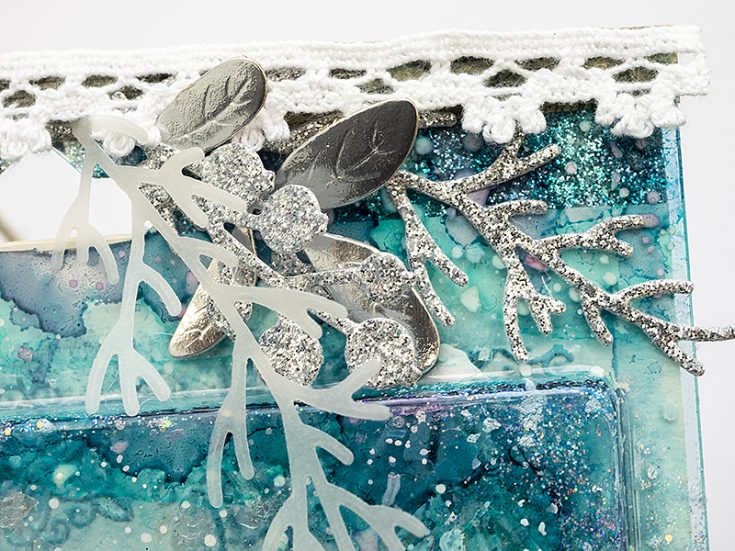
Place the paper inside the plastic packaging and seal at the top with design tape. I added a piece of lace trim to cover up the tape, since I liked the look of the white trim. Die cut Simon Says Stamp Berry Stems from Silver Glitter, vellum and silver metallic kraft stock papers and glue at the top of the panel.
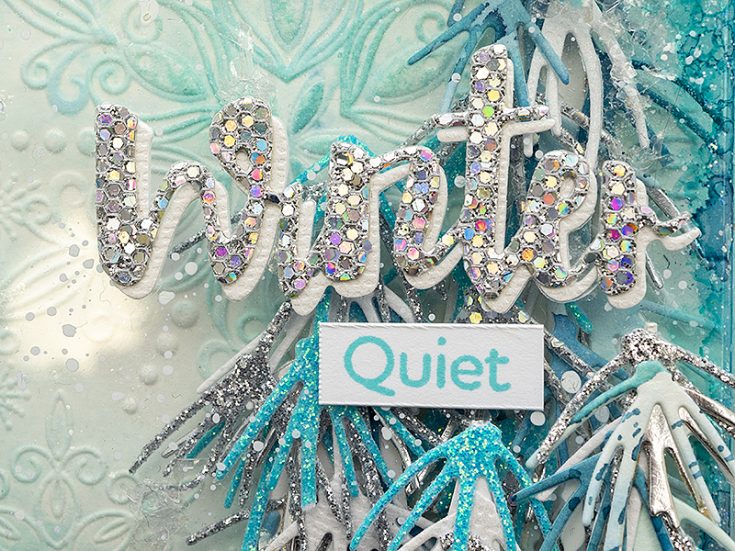
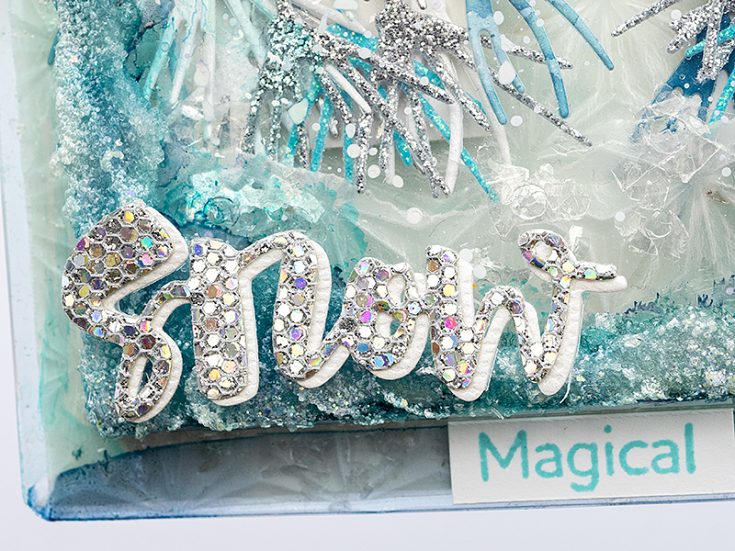
Die cut Simon Says Stamp Winter Snow from Luxe Glitter Cardstock and White Diamond Glimmer Cardstock for the title. Stamp sentiments from Simon Says Stamp Forest Scenery with Surf Pawsitively Satuated Ink on white paper and cut into strips.

Glue two trees to the outside of the shaker box, for even more dimension and for a tactile element.
The Snowfall Grit Paste gives the look of frost, especially with the added white paint and Stickles Glitter Gel.
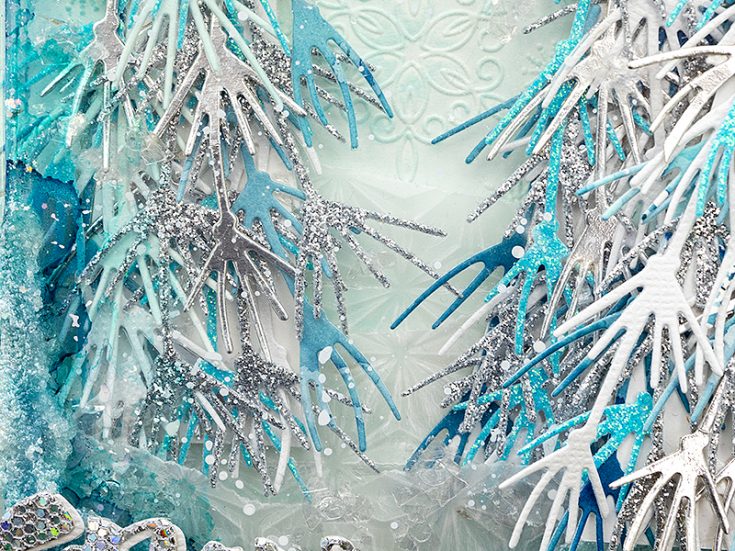
The frosty plastic cover, trees, dry embossed vellum, mica, glitter and dry embossed snowflakes give an interesting layered effect and dimension to the project.
If you want the project to look even less like packaging, you can cover the edges with design tape or ribbon and hide the hole at the top. I left the punched hole since I thought it was handy for hanging the piece on the wall.
I hope this tutorial inspired you to look at packaging in a new way, make some fun winter trees and to create the look of snow and ice on projects.
Thank you so much for looking! Happy Christmas crafting! -Anna-Karin
SUPPLIES:
|


Thanks so much for stopping by, and to Anna-Karin for being our guest!


WOW! GORGEOUS WORK!!! I DO LOVE the idea of using the packaging for this project! ;)
Holy Cow!!!! Absolutely Stunning!!!! Fabulous upcycle!!!!!
Magical is definitely an apt word to describe this amazing project, thank you for sharing the process.
This is truly amazing. Anna you are a great talent and I just adore your work. Beautiful job! Happy Holidays
What an amazing art piece! And, very creative! Thanks for the inspiration! <3
Sooooo beautiful!!
This is so beautiful! WHY oh WHY did I throw all my packaging away when I could be doing projects like this? LOL I am intimidated by mixed media projects, but you have inspired me! Thank you!
OMG this is so beautiful, am so tempted to try it out. thanks for sharing this amazing project!
What an amazing art piece! And, very creative! Thanks for the inspiration. A Custom Box by BLP can boost your restaurant’s sales and name in the market. We made boxes in all custom shapes and sizes with millions of colors.
Contact us
[email protected]
+971529169849
I love how you used the packaging to make this beautiful project!
i like keeping the packaging like this for special tags or cards that i put in the gift box. i find them much more secure than the foam taping the shaker windows.
Oh wow this is just gorgeous
I absolutely love this particular project. Thank you for the inspiration!
so gorgeous