Hope: Stenciled Background
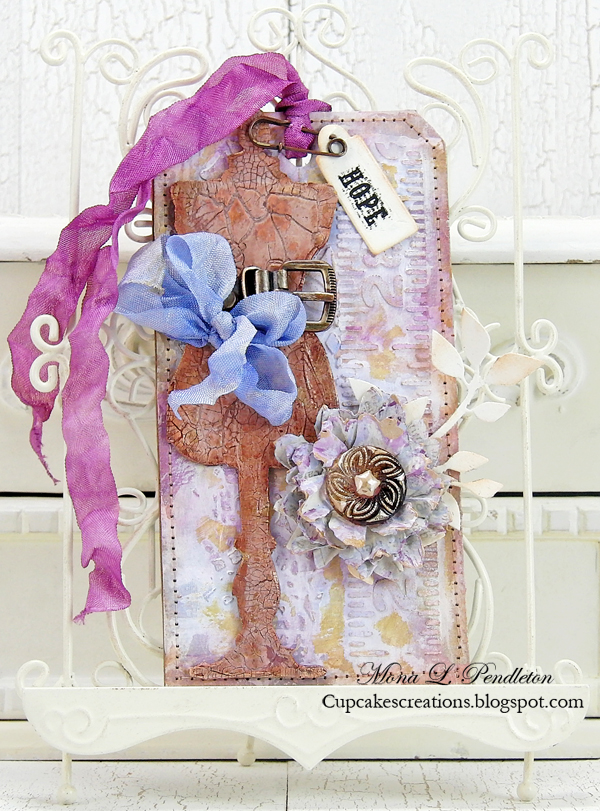
Hi readers! Happy Saturday to you! Today I’m glad to be back with guest designer Mona Pendleton (who is also on our Monday Challenge Design team). She’s showing us a couple cool tips & tricks on how to really get the most out of stencils!
Enjoy!
Steps to create beautiful textured background.
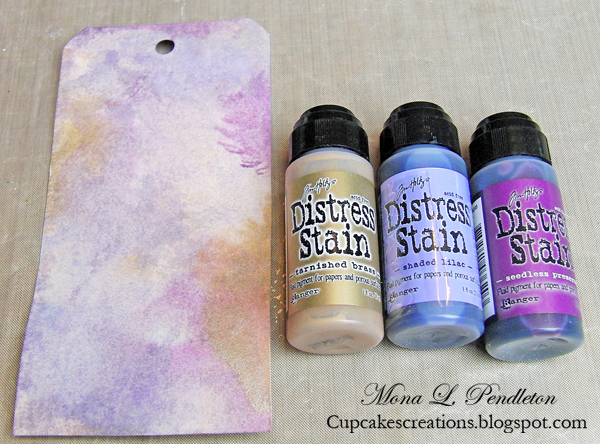
Step 1: Create a background using a combination of Distress Stains.
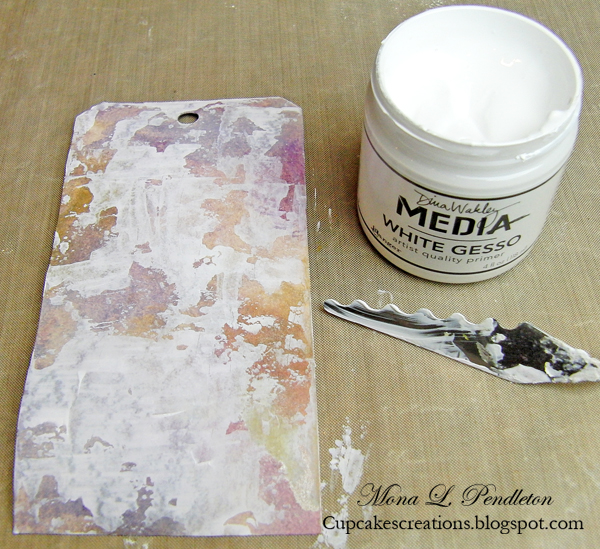
Step 2: Apply Gesso using a palette knife.
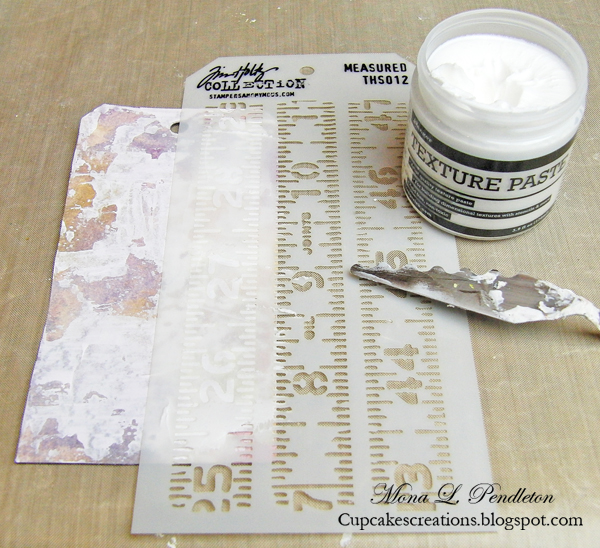
Step 3: Apply texture to background using Texture Paste and a stencil.
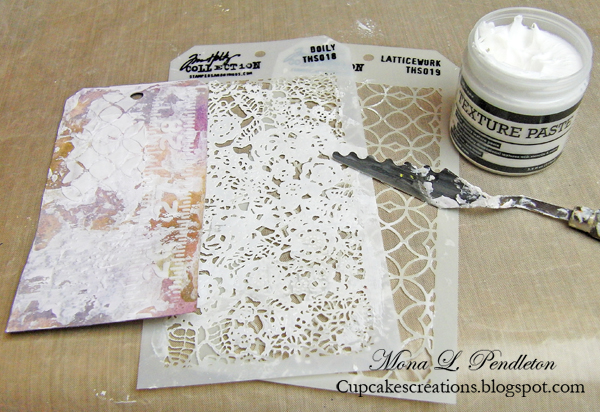
Step 4: Repeat Step 3, using a variety of stencils.
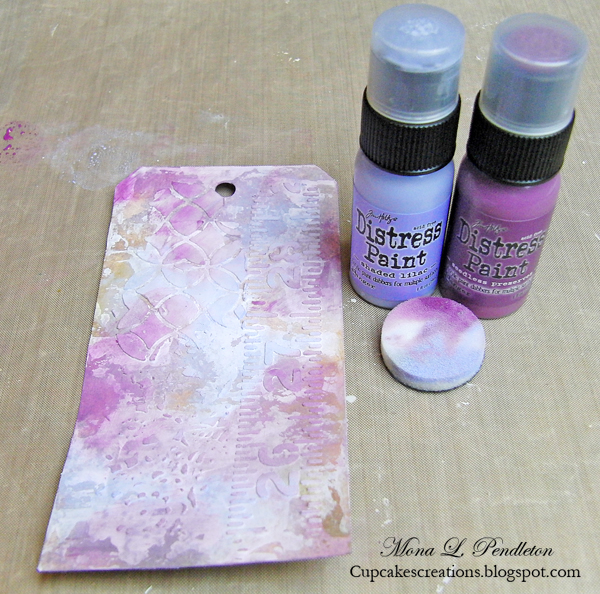
Step 5: Randomly apply Distress Paint using a mini ink blending foam.
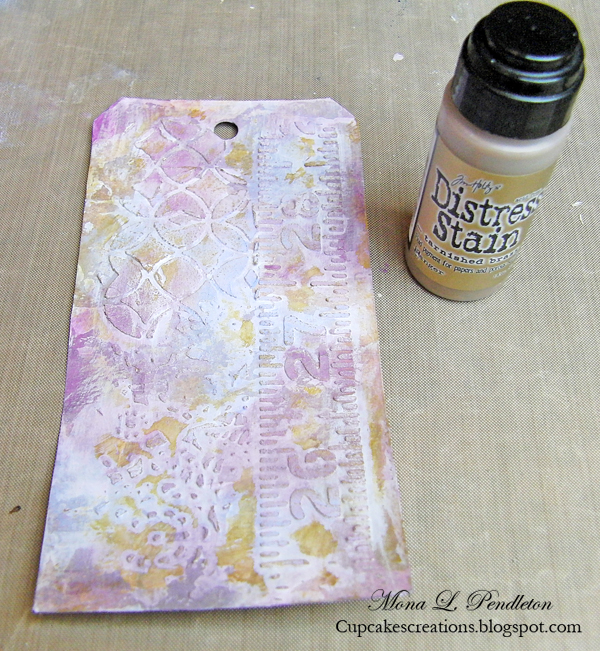
Step 6: Randomly apply Distress Stain using your finger tip.
SUPPLIES:
Thanks for reading today and thanks to Mona for being our awesome guest!
Blog Candy Alert!! Follow our blog via email and comment on this post for a chance to win a special blog candy!






What a fabulous tag! Thanks for the great tutorial:)
Wonderful textured background. thanks for the tutorial
Oh how I love this tag! Mona is always an inspiration to me & I love her clear instructions making it possible for someone like me to Case this–thank you!
Love this tag, and its ethereal colors!
Looks like a fun thing to do!
Love all the texture on this tag, so so pretty
I’ll have to give this a try. Thanks for sharing.
Crafty hugs,
D~
DesignsByDragonfly.blogspot
Gorgeous multi media and super textured tag!
Absolutely stunning! Love the layers.
Beautiful tag – so much detail. Thanks for sharing. I follow the blog by email.
I love all the texture on these tags!
What a gorgeous tag! I love all of the details.
Beautiful work!
Amazing tag! Love the texture and the colors. TFS.
Love the brass distress ink. Thanks for the inspiration.
This tag is gorgeous. Love the colors and textures. Adding the Brass Distress Ink is a genius idea. Thanks for sharing!
LOOOOOVE this tag! I just worked on a card this weekend, adding gesso & modeling paste! (My first time using “modeling paste!”) WHAT FUN!!!! GORGEOUS TAG!!!!!!!!!!!:D
Completely magical! Thanks for the inspiration!
This is gorgeous. But what is the difference between distress stain and paint? When to use which? Why is the gesso necessary?
Love all the layers!
What a gorgeous tag and great tutorial!
Oh my good gravy, Mona! Your project is just amazing, and the step by step tutorial is greatly appreciated!!!
The tag is absolutely beautiful!
I so love the color choices…elegant and stunning!
This is so gorgeous. Love that background
Love the colors and the texture. Pure awesomeness!!
How beautiful this tag is. I love that you used more than 1 stencil on it.
Great techniques and lovely finished tag!
Beautiful card. I really need to try stencils and paste!
Cool background!!! Can’t believe how many techniques you put on that background!
I love the effect of the paste and colors…Awesome!
Wow! I have a few of Tim’s layering stencils, but I can see I’ll need to get more. What a fabulous result!
Love, love this look! Great ideas. Thanks for sharing.
Katie B.
Thank you for the tutorial!
Beautiful tag! Thanks for the tips. Loving texture paste.
Wow, Mona, this is a wonderful technique! Thank you for sharing with us as a guest on Simon Says Stamp!
FANTASTIC tutorial!
Thank you for the tutorial!
Beautiful!!! Thank for this tutorial!!
I’ve never seen a tag done like this. It is beautiful!
Beautiful! So much inspiration on how to use texture paste and stencils!
I never thought of using more than one stencil and paste overlapping on a single project. Definitely gonna try it now!
Love Mona’s tag! The stains and embossing paste made for such an interesting background.
Wow that’s amazing!
Mona, you rock! Love the tutorial, it really makes it easy to follow.