Holiday Countdown featuring Tim Holtz Products!
Hey everyone! May Flaum here and happy to kick off a series of holiday project tutorials for you. What I love about holiday crafting is that you can create things for your loved ones, enjoy some crafting time, and it doesn’t have to take a long time either. Today I have a favorite distress ink stamping technique to feature with one of my favorite Tim Holtz stamps.
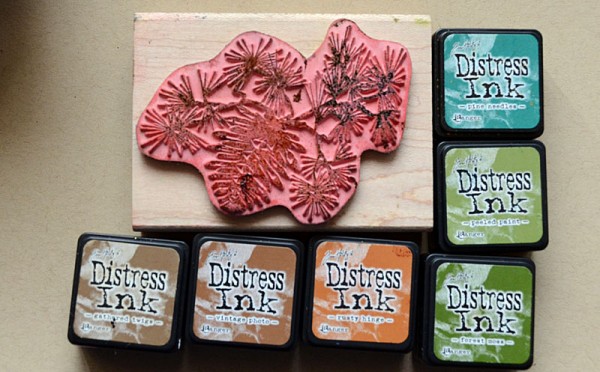
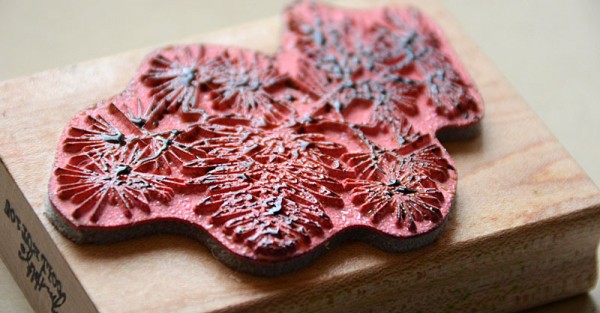
To begin with take mini distress inks and color the stamp. It’s ok to overlap colors and mix it up! Don’t have mini ink pads? You can also use distress markers for this.
Spray the stamp with water, then stamp onto watercolor paper.
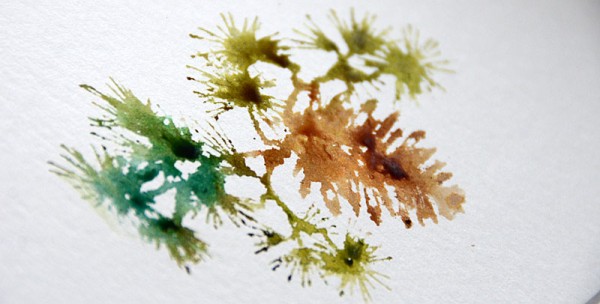
Isn’t it pretty? I love the blended soft look of this, and it would be pretty just as it is but we have more fun stuff to add. Before we continue, make sure to dry the stamped image totally, and clean and dry the stamp as well.
Next up, it’s time to stamp the image a second time. This time use clear embossing ink and just slowly lower the stamp down so that you are close (it’s ok if not perfect!) to stamping in the same spot.
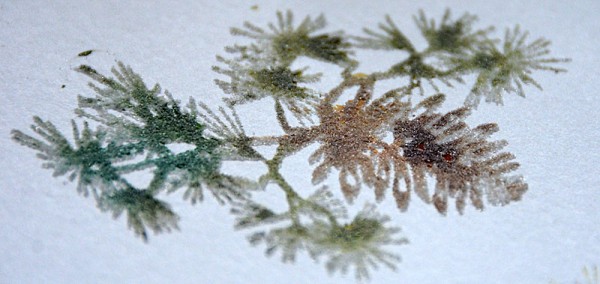
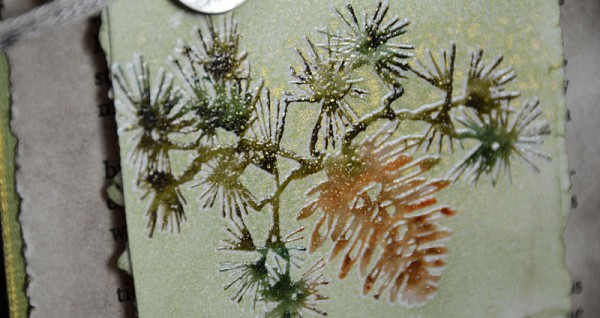
Coat with clear embossing powder, and heat set. This is going to lock in the lovely colors and add a bit of texture and shine.

To help make the stamped image really pop next use a pale distress ink color, start in the center of the stamped image and work outwards.
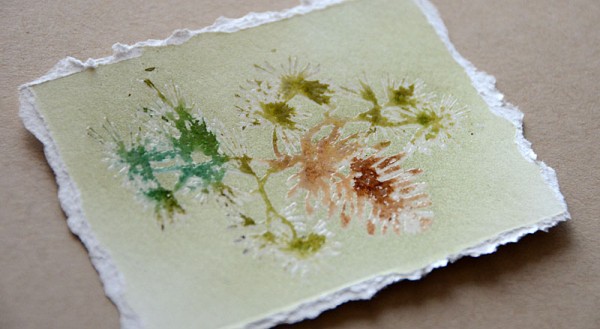
Some areas may show up white – that’s ok! You can add a bit more ink for contrast if needed, and when satisfied use the stamped image to become the centerpiece of a card or other project.
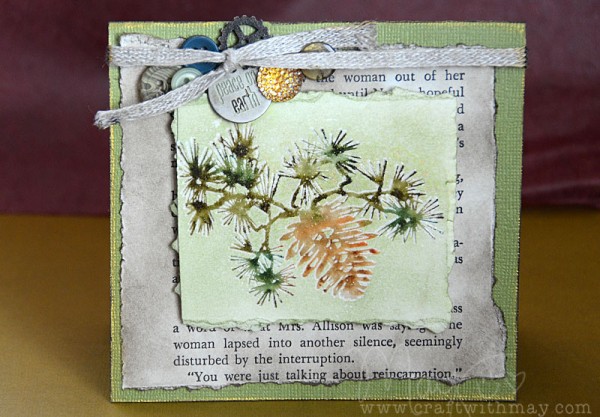
Here’s my finished card. I added some embellishments, sprayed everything with perfect pearls mist in sunflower sparkle
Supplies Used:
 |
 |
 |
|
 |
|
 |
 |
 |
 |
 |
 |
 |
 |
 |
 |

Blog Candy Alert!! Follow our blog via email and comment on this post for a chance to win a special blog candy!


This is gorgeous, May! And what a fun technique. Thanks for the tutorial!
Sometimes simple techniques can yield wonderful results!
Beautiful card May, I love it! Distress inks are so fun versital to work with.
Great card & technique! ;-)
WOW! Absolutely gorgeous! The distress inks paired with this image…swoon-inducing!
~c
WOW! Love this and love the technique! Can’t wait to try it.
I love this technique going to have to try this!
~God bless~
what a good technique. thanks for sharing
stamping sue
http://stampingsueinconnecticut.blogspot.com/
I love learning new technique e new ways to use distress inks. Thanks
Fantastic technique and I LOVE the outcome! Striking card!
WOW!!! That is gorgeous! I can’t wait to try this.
Very interesting technique!!
It is gorgeous! It really has a “feeling”.. Got to try it.
I really like the mini distress inks…makes things a little more affordable! Your technique looks like a winner!!
I have to have that stamp! Love this!
Nice creation n idea luv it much
What a beautiful card!!
This is great :-D I like it a lot and will sure try it :-D Thank you for sharing tutorial :-D
I am definitely tryingthis technique. Beautiful
So gorgeous and a wonderful technique! So do-able, thank you!~kim
Such a pretty card! Thanks for the tutorial!
wow! what a stunning technique that makes quite the impact!
What a beautiful card May! Love the technique that you used with the pinecone branch!
Thanks for sharing your BEAUTIFUL card and great technique.
Crafty hugs,
D~
DesignsByDragonfly.blogspot
So stunning and vintagey! Really great design work.
What a great looking card May. A new technique to add to my collection of tricks! TFS!
Oh, what a cool technique! Gorgeous card, May!
Can’t wait to try. This!
Very pretty and a neat technique.
with this technique looks amazing this card!
Awesome technique!
I am going to make cards today…..thanks for reminding me about a spritz of water, watercolor paper and emboss……voila a lovely card.
Love the look of this card. I will use it as inspiration for one of my Christmas cards :) Thank you.
This is gorgeous! I love using the lighter color to make the edges stand out!
That’s so beautiful. Thanks for the how-to.
Love how this looks! Great technique!
Awesome technique !! Great project I love this !
Wow! I love this May, gorgeous card and fab technique, tfs! x
A fun technique and fab creation!
What a great technique! Can’t wait to try it out!
I love this technique!
this is a fun technique that I’m going to try. The finished project looks so refined.
thanks for sharing.
Fun technique that fuses a modern watercolor look with vintage. Very nice!
Great card and technique
Very pretty, thanks for sharing!
This is just amazing :) I follow by email too
Love the soft look of this technique!
LOVE distress inks and this card is stunning. I’m always inspired to try new things when the great designers show us their creations.
So pretty!! That card must be pinned so that I will remember to make one later.
Gorgeous card!! Love the technique!!