Happy Inspiration!
Hi readers! Happy Sunday to you! I hope you’re having an awesome weekend! I am delighted to share a couple adorable cards from new guest designer to Simon, Amanda Korotkova!
Hello everyone! It’s Amanda here and I am so honored to be a guest at Simon Says Stamp blog today!
I want to show you two balloon themed cards I created using a few of my favorite SSS products.
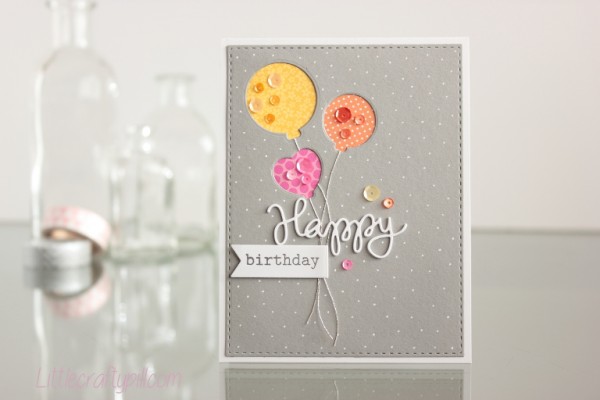
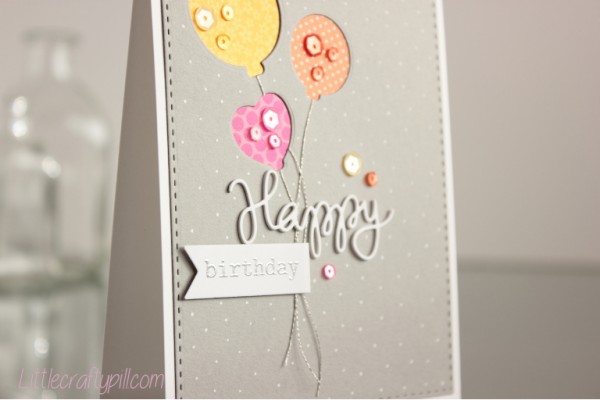
To make this card, I first die cut a piece of medium gray cardstock using the larger rectangle from the Stitched rectangles dies and then die cut three balloons from the Celebration time wafer dies. I adhered three different colors of patterned paper to the back of the balloons and then carefully glued silver threads to their bottoms.
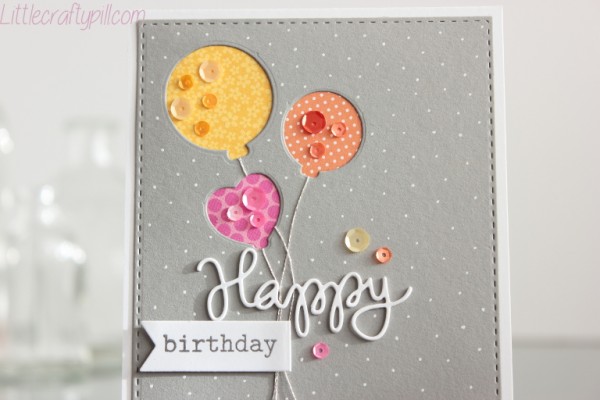
When I had that ready, I die cut three times the word “Happy” from the Happy Birthday craft dies and glued all of them using Zig two way glue to make it pop up a bit more from the background. I also created a banner where I embossed the word birthday in silver embossing powder and attached it to the card using 3D foam squares. Before adhering the card to a white card base, I added some sequins and white dots using my Gelly Roll pen.
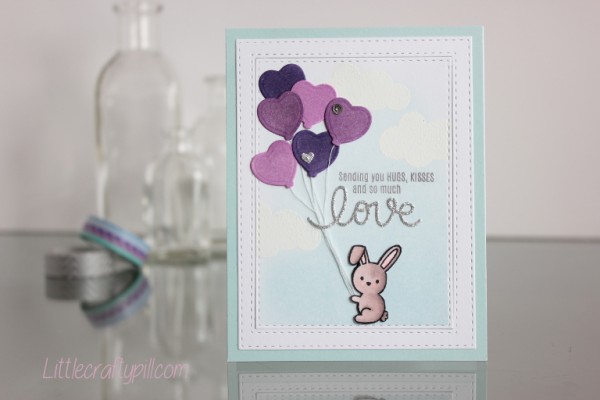
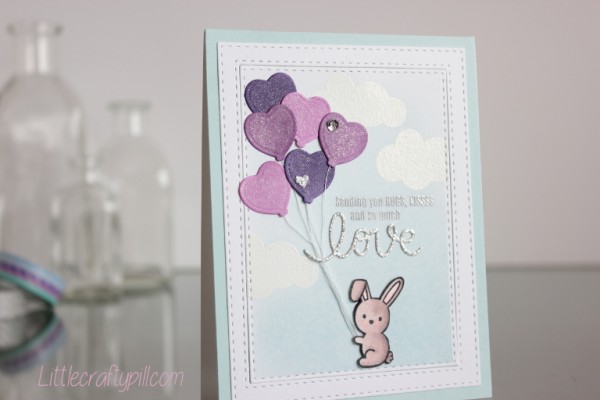
For this card, I also die cut a frame and a piece of white cardstock with the Stitched Rectangles dies and a bunch of heart balloons from the Celebration time dies. Then, I white embossed three clouds from the Soaring for you stamp set and inked the cardstock with Hero Arts pastel blue ink and a mini-ink applicator (I know that’s not how you usually use these inks, but I didn’t have any other soft blue and it worked pretty well).
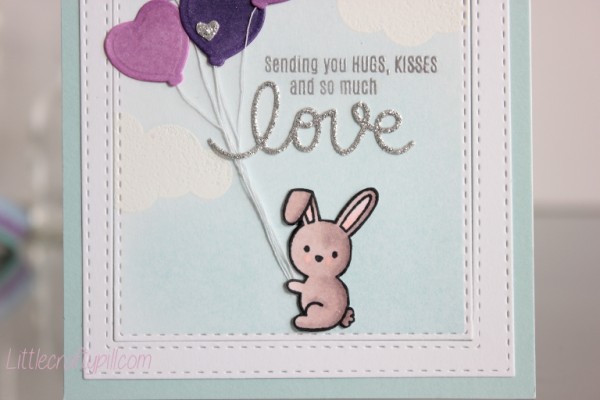
For the sentiment, I covered the word “love” and the little heart using some post-it tape and then embossed it with Ranger super fine detail silver embossing powder. I die cut the word Love from the Small Love You waffle die using silver glitter cardstock to complete the sentiment. To color the heart balloons, I used Copic markers (V12, V15 and V17) and then glued white threads to their backs before placing them on my card. I stamped the cute little bunny from Lawn Fawn’s Snow Day stamp set and colored it with Copics before fuzzy cutting it with my scissors.
Once I had all the elements, I adhered them to the card, added Wink of Stella Clear to the balloons and a little heart and silver sequin to a couple of them. To finish my card, I attached both pieces to a soft blue card base.
SUPPLIES:
 |
 |
 |
 |
 |
 |
 |
 |
 |
 |
 |
 |
 |
 |
 |
 |
 |
 |
 |
 |
 |
 |
 |
 |
 |
 |
 |
 |
 |

Blog Candy Alert!! Follow our blog via email and comment on this post for a chance to win a special blog candy!


I am already a follower. I love each of the cards.
These are ADORABLE!!!
Love the shape and size of the balloons. I am picky and this nailed it.