Gift Giving with Deco Foil!
Hi readers! Happy Tuesday! Please join me in welcoming a first time guest to our store blog; Alice Golden! She’s crafting up some fabulous tags and a card to give homemade gift giving that extra WOW factor! Read on…

Hi there! I’m so happy to be joining you as a guest today sharing a few ideas for using DecoFoil™. Have you tried using foil yet? There are so many ways to apply foil to your crafting! Today I will be showing you three different techniques. The first project I have for you is a set of gift tags made using a hot melt adhesive. As much as I enjoy making handmade gifts, I think I like packaging them up even better.
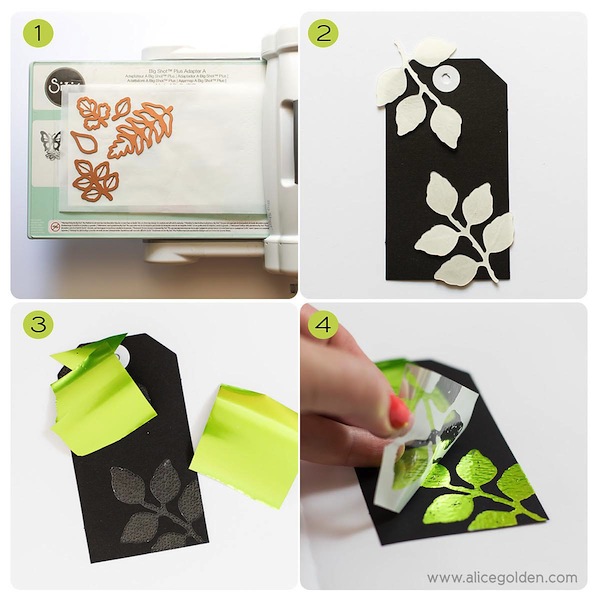
To make these tags you will need iCraft® DecoFoil™ Hot Melt Adhesive, die cuts or an electronic die cutting machine, and a laminator or iron. The laminator works best, but an iron will do in a pinch. The steps to add the foundation layer of foil is the same on all three tags.
First, place the adhesive sheet on your die cutting platform with the rough (adhesive) side facing up. Place a piece of parchment over the top and then die cut as usual. The parchment helps prevent the adhesive from getting stuck in the die. Next, remove the die cut adhesive from your machine and place it on the tag with the rough side facing down. Run through the laminator and then trim any overhang. Peel off the protective layer from the adhesive and cover with a piece of foil color side up, as shown in figure 3. Run through the laminator again and then peel up the foil transfer sheet. The foil will be permanently transferred to the adhesive. This adhesive can also be used to foil fabric – it can even be quilted and washed.
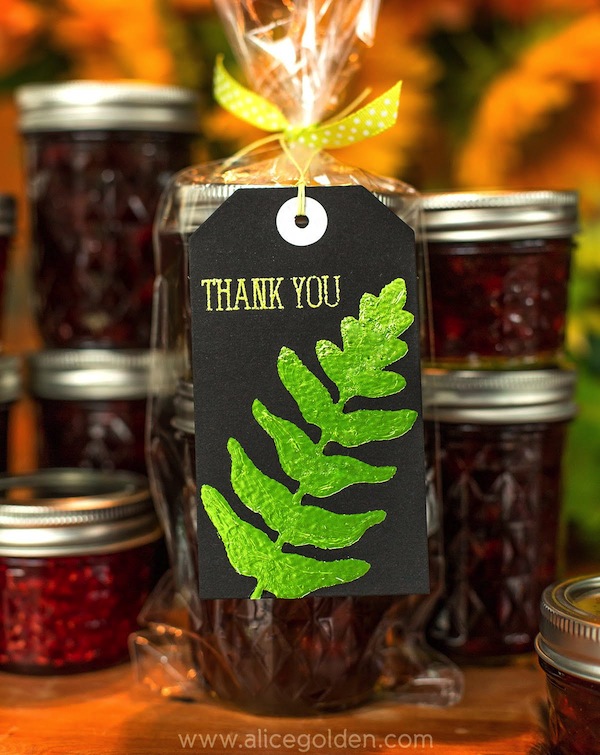
The next two tags take the foiling a bit further with a technique I am calling “painting with foil”. To do this you will need iCraft® DecoFoil™ Liquid Adhesive, an inexpensive paint brush, and assorted colors of foil. This is a great project for using scraps of leftover foil.
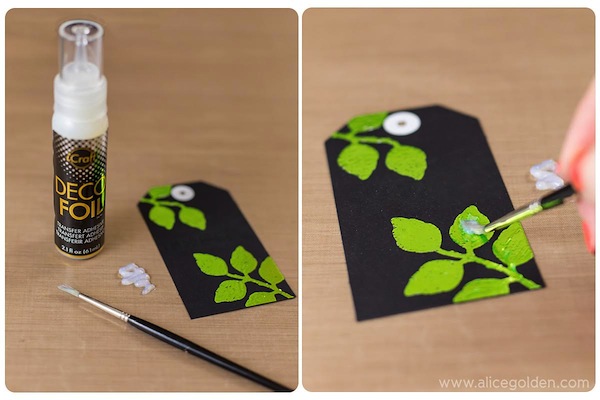
Put some liquid adhesive on a nonstick sheet and then paint it on where you want to add additional colors. When it dries the adhesive will be tacky to the touch and you are ready to start “painting with foil”. Simply press small pieces of foil over the adhesive to add detail and highlights. Apply the adhesive in a thick coat to add dimension and make visible brush strokes, or a thin, even coat for all over coverage. For these leaves, I wanted to add streaks that would mimic veining in leaves so I applied the adhesive quite heavily. “Paint” with scraps of foil that are partially used to add even more dimension.
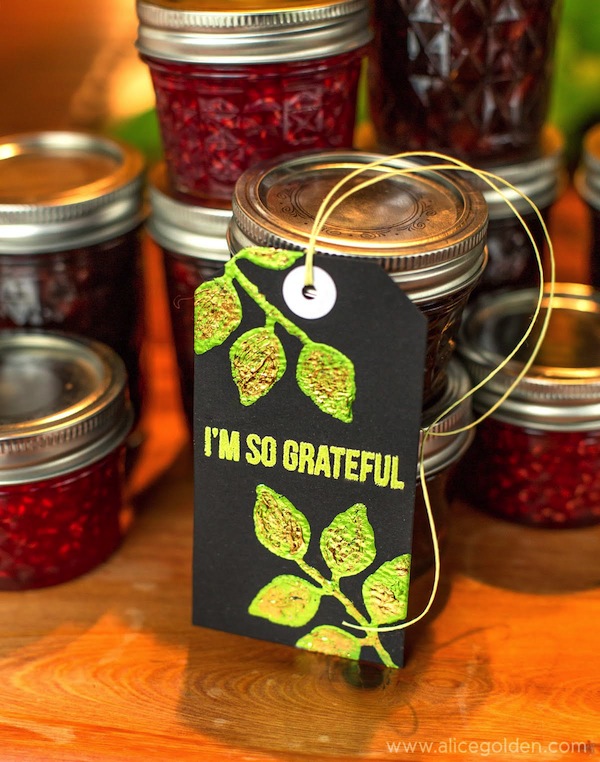
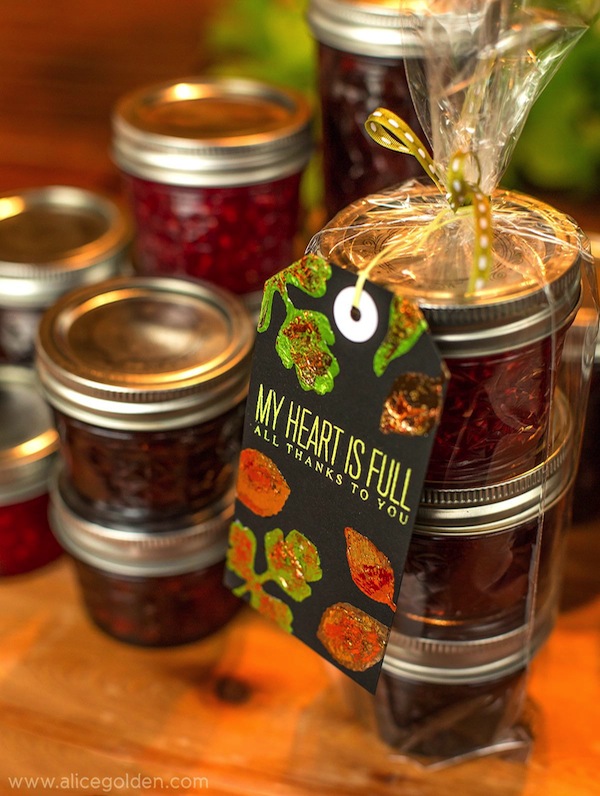
The last tag was created the same way as above, except instead of covering all the leaves with a base layer of lime foil, I used a combination of gold, rose gold, pumpkin, as well as lime. In addition to these colors, I added red foil “paint” to create the feel of autumn leaves. The only thing I really don’t like about foil is photographing it! In person, these look so much more dynamic – especially when the foil catches the light… very hard to capture in a still photograph.
I have one last project to share which doesn’t require any heat – perfect if you don’t have access to a laminator or iron (or since it’s August, prefer not to!)
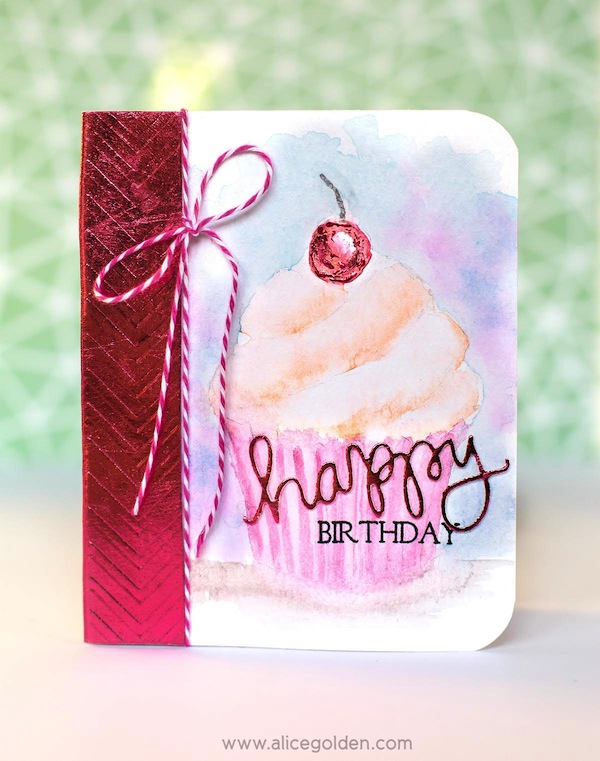
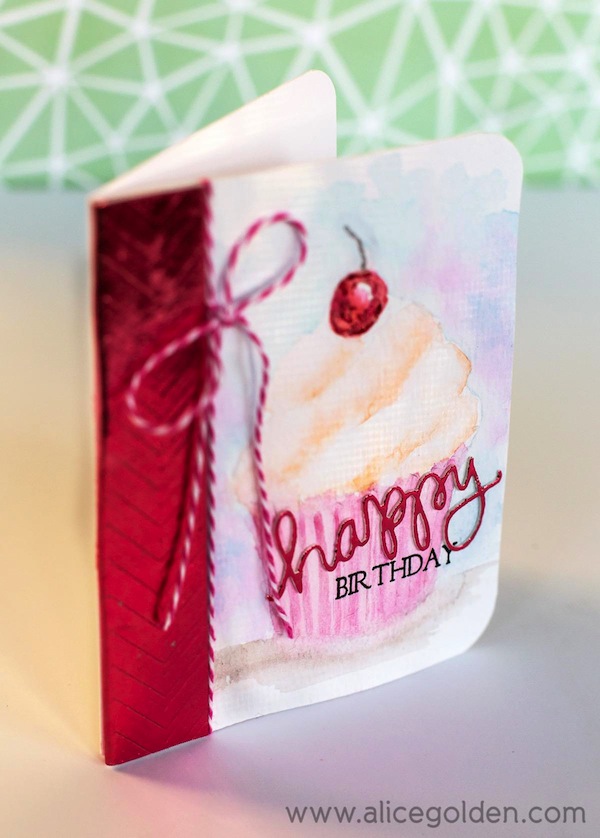
iCraft® DecoFoil™ White Foam Adhesive was used two ways on this card. First, I placed a piece of Pink Melon foil directly on one side of the foam adhesive and rubbed it all over to transfer the foil to the foam. After peeling up the foil transfer sheet, I used an embossing folder and die cut machine to add the chevron design directly to the foam.
One of my favorite things about this double sided foam adhesive is how well it die cuts. It is a great way to adhere intricate die cuts whether or not you are using foil.
After adhering the die to the front of the watercolored card, I removed the protective liner and applied foil. There is also a tiny bit of red and pink foil “painted” on the cherry.
I hope these have given you some ideas for ways to use foil on your projects. Thanks so much to everyone at Simon Says Stamp for inviting me to be a guest today.
Supplies:
 |
 |
 |
 |
 |
 |
 |
 |
 |
 |
 |
 |
 |
 |
 |
 |
 |
 |
 |
 |
 |
 |
Thanks so much to Alice for being our guest today, and thanks to YOU our readers for tuning in! :)

Blog Candy Alert!! Follow our blog via email and comment on this post for a chance to win a special blog candy!


Pretty tags. I love all the vibrant colors. Michelle t
Great info and projects! I still need to try foil!
Great projects! ;-)
Wonderful projects Alice. Thanks for sharing. I haven’t used foil before but you have inspired me. You make it look so easy.
I like it…
Love this. I need to try foil
Si cute!! Love it
Must try foiling. Such gorgeous results. Great tips. Hugz
I love using foil, and these projects show why. All projects should have a little bling.
I have the foil – I just need to sit down and start playing with it.
thanks for the tips on the different ways to foil.
Love all these foil creations. I will definitely have a go at using foil in my Christmas cards:0
It’s good to know that even if you don’t have a laminator, you can create some beautiful projects using foil. Lovely!
LOVE THIS
Love this idea, so pretty!!!
So cute. Great tags
Like the shimmer of the foil look.
Melissa
“Sunshine HoneyBee”
Love the foiled and embossed border on the second card!
Gorgeous creations! Makes me look at foiling in a different way!!
very pretty… gotta get out my old foils!
WOW!!! Amazing projects! Thanks so much for inspiring us with your awesome talent and projects!
Great projects Alice!! Thanks for sharing:)
Thanks for the tip about using up foil scraps! Love the tags and the card. Thanks for sharing!! =)
Wow! I love what you’ve done here…..just gorgeous work with great instructions. Thank you!
Beautiful foiling projects! Love this new trend!
Foiling is becoming very popular and I can see why. Alice did a great job on these projects and I’m loving black tags.
Alice, these are some delightful gift tag creations!
These are really gorgeous!
These tags are beautiful!! Thanks for sharing the techniques.
Hey There Alice! Great job. Love the foiling…and the shimmer it gives. Fantastic work!!
I have yet to use the foil supplies I have! Great projects!
I love your tags! Thank you for sharing.
Love the foiling on your gift tags, and beautiful colouring on that delicious cupcake too!
Wonderful cards and
a great technique!
Carla from Utah
The foil leaves are great! I love how vibrant they are! Great tutorial!
Stunning! Deco foil is on my list to tackle & this post today is pushing it to the top of my list…
Beautiful tags–great idea!
Beautiful projects! Thank you for so many ways to try out my foil sheets.
I love your gift tags!! A wonderful way to dress up some homemade gifts!
It looks cool
Such gorgeous tags. I am having some trouble with the foil and will have to try these techniques!
Love those tags!
Great idea!
Gorgeous, gorgeous, gorgeous!
I may even give this a go :)
Foil on foil – pretty amazing!!
Useful technique, thanks for sharing!
Oh this is so pretty! These tags with gift giving would be so classy and beautiful
Great projects. I love the look of foil on cards and tags.
What amazing tags and cards! Thanks for the foiling tips!
I really like the foil technique…the way it looks but not sure I can do it. I will have to give it a try. TFS
Great taqs!