Easy Tri-Fold Birthday Card with Layered Heirloom Roses: Yippee for Yana

Hi friend! Please join me in welcoming back the oh-so-talented and amazing Yana Smakula! (Please note: our dear friend Yana is Ukrainian. To show support to our brothers and sisters in Ukraine, please see Yana’s post HERE.)

Hello, crafters! This is Yana Smakula for Simon Says Stamp. Welcome back for another Yippee for Yana video!
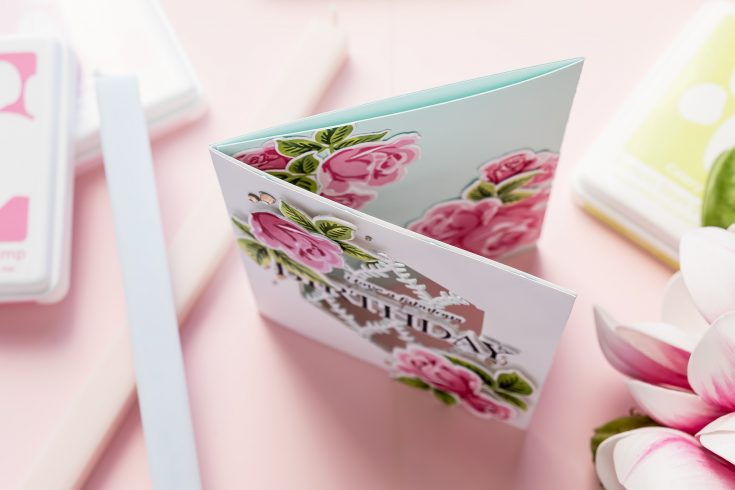
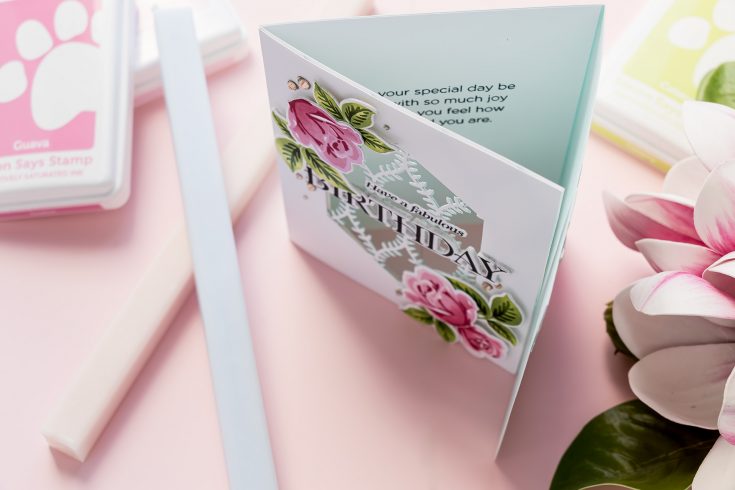
Fun fold cards are always a delight to make, and they’re even more fun to receive. It has been quite some time since I last created a fun fold design, so for today’s project, I decided to revisit one of my favorites — a tri-fold card. This card style is surprisingly easy to construct and offers plenty of extra space for decorating, making it perfect for showcasing beautiful floral images (or any other images you’d like to use).
For this project, I used the new Heirloom Roses stamp set and coordinating dies from Simon Says Stamp. The layered floral images in this set are absolutely stunning, and if you’ve followed my work for any length of time, you know I have a hard time resisting a good layering stamp set!
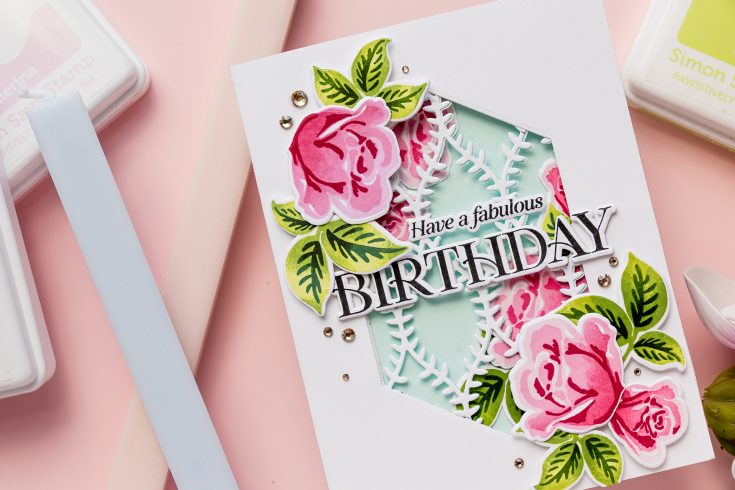
I began by creating the tri-fold card base. The construction is very simple and starts with two standard A2 side-folding card bases. One card base has a window opening die-cut into the front flap using an elongated hexagon die. The second card base slides inside the first one, creating additional flaps and extra space for embellishments and sentiments.
One small tip when creating this style of card is to trim a tiny sliver of cardstock from the edges of one of the card bases. This allows the card to open and close smoothly without buckling and ensures that the inside card base remains hidden from the front view.
With the card base complete, I moved on to stamping the florals. I stamped all of the roses onto Neenah Solar White 80lb cardstock using a stamping platform. Although the Heirloom Roses set is designed as a layering stamp set and creates beautiful results using ink alone, I wanted to add extra depth and dimension to the images.
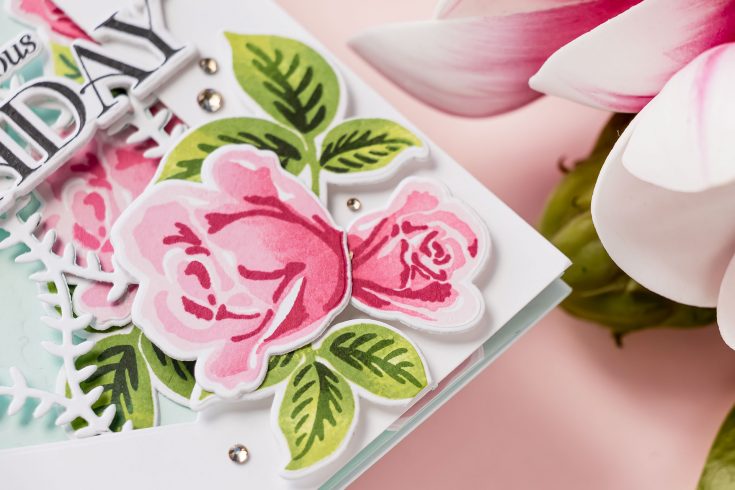
To achieve this, I used blending brushes to apply darker ink directly onto the stamp layers before stamping. For each floral layer, I lightly tapped a darker coordinating ink color onto the base of the petals. This simple technique creates subtle shading and makes the flowers look more dimensional and hand-colored.
I used three pink ink colors for the rose layers and introduced a fourth, darker shade to create additional depth (Ballerina, Guava, Watermelon, Brick). The result is a beautifully shaded floral image that goes beyond traditional layered stamping.
The leaves received a similar treatment, but with even more color variation. I started with a light green base layer and gradually built color using blending brushes and progressively darker shades of green (Celery, Pearfection, Field). By leaving portions of the lighter color visible and concentrating darker colors toward the centers of the leaves, I was able to create realistic depth and dimension.
For the detailed leaf layer, I stamped using a deep Pine green and added a touch of black ink near the centers where the veins meet. While black may seem like an unexpected choice, it created a beautiful contrast and helped emphasize the intricate details of the leaf images.
Once all of the florals and leaves were stamped, I die-cut them using the coordinating dies and turned my attention back to the card base.
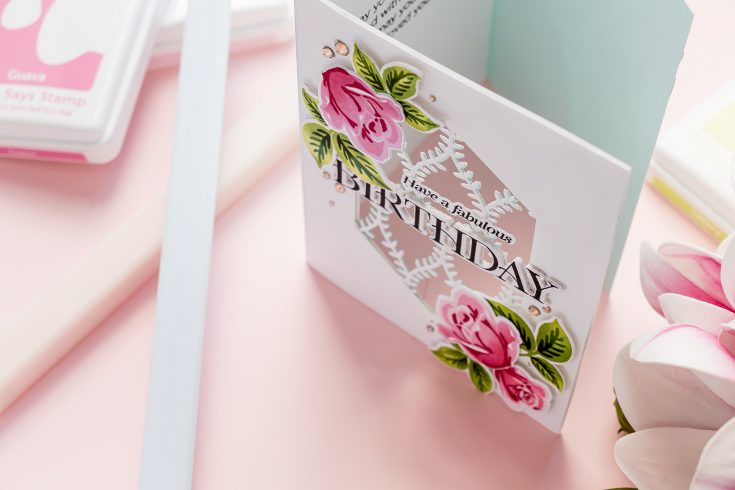
I used Simon Says Stamp Seafoam Cardstock for the 2nd card base and Neenah Solar white for the 1st one. To add texture, I embossed the second flap of the card using the Willowweave Stencil. Embossing with stencils is one of my favorite ways to add interest without introducing additional color. The subtle texture complements the florals beautifully and gives the background a sophisticated look.
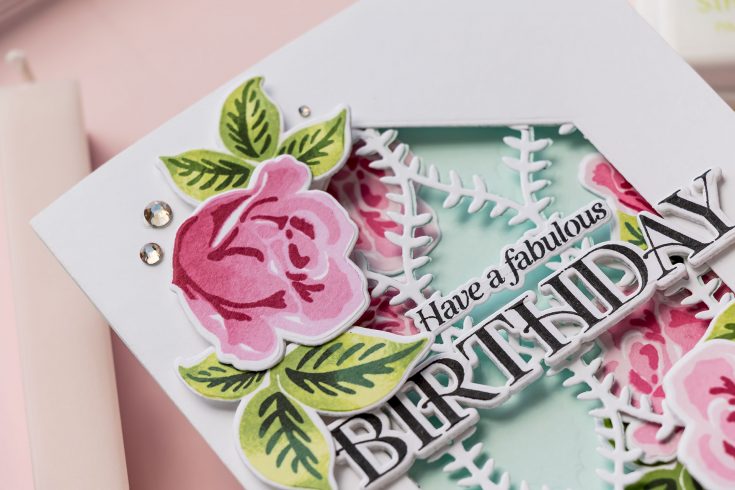
I also used the coordinating Willowweave Die to create an intricate die-cut element that fits inside the window opening. By cutting the design from both white and seafoam cardstock and adhering them back-to-back, I was able to create a finished piece with clean edges visible from both sides of the card.
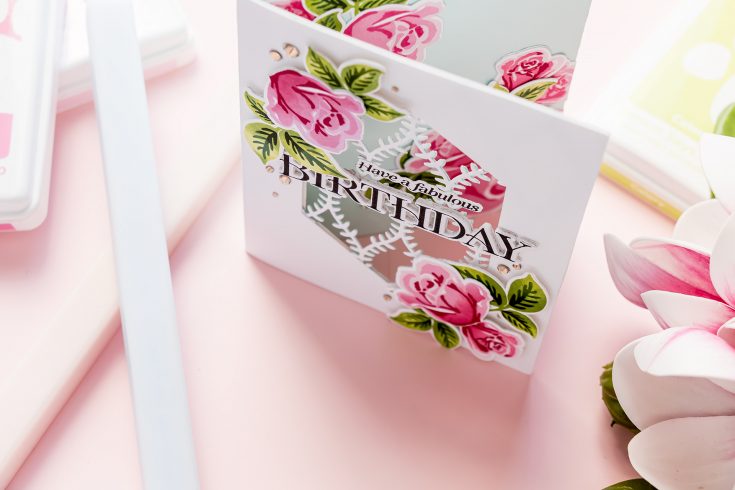
With all of the major elements prepared, it was time to assemble the card. I adhered the two card bases together, added the Willowweave window detail, and began arranging the floral die cuts.
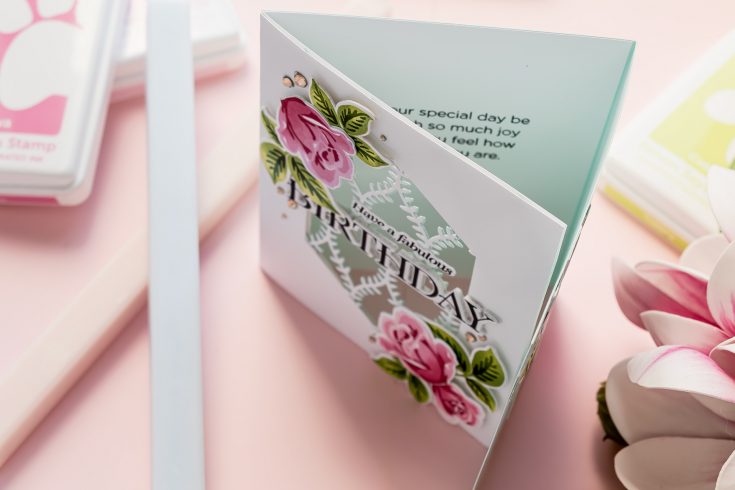
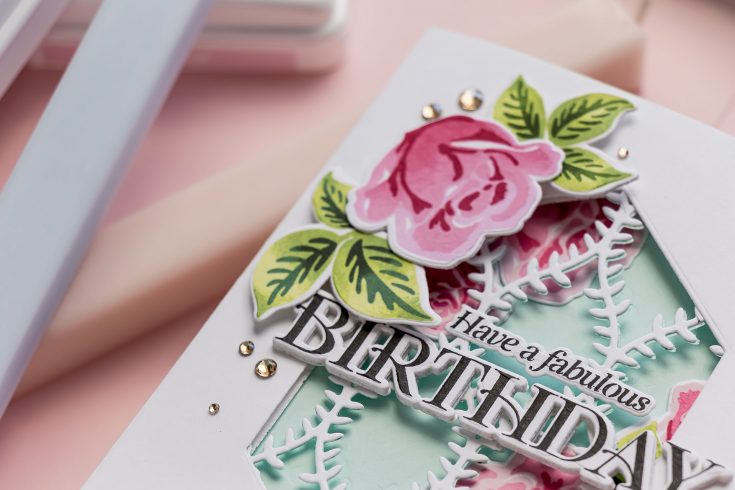
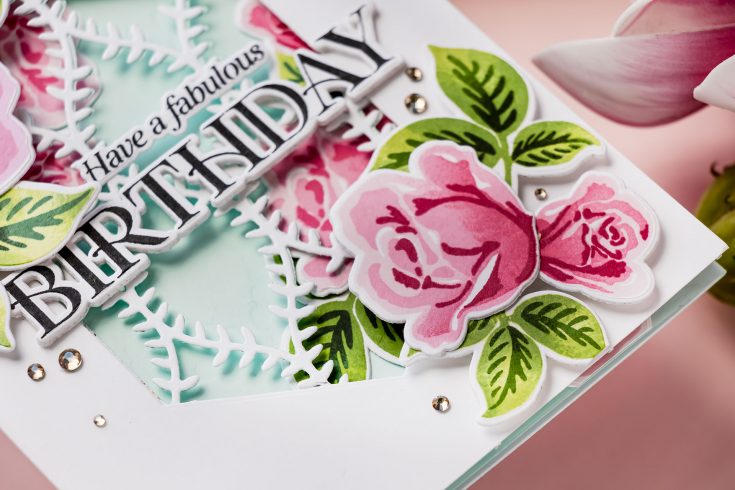
For the front panel, I created a diagonal floral arrangement with a medium rose in the upper left corner and additional roses and leaves clustered in the lower right corner. This design helps guide the eye across the card and frames the window beautifully.
The birthday sentiment was created by stacking multiple die-cut layers to form a sturdy chipboard-style embellishment. Since the sentiment spans across the window opening, the extra layers help provide stability and durability.
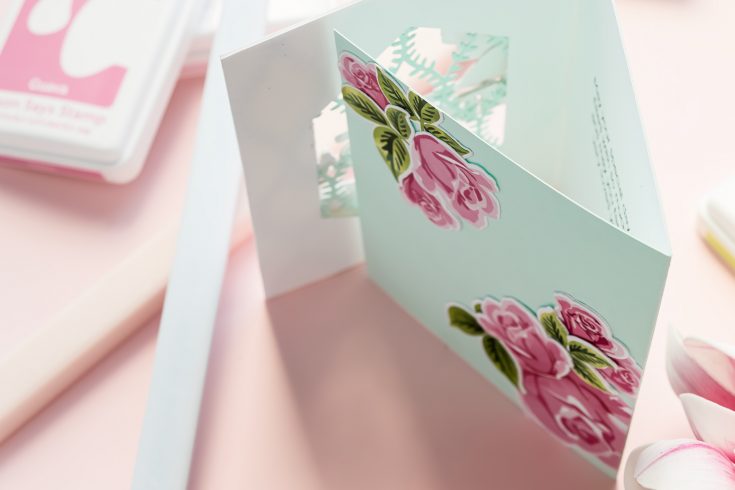
One of the best parts about a tri-fold card is all of the extra decorating space. On the inside flap, I added additional roses and leaves that peek through the window opening when the card is closed. This creates a lovely surprise when the recipient opens the card and reveals even more floral details.
For the final panel, I stamped a heartfelt birthday greeting from the Inside Birthday Greetings stamp set. This gives the card a meaningful finishing touch while leaving plenty of room for a handwritten message.
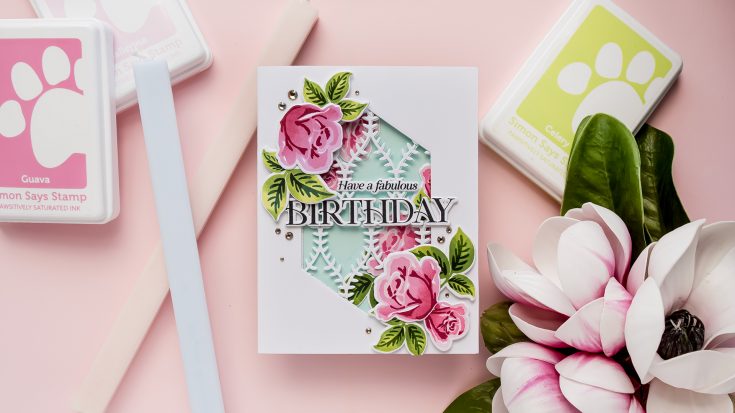
To complete the design, I added a few gold gems for sparkle and shine.
I had so much fun creating this project. If you haven’t made a fun fold card in a while, I encourage you to give a tri-fold design a try. It’s easy to create, offers lots of room for embellishments, and makes a wonderful interactive card for birthdays and other special occasions.
Have a wonderful day and happy crafting!
WATCH THE VIDEO:

SUPPLIES:
|


Ways to support Ukraine:
If you are looking for ways to support Ukraine, we encourage you to visit this page on Yana’s blog:

A big thank you to YOU, our reader — and to Yana for being our guest!


The card is lovely but the link to watch the video did not work.
What a gorgeous tri-fold design! The layered heirloom roses really give this card an elegant, dimensional feel. I love how Yana always makes complex techniques look so approachable. Would love to try something similar with AI-generated floral patterns as a starting point for hand-coloring.
This is so pretty – I love Yana’s cards
I love this card and would like to watch the video but it is not working.
This tri-fold birthday card is absolutely stunning! The layered heirloom roses give it such an elegant, dimensional feel. I have been experimenting with AI photo enhancement tools lately and realized how much they can help make handmade card photos really pop when sharing on social media. The shading on your die cuts is gorgeous. Definitely going to try this technique for my next birthday card project!
Yana always delivers the most stunning designs! Those heirloom roses look so realistic and the tri-fold technique really adds dimension. I have been wanting to try layered die cutting more and this tutorial is perfect timing. The color combination is gorgeous too. Thank you for sharing such detailed instructions!
Yana never disappoints! The tri-fold construction looks so much more impressive than it actually is to make. I really appreciate the tip about trimming a sliver from the card base edges to prevent buckling. The ink blending on the Heirloom Roses before stamping is such a clever technique for extra depth. Those four shades of pink create stunning dimension. Definitely pinning this for my next birthday card project!
What a stunning card design! The layered heirloom roses look so elegant against that soft background. I love how you used the tri-fold to create depth and dimension – it really makes the focal point pop. The color palette you chose is absolutely gorgeous and perfect for a birthday celebration. I have been experimenting with some AI image tools to help plan my card color schemes and it has been surprisingly helpful for visualizing combinations before committing to paper. Thank you for sharing such beautiful inspiration!
What a gorgeous birthday card! The layered heirloom roses are absolutely breathtaking, and the tri-fold design adds such an elegant touch. I love how you coordinated the colors so perfectly. I have been experimenting with AI image generation tools lately for my card designs and they have been a game changer for creating custom backgrounds. Would love to try combining that with your die-cutting techniques. Thanks for the wonderful inspiration!