Easy Mixed Media with Paula Cheney
Hi friends! Happy Saturday! Please join me in welcoming back very special guest Paula Cheney with this AWESOME mixed media tag inspiration! Read on and enjoy!
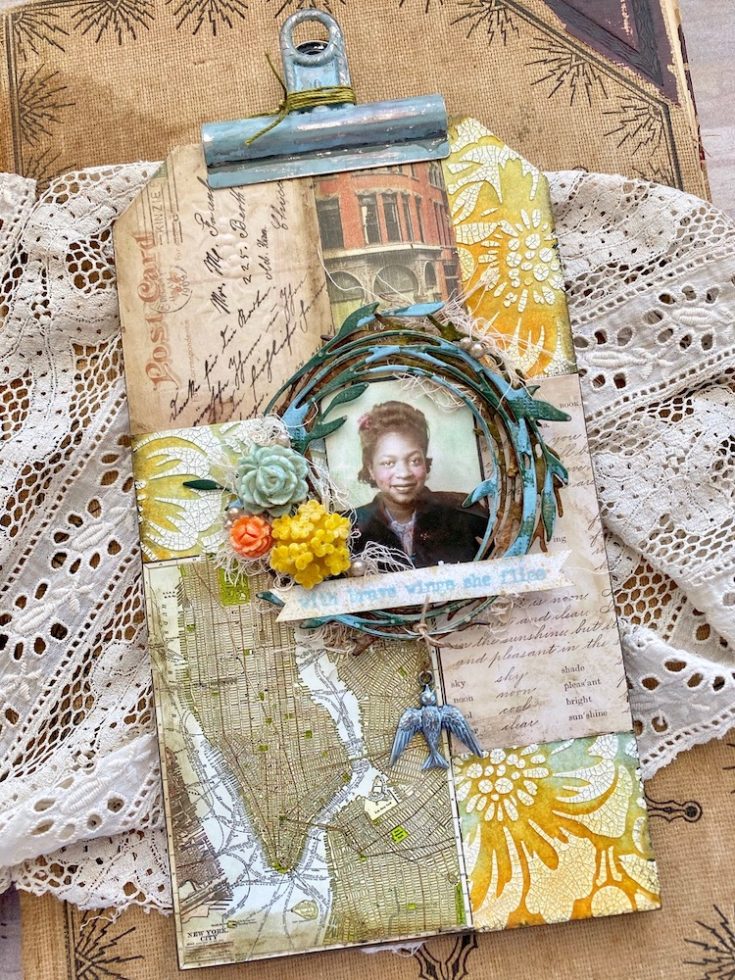
Hello friends! I’m so glad to be back on the Simon Says Stamp blog with an easy mixed media project. Today we will create a patchwork background, tint a Photobooth image, and emboss some resin flowers. Follow along as I walk you through the steps.
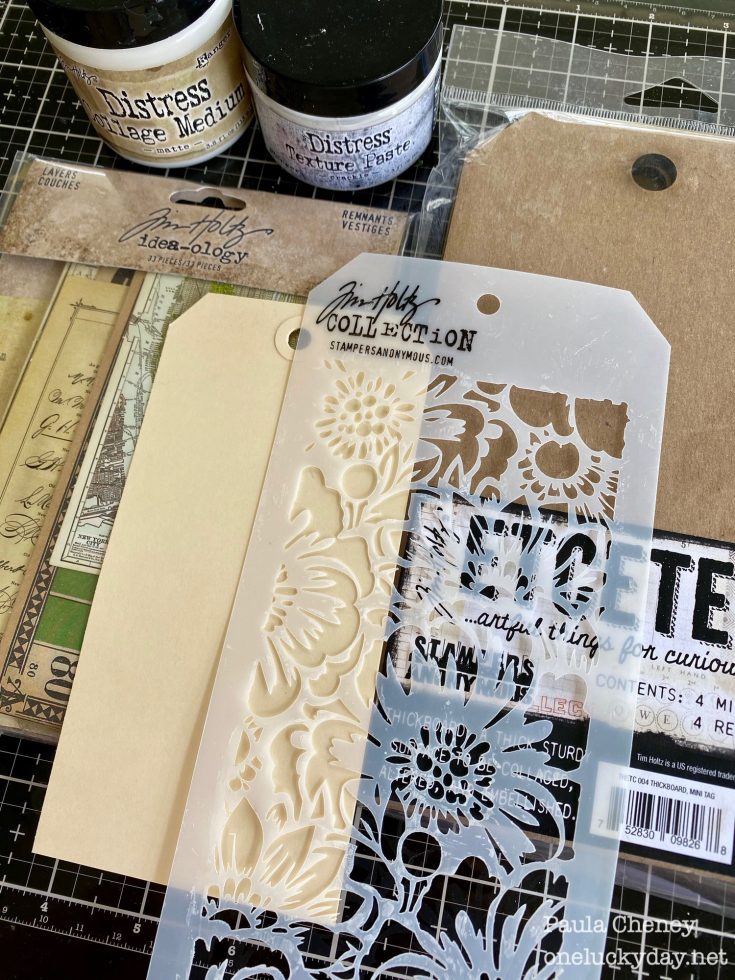
Gather a few supplies: Mini Etcetera Tag, Bouquet Stencil, a #8 Heavystock tag, Layers Remnants ephemera, Distress Collage Medium Matte and Distress Texture Paste Crackle
Heavystock tags are not to be underestimated! They are the perfect substrate for Mixed Media techniques because they hold up beautifully under all layers of wet mediums like glue, paste and ink.
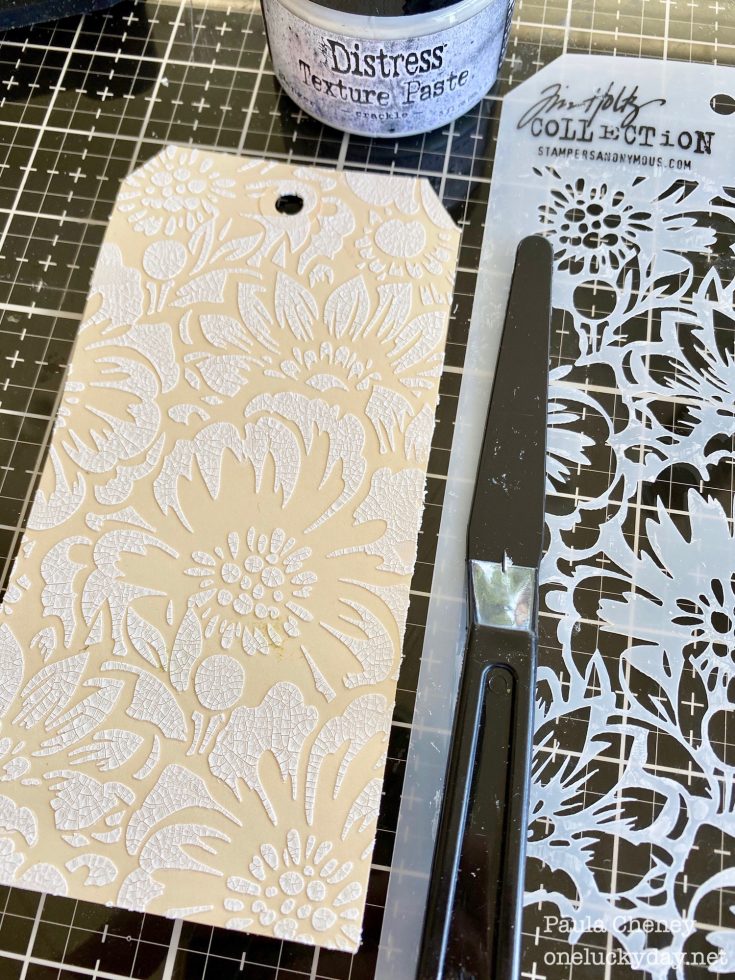
Lay the Bouquet Stencil over the Heavystock tag. Load Crackle Texture Paste onto the back of a palette knife and drag over stencil until covered. Remove the stencil and wash immediately. Let Crackle Texture Paste dry for at least 30 minutes.
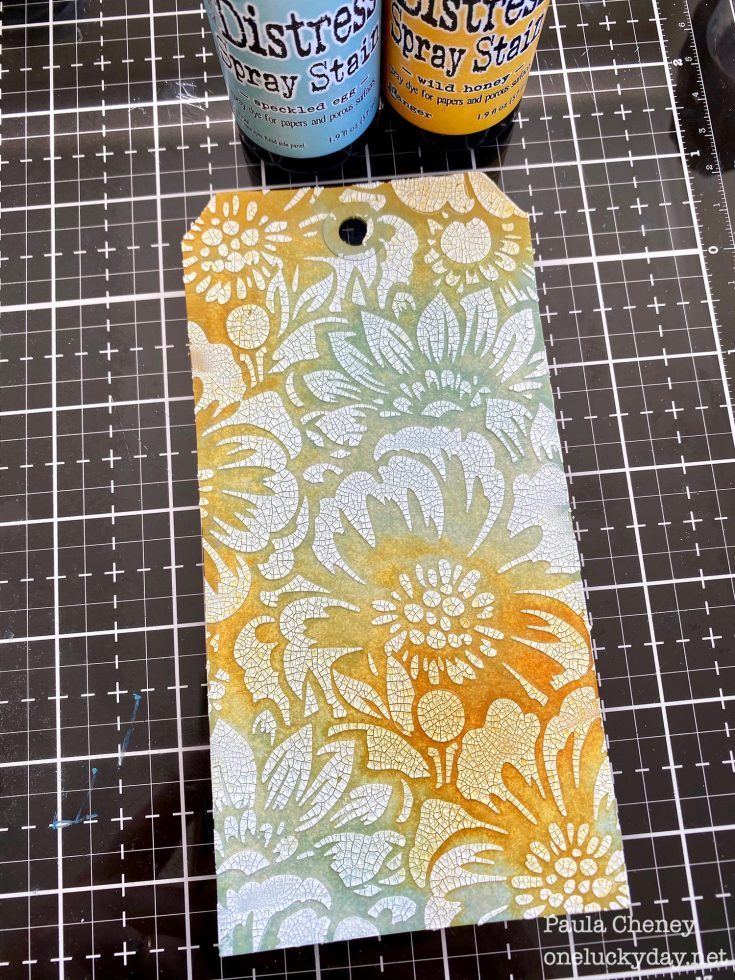
Once dry, spray the tag with Distress Spray Stain in Wild Honey and Speckled Egg. Dry with a Heat it Tool. The crackle will resist the Spray Stain and as it dries only the paper background will be left with color.
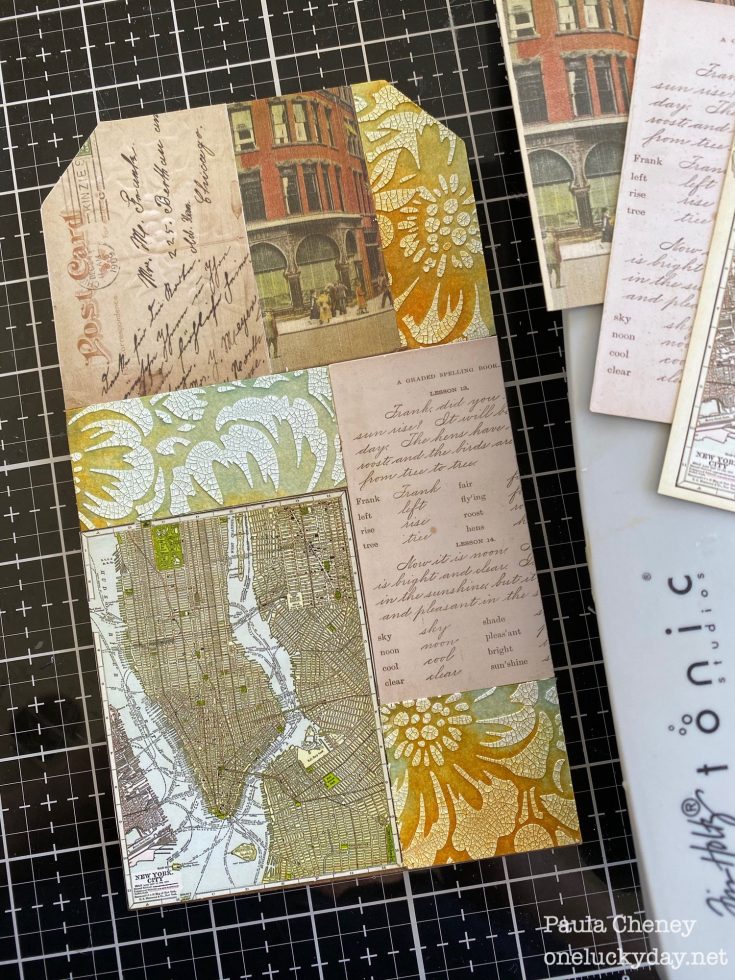
Use Tonic Paper Trimmer to cut the prepared tag into 3 pieces. Choose a few cards from the Layers Remnants pack to fill in the remaining spaces on the tag. Adhere all pieces with Collage Medium to create the patchwork background.
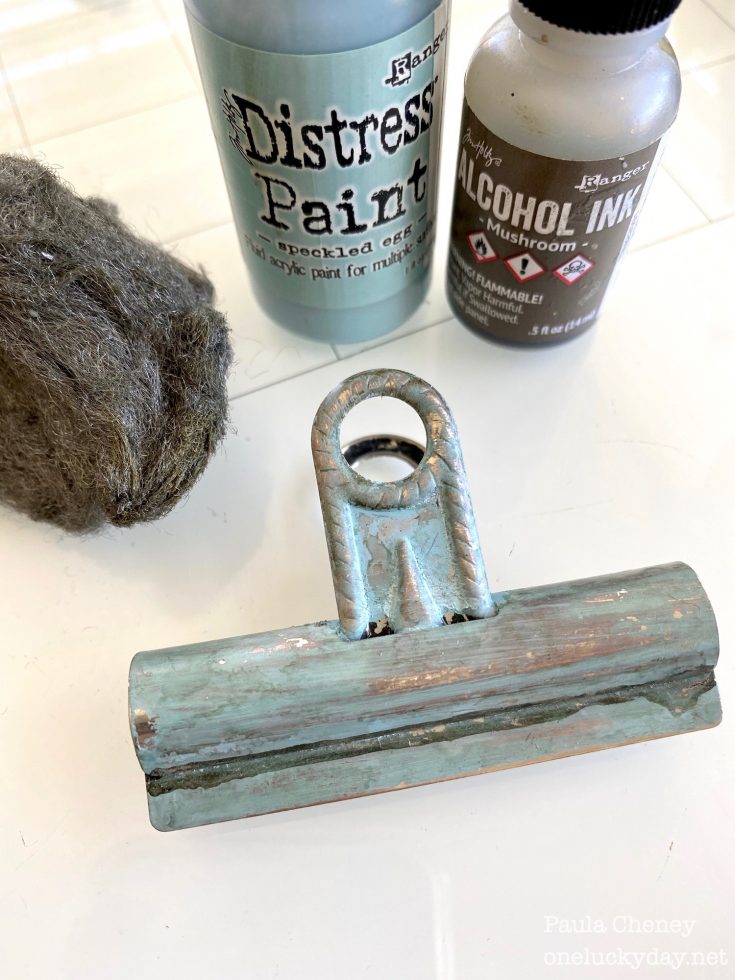
Paint an idea-ology Vintage Clip with Speckled Egg Distress Paint. Once dry, pounce Mushroom Alcohol Ink over the surface to age. Sand surface with steel wool to reveal some of the metal. Add to the top of the Mini Etcetera Tag.
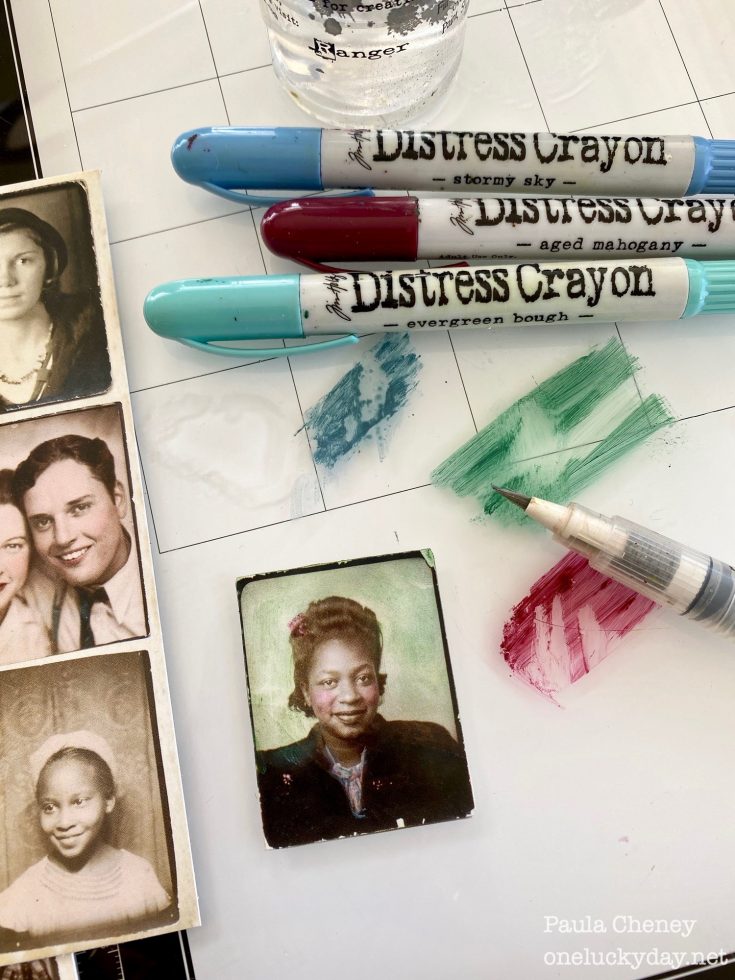
Choose a Photobooth image. Scribble a few colors of Distress Crayons onto the Glass Mat. Very little water from the Detailer Water Brush is needed to pick up the colors. Distress Crayons are very forgiving so if you need more crayon just add it. And remember, too much water will wash it away (which is good for starting over). Crayon can also be picked up from the Glass Mat with your finger tip and rubbed directly onto the background as I did. Her cheeks and clothing were colored with the Water Brush.
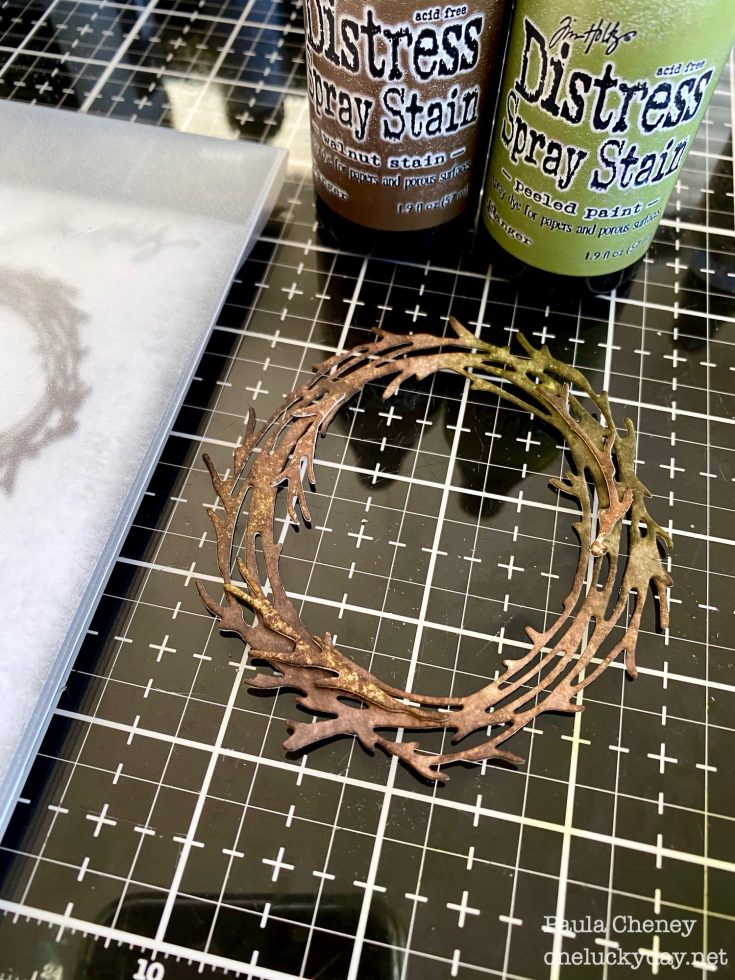
There are two Funky Wreaths in the die set – one twig, one leafy. I used both but with different cardstock.
Color a piece of Distress Watercolor Cardstock with Walnut Stain and Peeled Paint Distress Spray Stain and dry with a Heat it Tool. Run the cardstock through a die cut machine using the Funky Wreath (twig version). Set aside.
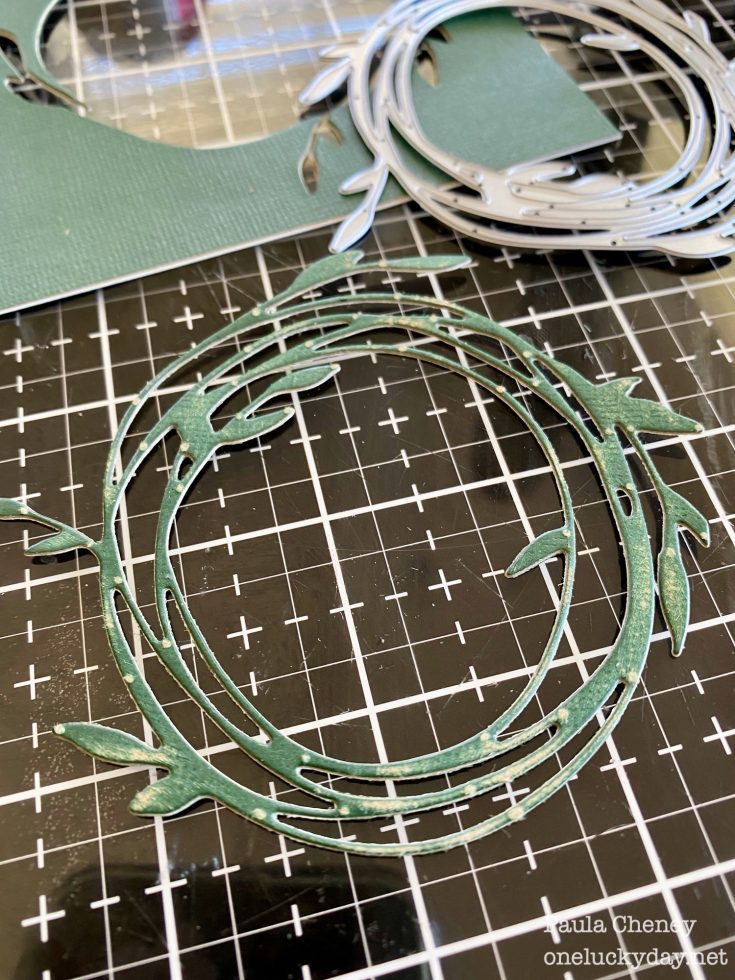
Adhere a piece of scrap cardstock to a piece of dark green cardstock to make it more stable. Run the cardstock through a die cut machine using the Funky Wreath (leaf version).

Use your fingertip to dab a bit of Speckled Egg Distress Paint onto the green leafy wreath. Set aside to dry.
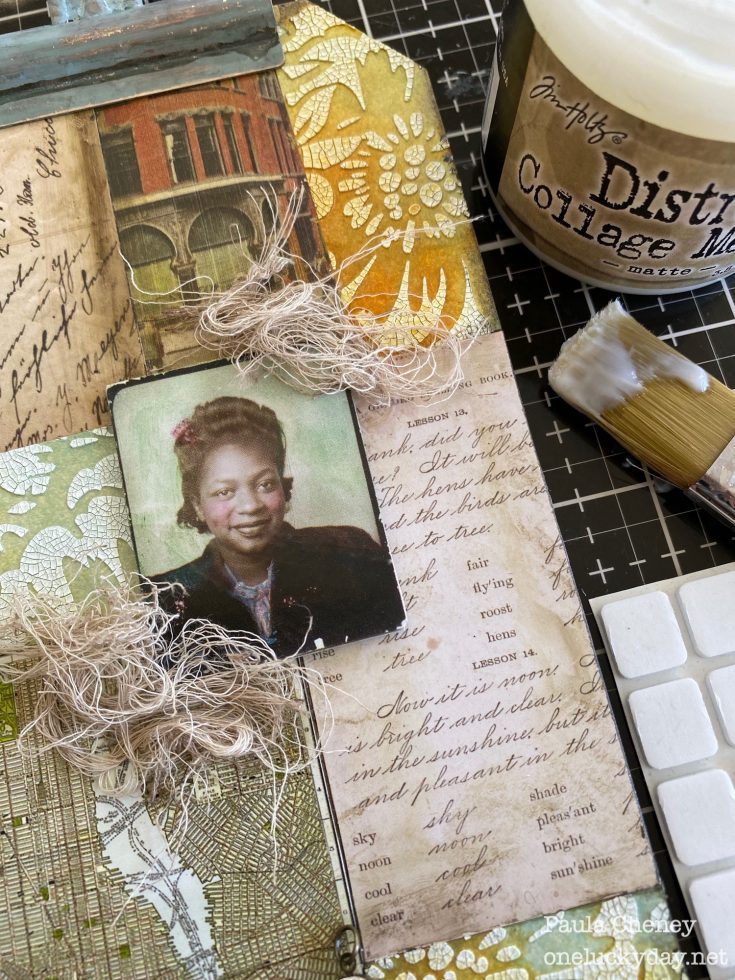
Adhere the Photobooth image to the Etcetera Tag with foam squares. Shred some cheesecloth into 3 or 4 clumps. Using Collage Medium, add two clumps of string on opposite corners of the photo.
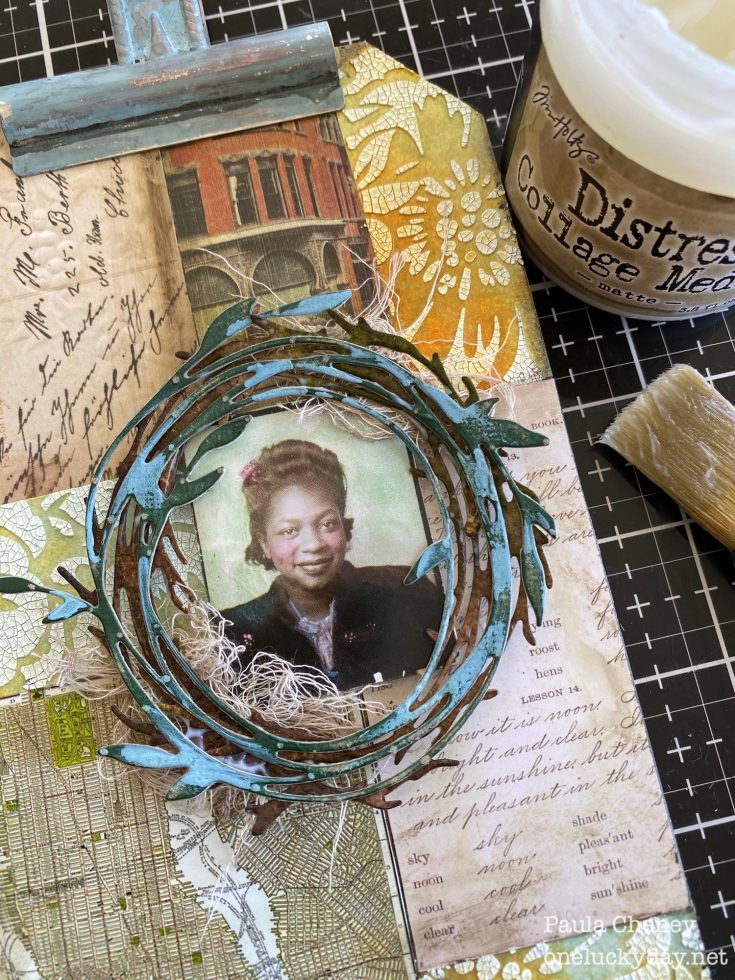
Add both wreaths over the image to create a nest.
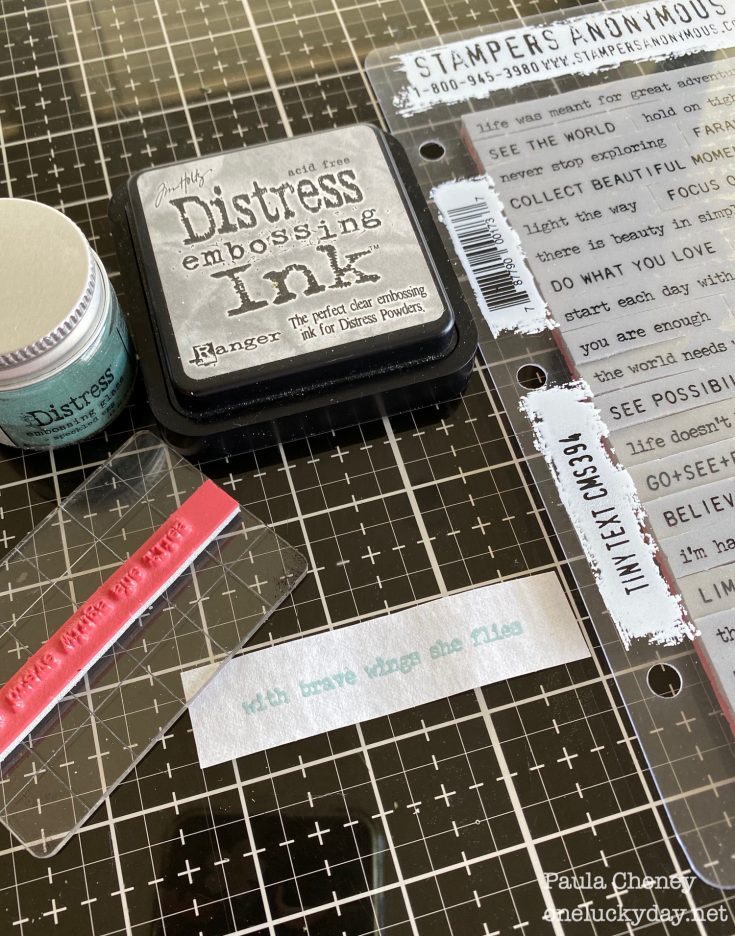
Cut a piece of thin paper (this is vintage typing paper). Choose a saying from the Stampers Anonymous Tiny Text stamp set. Stamp with Embossing Ink. Pour Distress Embossing Glaze Speckled Egg over the surface. Slide excess glaze back into jar. Heat with embossing tool until glaze is melted.
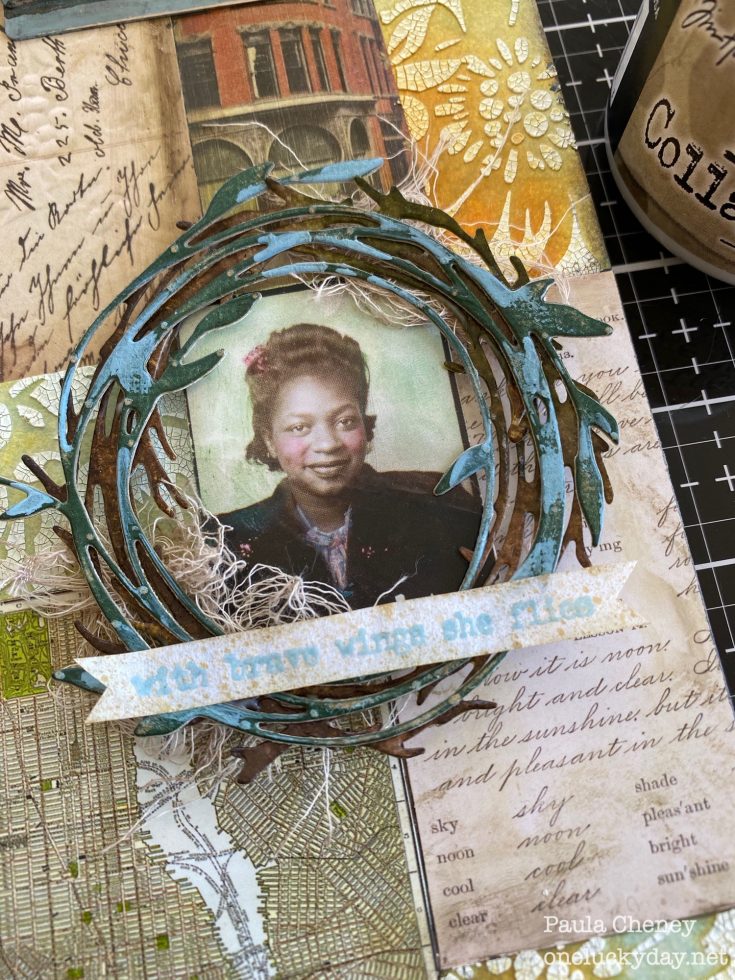
Cut the paper strip into a banner. Adhere banner to the nest with Collage Medium.
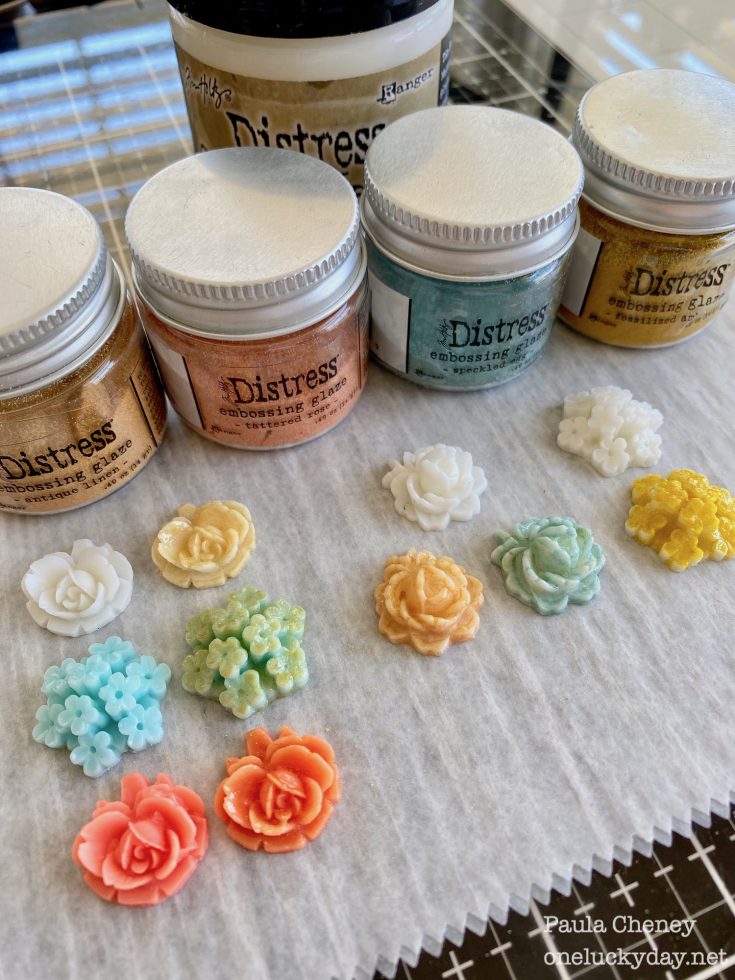
The next technique was something Tim shared in in Q&A video on Distress Embossing Glaze. Choose a few idea-ology Heirloom Flowers. You will only need three for the project but you can glaze as many as you like. Using a small brush, paint Collage Medium over the surface, then pour the Embossing Glaze over the top. Tap off excess Glaze and set it aside to dry completely BEFORE embossing. If you emboss right away the Collage Medium will bubble. Colored flowers can be aged with Antique Linen to give them a vintage look and white flowers can be colored with Tattered Rose, Speckled Egg or Fossilized Amber for even more variety. But remember, the key is to let the Collage Medium dry before melting the glaze.
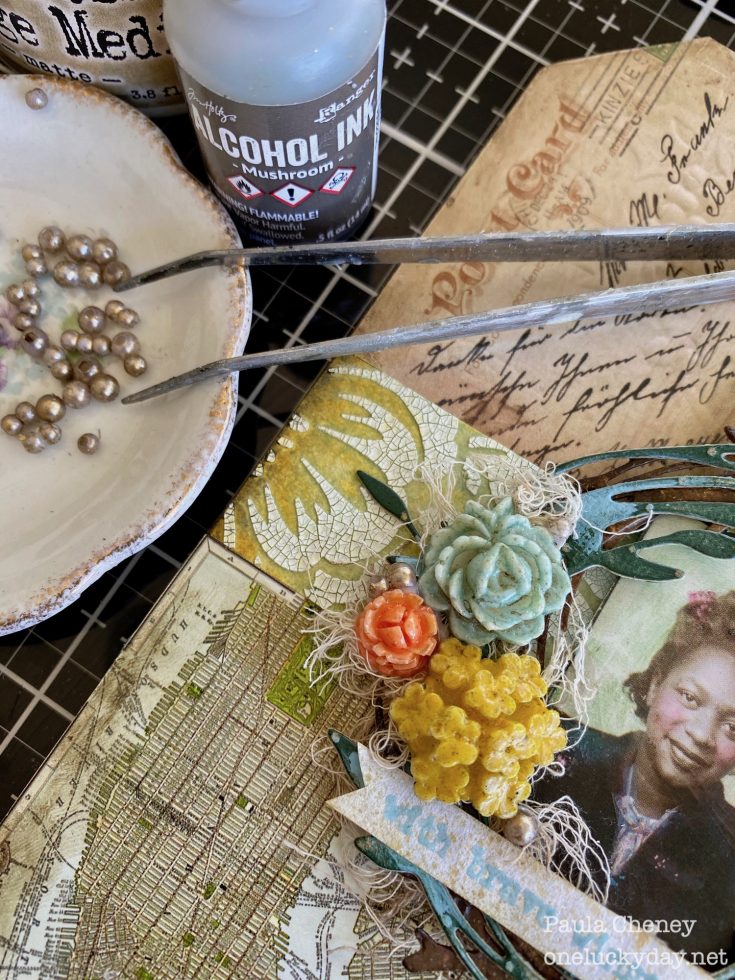
Use Collage Medium to add another clump of shredded cheesecloth on the right side of the wreath, then glue three Heirloom Flowers over the clump. I also added a few tiny craft pearls that had been previously colored with Mushroom Alcohol Ink. They are so tiny I need to use tweezers but they work great with the Heirloom Flowers.
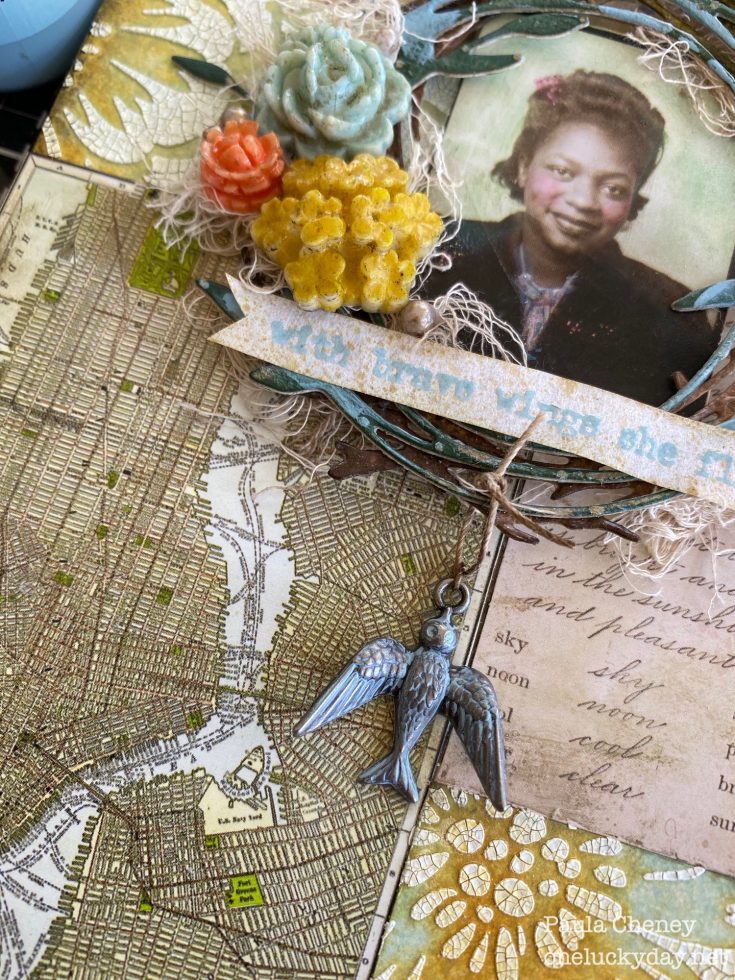
Rub some Speckled Egg Distress Paint over the surface of the little bird. Add to the nest with string.
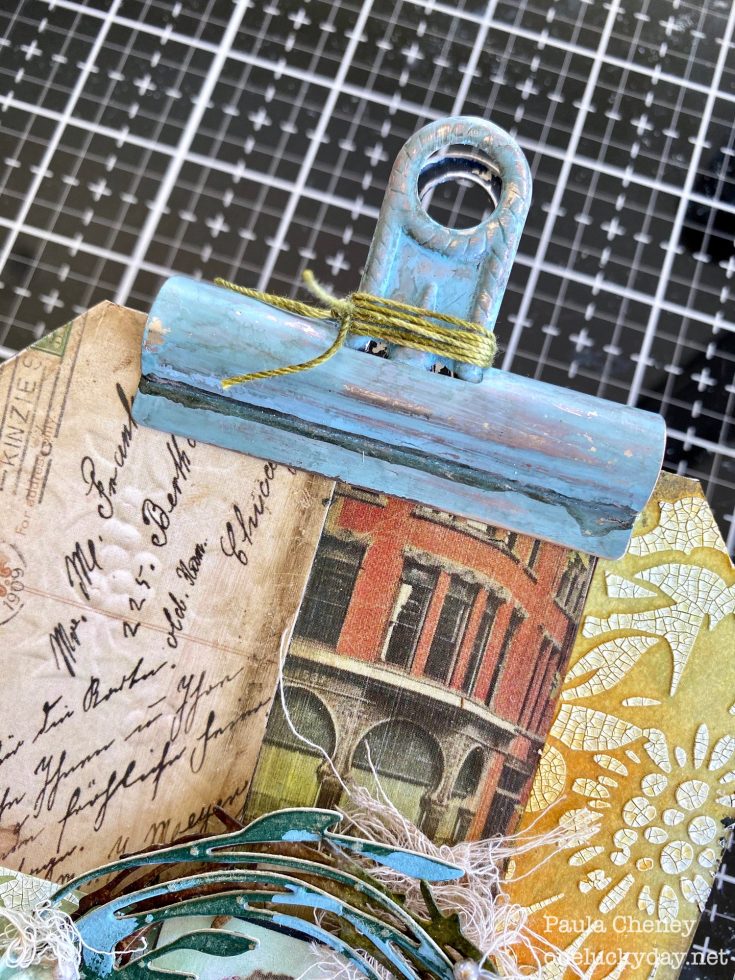
Wrap string multiple time around the Vintage Clip. Tie into a knot to finish.
SUPPLIES:
|


Thanks so much for stopping by, and thanks to Paula for being our guest!


Lovely project…especially like your stencil work and the cluster of flowers at the corner of your photo. tfs-stay well.
Thanks Paula for sharing your step by steps. Love the crackle texture paste, must get me some of that! Stay well :)
Beautiful tag!!
Beautiful. I like the wreath framing of the photo.
Really Beautiful!!!!
I LOVE this…really adorable and pretty simple to make (it seems). I will give this a try.
This tag is just gorgeous!!
Beautiful! Looks like such fun to create.
Beautiful creation! I hope we see more of Paula!
Wonderful mixed media tag, thank your for showing how you created it!
A beautiful tag, the stencilled background is gorgeous!
So gorgeous Paula, all those wonderful elements and the flowers look amazing with the glaze. Thank you for sharing all the steps x
This is so pretty
Paula, this is such a fun piece. I love how you keep everything simple enough that we can do these also. Thanks for sharing with us.
Absolutely beautiful! Love the vintagey feel to whole tag! You do gorgeous work! Thanks for sharing with us!
so pretty
I love it all but the vintage feel that goes with the clip at the top is awesome tysvm for sharing