Doodling with Debby: Making The Most Of Watercolor Prints
Hi friends! Happy Tuesday! Welcome to the latest edition of Doodling with Debby with Debby Hughes! Debby is sharing some beautiful ways on how to stretch your watercolor prints! Be sure to watch the video for more info and enjoy!

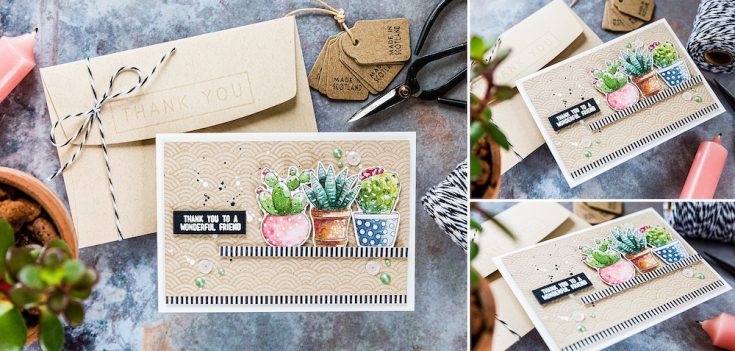
Hi, it’s Debby here, and for my Doodling With Debby video feature for this month, I’m making the most of watercolor prints. Suzy Plantamura designs the sets of watercolor prints that Simon Says Stamp stock and they are printed on Tim Holtz Distress Watercolor card. They are already a great value at under $10 per twelve card set, that’s just over 80 cents per card but when I saw the new Succulents set, I knew I could stretch that even further. Several of the cards have an arrangement of smaller images. It was the image with the cacti on a shelf that got me thinking and then looking at the other cards I was struck that with a little fussy cuttingI could make so many more cards from these smaller images.
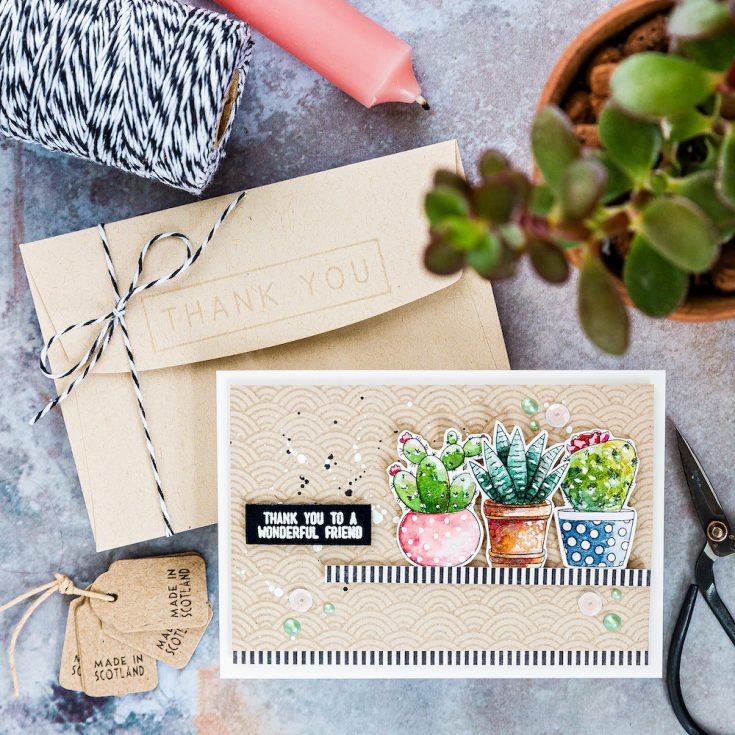
I took one of the cards with multiple small images and set about watercoloring three of the pots of plants. I used watercolor today as I love this medium and the cards are printed on Tim Holtz Distress Watercolor card, so you have that option. However, don’t feel that you have to watercolor. I’ve seen all types of media used on these cards – Copics, pencils, markers. The important thing is to use what you have available or what you are most comfortable with. I’m still in love with the look of watercolor, and so that was my choice for today. I used Daniel Smith watercolors and slowly added layers of color to the plants. You don’t have to worry about being too detailed as these are relatively small images, and so a light first wash of color followed by a little shading is all that is needed.
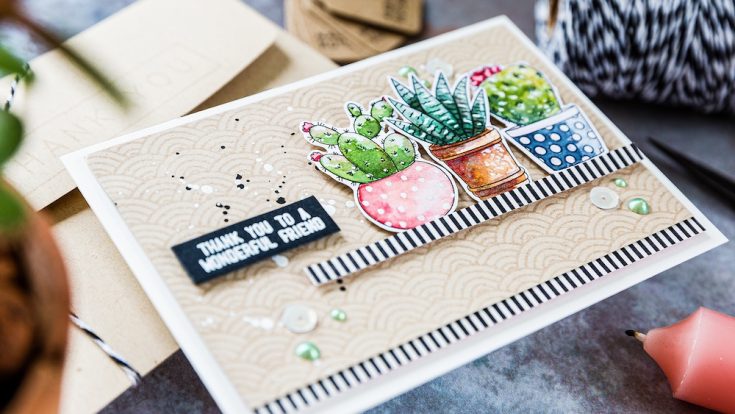
I keep harping on about white gouache but whether you like watercoloring or not I think a tube of white gouache should be in everyone’s toolbox. It gives such excellent opacity that you can paint it over darker colors, and it still gives that great white highlight. I even painted over the black polka dots on the pink pot, and it covered over that fine too. I started with Winsor & Newton Permanent White gouache and have loved it so much I’ve never felt the need to try anything else.
Once I’d finished painting, I dried the card with a heat tool and then fussy cut out each of the three images. I left a small white border around each, and that is so that I could keep the spikes on the cacti intact. My tip when fussy cutting is to keep the scissors steady and instead move the card as you cut. Also, start with the fiddly bits first when you have more card to keep a hold of rather than leaving those until last and then struggle to have much to hold on to. I then set the three plant pots to one side while I worked on the background for this card.
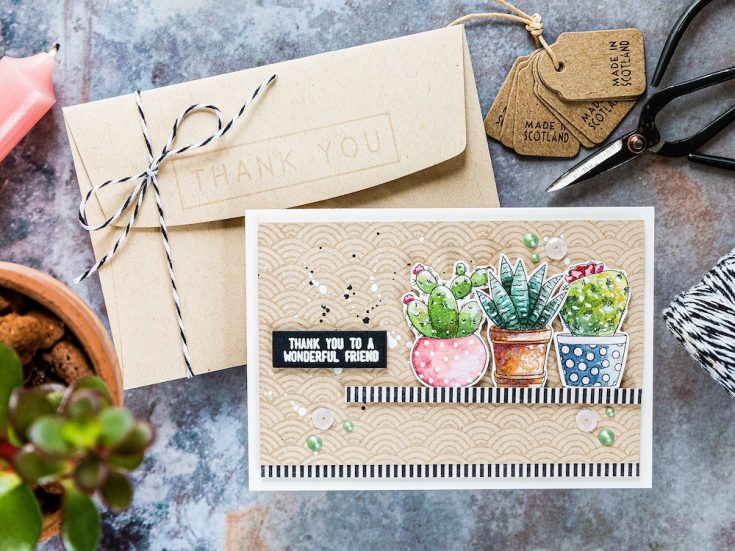
I have used the Scallop Waves Background stamp on virtually every card I’ve made since I received it. I love the scallops and find they make a great subtle background, particularly when stamped in a tone on tone way on kraft card. I placed the stamp in the Misti and stamped it in embossing ink on Neenah Desert Storm card. This ink is clear and slightly sticky when wet, and that is what embossing powder adheres to. However, I’m not embossing today; I’m just letting that ink give a slightly darker tone on the card.
I used to make a lot of 4 bar cards, these little cards are only 3.5 inches by 5 inches, and I think their small size is adorable and particularly suits these three small plant pots. So, I cut the background down, I did make a mistake on my dimensions though, but I fixed that later on. I added foam adhesive to the back of each of the pots and then trimmed a piece of striped patterned paper for the plants to stand on and added foam adhesive to the back of that too. I then splattered the background panel with black paint and then white gouache to give a little more interest and then dried it with a heat tool.
For the sentiment, I used the Thanks and Encouragement set. This set has two large stamps with a variety of messages spaced over them and then a matching die to cut them out. I stamped the thank you images in clear embossing ink on black card and then sprinkled with white embossing powder before heat setting. I then aligned the matching die, held it in place with washi tape and ran it through my die cutting machine. I only used one of the sentiments today, but I’ll tuck the rest away for another time.
I cut and scored a 4-bar card base from Ivory card and then realized my mistake – in cutting the kraft background panel I’d made it too narrow. However, I fixed that quickly by adding another strip of patterned paper along the long edge, and I prefer the extra detail this brings to the card so a happy mistake in the end. I added foam adhesive to the back of the panel and adhered that to the card base and then used the waves of the background to help keep my striped shelf for the plants to stand on straight. I then added each of the three plant pots with foam adhesive and the same for the sentiment strip.
Finally, it was time for a little embellishment. I do like adding a triangle of sequins, enamel dots, Nuvo droplets, crystals or such to catch the eye and draw attention to the focal point. Uneven numbers are supposed to be attractive to the eye, and so a triangle of embellishments is just right. I added three sequins from the new Sunken Treasure sequin mix and kept them in place with Gina K Connect glue and then paired them with Dragon Scales Nuvo droplets. I love Kristina Werner’s envelopes, and she has inspired me to take a little more care with my envelopes. Just a little touch of a stamped tone on tone thank you on the flap of the envelope using a sentiment from the Greetings Mix 1 set stamped in clear embossing ink and then a little twine around the envelope to tie into the black and white stripes of the paper strips on the card.
And there you have one little cute succulents and cacti card which used just three of the images from one of the prints from the Succulents set. I could make two more cards just from this one print, and there are more options in the other prints too. I really enjoyed taking those three plant pots and making this little card, and I’ll be sure to be making more of these. Thanks for joining me today and I hope you’ll join me next time for Doodling With Debby.
SUPPLIES:
|


Thanks so much for stopping by, and thanks to Debby for being our guest!

Blog Candy Alert!! Follow our blog via email and comment on this post for a chance to win special blog candy!


What a beautiful card! I love how you painted these plants and added the stripped paper as a shelf and to the bottom of the panel. :)
Such a lovely card – the cacti are so pretty! The background with just embossing ink looks great.
Such a sweet card, great tip on using the individual images to make a card.
This is so beautiful! I love the pattern on the background mixed with the black and white stripes. And then those fabulous plants!!
Great card! I love all the little details!
Very pretty and
the stamps you
used are cute.
Carla from Utah
I really like the succulents!
Great idea!
Such a pretty card!
Thanks for sharing…
Gorgeous colors and details! Love this!
So pretty and elegant – I love the soft colours and subtle texture.
Great card and envelope combo x
I love to use the smaller size cards. And the colors of the plants and finishing elements make these cards very special despite being smaller♡
This is wonderful Debby. These pots of cacti look awesome w/c’d and cut out and the shelf you made for them is such a great idea. Well done.
Gorgeous. Love the waves background as well. HUgz
Fabulous video…I have been on the hunt for a good realistic cacti set and these images are perfect. Love your card. hope that SSS makes these illustrations into a stamp set.
I simply love your coloring Debby ❤
This is just gorgeous!
Oooh! Pretty pretty! I love these, Debby! I love the stamped envelope too.
Lovely card. I really enjoy this series.
Beautiful card and thanks for sharing your way of creating your card.
This is such a beautiful card! :)
What a great idea to fussy-cut these pieces! I can’t get enough of Debbie’s videos. They are so soothing – it’s kind of like watching Bob Ross!! :D
What a gorgeous card! I may have to invest in some white gouache. I usually just use white paint.
A very lovely card!
So very pretty!, love the watercoloring card set…so fun to work with!!
gorgeous watercolouring, omg love that scallop stamp too!!
Beautifully elegant and so bright!
Gorgeous Debby, I love these awesome prints of Suzy Plantamura. Your idea is great, love it!
Thank you so much for showing your gorgeous inspiration.
Very pretty card
Flat on my back again after another surgery makes it hard to type but easy to enjoy all the inspiration here. ??????
Such a great card
Thank you for the tips on watercoloring! the plants look fabulous