Doodling with Debby: Experimenting With Distress Glaze + Texture
Hi friends! Let’s DIVE into this awesome technique tutorial and card sample by Debby Hughes! Be sure to watch the video and enjoy!

Hi, it’s Debby here and thank you for joining me for Doodling With Debby. This month I’m taking you on my journey as I explore more mixed media. I don’t know about you, but I’ve been glued to Tim Holtz’s Saturday Facebook lives as he demonstrates how to get the most out of his supplies. One technique which caught my eye was using Distress Embossing Glaze over various texture mediums. For my card today I played with, Dina Wakely white gesso, from the new Distress color Speckled Egg we have the Distress Oxide and Distress Ink pads, Distress Oxide Spray and Distress Glaze. Also, I’ll be using Peeled Paint Distress Glaze, and I’ll add in the Distress Oxide ink pad. Finally, for texture, I used Texture Paste in opaque matte and crackle.
I often see mixed media artists using gesso. It’s something I don’t have a lot of experience with, so I thought I’d give it a go. For my experiments today I used four pieces of Fabriano Artistico Cold Pressed watercolor card. I chose this card for its sturdy nature, ability to handle water, and its subtle texture. I plan to have two pieces of gesso so that I can try out the two different types of texture medium, and then I’ll also have two pieces of card without gesso as controls pieces for comparison. I wrote in pencil on the back of both the gesso pieces so that down the line I wouldn’t get confused as to what had what treatment.
I added a smidge of gesso on the two pieces and rolled out with a brayer. I moved the brayer in different directions to get texture marks across the card. On hindsight, I used more gesso than needed, so I’m glad I put down a tonic mat for easy clean up afterwards, but I think the generous supply of gesso did help with creating the texture I was after. As I’m impatient, I gently dried the gesso with a heat tool.
I love the look of a subtle text background, and I used the Thank You Text Background from Simon Says Stamp white heat embossed along one side. To start, I treated all four pieces of card with anti-static powder. I inked the stamp with Versamark ink down one side of the big background piece. Versamark is a sticky ink that embossing powder will cling to. I then gently rubbed part of the stamp down one side of each of the four pieces of card. I didn’t use a stamp block or platform but bent the rubber as I applied the stamp to create a soft, random edge to the stamping. I sprinkled Simon Says Stamp white embossing powder over each of the four panels and using a preheated heat tool, melted the embossing powder. By the end of this process, I had four pieces of card all with white heat embossed text down one side but two on a gesso base.
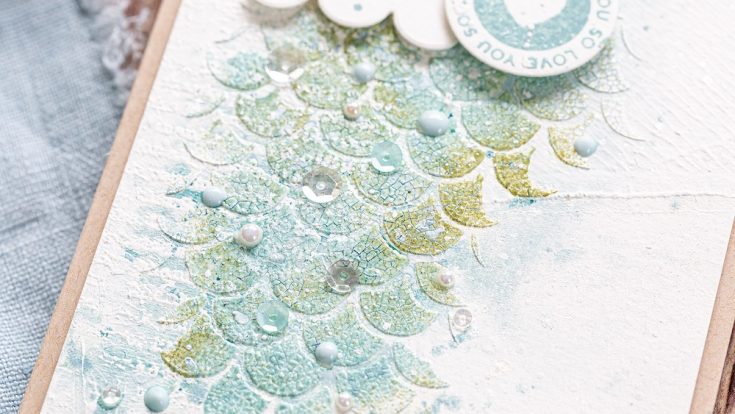
Moving on to adding the texture mediums and I dug around in my stash and found a small tub of opaque matte texture paste and a bigger tub of crackle texture paste. I have a few people I send cards to that love water and the sea, and that was where my mind was going with this project. I used the Mermaid Scales stencil from Simon Says Stamp and adhered it over one of the pieces of card, I wrote on the back, so I knew which texture paste I was using on each. This first piece was using the opaque matte paste over a non-gesso base. Using a spatula, I dragged the paste over the stencil. I didn’t want to cover the whole area but create a cascade of waves overlapping the heat embossed text. I’d say this was like spreading butter over bread, but actually, the paste is a bit thicker and more mousse-like than butter, so I’d say more like adding a sandwich spread over toast. After adding the paste, I put the lid back on to stop it drying out and cleaned up my spatula, lifted off the stencil to reveal the textured pattern and cleaned the stencil too ready for next time.
I opened up both tubs of Distress Embossing Glaze. I used Speckled Egg and Peeled Paint for a watery blue-green look. I sprinkled the glazes over the paste, and as the paste is wet, the embossing powder sticks to the paste. I sprinkled a base of Speckled Egg and then a touch of Peeled Paint and then following Tim Holtz’s advice regarding this technique I tapped my fingertips on the backside of the card to spread the powder around. I tapped off any excess and set the card aside to dry. I retook one of the gessoed backgrounds wrote on the back to make sure I knew which was which and repeated the process with the texture paste.
Then, I took the Crackle Paste and did the same thing for the remaining two pieces of card, the one without gesso and the one with gesso. The Crackle Paste is much smoother and more like a thick cream to spread over the stencil. So, by the end of this process, I had four pieces of card, all with a heat embossed text background and then four options,
- no gesso + texture paste
- gesso + texture paste
- no gesso + crackle paste
- gesso + crackle paste

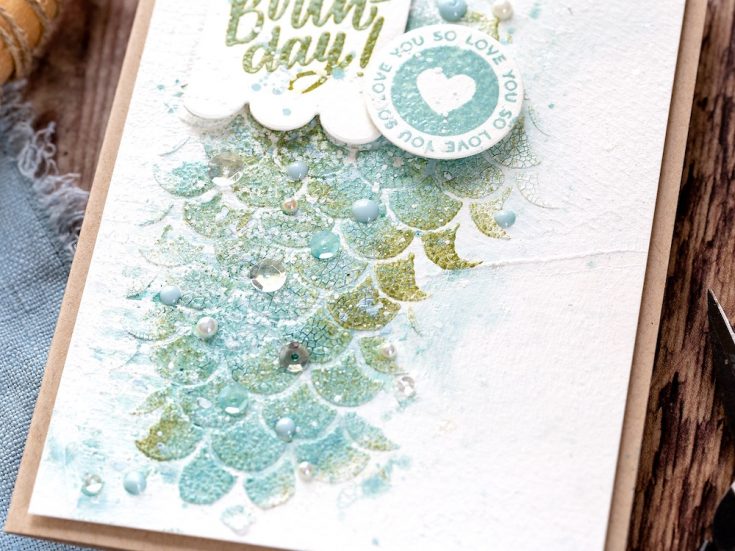
I left all four pieces to dry naturally. I tested this by touch with the opaque matte texture paste and also by seeing the crackle forming on the crackle paste. I then heat set the Distress Embossing Glazes with a preheated heat tool. When you heat the opaque matte texture paste, you get bubbling and expansion of the paste. I like this extra texture and so made sure to hit the heat on there to get the full effect. When you heat crackle paste, there isn’t any extra volume to the paste as the glaze forms, but it does seem to increase the crackle effect.
On each of the four pieces, the embossing glazes create a smooth, shiny surface over the texture. With the opaque matte texture paste, I love the extra dimension from the bubbling of the paste when heated. As for the difference between gesso and non-gesso, I’d say the non-gessoed piece has a sharper definition on the heat embossed text and the formation of the scales pattern. However, I love the more indistinct effect on the gesso and the extra texture the gesso base has. For the Crackle Paste, I was excited to see how the white heat embossed text seemed to react with the crackle paste and glazes and bubble to the surface creating an effect almost like the white crest of the waves. Not only that I love the crackle effect, I think this is a sure-fire winner for me. As for the gesso vs non-gesso question, again I prefer the more indistinct effect as one texture blends into another without such sharp lines and of course the extra texture from brayering the gesso in the first place.
On the basis that I preferred the crackle paste over the texture paste, I took these two pieces further and taped them down to my glass mat with painter’s tape. This helped to prevent them from warping when getting wet. I used Speckled Egg Distress Oxide Spray for this next step and gave the bottle a good shake before spritzing the panels with water. I followed with a spritz or two of the Speckled Egg spray and moved the color through the water with a paintbrush to give a soft background to the panels which highlighted the white embossed text down the sides. I also used my glass mat as a palette, pressing the Distress Ink and Distress Oxide Ink pads onto the glass to release some ink. The Distress Ink gives a more transparent, deeper color, which is a nice contrast to the more muted hues of the oxide.
I know it’s not for everyone, but I love splatter. I think it adds an extra layer of interest and texture. I added white gouache to my mat and mixed with a little water until it was a good consistency to splatter, which I did liberally over the two pieces. I also used some color from both a Speckled Egg Distress Oxide ink pad and a Distress Ink pad and again mixed with a tiny touch of water before splattering over the backgrounds. Finally, on the splatter front, I used a solution of Perfect Pearls powder for a little sparkle over the waves.
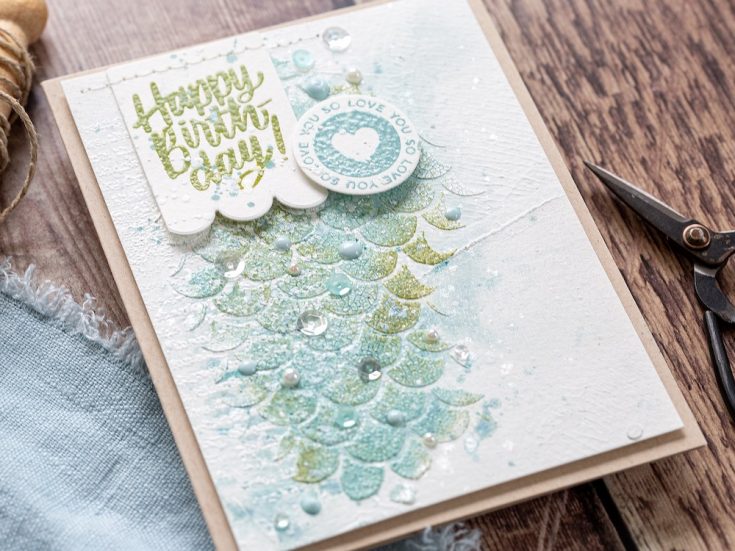
As for comparing the difference between the crackle pastes on just the watercolor card and the gessoed background, as I mentioned previously, the non-gessoed piece has clearer, more distinct text and stenciled pattern. In comparison, I think the gessoed background has more crackle and overall texture, and the watercolor effects of the Distress Oxide spray are more subtle. As such, I took the gessoed background with crackle paste piece onto the next step of creating a card.
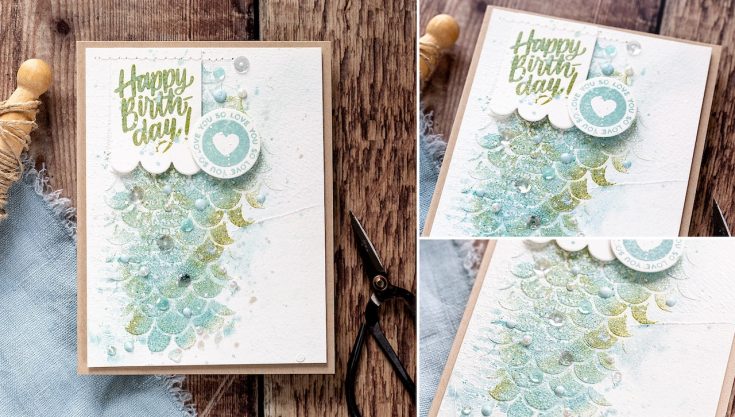
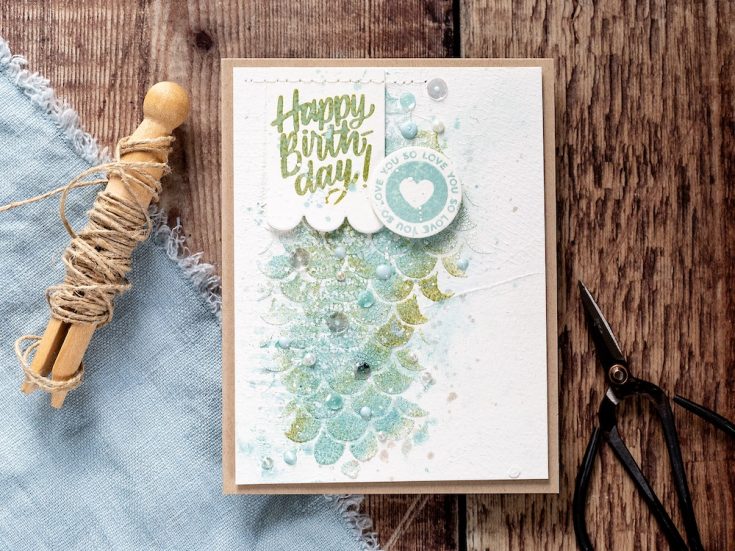
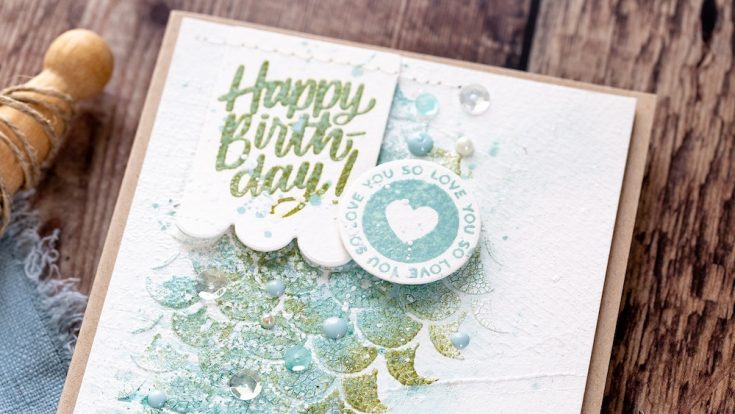
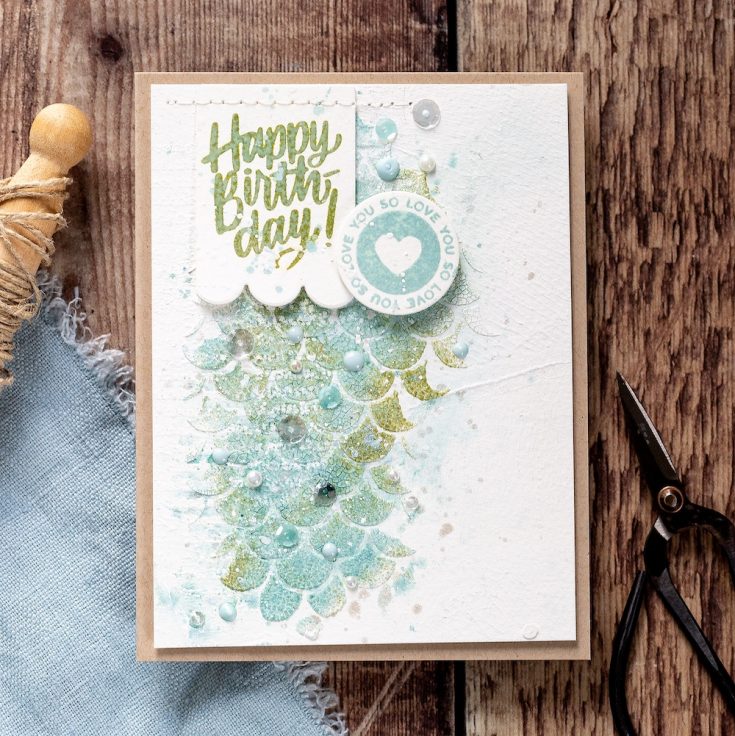
For the sentiment, I used the Happy Days set from CZ Design and the Hexagon Greetings set from Simon Says Stamp. I used the rectangle die from the Happy Days set combined with a Hexagon Greeting and then one of the circle elements from the Happy Days set. I aligned the two stamps I was going to use in a Mini Misti and added a piece of watercolor card, the same as I used all along so the colors match. I treated the card with anti-static powder and then stamped the two greetings in Distress Oxide ink, Peeled Paint for the ‘Happy Birthday’ greeting and Speckled Egg for the ‘Love You So’ circle. I had to stamp the greetings several times to get a good impression on the textured watercolor card. As Distress Oxide ink is partially made of pigment ink, it stays wet long enough to add embossing powder over the top. You could add the matching Distress Embossing Glaze, but I just added clear embossing powder and heat set. I think the glossy greetings then match and fit in well with the rest of the card. I kept the two dies in place with painter’s tape and ran it through my die cutting machine.
As an extra nod to the sea, I took the rectangle die and die-cut the bottom with a scallop border. I stitched this piece to the card base which I’d trimmed to fit on an A2 card base and then added a piece of foam adhesive under the greeting flap for extra dimension. I aligned the ‘Love You So’ circle with more foam tape and then splattered the sentiment grouping with Distress Oxide ink and white gouache as it was looking all a little bit too clean and stark and the splatter helped it to blend with the rest of the card. I added a collection of pearls, sequins and Nuvo Duck Egg droplets and then once dry added to a Neenah Desert Storm card base with foam tape.
Well, that’s me for this month. I hope you enjoyed this tutorial. Thanks for joining me and I hope to see you next time for Doodling With Debby.
WATCH THE VIDEO:
SUPPLIES:
|


Thanks so much for stopping by, and thanks to Debby for being our guest!


Thanks for the tutorial Debbie – a lovely example of the process of experimenting and trying out different combinations- and a stunning card at the end.
Great mixed media cards, Debby. Your video was so helpful to see how your created the various results with the various media combinations. tfs-stay well.
Absolutely ADORED this. HonestlyDebbie you make craft into a proper art form. Thank you for the inspiration and carefully written instructions.
Gorgeous! Thanks so much for all the hints and ideas, Debby! As always I learnt so much!! :)
Wow, just gorgeous, great watch, stay safe love Jane x
Very interesting techniques and uses of the different products. I liked your showing the different results from each. I purchased several of the Speckled Egg Products and am looking forward to using them now. Thank you so much.
Beautiful card Debby! Seeing how you created each background is awesome!
Thank you for sharing this very informative tutorial, Debby! As always your cards are gorgeous! I love all of the texture and the colors.
Beautiful card. Thank you for the great tips.
Love all the different looks you got. Thanks for the video! Love your card!!!
I am a big fan of your creations – love the colors and look of this card – makes me want to go experiment!
I love these! Stunning results and now I need to go dig out my gesso…wonder where I put it?
I want to see more Debbie Hughes videos please!
Fabulous–love the colors and textures.
Enjoyed your video a lot Debbie!! Thanks for sharing the comparisons, and I love the end results!
This is really a wonderful comparison. Thank you. I love seeing all the little extras you added.. the scalloped tag, the pearls and extra paint splatter. You truly are an artist and your video helps some of us look more talented !
This is stunning!
Your share is the great knowledge I have gathered, you are an important person I admire, thank you
Oh, I read about your distress glass on https://trustsession.com. There was a post on how to handle stress and your glass was on this list. I’ll definitely try it.
To get rid of stress, I tried many tips from the Internet, but it did not work at all. Then I decided to buy myself cbd capsules and took it daily. In just a week, my mood improved a lot and I began to feel great. Amazing discounts on supplements have already begun, so hurry up to visit the website of BlessedCBD if you want to get rid of stress.
Greetings!! If you’re seeking high-yield cannabis strains for your cultivation endeavors, I recommend exploring the high yeild cannabis seeds available at https://askgrowers.com/seeds/high-yield. These strains are specifically bred to produce generous harvests, ensuring a plentiful supply of top-quality buds. Take your time to research and select the strains that align with your preferences and growing conditions. Happy cultivating, and may your yields exceed expectations!
Check out https://beunspun.co.uk/ CBD Shop