Doodlebug Birthday Card
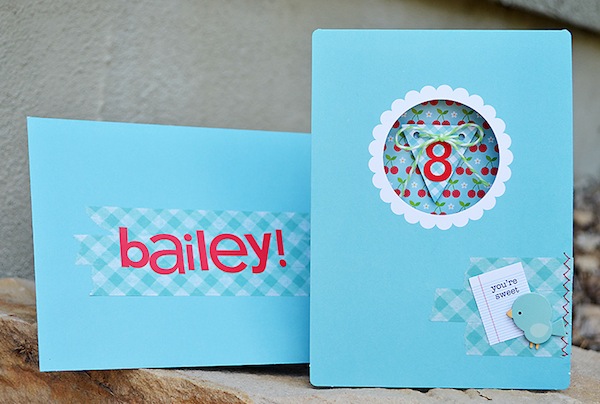
Hi bloggers! Happy Sunday to you!! I’m pleased to bring you an adorable Birthday card & matching envelope made primarily with Doodlebug products by Wendy Sue Anderson!
She was sweet enough to also provide a short tutorial so you can create your own personalized card, too!
Enjoy!
I love personalizing cards for my kids and my nieces and nephews. While creating individual and unique cards could be very time-consuming, using pre-made card bases and coordinating embellishments makes this process not only fun, but quick and easy too! I’d love to share one of my recent cards with you! Here’s how I created this card.
-
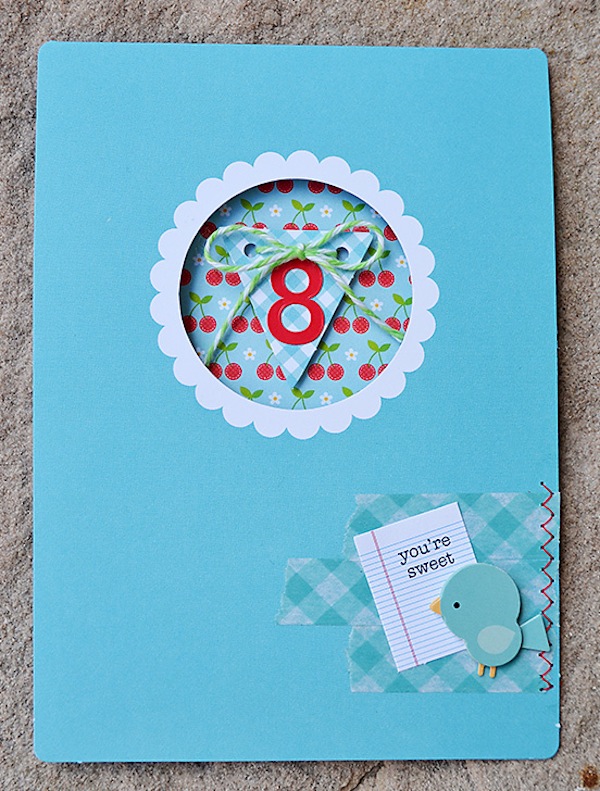
I used a card base from Doodlebug’s Create-A-Card collection as the base for my card.
-
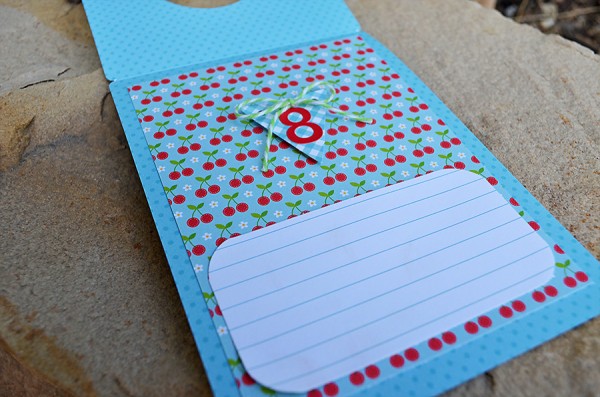
Next, I lined the inside of the card with patterned paper from the 6×6 fruit stand pad.
-
In order to have some “clean” writing space, I trimmed down a card from the fruit stand simply put 4×6 album inserts pad – rounding all four of the corners with a punch.
-
To add the number flag, I simply punched out a single piece from the fruit stand mini banner set, tied twine through the holes, and placed a number sticker on the flag. I used a foam adhesive dot to place the flag in the center of the pre-made circle opening on the card.
-
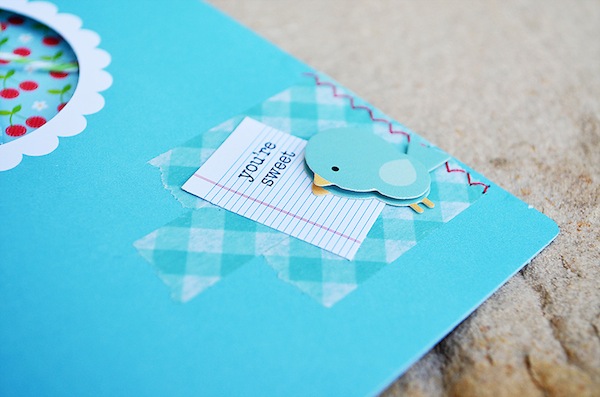
To embellish the front of the card, I ripped three strips of gingham washi tape and placed them along the edge of the card. I added some machine stitching with red thread as well. Finally, I added a small bird doodle-pop sticker and a “note” from the mini love notes collection directly over the washi tape.
And how much more fun is a cute card when it arrives in a cute envelope?!? To create this cute envelope, simply add three strips of washi tape to the center of the envelope front (the envelope also comes in the Create-A-Card pack) and add letter stickers to spell out the recipient’s name.
Quick and easy and sure to make someone feel extra loved on their special day!
Supplies:
 |
 |
 |
 |
 |
 |
 |
 |
 |
 |
 |
 |
|
 |
 |
Thanks so much to Wendy Sue for guesting today!


So cute!! Love cards with decorated insides!! And that little bird is adorable!
This card is so cute! I’m definitely using this sometime.
So cute. Love how all the elements are working great together.
Such a delightful cute project!!!
totally adorable, I love Doodlebug ♥
This card is so cute! I love the colors you used and the little bird is so sweet.
Very cute!! Love the washi idea!
So adorable! The little bird is so sweet.
This is such a sweet card! Love the use of washi tape and the cute bird :)
So cute and colorful and I like the use of washi tape.
Very cute!
Absolutely adorable! Your nieces and nephews must LOVE the cards you create for them! Awesome Aunty for sure! Thanks for the tutorial and especially the shopping list; you’ve made the whole ‘creation’ so streamlined I’ll *have* to give this a try! Thanks for sharing and inspiring!
c
Such a sweet card. I love the blue. The matching envelope is a great idea.
TWEET little bird!
What a sweet card!!
Love that little bird. A cute card I’m sure Bailey was thrilled.
This is so cute. I just LOVE the color and I also just love that little bookpage on the bottom of the inside. What a clever idea. Everything looks awesome and fit sooo perfect together on this card. it´s gorgeous work.
Have a wonderful week ahead now everyone and lots of great fun too.
This is a great idea for cards for kids! I will “case” this for sure.
This card is so sweet love that you decor the envelope too.
cute card – love the little bird
love today’s card thanks for sharing with us
What a cute card today thank you for sharing it with us today.
lovely little card and envelope too TFS !!!
Such a sweer card. Love the popped up flag on the inside and the cute bird on the washi tape. Great effect, and the matching envelope is a great touch!
This birthday card and decorated envie is amazingly cute. I pinned it for future reference!!
This is so happy! Love the use of washi on the front.
This is so cute! I love how you’ve carried the notebook element onto the inside.
Very cute card.
Bailey is lucky to get such a cute personalized card! I think it is adorable.
This card is just too adorable!
CUTE CUTE CUTE! I love this card and envelope set. TFS.
D~
http://designsbydragonfly.blogspot.com
A lovely card. I like the bird/tape/stitch detail and the window then opening to that lovely interior. Gorgeous
Bird very charming!!!)) Great postcard!
such a fun card! Love the surprise inside!
What great colours, just love the simple look!
What a great card for a child and I love the inside and the envelope. It’s perfect!
This card is soooo…cute! I loved the colors and the cute little bird and the personalised envelope. Thank you for sharing!
Adorable card! Love the way all the different pieces go together. Creative use of washi tape, too.
Adorable project, perfect for my niece.
So super cute! I love DB stuff!
This is so adorable! Love that cute bird and the patterned paper.
Adorable card! Love that sweet little bird, and the matching envelope!
This is a lovely birthday card!! Love the washitape and the little tweety!
xxx Marianne MW
What a lucky kid! Good idea for the envelope.
Such a sweet card, love that little bird…
Such a cute card, love the paper patterns!
Beautiful, yet simple, card! LOVE it!
Oh my gosh…. So cute! I love the bright bold colors! Thanks for sharing such a great card! I just get sooo much inspiration from SSS blog! Absolute FAV!!
So cute! Love those letter stickers.
So adorable & so simple!