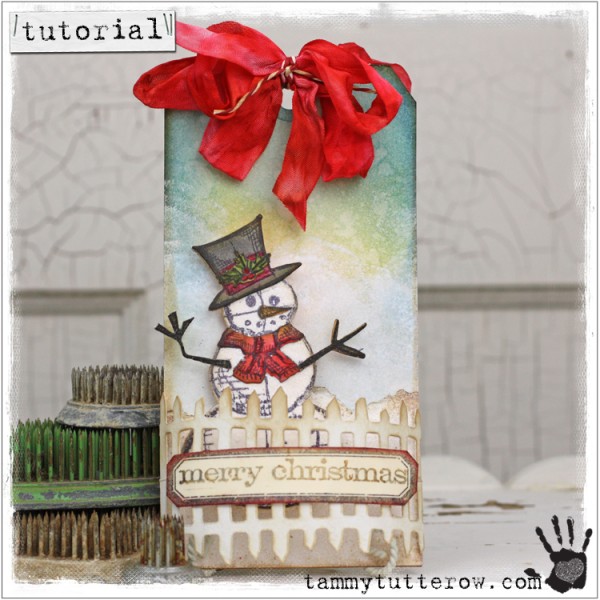
Die-Cember™ Snowman Tag
Welcome to Part 2 of Tammy Tutterow’s Die-Cember™ Snowman Tag tutorial! If you haven’t seen part one yet, be sure to check out Tammy’s blog! :)
Enjoy!
I am a die hard fan of die cutting. I love that with a few great shapes that I can cut whatever I need when I am crafting. With a great flower die, some ink and an assortment of surfaces, I always have the perfect flower embellishment on hand. Or maybe it is the perfect label, photo frame, or even tag shape. Since I also love stamping, having dies that work with my favorite stamp designs makes my crafty world a pretty happy place to be!
Today I want to share a tag with you that I created to celebrate the fun part of winter- playing in the snow and building snowmen! There are lots of steps to this tutorial so I decided to share it in two parts. To learn how I created the inked background and textured snow using embossing powder, visit part one on my blog. Part two of the tutorial showing how I created the die cut elements is shown below.
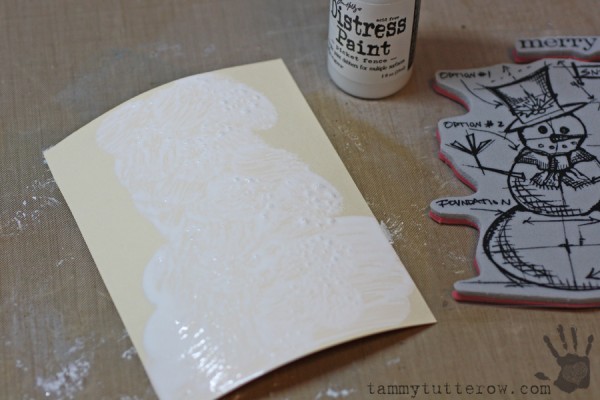
Cut a piece of manila cardstock roughly this size of the snowman image.
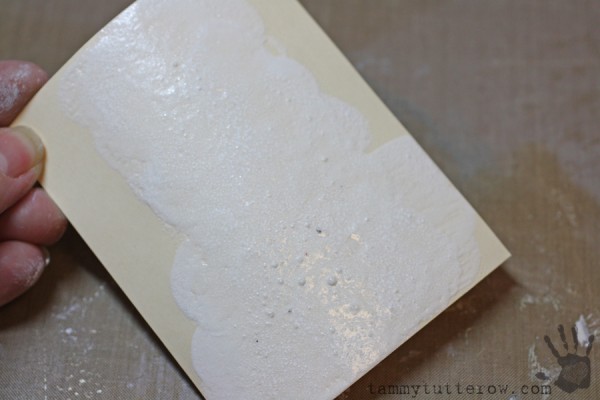
Create a Distress Paint and embossing powder background as shown in part one of the tutorial. For the snowman, I omitted the glitter layer (the third layer) so that it would be easier to stamp on.
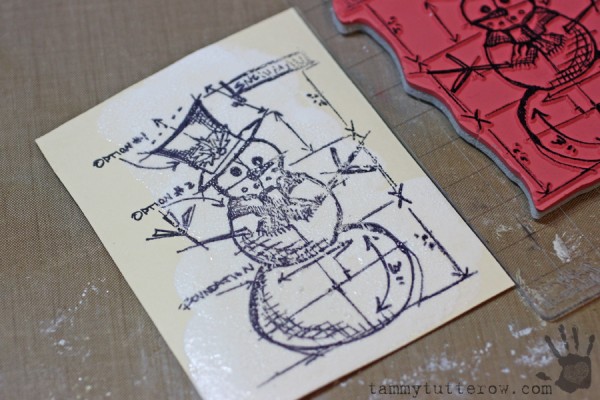
Stamp the snowman image on the prepared background using Jet Black Archival Ink.
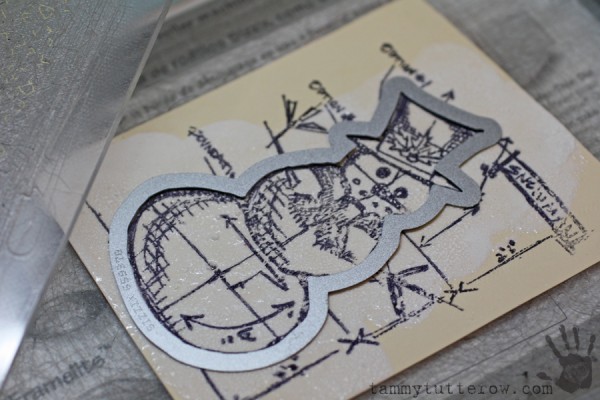
Use the snowman shaped Framelit die (the one without the arms) to cut out the the snowman shape.
Using the new Sizzix Magnetic Platform with the Framelits die makes cutting the shape out quick and easy. No more post-it notes to keep your die in place!

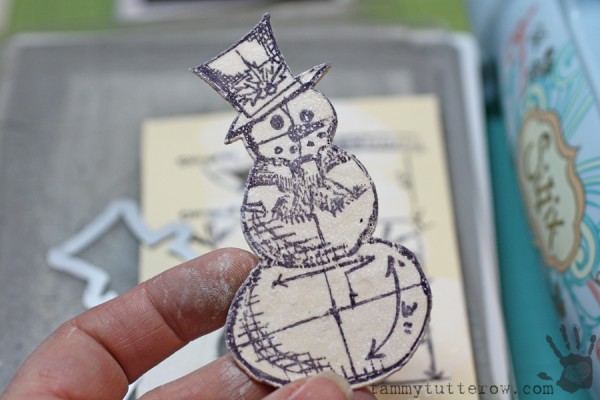
Stamp a second snowman on a piece of manila cardstock. To color my pieces quickly, I used my ink blending tools to apply color to the three shapes I planned to cut out. I wanted really soft color so I used the ink that was already on the foam pads without re-inking. Be sure that your stamped image is dry before using the foam to apply color, otherwise it can smear. A quick blast of heat from a heat tool will do the trick.
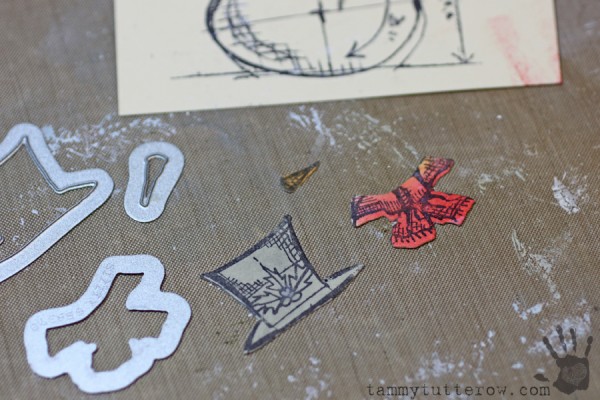
Use the included Framelits dies to cut out the carrot, scarf, and hat.
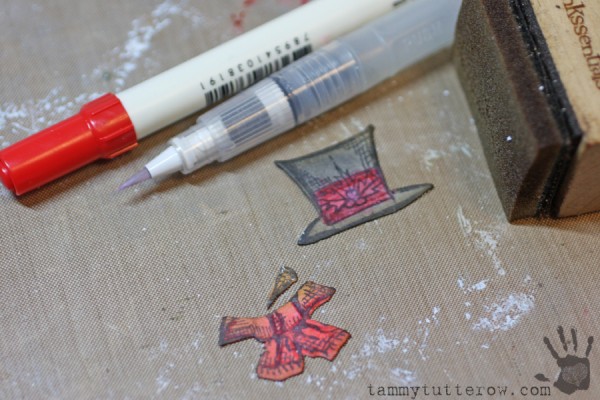
Use an ink blending tool to ink the edges of the pieces with Vintage Photo Distress Ink. Use Distress Ink markers to accent details on the images.
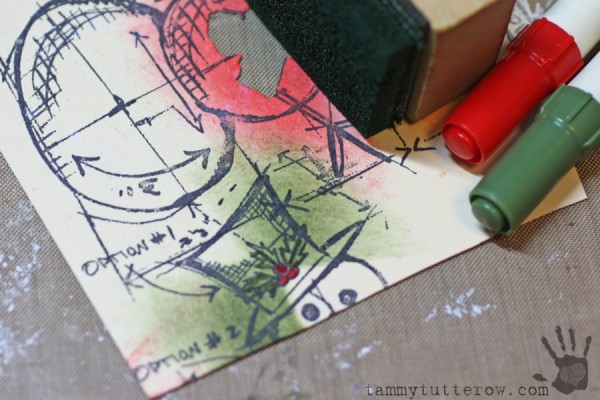
Stamp the hat portion of the image on manila cardstock. Use an ink blending tool with green ink to color the holly leaves. Use Distress Ink Markers to accent the leaves and color in the holly berries. Cut holly leaves and berries out using the matching Framelits die.
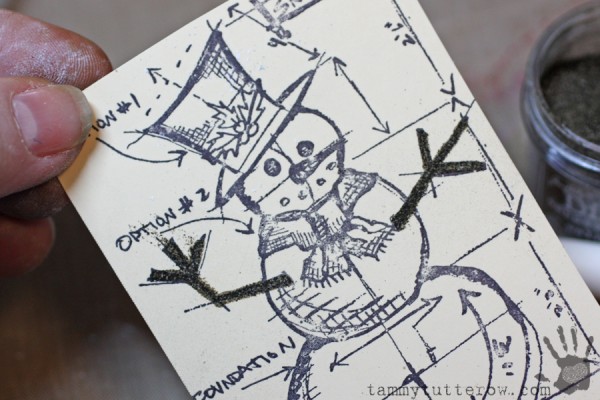
Stamp a snowman again on another piece of manila cardstock. Use a Ranger Inkssentials Embossing Ink Pen to color in the arms with clear embossing ink. Apply Walnut Stain Distress Embossing Powder to the ink. Use a heat tool to melt the embossing powder.
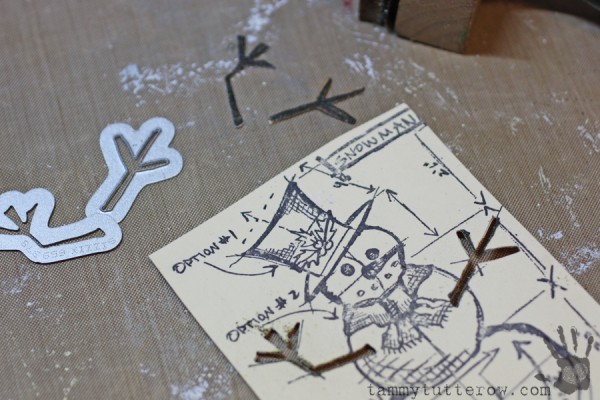
Die cut the arms using the matching Framelits dies.
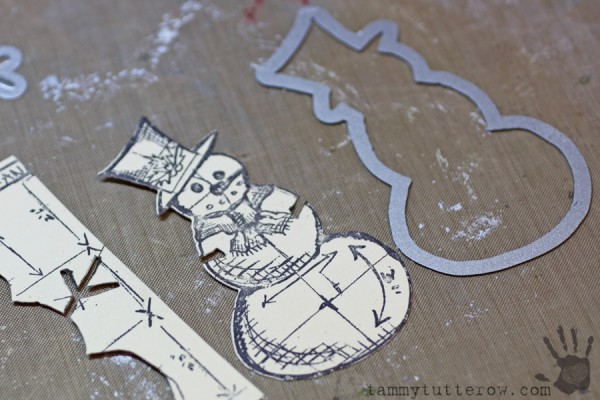
Use the snowman shaped Framelit die (the one without the arms) to cut out the the snowman shape from the scrap. Use this piece as a base to make the assembled snowman more sturdy.

Adhere the base snowman to the back of the stamped snowman. Adhere the hat with holly leaves, scarf, nose, and arms to the snowman.
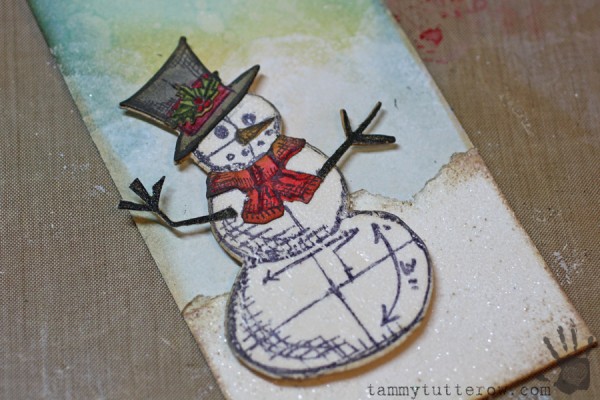
Use adhesive foam squares to adhere the snowman to the background created in part one of the tutorial.
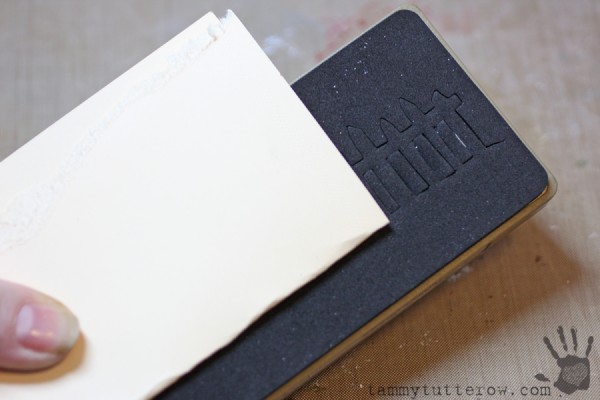
Cut a piece of manila or heavy white cardstock so that it is two times the size of the size of the Tim Holtz One the Fence die (approximated 5 1/2″ x 3″). Fold the cardstock in half so that it is the size of the die. Place the fold of the paper on the die just above the bottom edge of the design. Die cut the piece of cardstock.
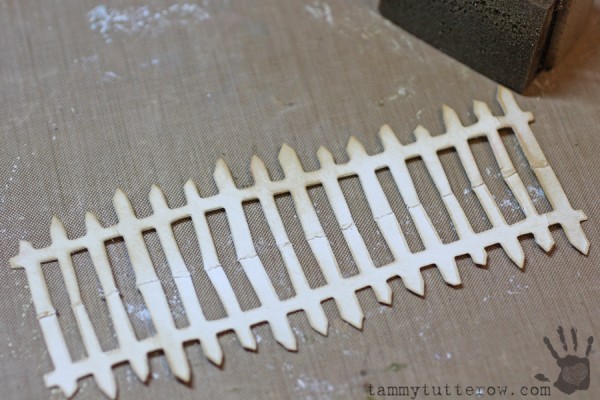
Unfold the cardstock. Die cutting the fence on the fold will create a taller fence that has both a top and bottom edge. Using an ink blending tool to apply Vintage Photo Distress Ink the the edges of the fence.
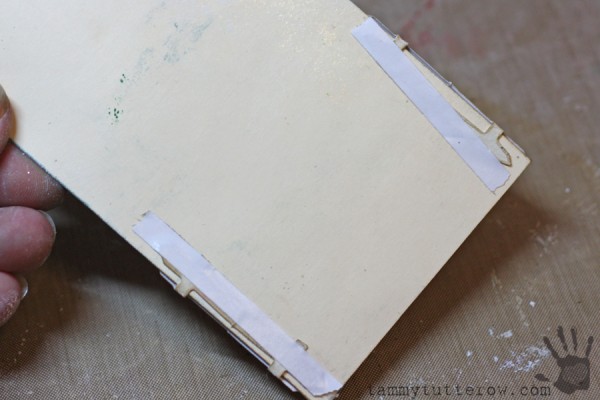
Adhere the two end pickets to the back side of the tag.
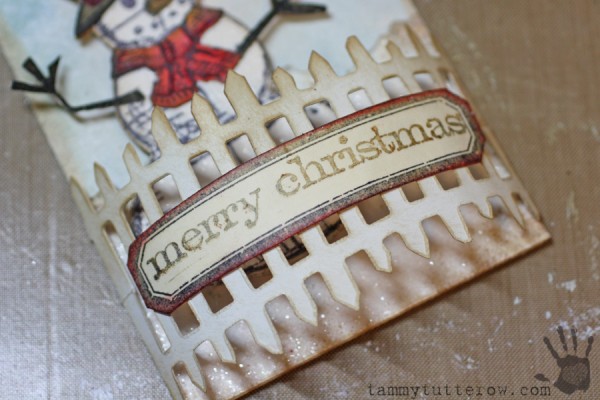
The fence will curve outward on the front of the tag creating lots of extra dimension! Stamp the label and sentiment from the set onto manila cardstock. Adhere the stamped label to the front of the fence to hide the folded edge in the fence.
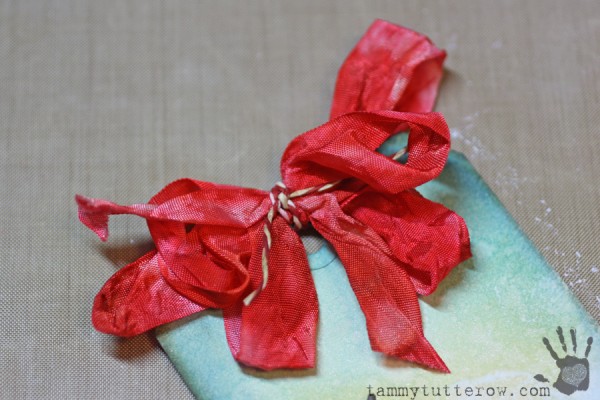
Dye a piece of Crinkle Ribbon using Distress Stains or Inks. Tie a bow with the ribbon and attach to the top of the tag.
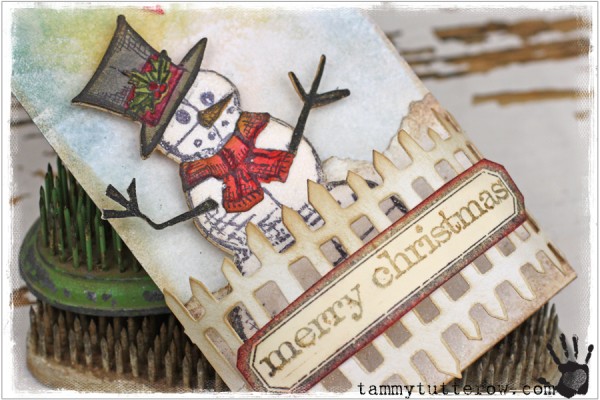
I hope you enjoyed seeing how to create this fun dimensional snowman scene! I think it is such a fun little inky project. This little snowman makes me smile! I love the way all of the techniques in this project combine together to create so much texture and dimension. I plan to hang this tag on my Christmas tree. I can’t wait to see how the lights reflect on the glitter in the snow!
SUPPLIES:
 |
 |
 |
 |
 |
 |
 |
 |
 |
 |
 |
 |
|
 |
|
|
|
|
 |
 |
 |
|
 |
 |
 |
|
 |
|
|
 |
 |
 |
|
Thanks for reading today, and thanks again so much to Tammy for this gorgeous tutorial! I hope it inspires you to get crafting with your dies!

Blog Candy Alert!! Follow our blog via email and comment on this post for a chance to win a special blog candy!


I always love looking at filling in colors, cus I’m REALLY bad at them. XD
I just love this snowman tag!
Wonderful! Thanks for all the
instructions on making this
cute creation.
Carla from Utah
Fabulous tag!
What a wonderful tag!
What a great tutorial. Great idea about extending the picket fence. Thanks so much.
Gorgeous. Love that snowman. The dies make it so easy. Thanks for the great tutorial
Fabulous tag – thanks for sharing
Gorgeous tag!!!
This is such a cute tag and a great tutorial! Thank you!
LOVE how you tied the bow!
What a beautiful project!
I learned so many great techniques, thank you…I love the look you created.
love love love this tag!! loved the snowman n the picket fencing..
Wow! That’s quite the tag…thanks for the tutorial!
Wow! Love all the detail!
Oh my gosh, I love this tag! The combination of snowman, fence and distressing makes for a wonderful project!
I really appreciate all the detailed directions on this tag project. It’s super cute!
wow very beautiful work congrats
Wonderful tag! Love all the texture and dimension!!
I don’t do christmas but I love the ideas behind your tag. I love the fence doubled over and the dimension of it and how the snowman is stamped and cut. I hope to purchase some of your dies and stamps in the new year.
I love this snowman–love the die that goes with this marvelous stamp and your tutorial is great–thanks so much!
What a beautiful tag Tammy. I love the snowman. Thanks for the tutorial showing us how you made it. Love the fence and the bow and you’re coloring. Merry Christmas to all!!
This is so adorable and thank you for the great tutorial.
Great card – love that snowman.
Such a pretty tag..love the different techniques.
he is brillant
lovely tag thanks for sharing
nice tag layout thanks!!
wonderful tag design today thank you
This is one amazing card! Love your techniques!
The Tim Holtz blueprint style stamp images are some of my favorite and this is a fabulous tag!
loved how you layered the snowman
Thanks for the tutorial, lovely tag!
Gorgeous tag!
This is fantastic! Thanks for sharing.
Love the snowman!
The Tim Holtz Blueprint Stamps are on my wish list this year! Love the Snowman! Thanks for the inspiration!
Beautiful tag. I love the fence. Thanks for the tutorial.
This tag is amazing I love to fussy cut it relaxes me and the and the end result is worth it especially if the end result looks like your tag. Happy Holidays
I really like the background and how good the snowman looks when fussy-cut!
What a beautiful tag, can’t wait to make something like this.
Love your tag! Love how you bent the fence as well. Thanks for the tutorial and hope you have a wonderful Christmas too.
What a darling tag Tammy. Thanks for the tutorial and hope you have a wonderful
Christmas too.
Fabulous, love the background!
Great techniques to make this fun snowman scene.
WOW! What a gorgeous tag. Thanks for the tutorial.
As much as I LOVE that snowman, snowmen are my favorite, I’m really loving that red, red, ribbon at the top. The color is gorgeous.
Super cute! Thanks for the tutorial!
Thanks for sharing this great technique, your tag looks fabulous.