Creative Uses with Debby Hughes
Hi readers! Happy Thursday to you! I hope you’re having a great week! I’m pleased to be back with this month’s feature with Debby Hughes showing us even more creative ways to use Simon Says Stamp exclusive products!
Enjoy!
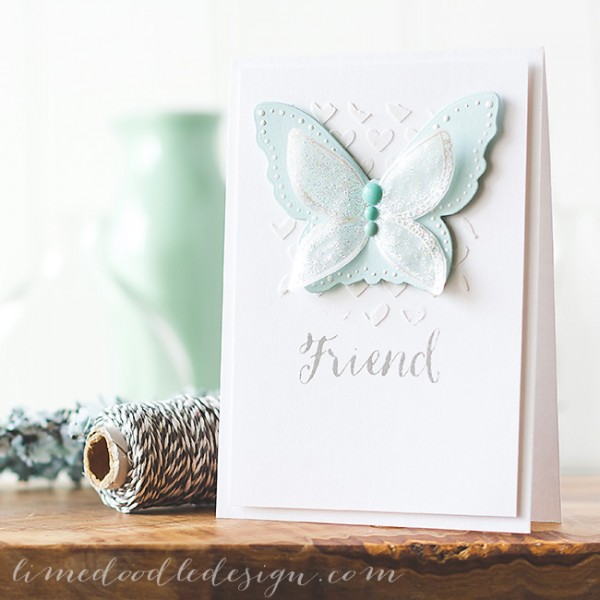
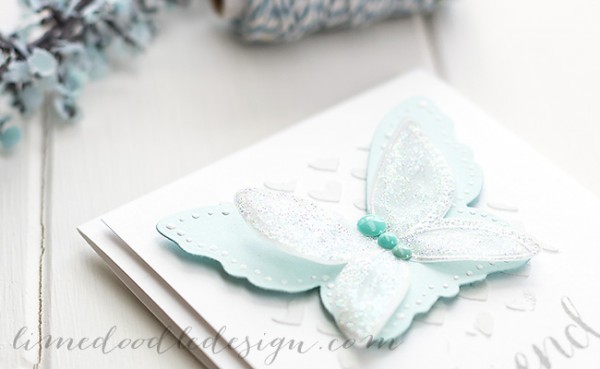
Hello, Debby here and yes, it’s time for another ‘creative uses’ post! I’m starting with this card using one of the dies from the Butterflies set cut from Sea Glass cardstock. No creativity there, but by adding those lacy wings, this clean and graphic butterfly set all of a sudden becomes soft and dreamy. Those lace wings …. they are one of the sheer overlays for the dress in the Princess set! I white heat embossed them twice onto vellum and cut them out. However, the images are both the same – ‘right wings’ in effect. But as these are on vellum, by flipping one set over and using the back of the vellum you get a ‘left wing’ and can still see the white embossing through the vellum. By the time I’d added a liberal covering of Stickles Star Dust glitter glue any apparent differences between the two wings disappeared :D A few Doodlebug enamel dots became the butterfly body and hid the join between the two wings.
After being on a water colouring kick for the last wee while I’m now falling in love all over again with my white embossing paste as a background and I love the small patterns within the Balloons Patterns stencil set. I went with a simply stamped sentiment from the Butterflies Friends set stamped in Smoke ink.
SUPPLIES:
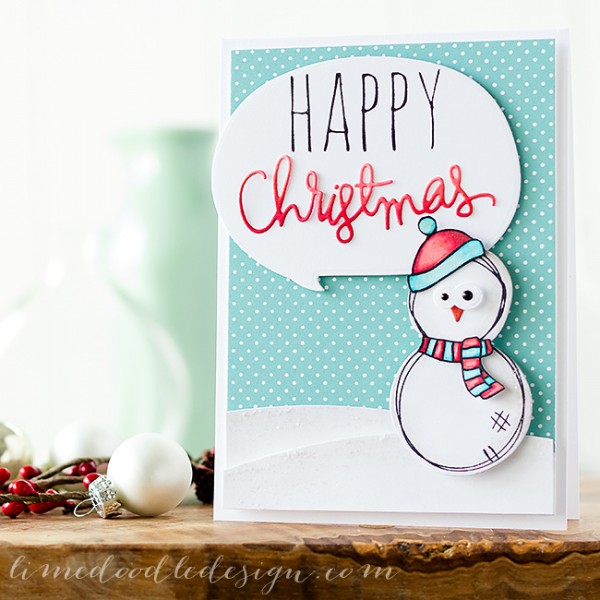
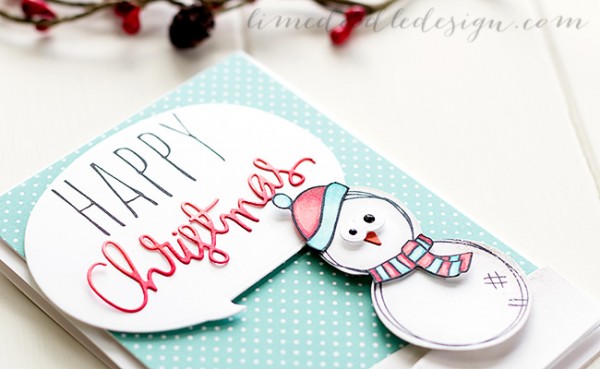
OK, don’t kill me for this one! I know it’s not Christmas for aaaaaaaages, but I also know a lot of people make Christmas cards all year round. So when I was looking at the summery Scribble Flowers set and saw not only flowers but cute snowmen then I had to go for it! The scribble lines add just the right amount of character to this guy :) I stamped two of the flowers in black on their matching die cuts, for the eyes I cut the flower center piece from the die set and added black enamel accents for the pupils. The carrot nose is the tip snipped from a Mini Star cut from Burnt Orange. To embellish I added the scarf from Stylish Simon and the hat from Furry Christmas both of which I added colouring with Copics. The snow banks are cut using the A2 card curved edge die and then foam mounted on a panel covered with some Lawn Fawn paper from their petite paper pack.
For the sentiment I used the fabulous Thought Bubble die and stamped the ‘Happy’ from the matching set. The die cut ‘Christmas’ is from the previously released Merry Christmas set cut from card coloured in an ombre pattern with Copics. Phew! I did add a little Distress Stickles in clear rock candy to the snow banks and side of the snowman too just for a bit of rustic sparkle.
Well, that’s me for this month. I hope you enjoyed my little look at stretching your supplies :) Until next time!
SUPPLIES:
Thanks for reading today, and thanks to Debby for continuing to inspire us to STRETCH our supplies!!
Blog Candy Alert!! Follow our blog via email and comment on this post for a chance to win a special blog candy!







The butterfly is stunning and the little snowman is just too cute! Thanks for sharing him, after all it is just 201 days ’til Christmas!
DELIGHTFUL and ADORABLE cards!!!
I haven’t tried embossing paste {yet} – LOVE your hearty background GORGEOUS layered butterfly!!!
SUPER CUTE snowman too – what a clever way to use the scribble flower stamps :)
THANK YOU for the inspiration!!!
Both cards are gorgeous! Your friend card is so elegant – I love butterflies! And don’t apologize for making a Christmas card in June – I make them all year long – I start in January LOL! Your little snowman is precious!
Lovely cards! I really like when you get more use out of the stamps :)
Love your use of circle stamps! Both cards are wonderful!
Wonderful cards. I like the dimension on both.
The butterfly is so elegant and looks so simple, just gorgeous! I love the snowman, it is getting hot and seeing him is literally cool! Have a great day!
Debbie’s card are always AMAZING and these are no exception! I love that adorable little snowman!!
Wow Debby! You continue to amaze with your creativity! Really like both cards, but that snowman tugs at my heart (even though I really don’t want to see snow for a very long time). :)
Great cards. Love that butterfly.
So very creative, Debbie! Love the snowman. :)
Debby is amazing! Her cards motivate me so much~
Fantastic cards! The butterfly one is my favorite. Bah Humbug on the Christmas one! ☺
I love that snowman card – especially love that it encouraged the stretching of our current stash and supplies!! Thanks so much!!
Beautiful butterfly card!
These are such cute cards! I love them!
What a cute snowman card — love it!
I really like the white embossing paste. Great cards.
So delicate.
Lovely cards.
Your talent amazes me…I hope your on the teachers list for next years Create :-)) I love the soft butterfly card n the snowman made me smile.
Great idea with the snowman, gotta try it! ❤️
Love the butterfly. It looks so delicate!
Both cards are lovely! I especially love the butterfly card!
Much too cute!!!
Debby, you rock! While working on some cards a while ago, some of your “creative” energy came to me. I was punching a library card pocket, and it occurred to me that the resulting die cut could be used as a t-shirt. Pretty cool! Cheers!
Great cards. I follow the blog by email.
Love these cards truly inspirational
Elegant butterfly card, and soooo adorable snowman! I luv him! too cute! Makes me want to make winter cards. thx.
lovely cards !!!
So cute! I love the stretch!!
Stunning card!
the butterfly card is simply gorgeous, and the snowman with his googly eyes cracks me up! :)
Gorgeous cards! Love the butterfly-TFS :)
Of course the butterfly card is beautiful, after all, it’s a Debby Hughes original! But the snowman. Oh that adorable, precious snowman! He just tickles my heart! I am going to do this card and try to find some googlie eyes for him! My grandkids will love him!!! Thanks Debbie.
Love the butterfly card and even the techniques on the snowman card, but I DON’T want to think about Christmas yet!
LOVE the non-traditional use of color in her Xmas card. Especially love the butterfly card.
Butterfly wings from a skirt overlay- a-mazing. How very clever of you. And your snowman is adorable.
Love those delicate butterfly wings! And the hearts in the background. Awesome cards! Thanks for sharing.
Katie B.
Adorable cards. I just love that butterfly. The snowman is just so sweet.
Clever use of the stamps for the snowman and what a gorgeous butterfly. Very creative!!!
<3 J
jwoolbright at gmail dot com
HerPeacefulGarden.blogspot.com
That butterfly is gorgeous and the snowman is so cute. Great inspiration.
Love these cards, Debby. Your creativity is mind-boggling.
The Cricut is a die-cutting machine for creating crafts of all sorts. Go to cricut.com/setup and check out the materials you can cut with your Cricut machine. For such a big investment, you cannot afford to lose your way while setting up Cricut. And that is why we have gathered the steps for you. From setting up the machine, setting up the cutting mat, cleaning the mat to downloading the design software, cricut.com/setup is the only answer.