Crafty with Caly: Sprinkling You with Love
Hi friends! Happy Saturday! We’re delighted to bring you the latest edition of our bi-monthly series Crafty with Caly with Caly Person showcasing this sweet and dimensional love card! Be sure to watch the video for all the details, and enjoy!

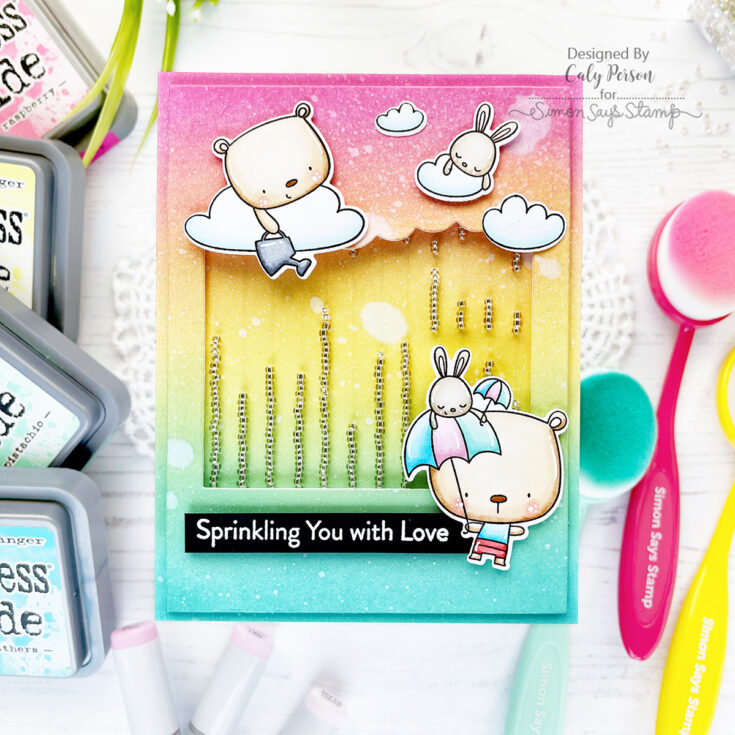
Hello, Friends! It’s Caly with you today and I’m so excited to share my fun rainfall card with you today using the Sprinkling You With Love set from My Favorite Things. rainfall cards are fun and easy to make and add such a fun interactive element for the recipient.
In my video today, I share how you can use dies to create your rainfall card, or you can use what you currently have. Be sure to check out the video to see how it’s done!
WATCH THE VIDEO:
I stamped and colored the images from the Sprinkling You With Love set using Copic markers and set them aside before working on my background. The background is layered with two similar ink-blended panels. You can certainly make it with just one ink-blended panel, but I didn’t want any white to show through when lifting the interactive top panel to adhere to a card panel or card base for dimension and to allow space for the beads to fall freely.
Copics:
- Reds: R22, R24
- Pinks: RV10, R81, R83
- Teals: BG10, BG11, BG13
- Blues: B0000, B000, B01, B04
- Grays: C2, C4, C6
- Bunnies: E40, E41, E42, E43
- Bears: E50, E30, E33, E39
- Blush: R20, R30
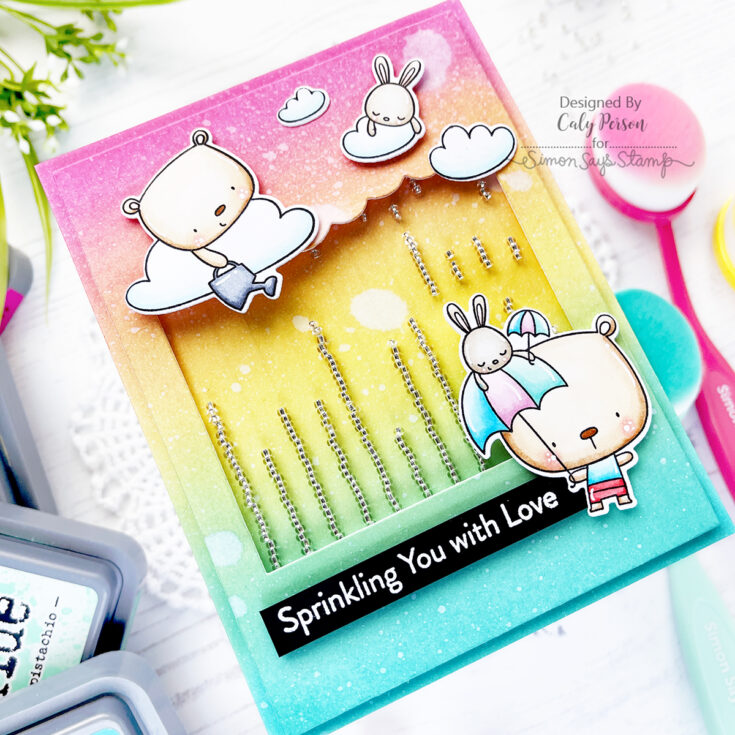
My ink-blended panels are ink-blended with Distress Oxide Inks in Picked Raspberry, Squeezed Lemonade, Cracked Pistachio, and Peacock Feathers. You can see some orange and green organically from the blending of the colors – I love it! I sprayed both panels with water to give it lots of texture. Using a frame, I used the MFT Falling From the Clouds die (you can also use the Reverse Confetti Head in the Clouds frame), I die cut an opening for the rainfall window.
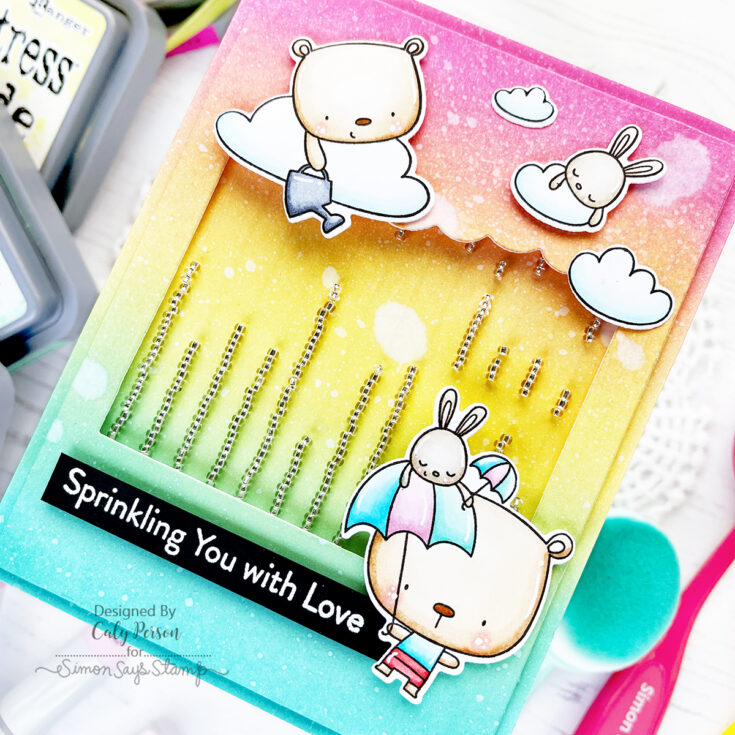
Next, I strung some Pretty Pink Posh Silver Shimmer Seed Beads on some clear thread to feed through cut slits at the top and bottom of the frame created from the step mentioned above. It’s difficult to explain, but seeing it in the video will help a lot – be sure to check that out. Once it’s strung and your window is filled beads, you can adhere this frame over the other ink-blended panel. I finished by adhering my colored images and embossed sentiment. I hope you like it! Thanks so much for stopping by today!~Caly
SUPPLIES:
|


Thanks so much for stopping by, and thanks to Caly for being our guest!


Adorable card!!!! Thanks for the how to video, Caly!!!
Oh wow Caly, this is just adorable
What a cutie-patootie card, Caly! You always rock it! ?
What an adorable card and such a great idea!
Thanks for a great video!
Such a cute & pretty card. The colours are beautifully blended together & those critters so cute. Thanks for sharing such an inspirational & easy to follow video, much appreciated x
This was one of the best videos I’ve seen lately. What an ingenious way to make something without paying allot for a special die. We have such big “stashes” that it’s always fun to use what we already have. Thanks for showing us this. This card was amazing and so cute.
Adorable! I think this has been the easiest follow along tutorial for making a ‘rain’ card! Thanks so much! It’s really beautiful too!
Absolutely adorable Caly!