Celebrate!
Hi readers! Happy Tuesday! Please join me in a BIG Simon welcome to a first time guest designer on the Simon blog, Audrey Pettit! She’s made a lovely Birthday card full of dimension and fun, and perfect to send to someone special!
Enjoy!
Hi everyone, it’s Audrey, and I am so excited to be here on the Simon Says Stamp blog today! I have got a fun birthday project to share with you. It’s a pocket-envelope, gift-card-holder card. Now how’s that for a bit of a tongue-twister?
I know you guys are probably like me, and are always in need of birthday cards, right? This month, I’ve got a very special birthday to celebrate, and instead of a gift, the girls and I have chipped in together to get a gift card for the birthday girl for a luxurious day at the spa. Now I know you can present a gift card in those plain little envelopes, but that seems a little boring. So I’ve come up with a fun alternative. It’s a pocket, and a card, and a gift-card holder, all in one.
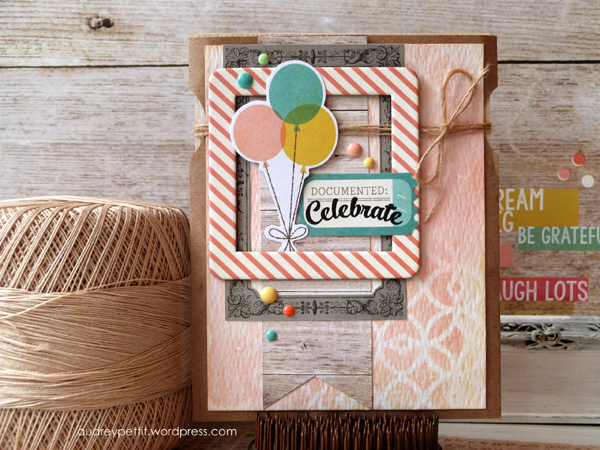
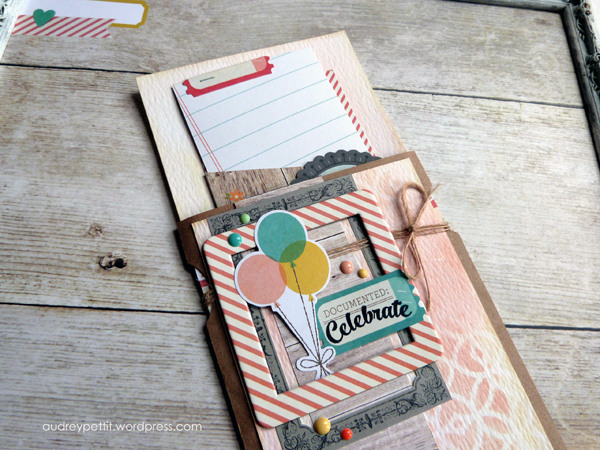
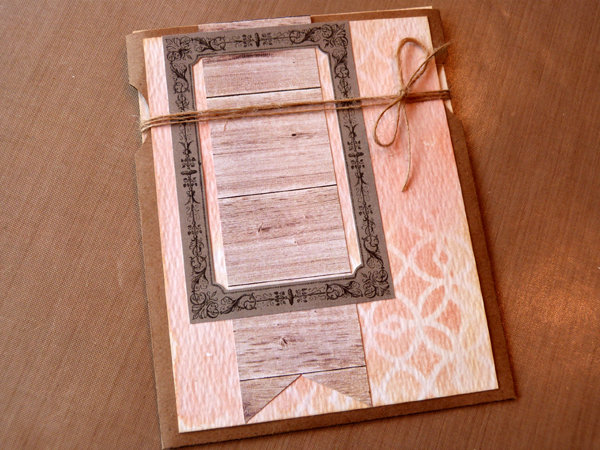
See? The pocket is made from an envelope, and the front of the pocket is dressed up like a card. Then for the inside of the pocket, there is an insert with yet another little pocket, perfectly sized for holding the gift card and a handwritten note. It looks fancy, but it’s really quite simple, thanks to lots of fabulous pre-made embellishments. And I’ve given this a touch of my own personal flair with the help of a favorite stencil and some Distress inks. Here’s a closer look at how.
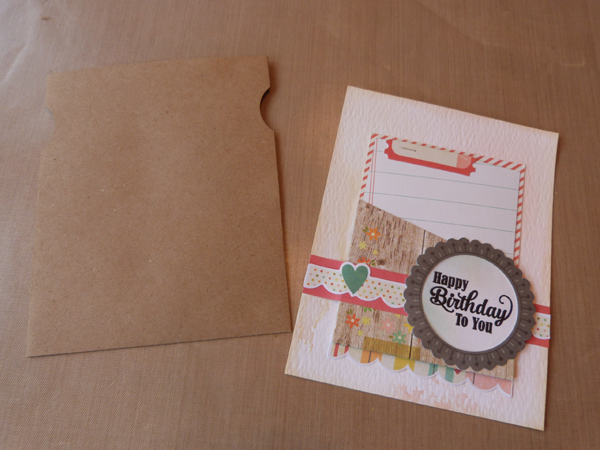
To create the pocket, seal an A2 kraft envelope, and slice off the tip of one end with your paper trimmer. Using an 1 1/4″ round paper punch, punch a slight notch on either side of the pocket, about an inch from the top. This is a small touch, but it adds a little eye catching detail, and shows your recipient there is something else inside.
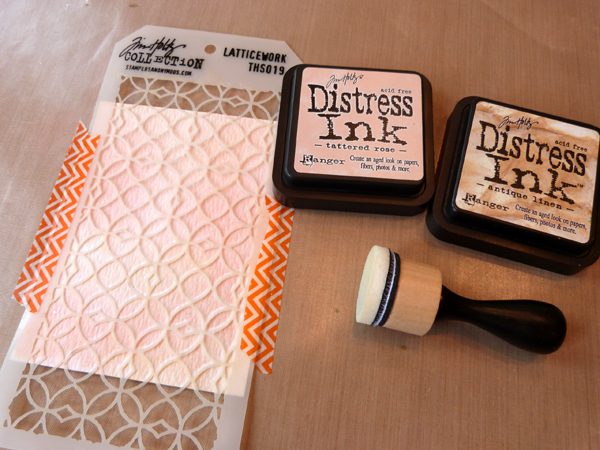
The insert is made from a piece of Tim Holtz Distress Watercolor Paper, inked with Antique Linen and Tattered Rose Distress Ink. To create this light watercolor wash, dab the inks onto a non-stick craft sheet, and mist the inks liberally with water until water beads form. Then press and drag the paper through the ink mixture. Set the paper aside and allow it to dry completely.
Then take a second piece of watercolor paper and repeat the process with the remaining ink. We’ll use this piece on the cover of the pocket.
Once the watercolor paper is dry, embellish the insert with papers, die cuts, and a pre-made pocket. I used goodies from Simple Stories’ adorable Summer Vibes collection. The pocket and journaling card are from the SN@P Pages, and are all ready to go. I cut down a 3×4 journaling card slightly on one side to fit in the pocket, and added a die cut ticket stapled with a Tiny Attacher to the top for an instant handle. Dressed up the page with a strip of 6×6 patterned paper and die cut ephemera bits. A Sizzix stamped sentiment framed in a BasicGrey Barista die cut make a quick and easy greeting.
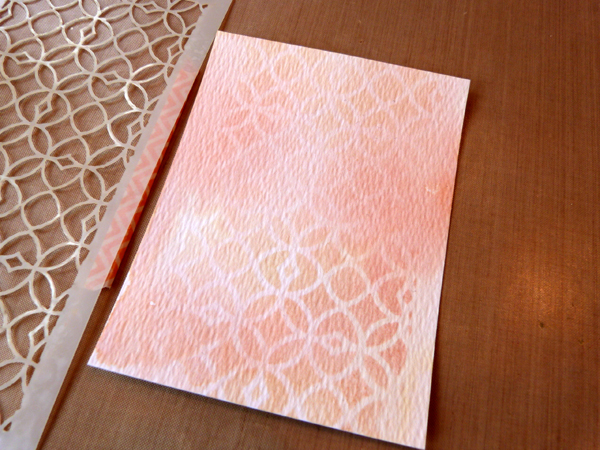
Once the cover paper is dry, trim 1/4″ off the top and one side to create a slightly smaller layer. Tape a favorite stencil onto the paper, and ink over the top using the same colors of Distress Inks and an ink blending tool. I wanted a random look, so I varied the amount of ink I used, applying some of the ink darker and heavier in some spots, and lighter in others.
Peel back the stencil and look at the pretty background you have made!
Slip the insert into the pocket, and adhere the stenciled background to the front of the pocket. I added a banner strip of Summer Vibes 6×6 woodgrain paper to the left side, topped with another BasicGrey Barista die cut frame. Then wrapped natural twine several times around the top, tied into a bow on the right side.
Then just a few final embellishments to finish things off. A Summer Vibes chipboard frame, enamel dots, and die cuts. The celebrate sentiment is from the same Sizzix stamp set used on the insert, stamped in Ranger Archival Ink in Jet Black.
I hope you’ve enjoyed my pocket card! And huge thanks to the team at Simon Says Stamp for having me today!




Fantastic card to receive and fun to make – thanks for a real winner!
Love this card and can’t wait to try it! My granddaughter will love it, too, when she receives it.
Pretty and practical. Love the layered frames. Hugz
Neat card. Really like the background you created.
What a lovely card!
Like the stenciled background…nice card!
Love that nifty envelope idea!
VERY cool, love the layering on this!!
The stenciled background turned out very lovely.
Great combination of elements !!
This is a fabulous card. I like the stenciling especially
Welcome Audrey! Love your special watercolor envelope card!! You had me at Simple Stories wonderful wood grains!
Lovely, especially the stencilling
Lovely background on your card with its fun watercolor and stenciled finish, and a special treat inside. Delightful gift.
Great idea Audrey. Thanks for sharing with us.
Awesome card.
Really great layering, also love the color pallet. Has a carnival feel to it.
So pretty, love all the layering
This is Super Pretty!!
I love seeing stencils in action!!
Very lovely card!! I love all the layers!!
LOVE this card!!Thanks for sharing:)
I love all the wonderful layers and the pocket inside a pocket is such a fun idea! TFS!
Well this was a unique layout, very nice!
Love all the gorgeous detailing on this card!
Great gift card idea.
Very lovely look, thanks for the inspiration!
Carol B
ciaoitalia2007 (at) gmail(com)
Love all the layers and the stenciled background!! Wonderful card!
Gotta get my stencils out more often! Beautiful project!
Welcome to the blog, Audrey! Beautiful project!
What a great idea! Thanks for the step by step instructions.
I love the diagonal stripes and the fabulous geometric stencil. Beautiful project!
That is adorable! The card is a gift in itself.
Thats a fun one
This is such a beautiful, detailed card!
Great i love the projects. Thanks for sharing.
Such a fun card!