Bunny Games Easter Trio by Emma Williams
Hi friends! Happy Sunday! I’m SO delighted to welcome back special guest Emma Williams to our blog today with the most adorable inspiration!! Be sure to read on to learn all of the sweet details and enjoy!

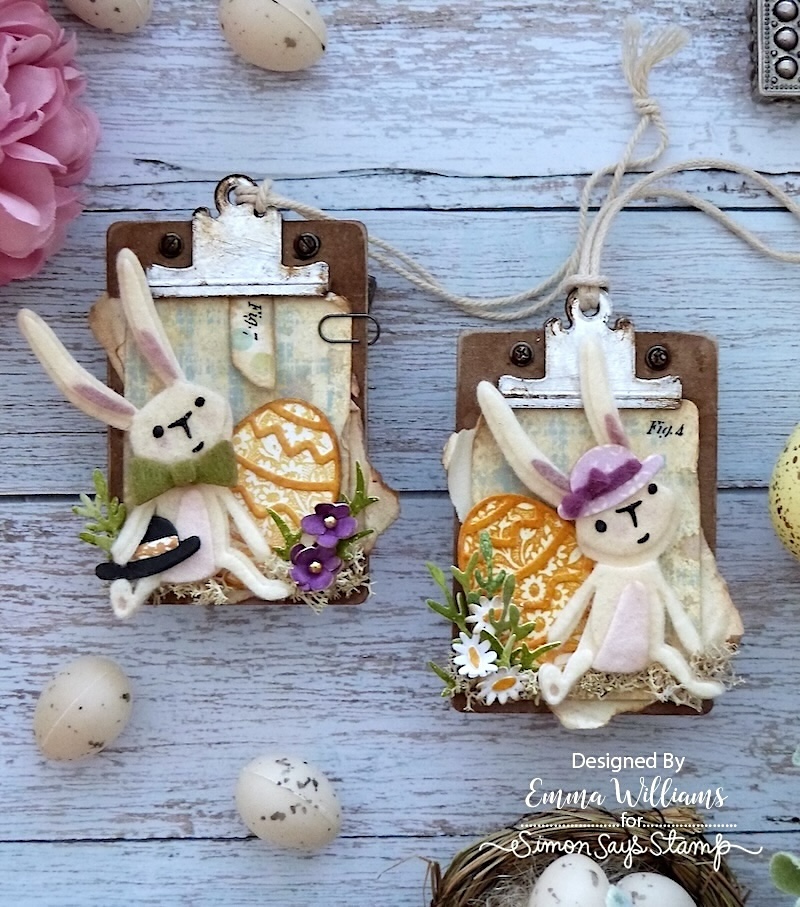
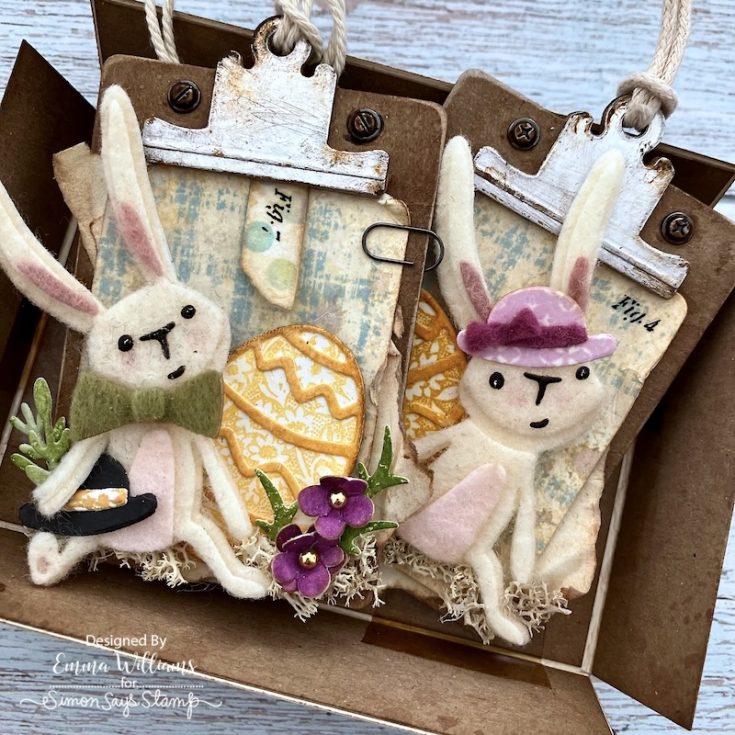
I’m so happy to be back on the SSS blog today and I can’t wait to share all the details of my latest project. With Easter just around the corner, I thought it would be nice to create a gift box, with a hidden surprise and matching gift tags. So with this in mind, and because I wanted to have some bunnies that had character and attitude, I chose to use the Bunny Games Die Set by Tim Holtz and Sizzix and combined them with other dies from Tim.
So, let’s get started and I began by making the tags and box, using a couple of Tim Holtz Sizzix dies ~ Vault Noteworthy Thinlits Die Set and the Curio Box Die Set.
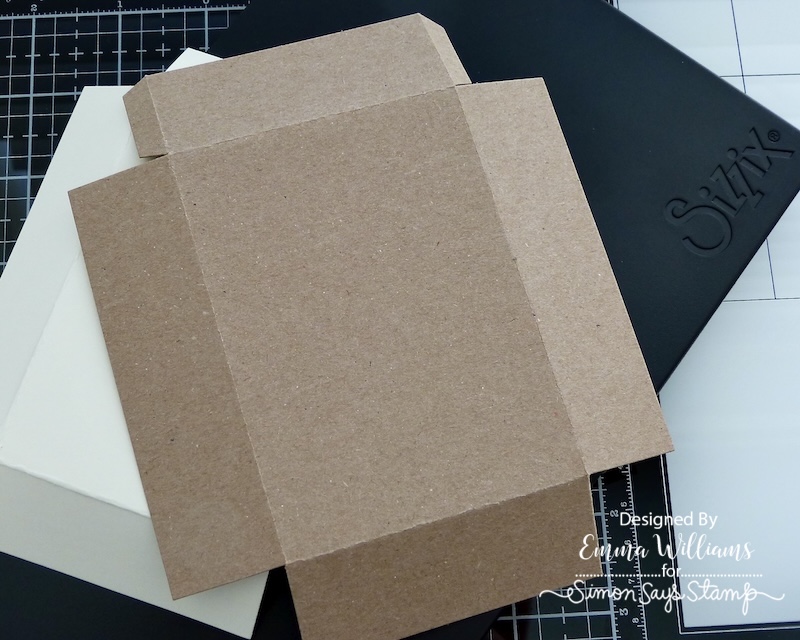

To begin with I made the treat box and started by cutting the lid from Kraft card and the base from Mixed Media Heavystock card. Fold along each of the scorelines on the base and the lid, and then attach the tabs on the lid using red line tape.
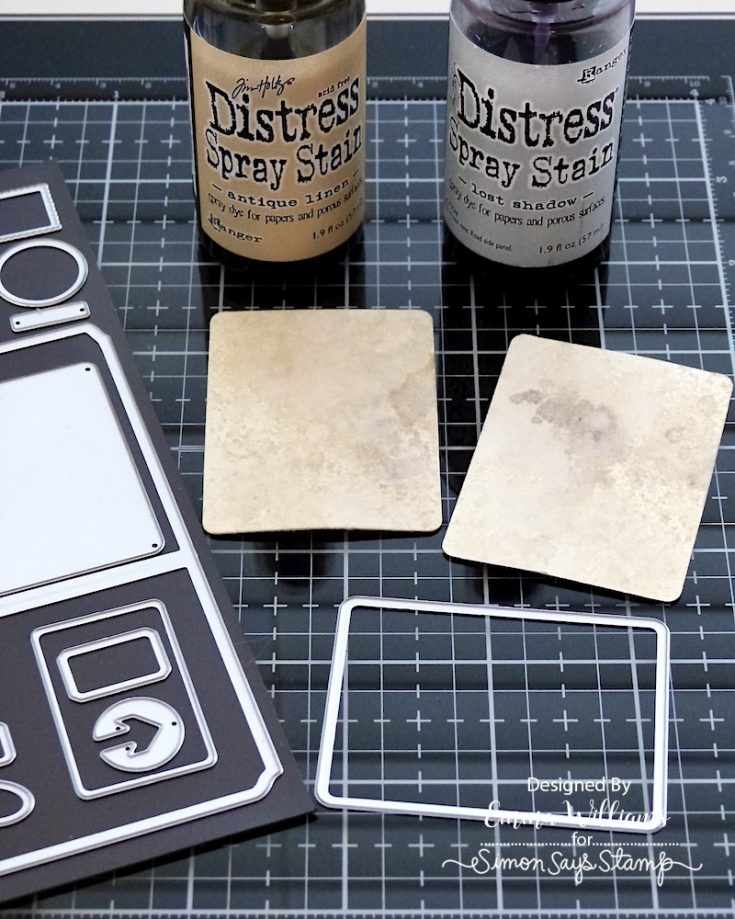
With the box complete, I moved onto the panels that will decorate the lid. For this I cut a piece of Mixed Media Heavystock, which I lightly misted with water and then spritzed with Antique Linen Distress Spray Stain to knock back the colour of the card and create a more shabby, vintage feel as a background. Heat dry the card.
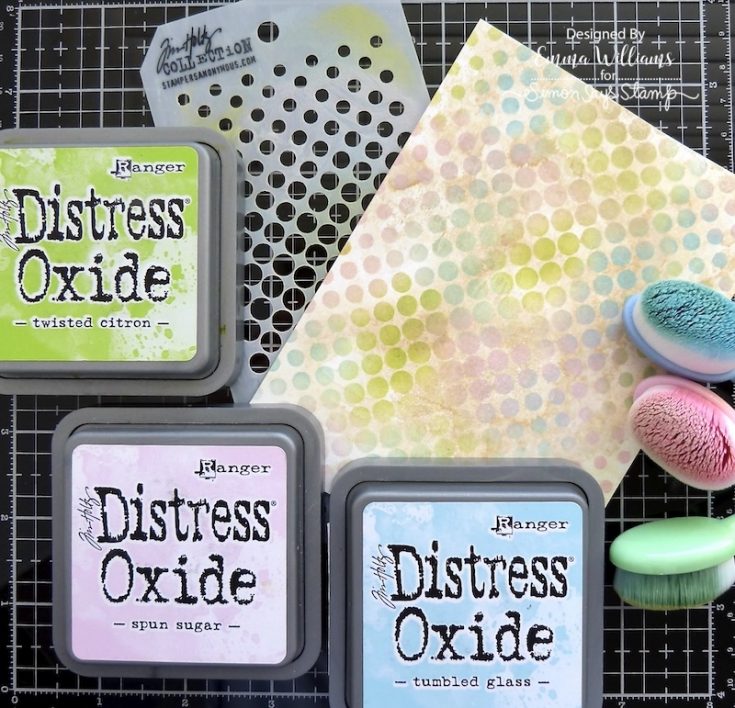
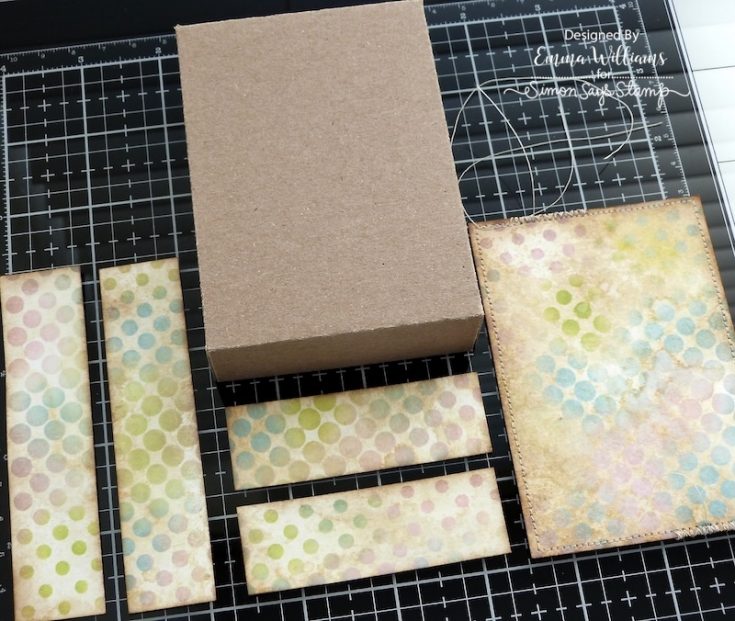
Taking the Gradient Dot Layering Stencil, I placed this over the ink stained background and used blending brushes to apply the following Oxide Inks through the stencil ~ Spun Sugar, Twisted Citron and Tumbled Glass.
Once I was happy with the blend, I cut the inked card into 5 panels, four side panels for the lid and a panel to fit the top. After inking the edges of the panels with Walnut Stain Distress Ink, I machine stitched a border around the top panel.
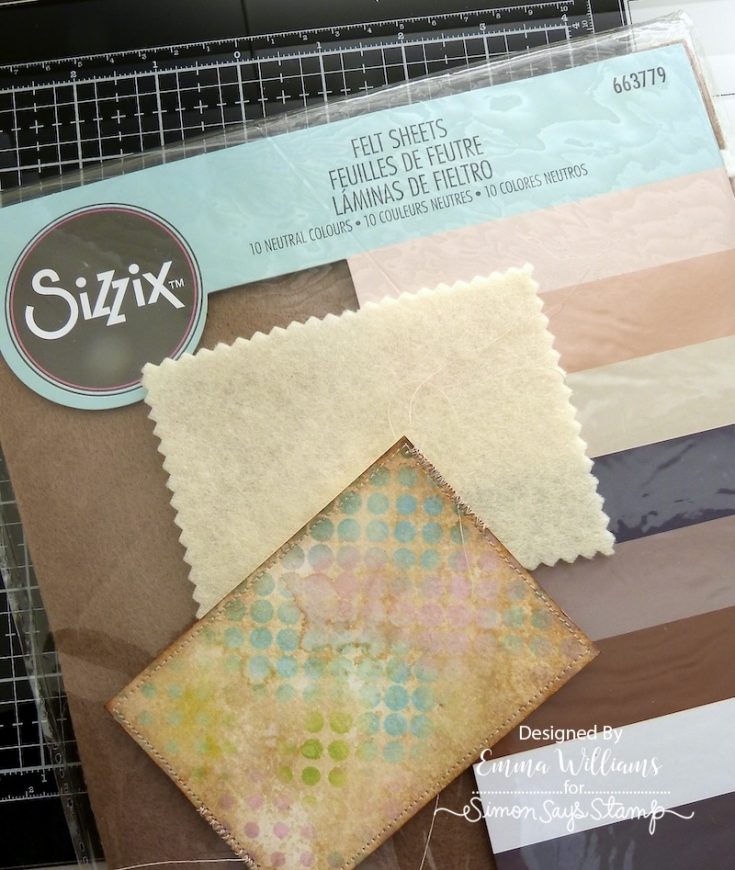
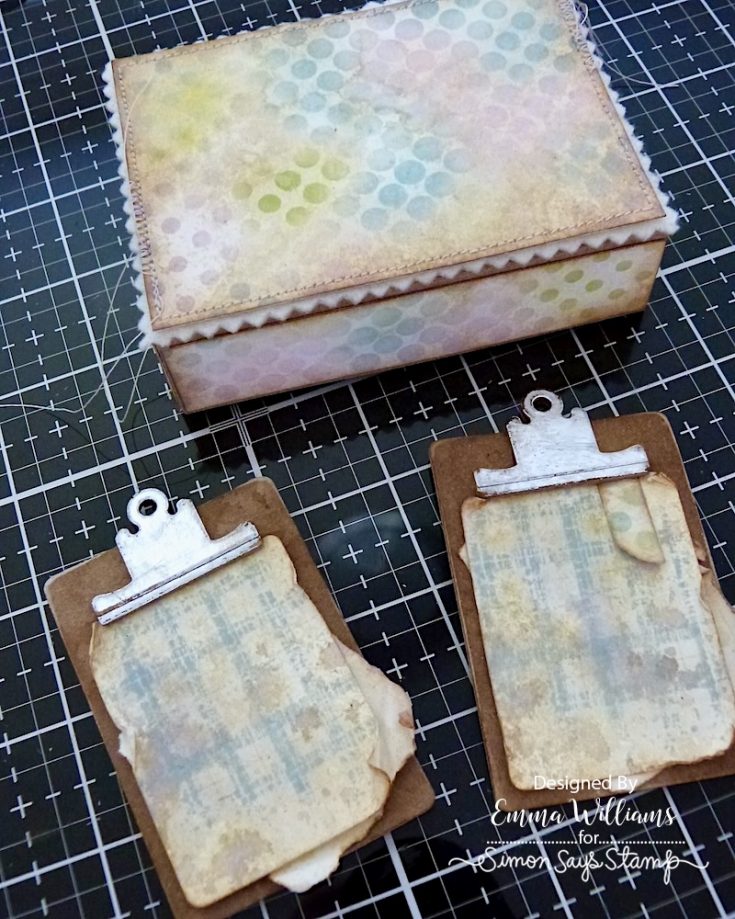
I attached the side panels to the lid with Matte Collage Medium before I attached the top panel to a piece of felt, cut with pinking shears to form the decorative edge. I then adhered this panel to the lid of the box.
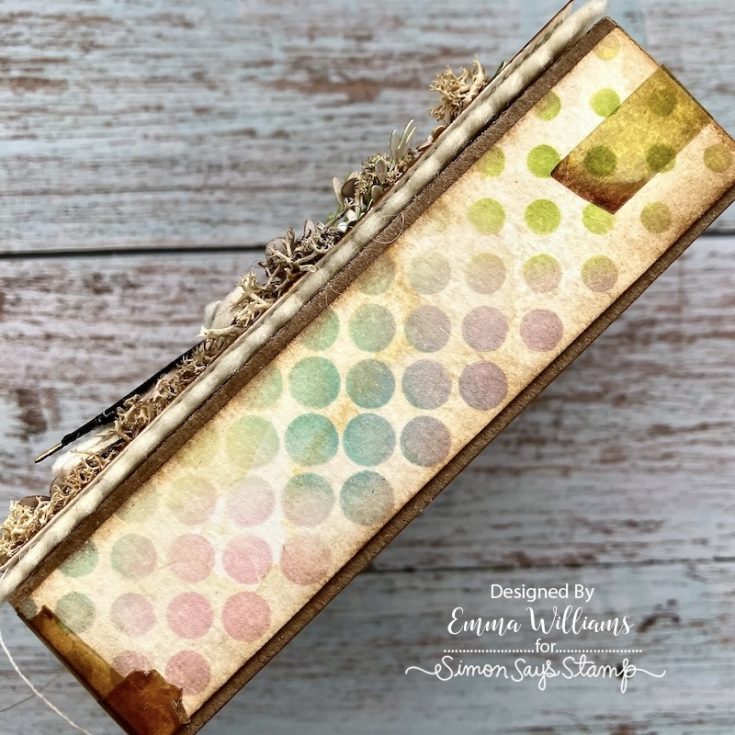
I added some Cello Stickers around the edges of the box as a small detail, and this helps to add another vintage touch to this piece.
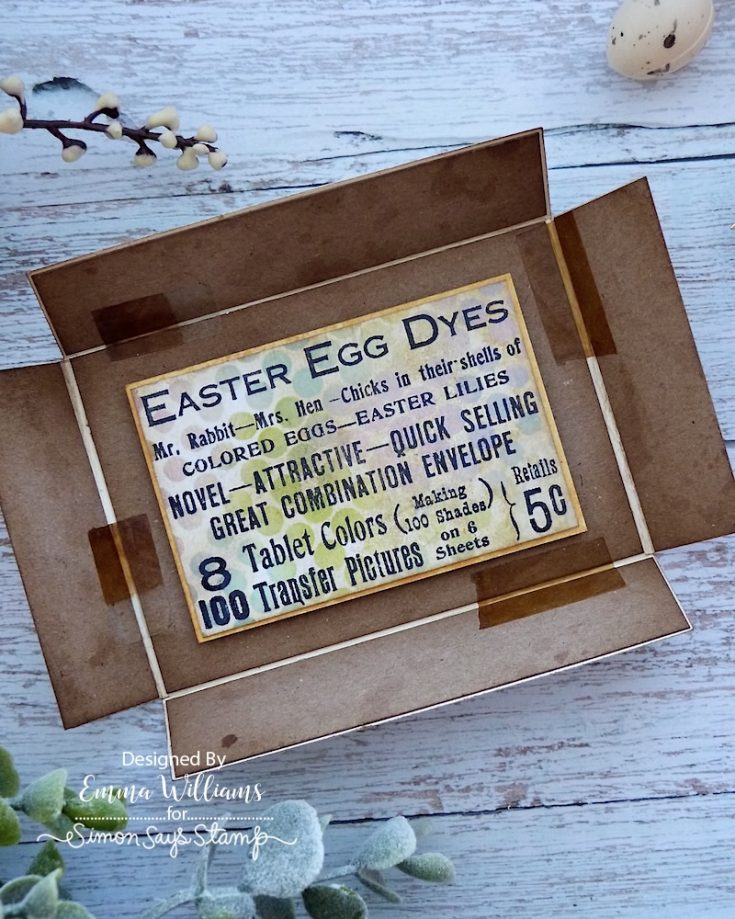
When you open the box, it contains a little surprise on the inside the box.
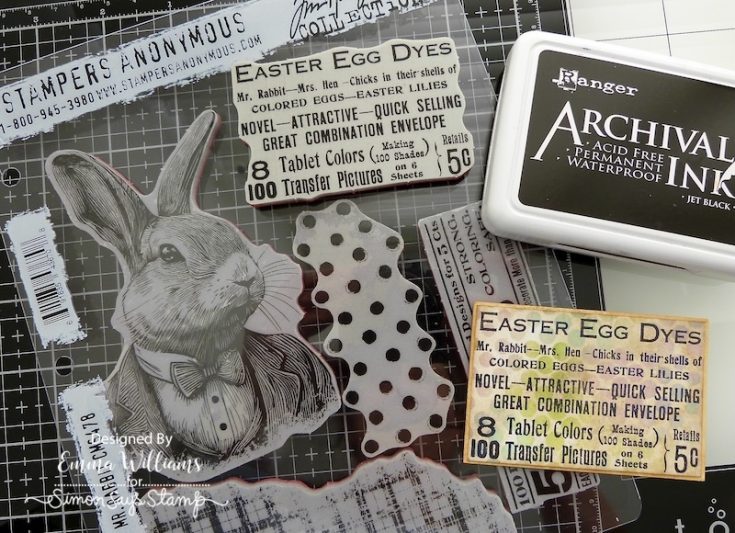
I covered each of the panels on the inside with Kraft card, inked them with Walnut Stain Distress Ink and then misted them with water to diffuse the inks. Ink the “Easter Egg Dyes” stamp from the Tim Holtz/Stampers Anonymous Mr Rabbit stamp set and stamp this onto a further panel of the stencilled card. Cut the panel to fit inside the box, ink the edges and then mount onto yellow card, before using foam pads to place it on the base of my covered box.
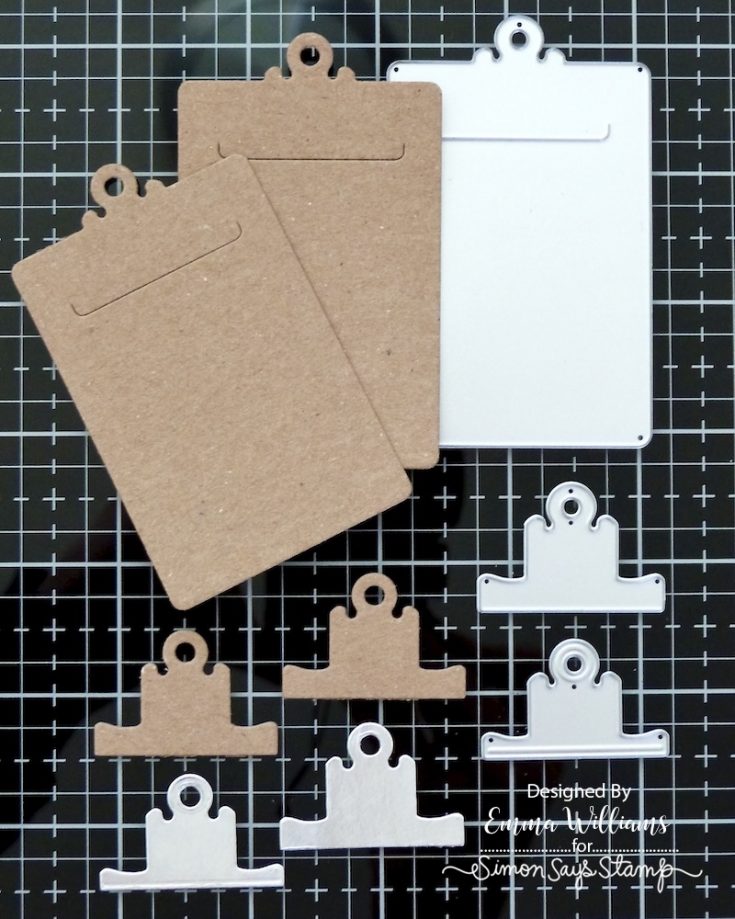
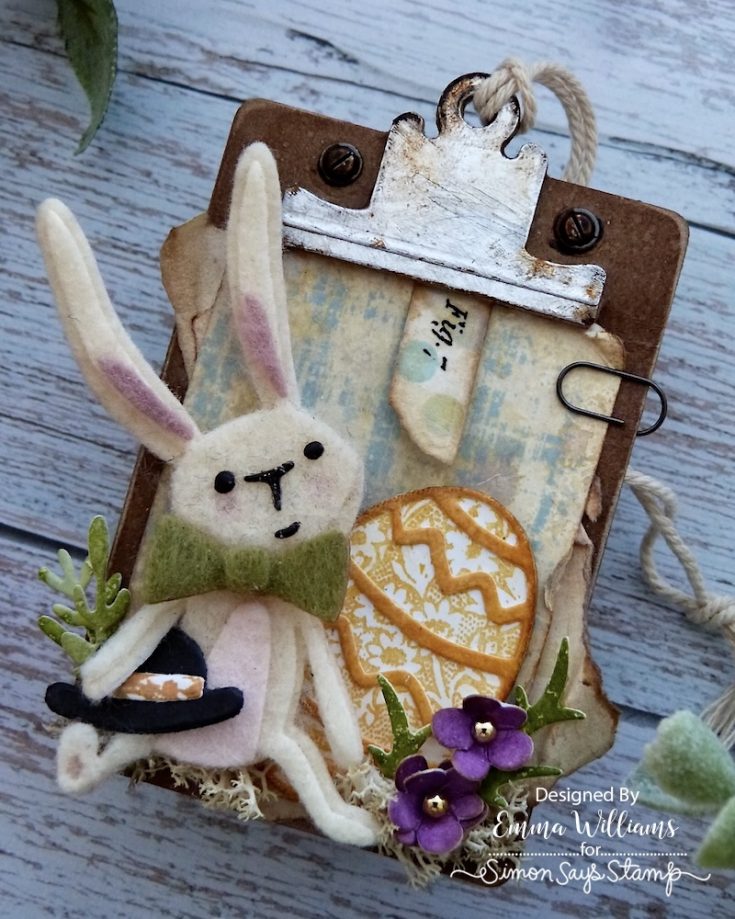
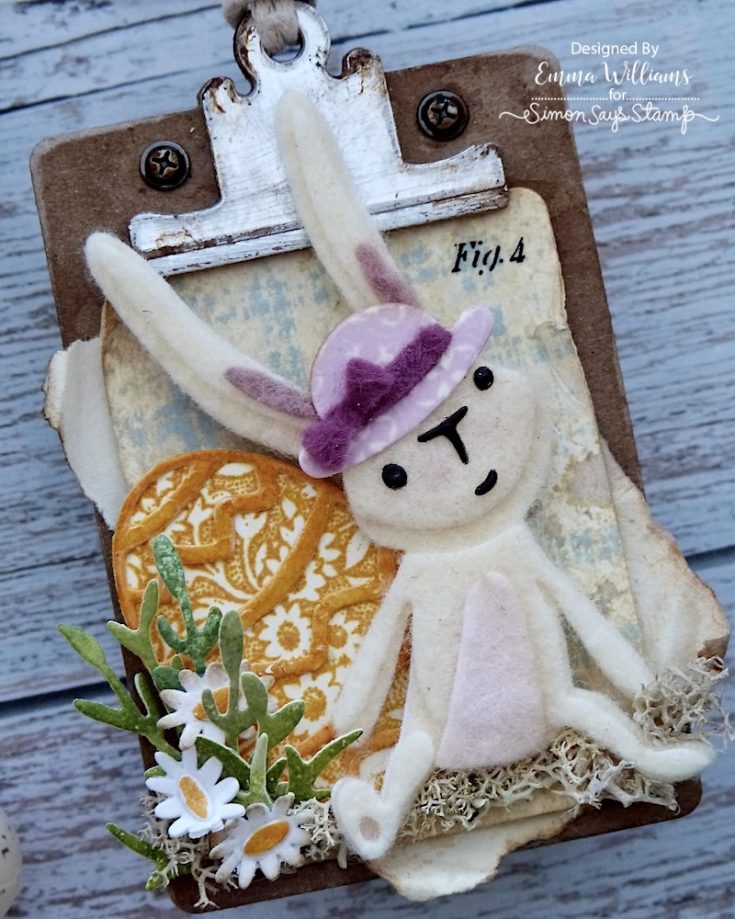
Moving onto the tags. For these I used the Clipboard die from the Vault Noteworthy Die Set andcut the bases twice from Kraft card. Adhere these die cuts over one another to form a thicker, more substantial die cut that resembles a clipboard base. For the clip, I cut two pieces from Kraft card, and two from silver metallic Kraft card. Once again, I layered these by placing the silver piece over the top of the Kraft card to form a thicker die cut.
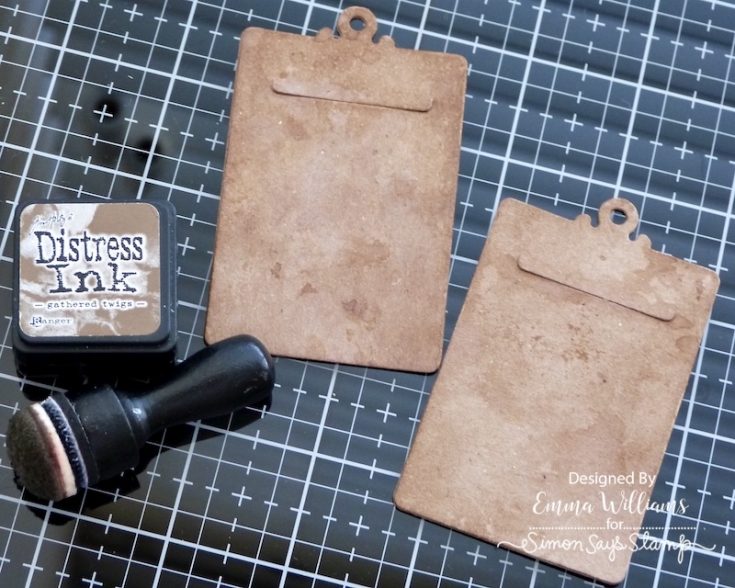
After inking the Kraft card bases with Gathered Twigs Distress Ink, I spritzed them with water and heat dried the surface.
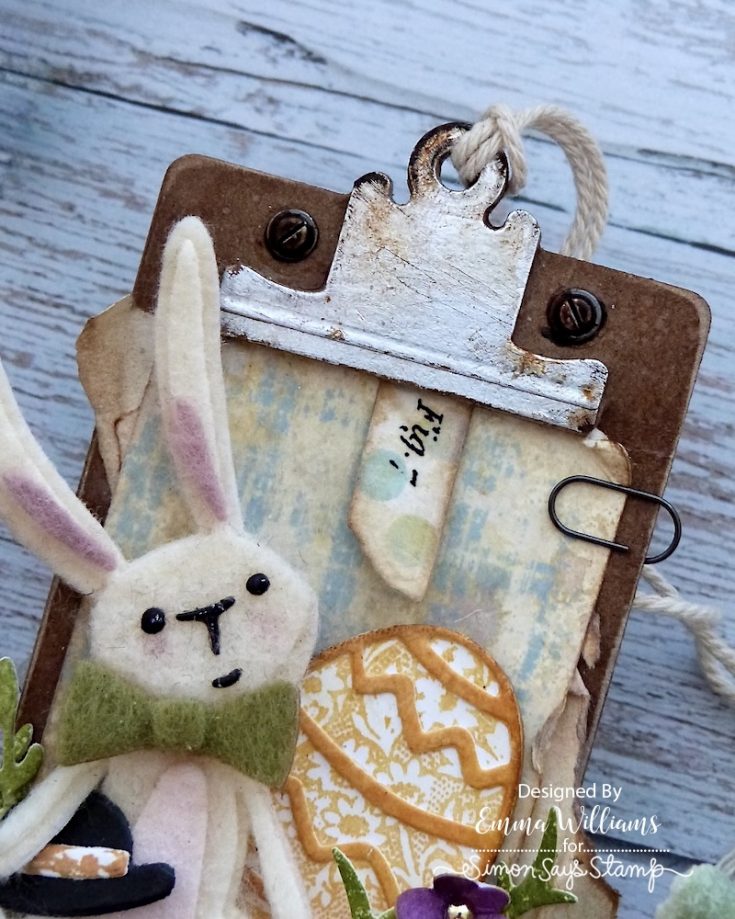
Use Matte Collage Medium to adhere the “metal” clips to the bases and then attach a Screw Head to either side. To create the rusty effect on the metal screw heads, I applied a little Black Soot and Crackling Campfire Distress Paint to the surface.
To complete the clipboards, I cut the card panel from more Mixed Media Heavystock Card, using the die in the Noteworthy set. Spritz the card with a light misting of water, and then with Lost Shadow and Antique Linen Distress Ink to add a hint of colour. Heat dry the surface.
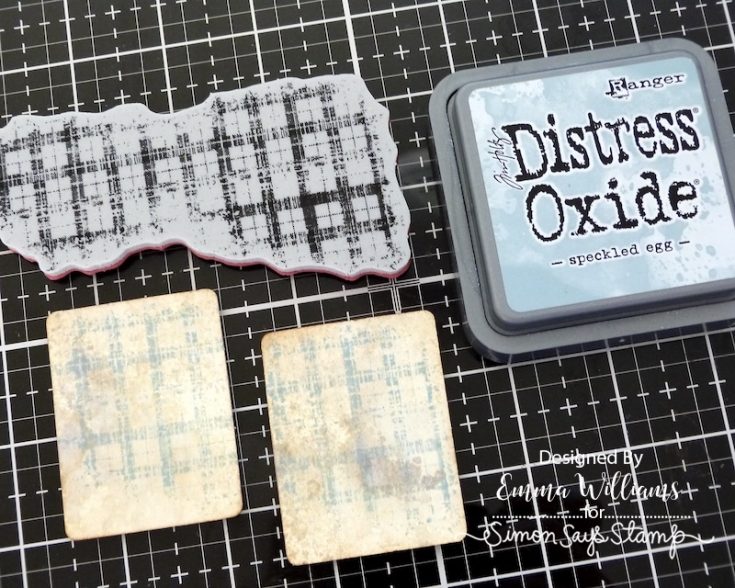
I stamped the die cut card panels with the plaid stamp from Mr Rabbit, inked with Speckled Egg Distress Oxide.
After inking the edges of the die cut with Walnut Stain Distress Ink, I attached these pieces to the clipboard, placing a piece of vintage writing paper underneath, adding some rips and tears to the edges to add more of a vintage touch. The bases are now complete and ready for the little Bunnies.
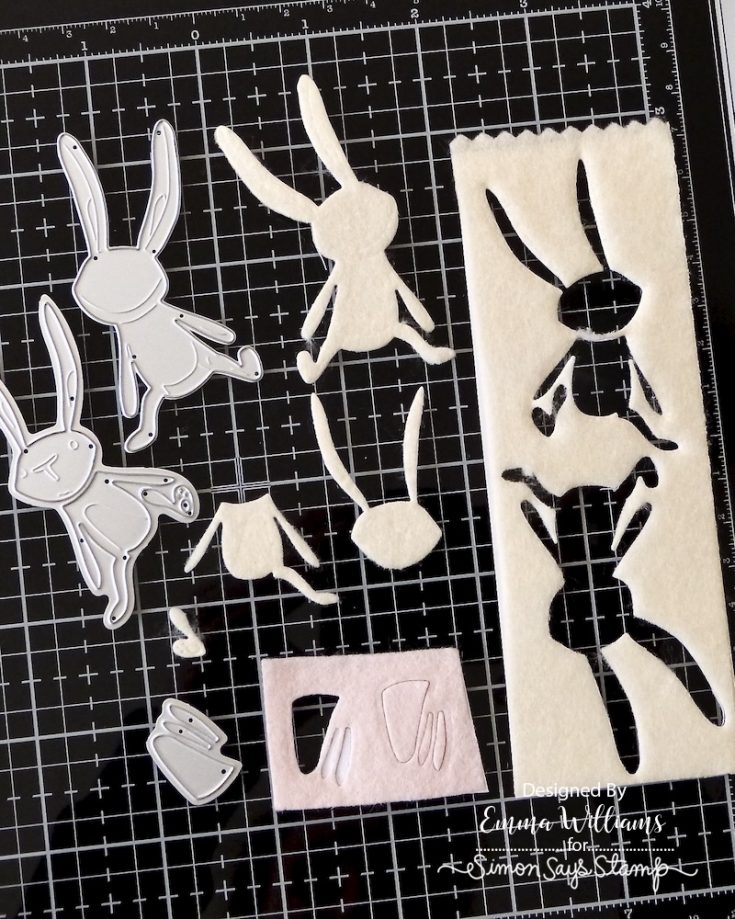
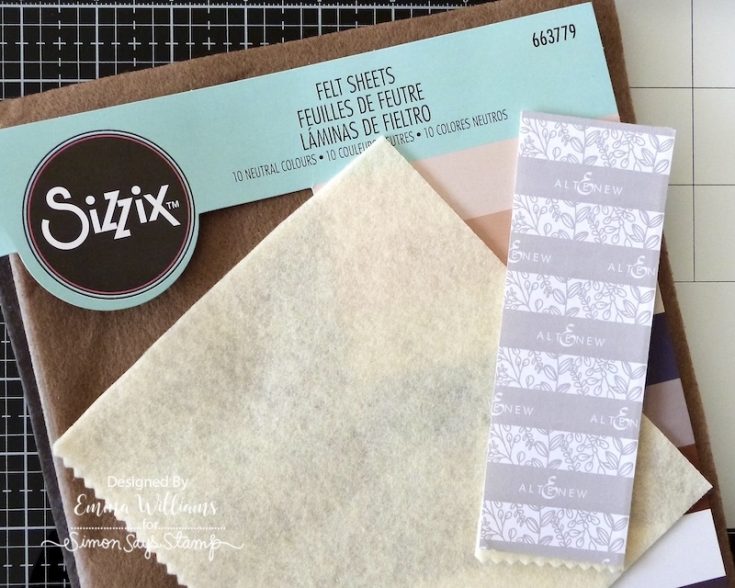

I selected the colours I wanted to work with for the bunnies from a pack of Sizzix Felt. If you prefer, you can create these from card. Before die cutting, I attached the felt to a self adhesive sheet as this will help when you attach each of the layers to build up the die cuts. The facial features are cut from Black Kraft Card, and stuck to the felt with Matte Collage Medium.
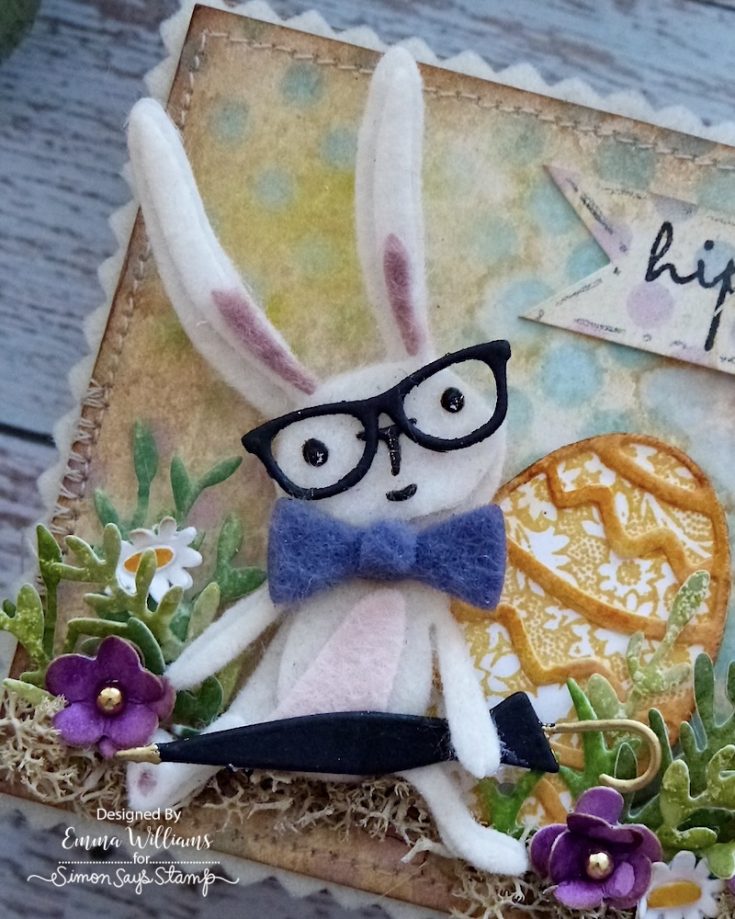
Once all the pieces are cut, I adhered each piece to form the three separate bunnies, all of which are now ready to have their accessories added. Starting with the tiny umbrella ~ I used a dies from The Park Die Set, and cut the pieces from black card. To create the gold handle and umbrella tip, I applied ink with a Versamark Mark Pen and then dipped the die cut into gold embossing powder, which I heat embossed until molten.
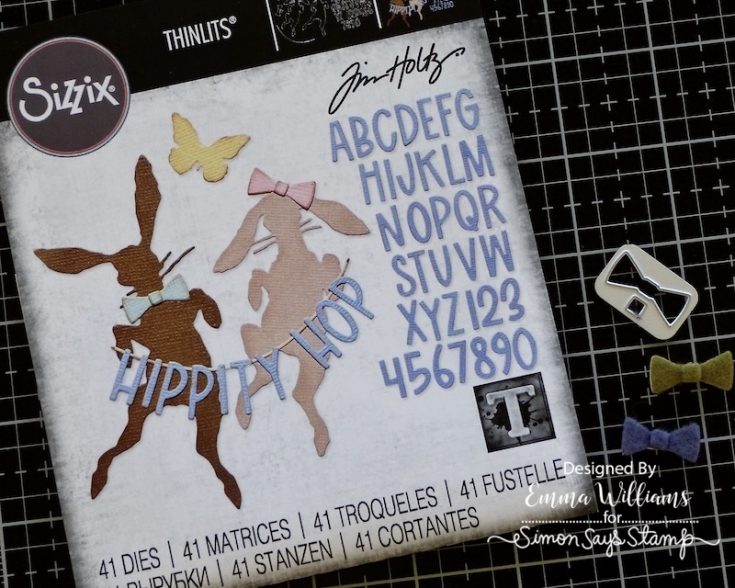
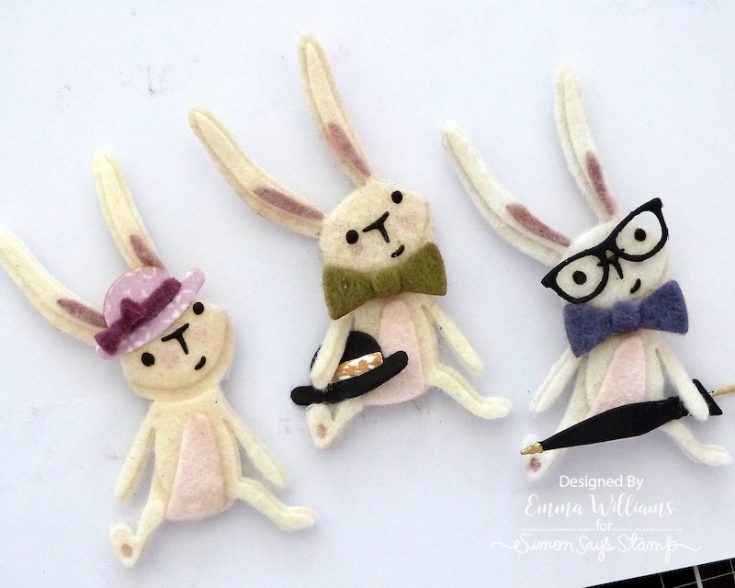
The tiny bows are cut from various colours of felt using dies from the Sizzix/Tim Holtz Hippity Hop Thinlits Die Set.
The glasses are cut from black Kraft card and the tiny hats are cut from patterned card stock in my stash ~ these are all cut using a discontinued die set that I have in my stash called, Hip Haunts but if you don’t have this die set, then the Simon Says Stamp Mini Things Wafer Dies are perfect for accessories that can be used on these bunnies and many other dies that Tim has released.
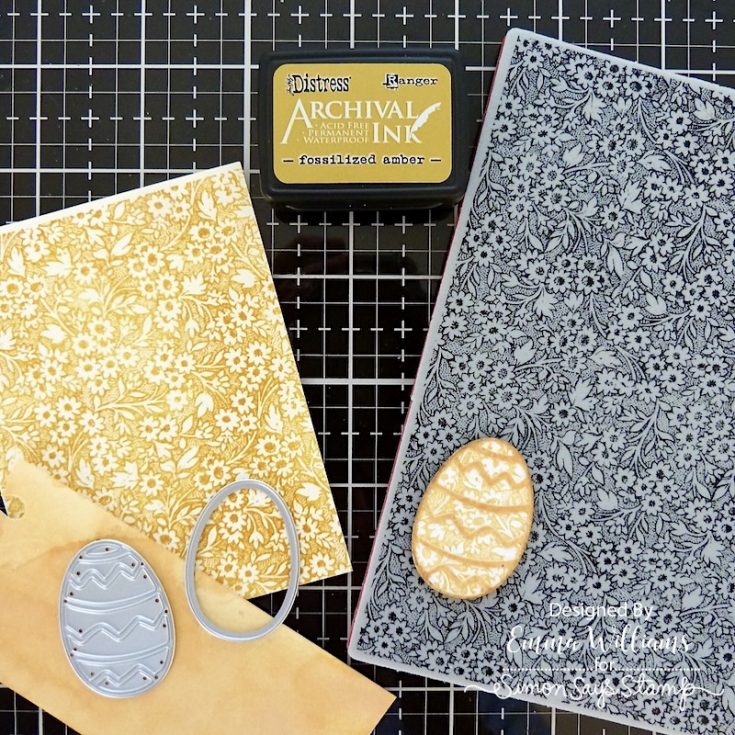
Placing the finished bunnies to one side, I moved onto die cutting the Easter Eggs. I cut three eggs from Mixed Media Heavystock card, that I stamped in Fossilised Amber Archival ink using the Stampers Anonymous Tiny Prints stamp set by Tim Holtz. I then used the smaller Easter Egg die in the Bunny Games set to die cut the solid section of the stamp, before taking the second corresponding die in the set to die cut a separate panel of card, inked with Fossilised Amber Distress Ink. Adhere this layer over the top of the solid egg to form one Easter Egg.
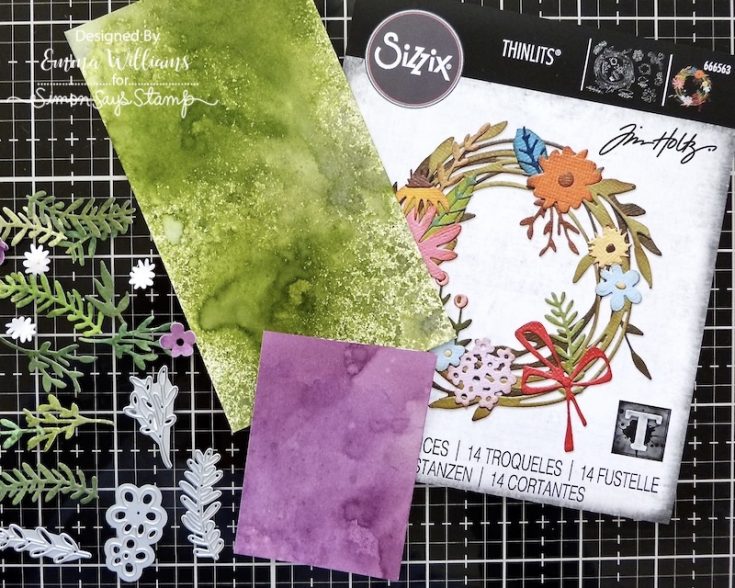
Finally, I cut some green foliage, the little daisies and some tiny purple flowers using a combination of dies from the Bunny Games Die Set and the Vault Funky Floral Wreath Die Set. (If you don’t own this die, then there are many other dies from Tim, that can be used to create the leaves and flowers). All my card stock is inked with Distress Inks.
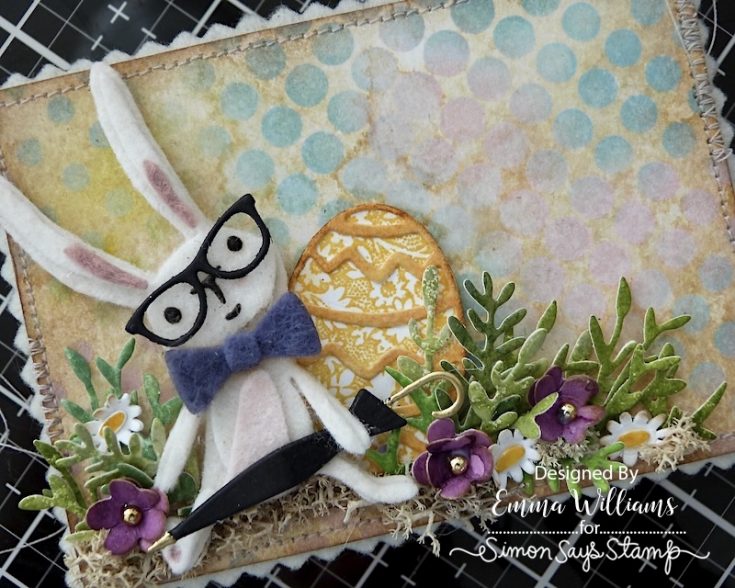
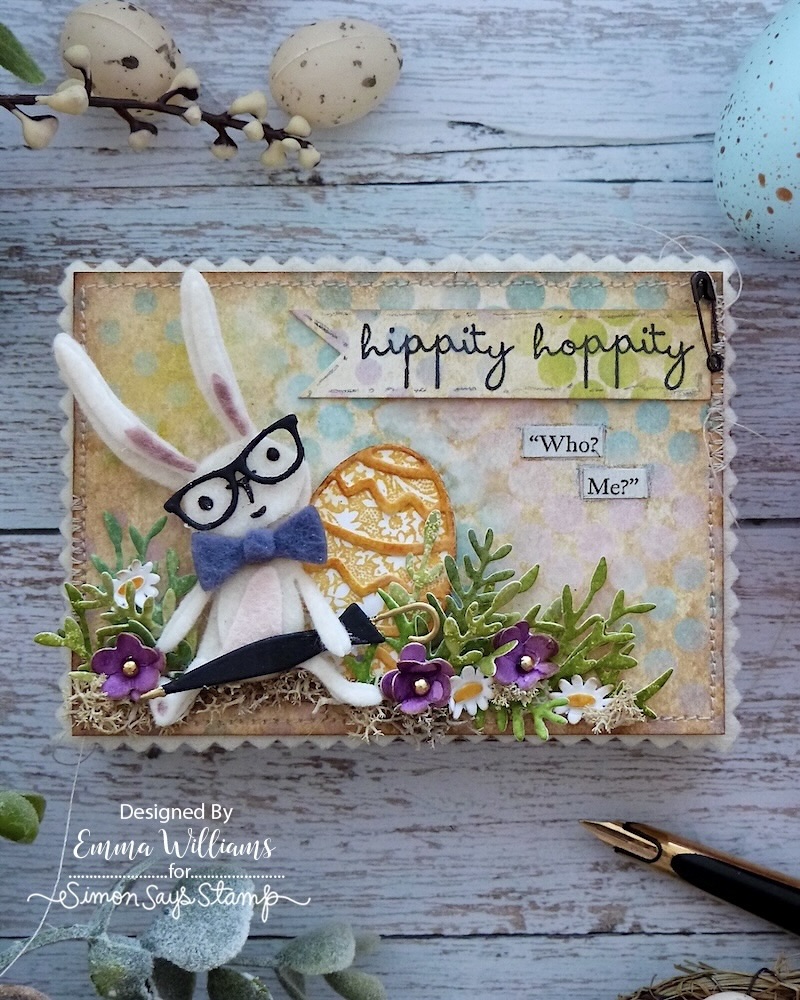
With all the pieces ready, I created the scenes on the box and the tags and this is where the fun begins. I arranged each of the bunnies in their individual scenes and of course, at this stage, you can choose exactly how you want these to look ~ you can add different accessories, different foliage and change the colours of the eggs ~ it’s entirely up to you. To complete the scenes on each piece, I added some moss.
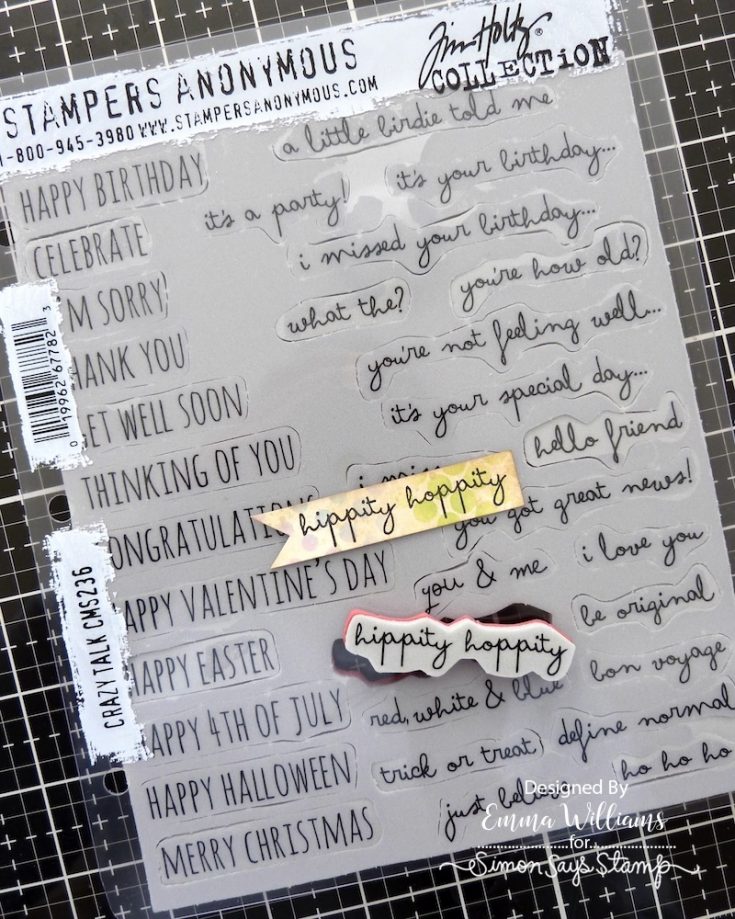
All that’s left now is to add the sentiment to the box, and for this I inked up ‘hippity hoppity’ from the Crazy Talk Stampers Anonymous stamp set, and stamped it in Jet Black Archival Ink, onto a piece of the leftover card that I had inked for the box. I cut an inverted ‘v’ into the strip to form a banner, which I attached to the box, securing a tiny pin into the stitching on the box itself.
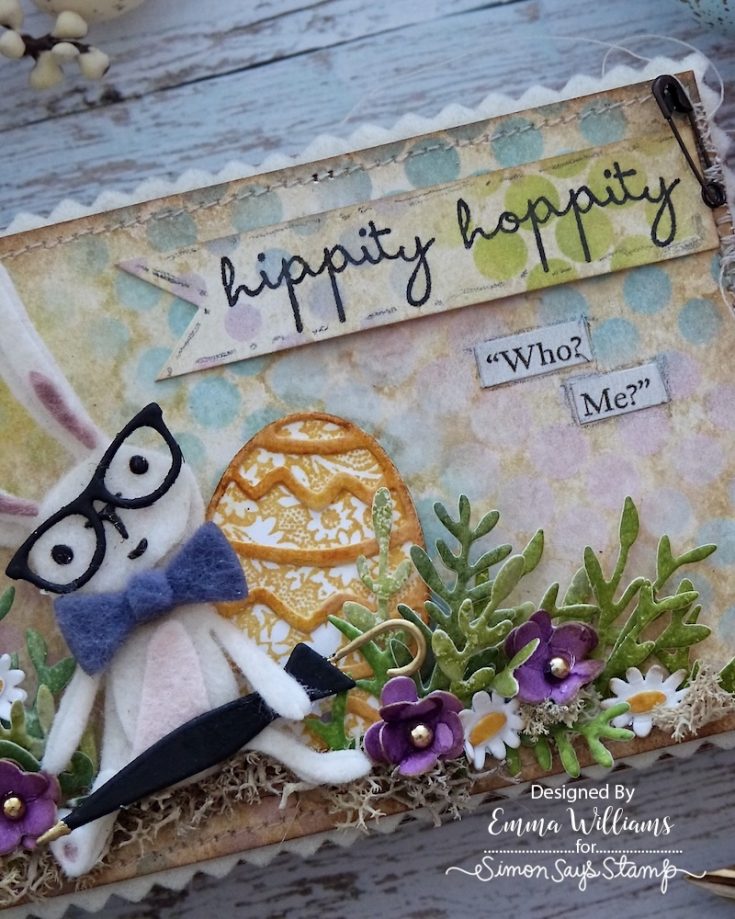
Finally, I chose a Clippings Stickers from the Sticker Book, and added the “Who? Me? Underneath the sentiment.
The You can either fill your box with candy, or if you want to gift this piece, then the tags fit in the box perfectly.
So that’s my project complete and I really hope you enjoyed this tutorial and you’ve been I inspired by the pieces I’ve made. The ideas that I’ve shared can be used in so many different ways, on cards, home decor or just as I’ve done to create little Easter Gifts for loved ones and I can’t wait to see what you create.
See you all again very soon and Happy Crafting everyone…Emma x
SUPPLIES:
|


Thanks so much for stopping by, and thanks to Emma for being our guest!
Mark your calendar!
Join us live TOMORROW April 14th at 12 PM ET! Click or tap the bell by ‘Notify Me’ to be notified when we begin on TOMORROW, April 14th at 12 PM ET!


Bunny Games Easter Trio looks like the kind of seasonal activity that appeals to a wide range of players because it combines fun themes with light, engaging gameplay. Holiday-themed games often stay popular because they create a festive atmosphere while keeping things simple and accessible. I think the creative presentation is just as important as the gameplay itself. That’s something I notice across many digital products, including apps focused on personalization like https://ayugramapks.com/, where users can tailor their experience to their own preferences. Small details and customization options often make content feel more enjoyable and memorable.
The Easter theme always works well for casual games because it creates a fun and colorful atmosphere that appeals to a wide range of players. What stands out most is how important nostalgia can be in gaming—people often enjoy experiences that bring back familiar memories and simple gameplay styles.
That’s one reason communities around classic game versions continue to grow. I recently came across https://barbosaservers.com/, which focuses on recreating the original Free Fire experience that many longtime players remember fondly. Whether it’s seasonal games like Bunny Games Easter Trio or classic multiplayer titles, familiar gameplay elements can keep players engaged for years.
Hello,
I enjoyed the charm of Bunny Games Easter Trio, especially its relaxing vibe and cute design. For players who also like something more action-focused alongside casual titles, I recently came across https://getshadowfight2apk.com/ which dives into a darker fighting experience with smoother progression and unlocked features. Nice contrast if you switch between light and intense gameplay.
These bunny projects are absolutely adorable! The Easter-themed designs are creative, colorful, and perfect for handmade gifts. I especially love the attention to detail in the packaging and tags. Thank you for sharing such wonderful inspiration with us.
I also enjoy finding useful online resources, especially YouTube to MP3 converter tools and other helpful tech guides. Looking forward to more amazing projects!
This is such a beautifully detailed and creative Easter project! The layering, textures, and attention to small details really show how planning and patience can completely transform a simple idea into something special. It actually reminds me of how in strategy-based games, every small decision and upgrade matters to build a strong outcome. I recently came across a helpful guide on Shadow Fight 2 combat strategy that explains how smart choices and timing can improve performance in battles, just like how every design choice here adds depth to the final artwork.
Interesting how mobile streaming apps are changing the way people watch movies and shows nowadays. Fast access, simple interface, and offline viewing options really make a big difference in user experience. It’s clear that users now prefer platforms that are lightweight and easy to use on any device without complicated setup.
Hello,
The Bunny Games Easter Trio has a really charming and playful vibe, especially with its light mechanics and visuals. It reminds me how simple game design can still feel engaging. I recently came across a similar mix of casual and chance-based gameplay here https://royalxcassino.com.pk/ where variety keeps things interesting in a different way.
I recently explored Boomerang and found the platform to be easy to navigate, with a modern interface and well-organized sections that help users quickly find games, promotions, and account-related information. The overall experience feels smooth and responsive, making it suitable for both newcomers and experienced players. boomerang-au.bet The site presents its content clearly and offers a convenient browsing experience across different devices. Overall, it leaves a positive impression thanks to its usability, clean design, and straightforward structure.
Impressive artical thanks for sharing
Absolutely great post! 💯
Advanced gaming platforms continue to attract players through convenience, speed, and user-friendly functionality. SlotXO Auto is often recognized for its streamlined navigation, responsive design, and compatibility across multiple devices. Users can access various features with minimal effort, making the overall experience more enjoyable. For those interested in learning more about available options, คลิกที่นี่ to discover additional details and platform information. Enhanced performance, smooth operation, and reliable accessibility contribute to its popularity. As player expectations evolve, platforms like SlotXO Auto continue adapting to provide efficient and engaging entertainment experiences.
Father’s Day is a special day dedicated to honoring fathers and father figures for their love, support, and sacrifices; it is celebrated in many countries on different dates (in the U.S. it is observed on the third Sunday of June), and people usually show appreciation by giving gifts, spending time together, or expressing gratitude.
This Easter gift box project sounds absolutely charming! The hidden surprise, matching gift tags, and playful bunny designs make it feel extra personal and festive. For a fun creative break between craft projects, toca boca pc is a great option to explore.
The Bunny Games Die Set sounds perfect for giving Easter crafts a little personality and humor. Combining different dies is such a clever way to create unique gift packaging and tags. Adding aesthetic text copy salin to digital craft posts can also make the captions feel more creative and eye-catching.
666EP Game is a feature-rich mobile gaming app that provides users with a smooth and enjoyable entertainment experience. Its modern design, responsive controls, and easy accessibility make it a popular option for players who enjoy mobile gaming.
EC99 Game is an interactive online gaming platform that offers exciting gameplay and a user-friendly environment. The app is designed to provide a seamless entertainment experience with reliable performance and convenient access.
PK786 Game is a digital gaming platform that offers users an exciting collection of mobile games and interactive activities. The application provides fast access, convenient controls, and an enjoyable user experience for players of different skill levels. Many users choose PK786 Game to discover new gaming experiences and enjoy online entertainment. Since gaming results are not guaranteed, players should participate carefully and use the platform responsibly.
The layered bunny details and vintage color palette work really well together. I also like how the gift box and matching tags make the project feel complete. It would be interesting to see the same style adapted for other seasonal themes too.
The layered bunny design and vintage-inspired color palette complement each other beautifully. I especially like how the coordinating gift box and matching tags bring the entire project together with a polished finish. It would be great to see this creative style applied to other seasonal or holiday-themed projects as well.
Creative mobile experiences often become more interesting when users can customize and explore related tools. For those curious about managing Android app files or learning more about APK editing, this resource on MT Manager APK is worth checking out: https://mtmanagersapk.com/. It’s a useful guide for advanced users.
666EP Game is a mobile entertainment platform that brings together exciting earning games with a simple and modern interface.
EC99 Game is a growing online gaming app that offers a fresh collection of earning games for users seeking fun and engaging entertainment.
PK786 is an all-in-one gaming platform featuring a wide selection of earning games with a clean and user-friendly layout. Whether you are a beginner or an experienced player, the app delivers smooth performance and exciting gameplay.
EU777 is an innovative mobile app that provides access to a variety of earning games in a fast and reliable environment. With regular feature updates and an intuitive interface, it offers an enjoyable gaming experience for Android users.
Tiranga is a well-designed online gaming platform that combines entertaining earning games with modern mobile technology. The app focuses on smooth navigation, responsive gameplay, and a comfortable user experience.
Money Game is a powerful mobile gaming app that offers a diverse range of earning games with smooth controls and an attractive interface. Designed for Android users, it delivers engaging gameplay, reliable performance, and continuous improvements for an enjoyable entertainment experience.
Find Hollywood, Bollywood, South Indian, and web series collections in HD quality with a user-friendly experience at MKVMoviesPoint.
Cute Easter-themed games are always a fun way to relax, especially when they’re easy to jump into. If you also enjoy casual games with smoother controls on a bigger screen, I recently found a helpful guide for playing 8 Ball Pool on PC: [https://8bpoolproapk.com/8-ball-pool-for-pc/](https://8bpoolproapk.com/8-ball-pool-for-pc/). It explains the setup process and what to expect.
Browse fresh entertainment content featuring movie reviews, OTT releases, celebrity updates, trailers, and upcoming cinema highlights.
Creative hobbies often remind us that the most enjoyable projects come from a mix of imagination and the right inspiration. Whether you’re crafting handmade Easter decorations, designing greeting cards, or exploring other forms of entertainment, it’s always helpful to have reliable resources available. If you’re interested in digital gaming, the EP 567 guide provides detailed information on its features, setup process, compatibility, and practical tips for a better experience.
Easter puzzle collections like Bunny Games Easter Trio are always fun, especially if you enjoy experimenting with Android games. If you like exploring how apps are structured or organizing game files for personal learning, I found this overview of MT Manager helpful https://mtmanagerapk.app/. It explains APK editing, file management, and archive handling in a beginner-friendly way.
Get Vedu APK latest version for free. Experience high-quality entertainment with a secure download and seamless user experience.