Britta Swiderski Creates with the Simon Says Stamp Brand!

Happy Saturday, Bloggers! We’re going to dive right into today’s content with Britta Swiderski! First, a quick bio & then on to creating with Simon Says Stamp exclusive products!! How exciting!!
Hey there! I’m so glad to be here on the Simon Says Stamp blog to help celebrate Stamptember™. Thanks for having me, Simon! Here’s a little more about me:

I’m a graphic design major at the University of Minnesota and have been scrapbooking, cardmaking and crafting for as long as I can remember.
I love to explore new techniques and teach others about them, which led me to start up a blog several years ago, which has evolved into one of my great passions. I’m always itching to get creative as a break from my educational obligations! I also love to travel, read, and watch sports with my friends. You can check out my blog here and my youtube channel here.
Today, I wanted to show you a little technique that I’ve been obsessed with lately. I’m calling it Watermark Painting with Distress Ink. I’m a ginormous fan of Distress Inks and what they can do, and this technique shows off one of my favorite parts of Distress Ink – its interaction with water.
Here’s the step by step to create the background:
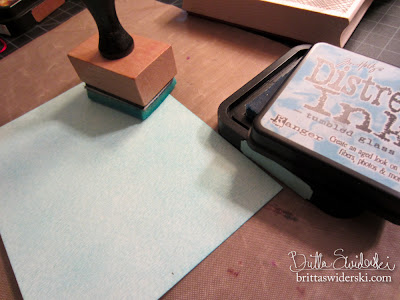
1. Ink your watercolor paper (Simon Says Stamp has the best watercolor paper!) with the lighter of your two Distress Inks evenly. Here, I used Tumbled Glass.

2. Ink heavily around the edges of the paper with the darker color (here, I used Salty Ocean from the Summer Seasonal Distress Inks). Blend the color in well using both blending tools for a very smooth look.
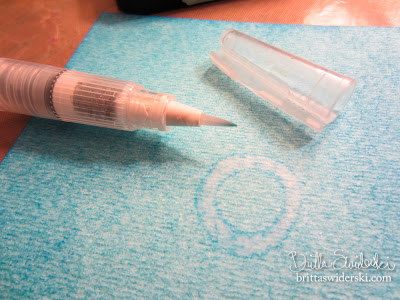
3. Get your Detail Water Brush flowing on a piece of scratch paper (no need to squeeze – just draw like you would with a brush marker) and then slowly draw circles onto your inked cardstock. The water takes a few seconds to react with the ink, so be patient!

4. For a larger line, squeeze lightly on the barrel of the waterbrush. This will create a little more bleeding and unpredictability, but the look is really nice when you want to change it up.

5. Continue across the rest of your cardstock, working from the center out and varying circle sizes. When the water has dried, you can go back over your circles with the water brush for an even more dramatic look.
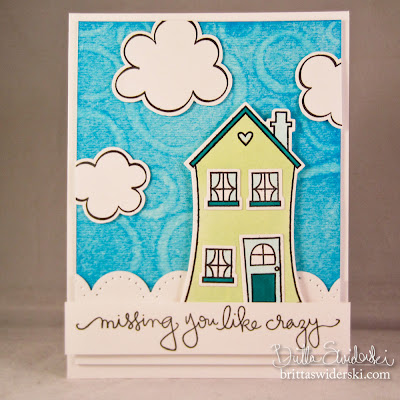
This card is a nice happy one that I think I’ll send to my mom. She’s always the first person I think of when I think of home. :) The Where Your Heart Is Stamps and Dies set by Simon is perfect for this happy little background, and these shapes are so much fun to die cut, stamp and then color with Copics. Love! Since stamping is all about combining your sets and making the scene look just how you want it, I knew I wanted two different sizes of clouds, so I borrowed them from Lawn Fawn’s Sunny Skies. It’s a perfect match for this set when you want two sizes of clouds! I hope you enjoyed this fun background technique and give it a try this month in celebration of Stamptember™!
Supplies:
BONUS!! For an extra special coupon you’ll only find on Britta’s blog, be sure to hop on over and GRAB IT!

Steph

Blog Candy Alert!! Join our following and comment on this blog for a chance to win an exclusive bundle of SSS goodies! Winner will be announced on Monday, good luck!


There are no comments.
Leave the first?