Bright Birthday Trio
Hi friends! Happy Sunday! Please join me in welcoming back special guest Cheiron Brandon who has a lovely bright and colorful project to share with us today! Read on and enjoy!
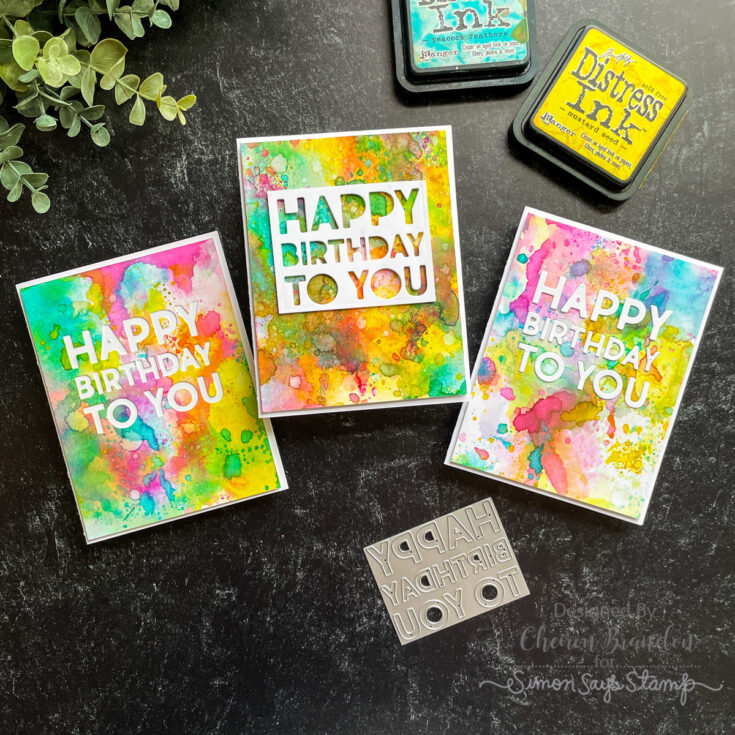
Hi there creative friends, it’s Cheiron Brandon here and I am back with another Tim Holtz Distress project. Today I have created a card project that anyone can make with just a few supplies using Distress Watercolor Cardstock, three colors of Distress Ink and the Sizzix Bold Text 1 Word Dies. I am also going to show you 3 variations for assembling these cards.
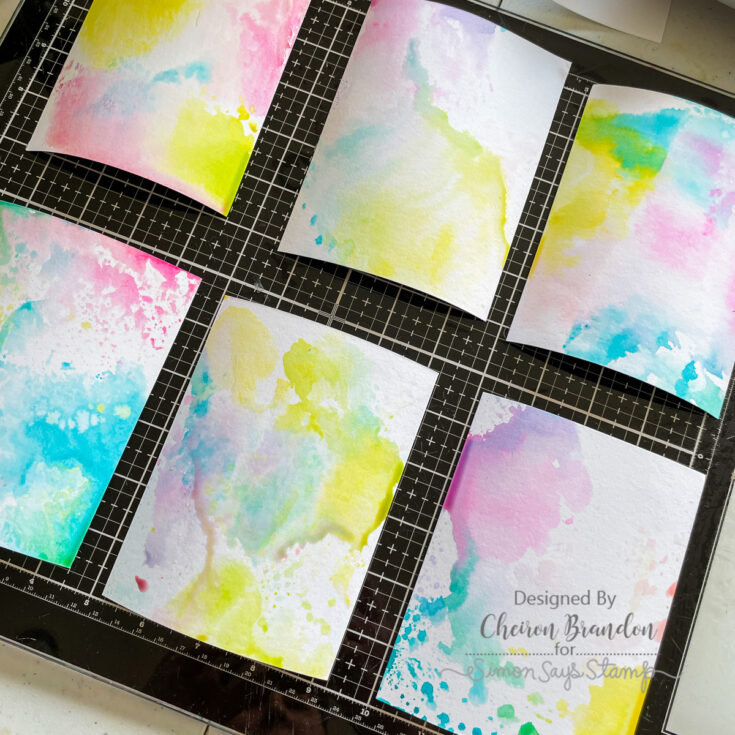
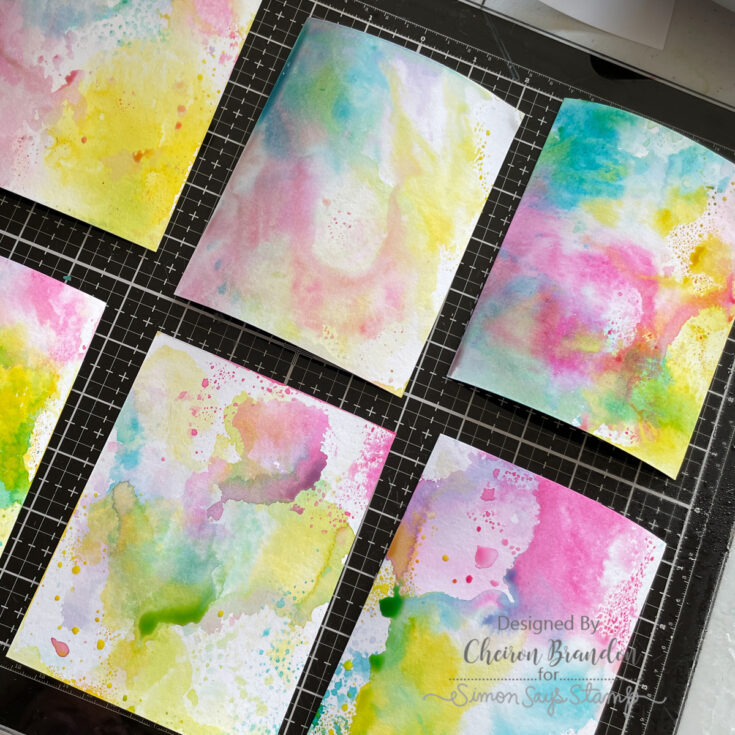
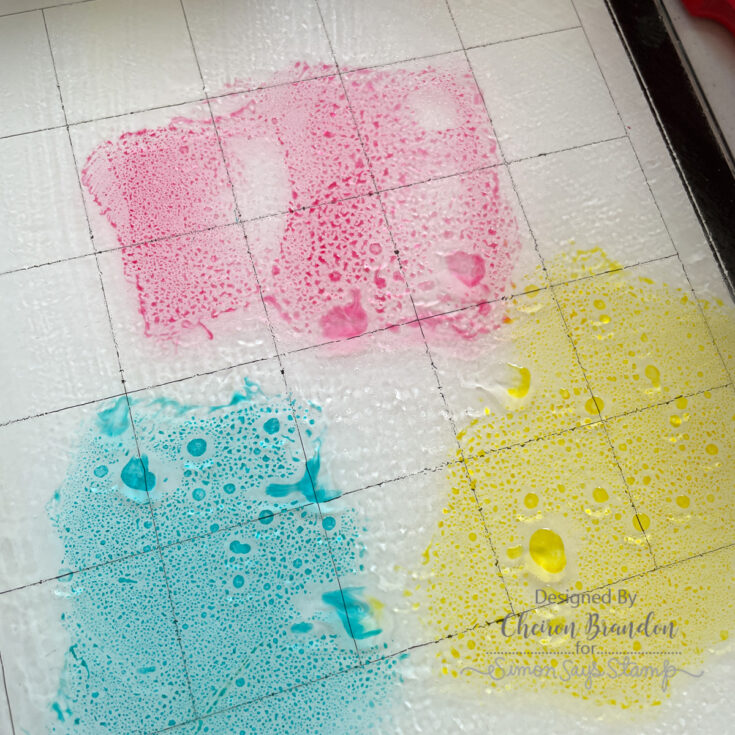
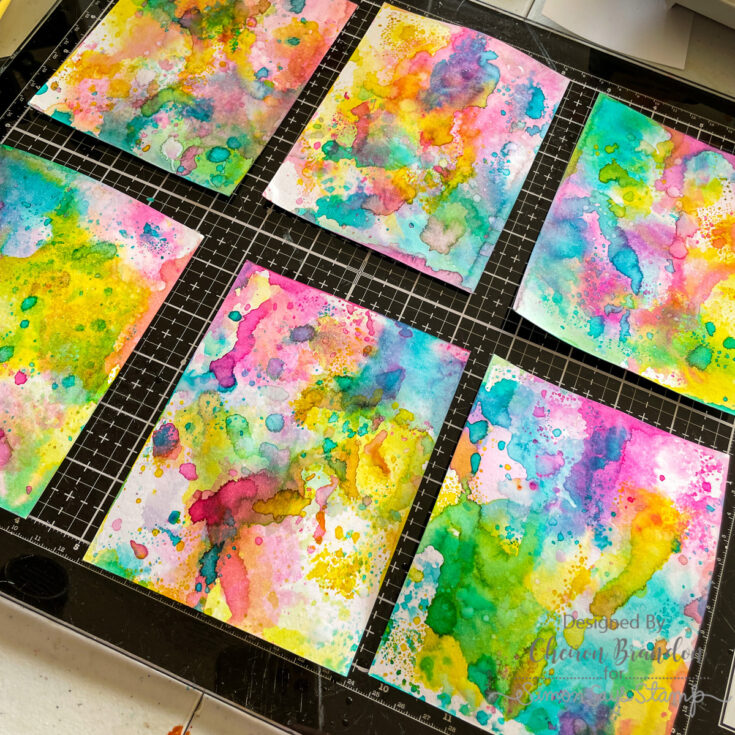
When I set out to make these, I create some fun vibrant backgrounds simply to build my birthday card stash. To keep it easy, I used 3 colors of Distress Inks: Picked Raspberry, Mustard Seed and Peacock Feathers. I used a Distress Watercolor Cardstock, and then pressed some of the inks onto my glass mat, sprayed them with water (till you see the ink bead up) and then pressed each piece into the color to create the first layer. Just press and lift up, do not smoosh around or you will just get one color! I dried them all with a heat tool, then continued to build the layers by adding more ink to each piece just in small areas at a time

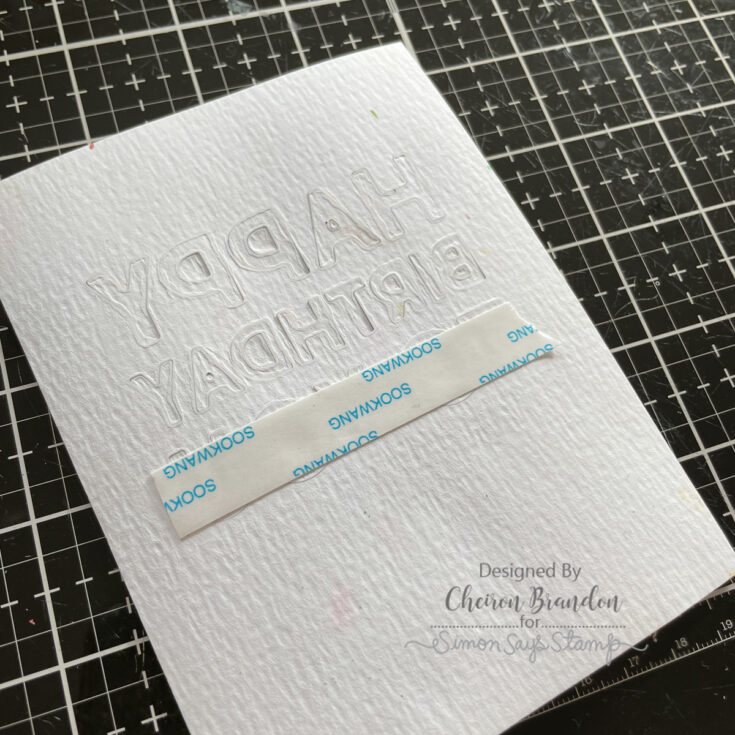
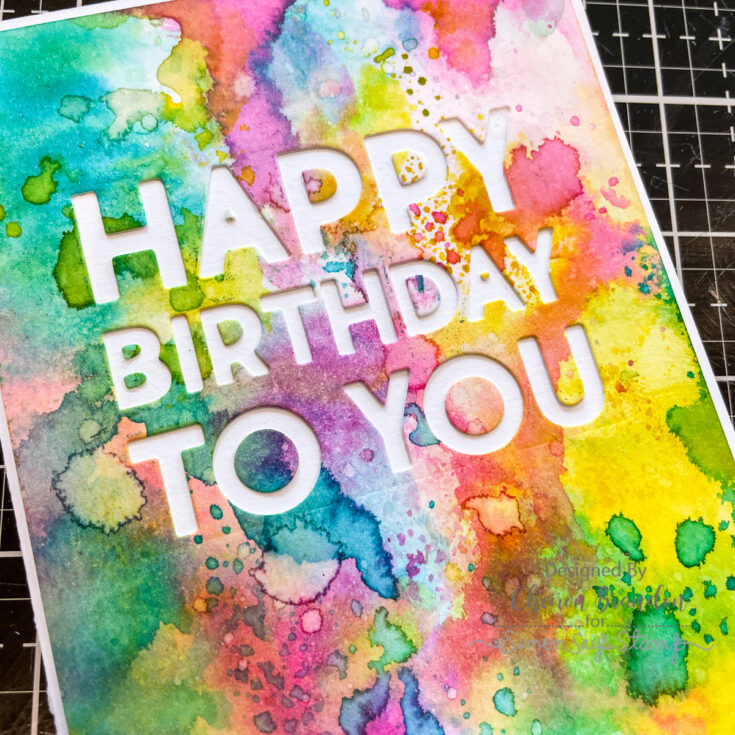
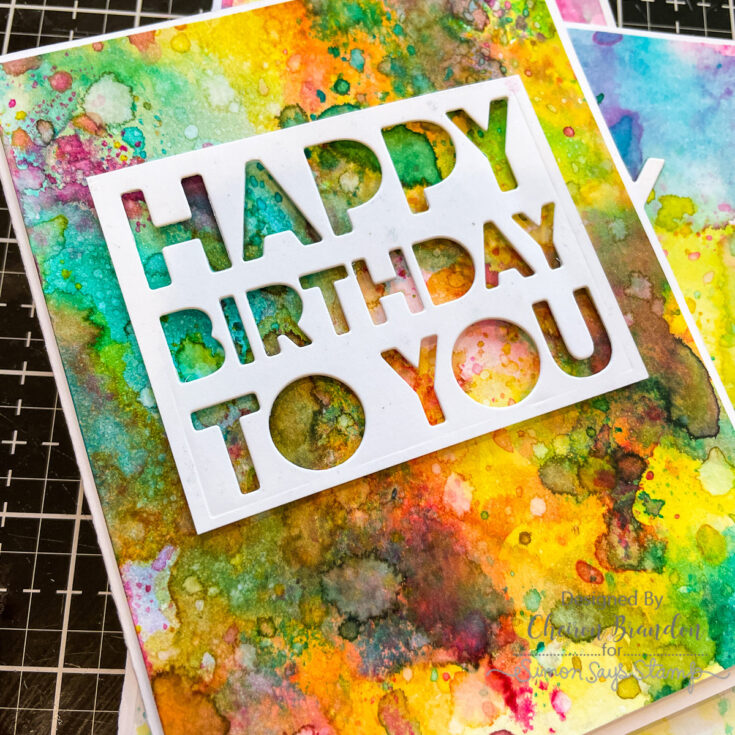
Once the panels were dry, I wanted to add a sentiment for a quick and easy birthday card. There are a few ways you can do this, and I wanted to share three ways that I have made cards using these Bold Text dies. The first is to add the words on top of the panel. The way I do this is to die cut the words out of my panel, but keep the letters in by adding Sookwang tape to the back. Then I cut the letters again out of white cardstock and layer them on top. The second, possibly easier way is to cut the letters out, back the panel with a piece of white cardstock and then add the ‘insides’ of the panel back in. And one more, even simpler way is to cut the words out of a rectangle of white cardstock and adhere it over the inked panel. I did use a bit of foam tape on mine.

These techniques are perfect for making batches of cards! You could make backgrounds one day then add sentiments the next. If you want to make the cards even fancier, you could add Distress Mica Spray or even embellishments (like tiny stars). I hope this post gave you some fun ideas for creating with the Bold Text dies! Let me know which one you find the easiest!
SUPPLIES:
|


Thanks so much for stopping by today, and thanks to Cheiron for being our guest!


Hello Cheiron! Absolutely LOVE the bright colors! Thank you for the Sookwang Tape tip to keep all the bits under control – I’ll be incorporating that step! Thanks so much for sharing your art and the tutorial. I’m going to try this for my next project. =) Wishing you a lovely day.
These are soooo Bright and Cheery!!! Beautiful Birthday cards!!!
I love how bright and cheery – and inky! – so many of your wonderful cards are. I simply love these and I will try all 3 methods for the sentiments….they are all good, I bet. Love to see you here with Simon and anywhere else I can. Thanks for sharing.
So pretty and bright!!!
Love these bright and lovely cards! Thanks for the super directions and inspiration ❤️
These are gorgeous and I went and created my own version almost immediately. Unfortunately, I had to use oxides as I don’t have the inks. It definitely makes me want to purchase the inks for a brighter color. Thanks for the inspiration.