Boo Ghost Panel Tutorial by Anna-Karin Evaldsson
Hi friends! Happy Tuesday! Please join me in welcoming back special guest Anna-Karin Evaldsson to the blog with this delightful Halloween themed panel tutorial! Read on to learn step by step how to recreate this fun seasonal make for yourself and enjoy!

Hi everyone! It is already October and I am happy to be here on the blog today with a fun Halloween project. I enjoy making my own Halloween decorations and it is such fun to unpack and display them every year. This mixed media project features three fun ghosts and a textured background.
Ghosts are fun to use on Halloween projects and don’t have to be super scary, but can also be comical, cute and a bit crazy. Here’s a little family of ghosts flying around at night wishing everybody a Happy Halloween. I created a collage master board as a base for the ghosts, pumpkins and stamped sentiments. The collage paper has just the right amount of texture to also show the stamped details well.
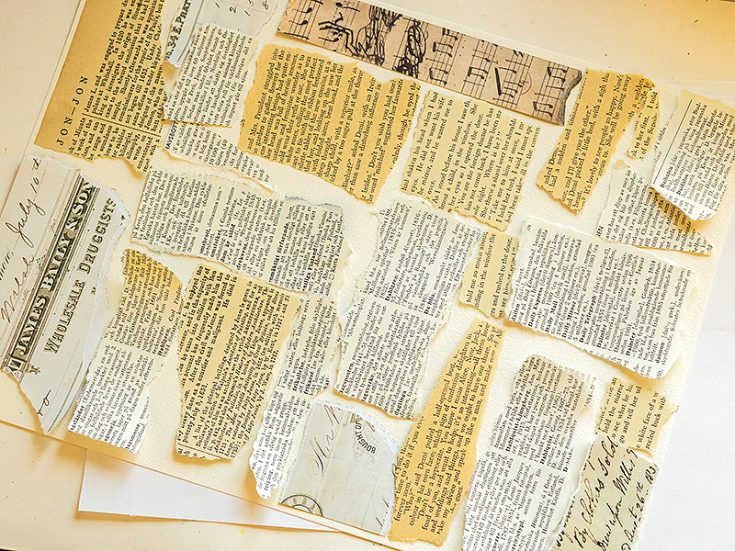
Start with a sheet of watercolor paper. Tear scrap pieces of patterned paper, old book paper and dictionary paper and plan where to place them.
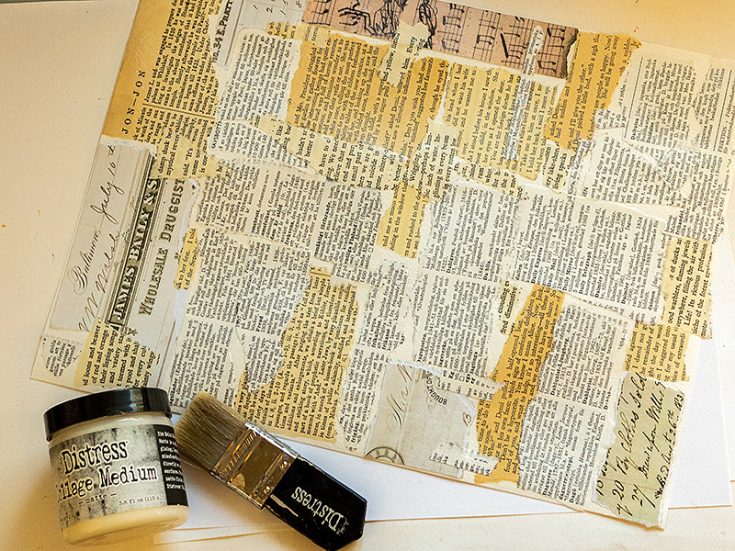
Glue the pieces down with Ranger Matte Collage Medium. Add a layer of medium on top too. Let dry.
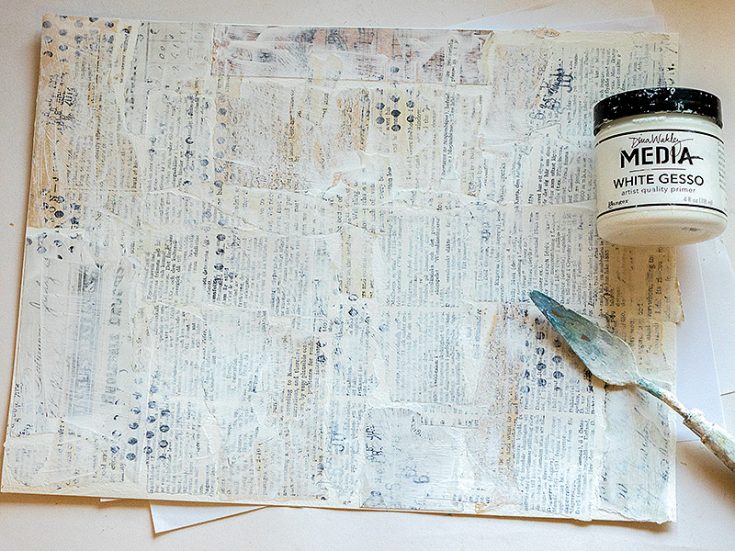
I stamped the page with a dot stamp and a messy number stamp, but missed taking a photo of that step. Use a waterproof ink for the stamping, such as Archival Ink Jet Black. Apply gesso with a palette knife. Don’t cover all the text and stamping.
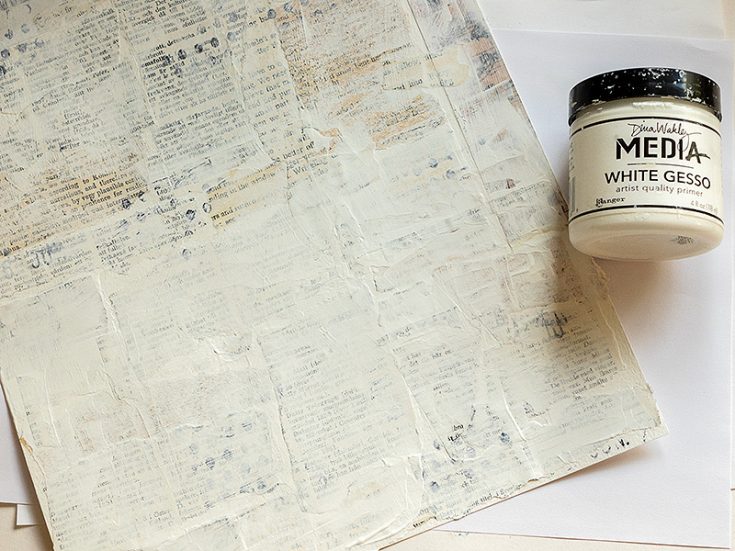
I wanted to have less background texture for the ghosts and painted half of the page with another layer of gesso. Let dry.
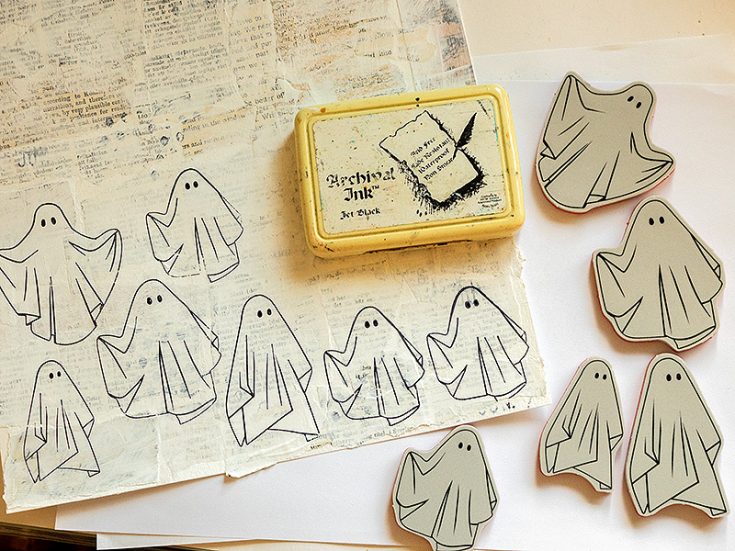
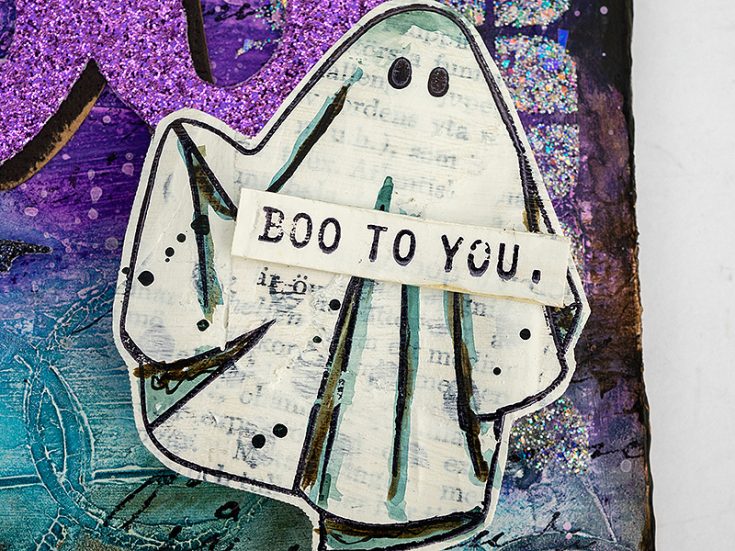
Stamp the ghosts from Tim Holtz Spooky Spirits on the collage master board.
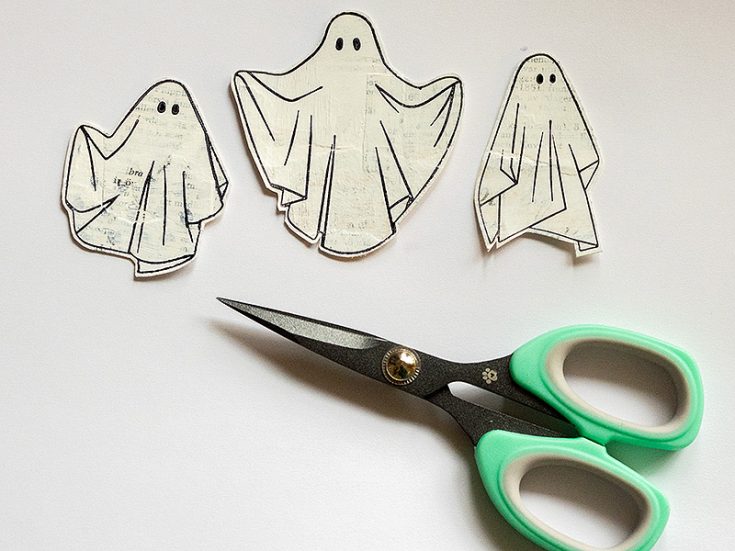
Simon Says Stamp has coordinating Spooky Spirits dies, but I don’t have them yet and cut the ghosts with a pair of scissors instead.
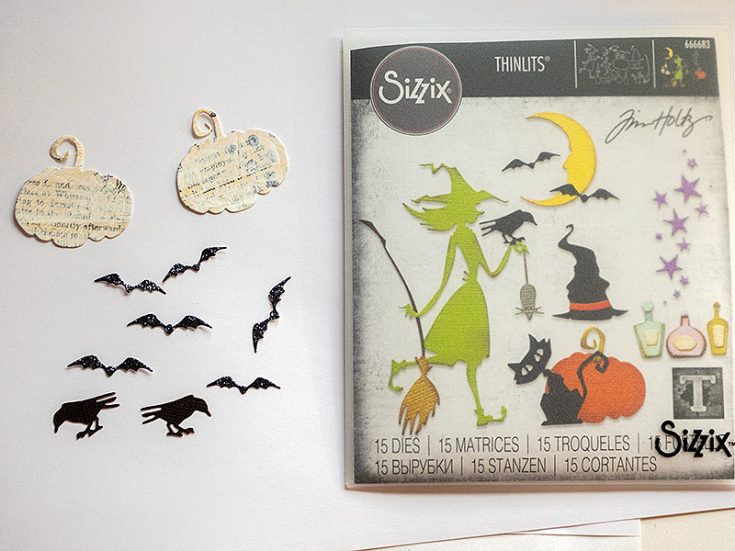
Die cut two pumpkins from the collage paper using Tim Holtz Vault Wicked set. The bats were die cut from Simon Says Stamp Black Glitter Cardstock and the birds from Tim Holtz Black kraft-stock.
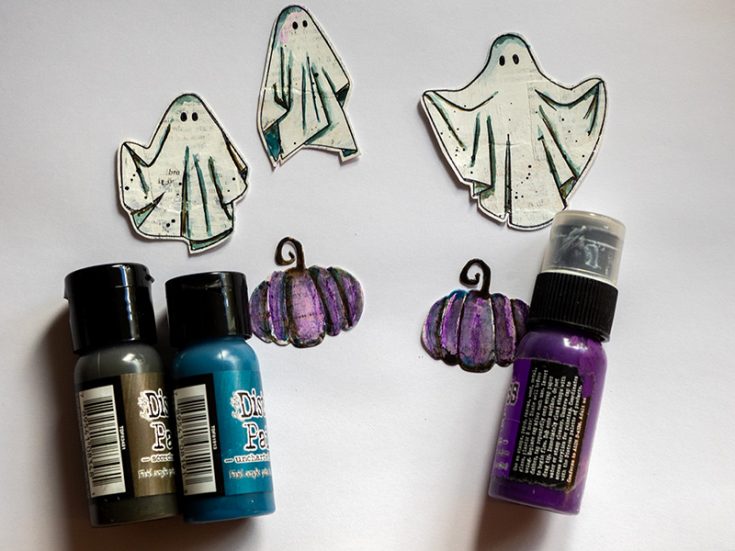
I like the way Scorched Timber Distress Paint mixes with different blue paints. Here I used Uncharted Mariner to create a grey/brown/blue mix. Use the mix to paint. I painted the pumpkins with Wilted Violet, Uncharted Mariner and Scorched Timber. Splatter a tiny bit of paint on the ghosts.
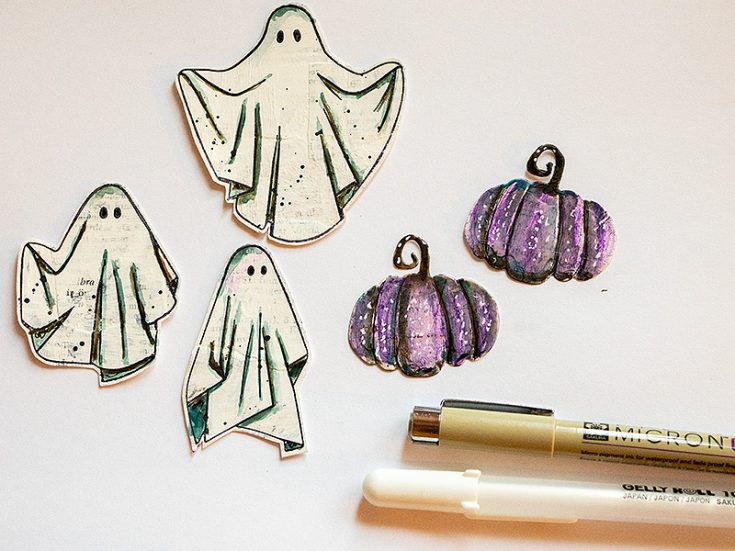
Add highlights with a white gel pen and details with a black pen.
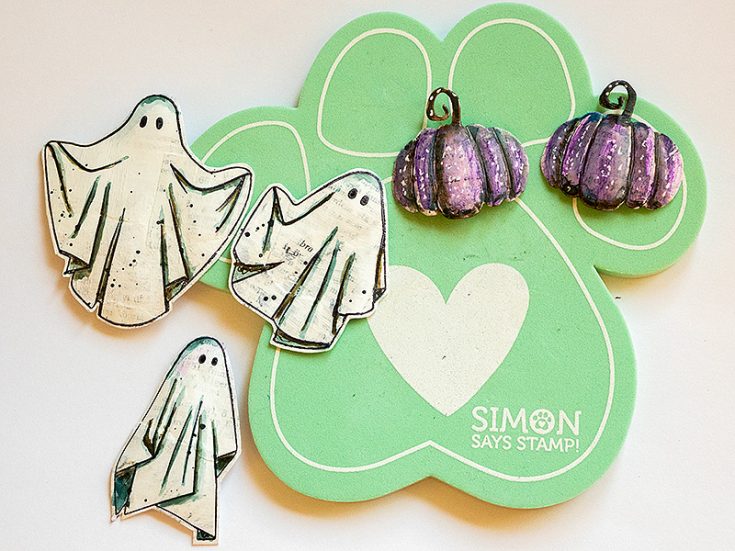
Use Tim Holtz Shaping Kit and a Simon Says Stamp Pawsitively Perfect Craft Pad to give shape to the ghosts and pumpkins. The collage paper is strong.
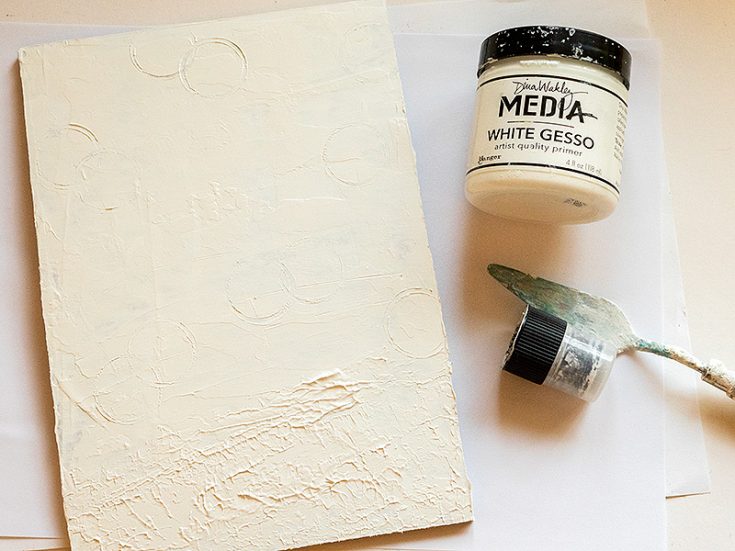
For the background, I used a Tim Holtz Etcetera Panel. It is 6 x 8.5 inches. Coat it several times with gesso, letting the gesso dry in between. In the last layer, press the lid of a Distress Paint bottle into the paint. Press a palette knife up and down to create the texture of the ground. Let dry.
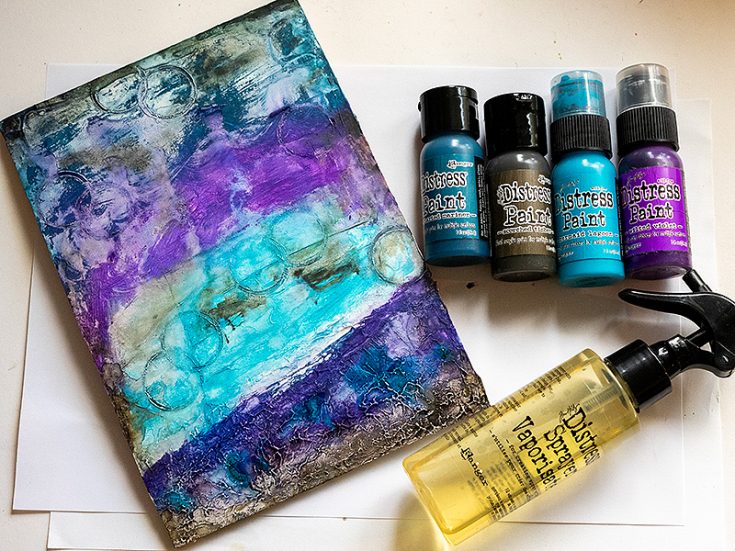
Paint with Distress Paints and mist with plenty of water to blend.
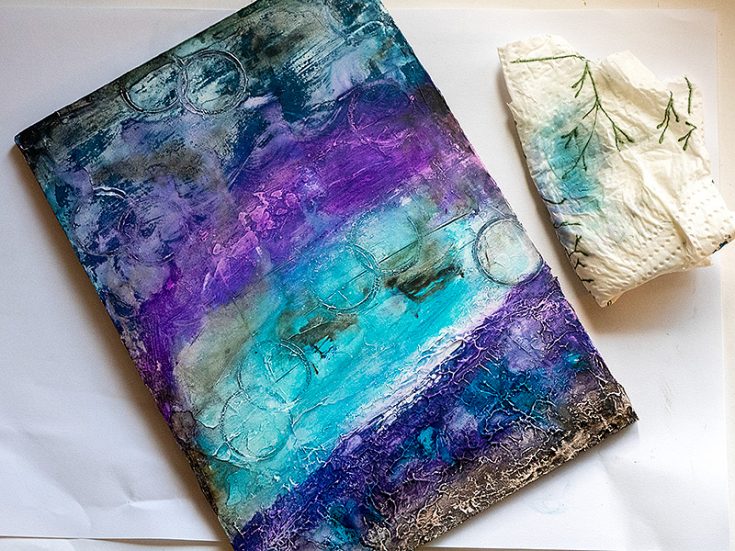
When the paint is almost completely dry, you can wipe some off with a paper towel.
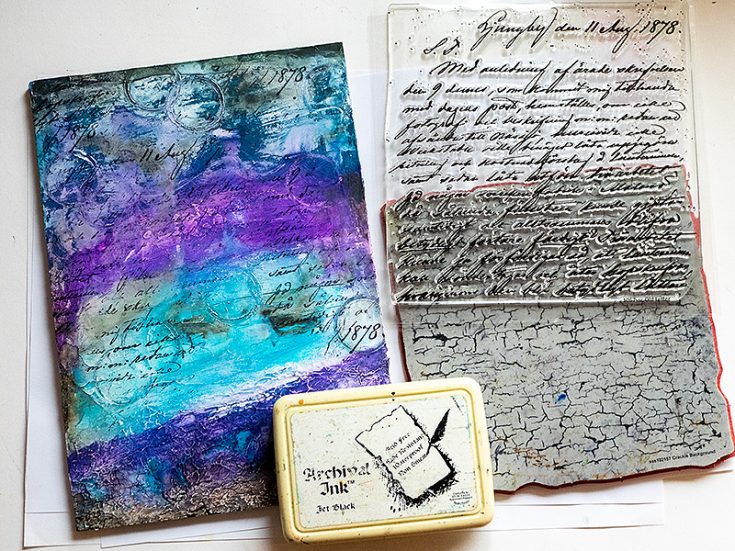
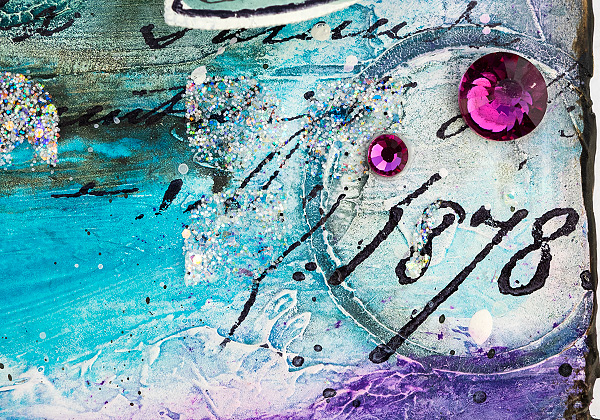
Stamp the sky area with Simon Says Stamp Old Letter Background and the ground with Simon Says Stamp Crackle Background.
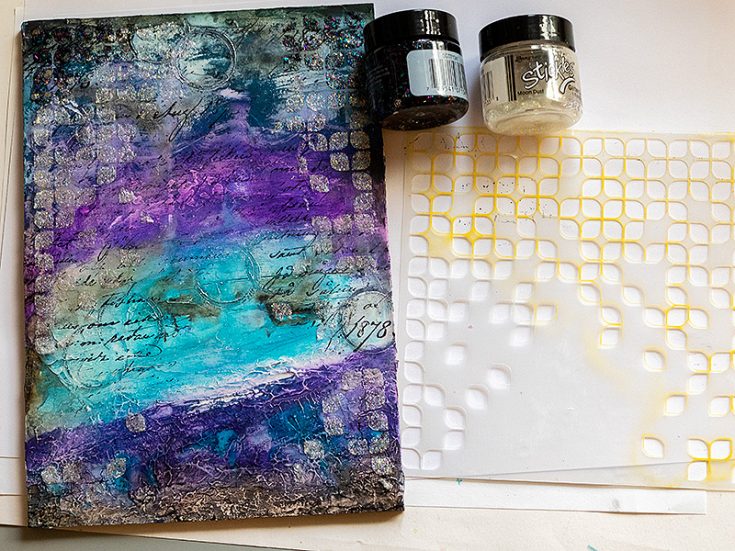
Apply Ranger Stickles Glitter Gel through Simon Says Stamp Geo Leaves stencil with a palette knife. I used Dark Matter gel at the very top and Moon Dust for the rest.
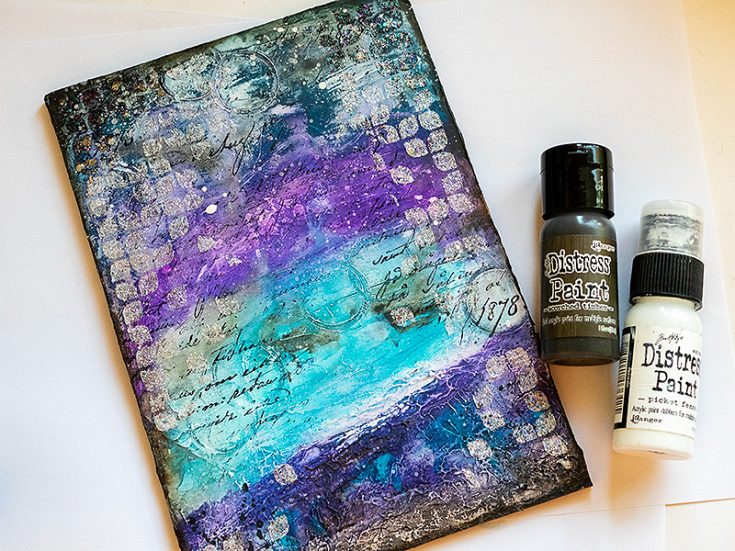
When the glitter gel is dry, splatter a little Picket Fence paint on the sky area and a little Scorched Timber on the ground.
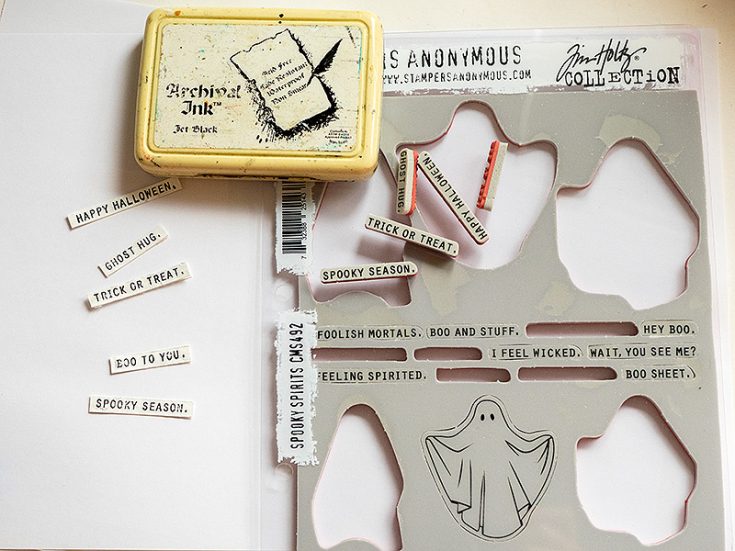
Stamp sentiments from Spooky Spirits on the collage paper and cut into strips.
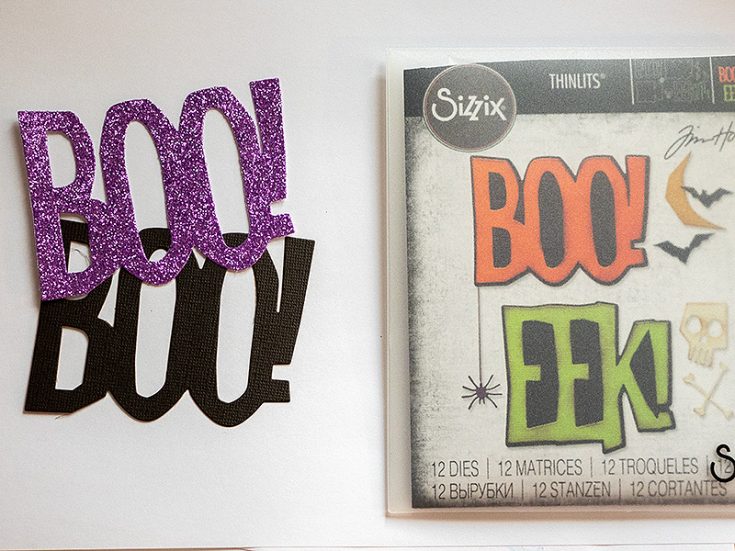
Die cut ‘boo’ from Simon Says Stamp glitter cardstock and from Tim Holtz black kraft-stock, using Tim’s Big Frights die set.
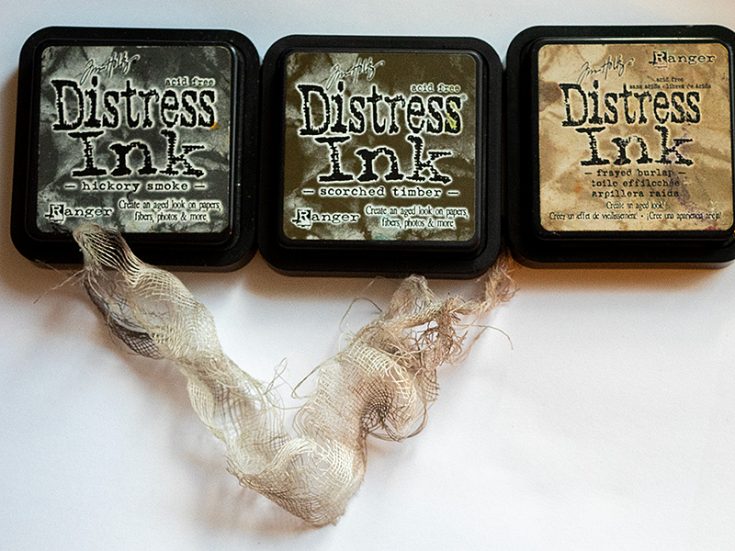
Dye Mummy Cloth with brown and grey Distress Inks.
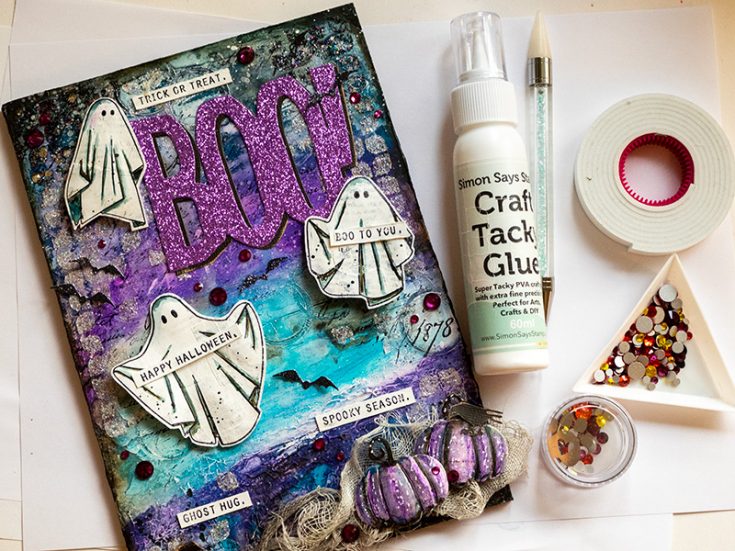
Adhere the ghosts with two layers of Simon Says Stamp Pawsitively Perfect Foam Tape. Glue Warm Tones Dazzling Gems to the background. I always use the Simon Says Stamp Place and Score Embellishment Wand to pick up gems or sequins.

The Dark Matter Glitter Gel has several shades of colors and work very well with the gems and the colors of the background.
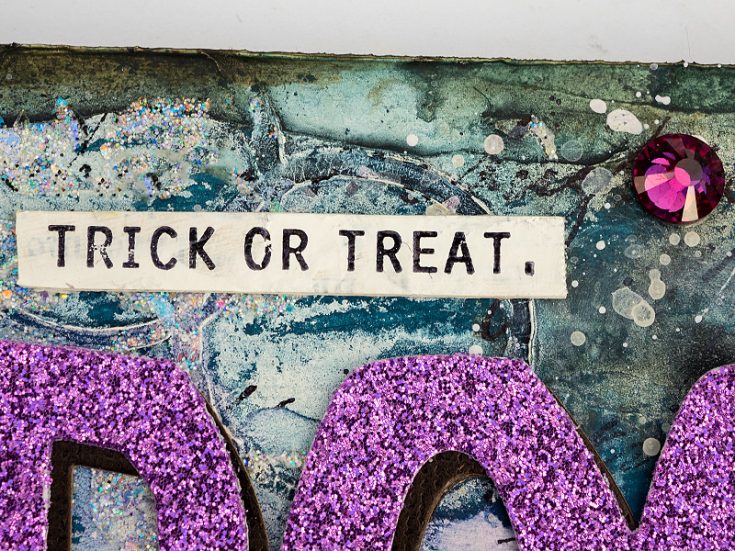
The background has interesting textures created by the gesso, paint, stamping, glitter and splattering.

Sand the edges of the kraft-stock word before gluing the glitter word to it.
I like how you can glimpse the text and patterns through the gesso. This ghost is pointing towards the title.
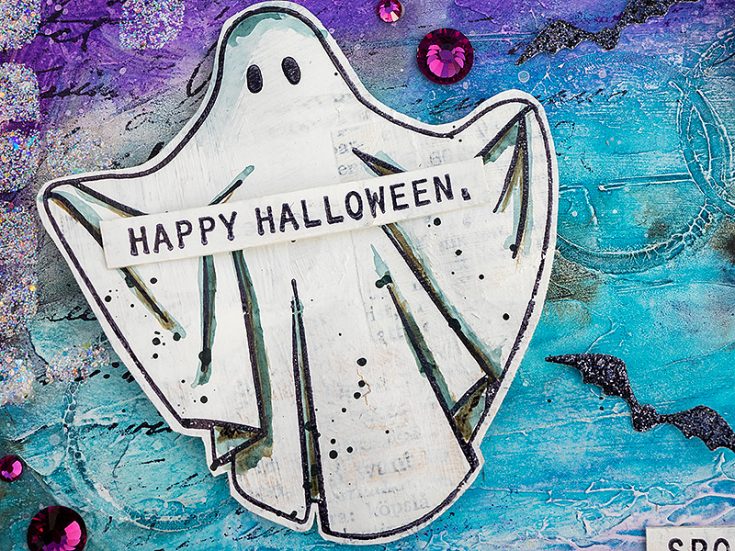
I glued sentiment strips to two of the ghosts.
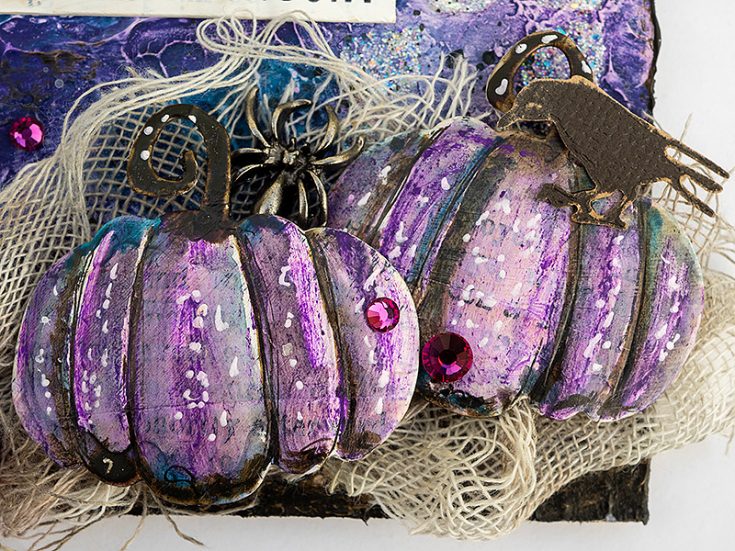
Glue the Mummy Cloth in the right-hand corner and adhere the pumpkins with two layers of Pawsitively Perfect Foam Tape.
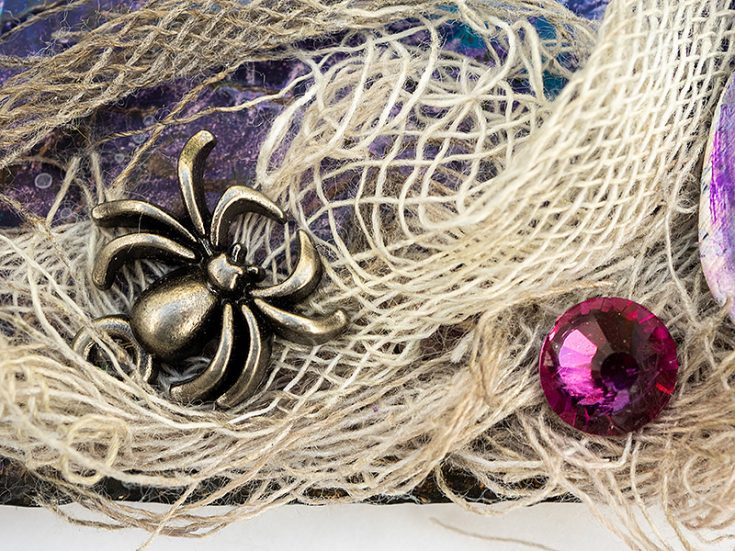
Glue two Tim Holtz idea-ology spiders to the cloth.
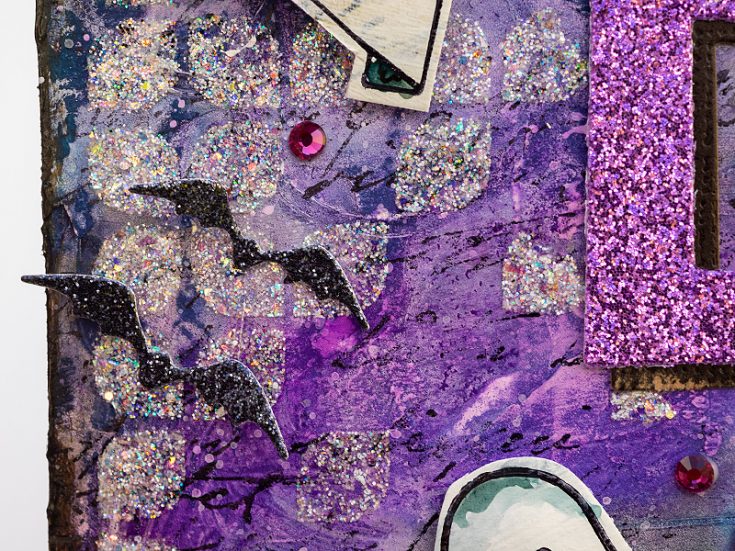
The Geo Leaves stencil together with the Moon Dust Glitter Gel add a lot of glitter, without overpowering the background.
Pressing items into gesso gives interesting effects when you paint the background, since the paint will collect and become darker in some areas.
I hope this project inspired you to make Halloween decorations and to try out some mixed media techniques. All you need is a little patience in between the steps for drying time.
Thank you so much for looking! Happy crafting! –Anna-Karin
SUPPLIES:
|


Thanks so much for stopping by, and thanks to Anna-Karin for being our guest!


What a thorough tutorial! Love this!
Anna-Karin, this is amazing!!! Thank you for sharing so much detail!!!
Wow!!! Super cool!!! I love your background!!
That is the coolest Halloween anything I have ever seen. I really wish I could do that for my best friend; she would hang it up all year long.
This is so so cool!
Wow! I love this so much! Thanks for sharing the details!
love this so much
This tutorial is such a creative and fun project. As a student, I really enjoy finding ways to combine art and storytelling, so this Boo Ghost Panel tutorial immediately caught my eye. It reminds me of how art can communicate emotions and ideas in such unique ways which are similar to how we manage college tasks. Speaking of navigating complex topics, I recently came across this mysupergeek resource which can help to handle challenging decisions for students.
Telecommunications has transformed the way we live, work, and connect globally. From traditional landlines to cutting-edge 5G networks, this field continues to drive innovation in communication technology. Businesses rely on telecommunications for real-time collaboration, while individuals enjoy seamless access to information and entertainment. As demand for faster, more reliable connections grows, telecom companies are investing in fiber optics, satellites, and IoT solutions. To explore the latest advancements and how they impact daily life, click here and discover the dynamic world of telecommunications shaping our digital future.