Add a Bit of Gold Glam
Hi readers! Happy Sunday! Today we have some fantastically GOLDEN inspiration for you from Lisa Spangler!
Enjoy!!
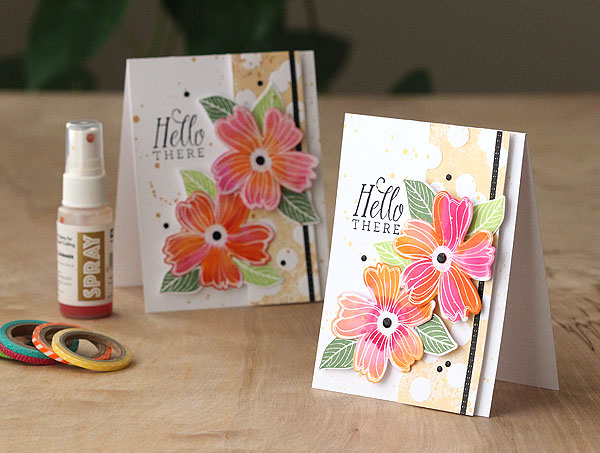
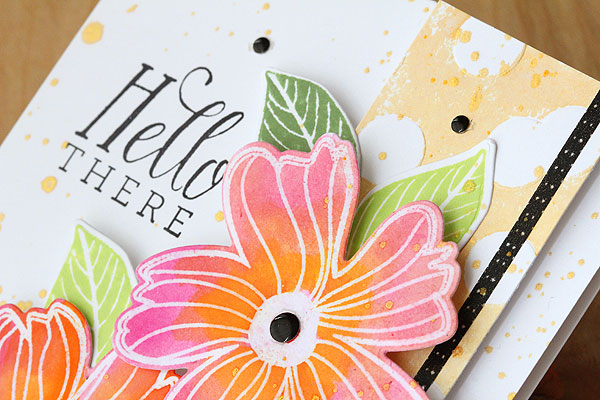
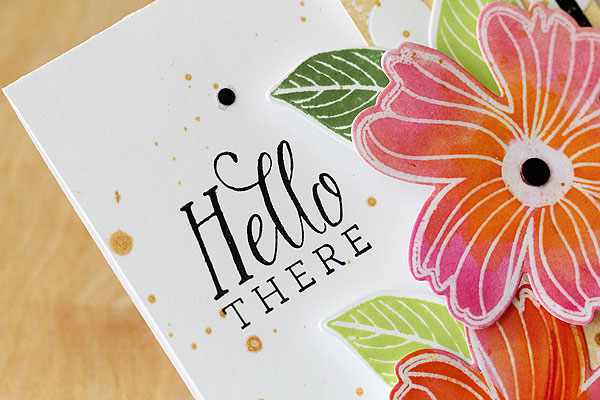
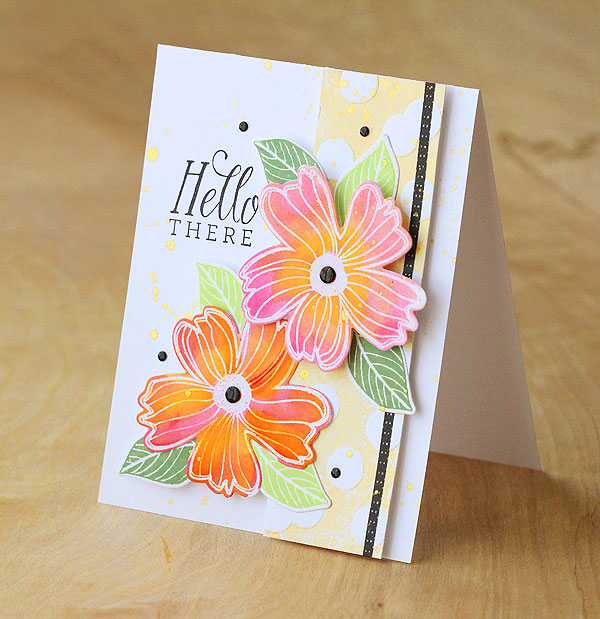
Hello there! I have some tropical greetings to share with you today that also have my favorite color of the summer: GOLD! I have a feeling I’ll be using gold on my Christmas cards this year too. I also have a nifty trick you can do with stencils. So, read on! :)
I started out by stamping this flower from the Hero Arts Hello Flowers set with Versamark ink, then heat embossing it in white. Then I broke out my peerless watercolors and went to town!
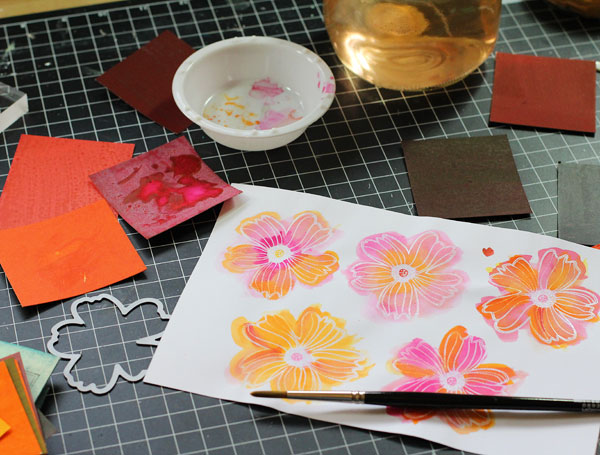
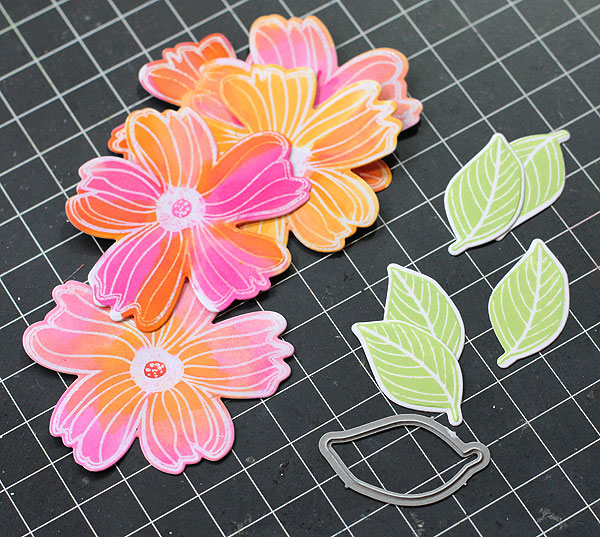
I first used these last summer while on vacation in Quebec. I just love them to take with me while traveling — they pack up so well! And the colors are so vibrant. LOVE.Next I stamped a bunch of leaves in lime and field greens and cut them out with the matching die cuts. I am not very patient when it comes to fussy cutting, so I love having matching dies! :)
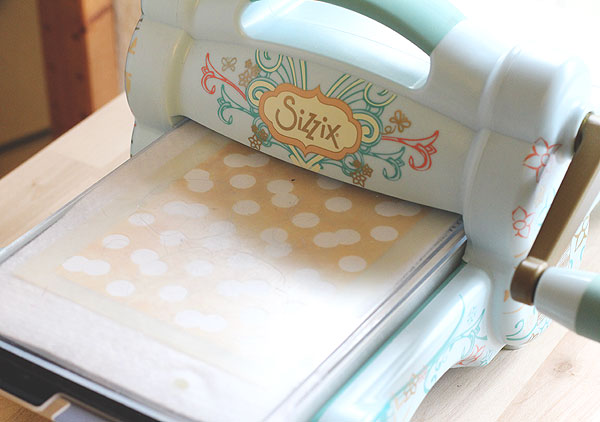
Now for my stencil trick! I placed the confetti dot stencil on some white cardstock and misted it with gold, but I didn’t think the design was strong enough to go with the bold flowers. Then it hit me to use the stencil as a stamp!
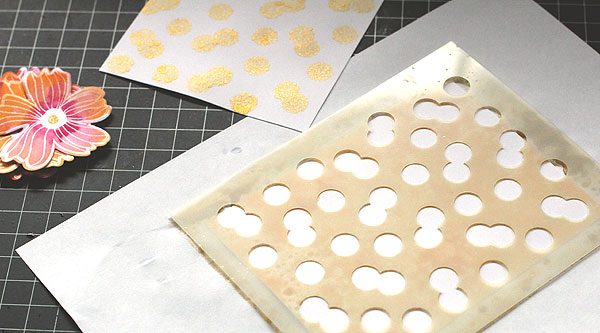
I just picked it up carefully and placed it on a piece of cardstock trimmed to 4.25×5.5″. Then I covered it with scratch paper and pressed all over it really well. It doesn’t come out quite as well as a true stamp would, but it gives a nice shimmer.
Then I decided to use the stencil to emboss it, too! This really makes the dots pop. :)To do this, just place a piece of felt under the paper and the stencil on top in your sandwich and run it through the machine as you would for a die cut.
Next I partially assembled the card, adding a strip of this skinny Amy Tangerine washi tape. Yes, I am still addicted to washi tape. :)Before I adhered the flowers with pop dots I stamped the message in black.
Then after the card was assembled I splattered some more gold mist over everything. Because you can never have enough gold!
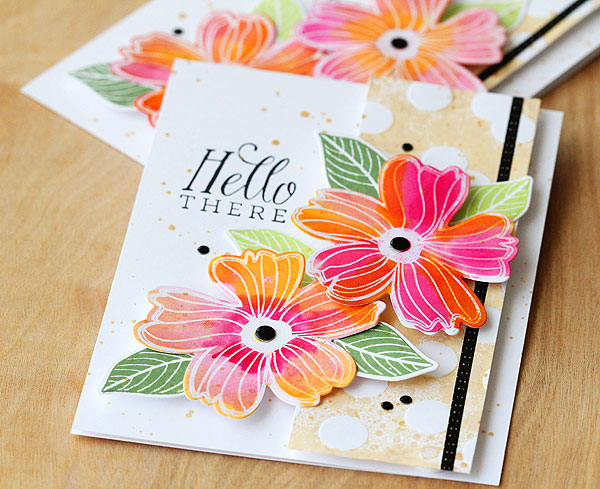
Oh and I wanted to add that I added some Hero Arts black decor to the centers of the flowers and here and there on the card. I like how the black really stands out with the vibrant watercoloring, yet doesn’t take anything away from it.
Thanks so much joining me today, and thanks to Simon Says Stamp for having me! Hope your summer is golden. xo
SUPPLIES:
 |
 |
 |
 |
 |
 |
 |
 |
 |
 |
 |
 |
 |
 |
 |
 |
 |
Thanks for reading today and thanks to Lisa for the inspiration!!
Blog Candy Alert!! Follow our blog via email and comment on this post for a chance to win a special blog candy!
![]()


ahhhhh, yes, thanks for the reminder that you can use stencils to emboss too! Love the samples you created today.
Gorgeous! I love how this turned out! And thank you for the step-by-step instructions! Your watercolour flowers are beautiful!
This is amazing!! I love the colors and the card and everything! Beautiful..
Beautiful cards ..lovely cards n I loved the idea to use stencil as stamp !
Very, very pretty card!!
absolutely amazing!
Beautiful card! Thanks for sharing how to use the stencil as a stamp. This girl is learning lots of new tricks!
Beautiful card!
~God bless~
I didn’t know you could use stencils to emboss! What a beautiful card. I’ve been eyeing those peerless watercolors. They are so vibrant and beautiful!
This is stunning! Love how you used your stencil as a stamp and for embossing!
Love this technique! Great card; thanks for the inspiration!
LOVE the watercolors on the card, super cute!
Beautiful card! Love gold for crafting!
Absolutely gorgeous.l
Well done. Thanks for the new stencil techniques. I love gold, too!
So bright, vivid and colorful. Just right for summer days.
Love those Peerless water colour sheets, the stamps and dies for this card are gorgeous! Love every little detail – thank you for sharing Karen x
I love the colors on this card. Very Polynesian looking.
Debbie
What a great card! I love the added embossed detail you did with the stencil!
So pretty! I didn’t know you could used felt to emboss, that’s a cool technique!
i love my peerless, pretty flowers indeed.
Amazing creativity, Lisa!
Beautiful cards!
GORGEOUS flowers and DELIGHTFUL cards Lisa!!!
THANK YOU for sharing your tutorial … LOTS for me to buy and techniques to try :)
Love the flowers they look marvelous on the card!
The flowers really pop on the card….very pretty.
Very pretty–love the touch of gold.
Beautiful flowers. Great job on the cards!
those flowers are gorgeous!
I love these flowers. TThe card is beautiful, love all the elements you put on it (especially the black enamel dots). Thanks for sharing.
Beautiful card…love your layers and the gold…oh yes!
Fun and vibrant card! Love the techniques.
Love all the creative ways you used your stencil and your card is gorgeous!
So beautiful, love the fun of the card! Thanks for sharing!
Lots of good tips and techniques. I really like the stencil being used as a stamp.
Such a pretty card! I love the stamp sets that have matching dies. They make creating so much easier.
Gorgeous card. Love it!
Lovely card… just gorgeous!
So so GORGEOUS!!!
Soooo pretty!!!
Ahhh this is so pretty :)
So love that watercoloring. Very pretty, would try to do one for my cards
Wow, what a gorgeous card! Love Lisa’s work.
Love this card Lisa! the colors, the design, the gold glimmers …. so pretty!
Beautiful card- those gorgeous flowers really pop. Well done, Lisa.
Glam is good! Love what you did!
Love how those flowers end up, they’re gorgeous.
Love this card. Makes me want to try the Peerless Watercolors. The colors are beautiful!!
Love the watercolor look of this!
Love the fun summer colors.