A Thank You Card by Joy Taylor
Hi bloggers, and happy Sunday to you! I hope you have had the perfect combination of fun and rest this weekend! :) I’m pleased to bring you another card by Design Team member Joy Taylor! This week she shows a few techniques with this lovely thank you card!
Supplies to make it:
Instructions:
1.Trim Kraft card stock to form card base, measuring 4 /14 x 5 ½ inches.
2. Trim watercolor paper to measure 2 ½ x 5 ½ inches.
3. Ink up the Starbursts stamp with Versamark ink, stamp onto the watercolor paper and add a layer of white embossing powder, heat set.
4. Spritz paper lightly with water for more tooth.
5. Apply layers of Distress Stains, Tattered Rose, Victorian Velvet, Aged Mahogany, Walnut Stainand Picket fence, the embossed image will resist the stains, apply the stains until happy with the end result.
6. To make the drying a faster process, use heat gun.
7. To give the image more depth, add spritzes of Mr Huey’s Mists, Plum Thumb, Clay, CalicoWhite and Calico Shine.
8. Once dry add the watercolor paper to a piece of white card stock, giving it a matte look.
9. Adhere this to the front of the card with foam tabs.
10.Trim a small piece of white card stock to form a sentiment banner, stamp the Thank You sentiment from the Say it All stamp set with Archival Jet Black Ink, trim a V in one end of the banner.
11.Adhere the sentiment to the card with foam tabs.
12.Complete the card by corner rounding the two right hand corners with the 3/8 inch CornerChomper and add pearls to the centers of the flowers as well as the sentiment.
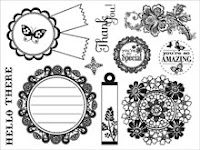
BLOG CANDY ALERT! Join our following and comment on this blog and you could win this not for resale Hero Arts Stamp set pictured above! Winner to be announced on Monday, good luck!
*Follow Simon Says Stamp on Twitter!
*Like Simon Says Stamp on Facebook
*Enter the Vintage Simon Says Stamp & Show Challenge!
*Enter the Simon Says Stamp Challenge!
*Subscribe to our Blog!
*Subscribe to our Blog!
*Sign up to Receive Our Newsletter!


There are no comments.
Leave the first?