Studio Monday with Nina-Marie: 5 Craft Room Organization Quick Tips
Hello friends! It’s Nina-Marie here with you this week sharing five tips that you may find helpful in organizing your craft room and supplies!
Organization is something I love. I am constantly coming up with new ways to reorganize my studio! Organization is important to me because it is one of the things my workflow relies heavily on; if my studio is messy and no easy to navigate, I am less productive. I also am a person that likes things to be fresh and new, so I update my organization methods within my studio often, just to give myself a fresh environment.
In today’s video I am going to focus on 5 tips I find helpful in organizing my own studio and supplies. In the video, I also mention the previous Craft Room Organization Tips video that I posted here a few months back; you can find that post and video HERE.
TIP #1: BUTTONS
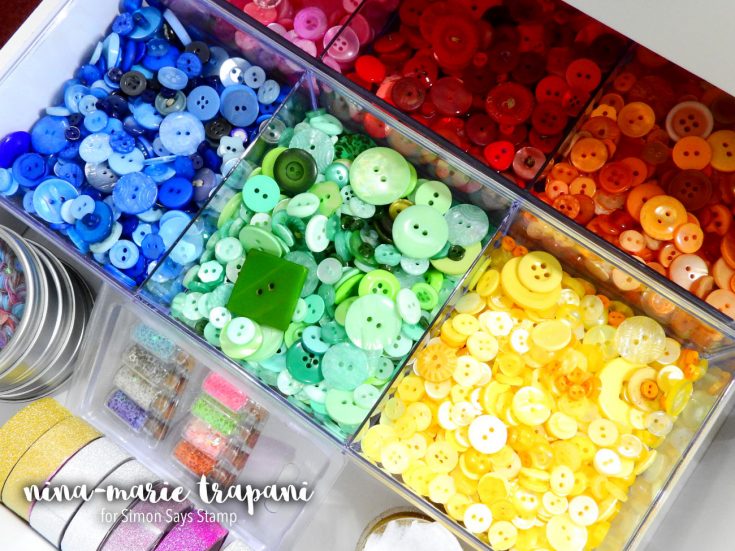
Buttons are a great embellishment for cards, scrapbooks, mixed media, DIY projects and more. I find it very handy for me to store them in divided containers, such as the InterDesign Clarity Tray. I sort the buttons by color hue and I can fit four of these trays in a 12×12 draw (two side by side and another two trays stacked on top).
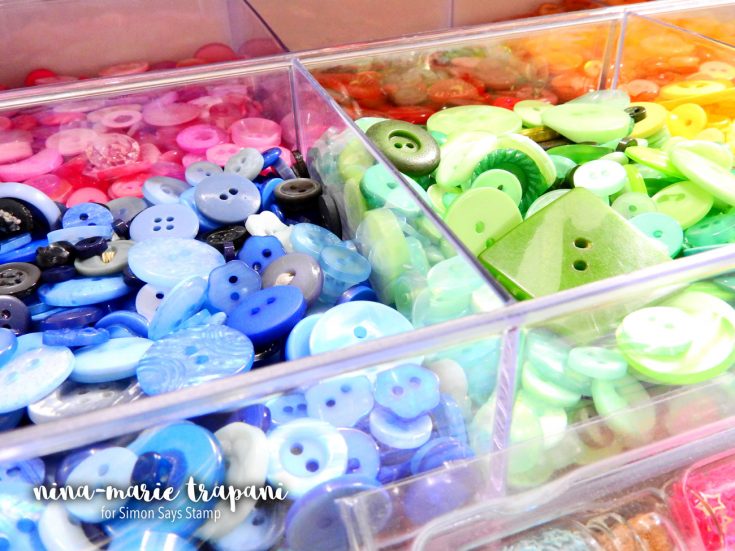
By having the buttons organized in color (like pretty much everything else in my studio!), I can easily reach for what matches my card best and keep on creating!
12×12 BINS
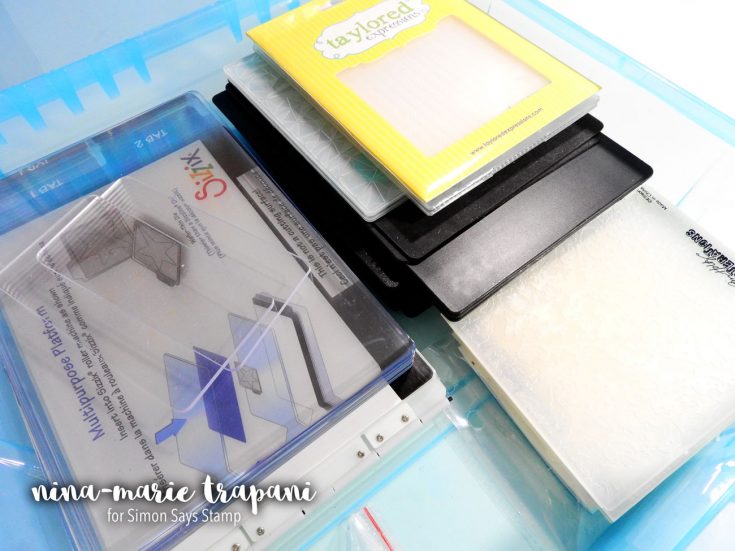
Plastic storage bins such as the Alvin Stow and Go, are perfect for tucking away supplies you don’t reach for as often. I can fill these with quite a bit of product and then tuck them on a shelf to keep my supplies clean and ready to use.
Some examples of how I use these bins include:
- Foam sheets: I can fit a huge stack of 8.5×11 inch foam sheets inside these bins. In the space leftover in the bin. I can also tuck my scraps of foam that I end up with from projects.
- Die cutting supplies: In another bin I store my extra cutting plates for my Big Shot, as well as platforms, impression plates and embossing folders. All of these can get tucked away until I need them.
- Donations (not shown in video): I have another bin I keep with supplies I no longer need and plan on donating to charity. This keeps them protected, clean and in one place for me to go to when I am ready to donate them to someone that could use the supplies. I like being able to give back to others and help spread the “crafty bug”!
TIP #3: MAGNET SHEETS
Dies are something I think pretty much all of us have some of in our crafty stash! I love using magnet sheets to use as an organizational option for my dies. We carry a variety of different magnetic die storage option here at Simon Says Stamp, such as:
- DoCrafts magnetic sheets
- Tonic Ringbinder with Magnetic Sheets
- We R Memory Keepers Magnet Zipper Pouches
- Art Bin Magnetic Storage Case
- or even magnetic storage trays like this one from Tim Holtz!
I personally like using simple magnetic sheets and storing the dies in stamp storage sleeves.
TIP #4: BAKER’S TWINE
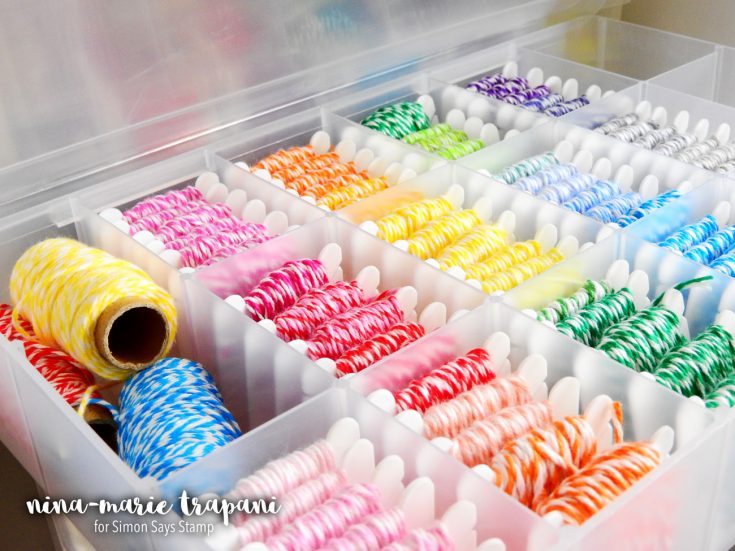
Baker’s twine for me was ALWAYS an issue. I love the cute spools that they come on, but I always ended up having my draw of twine a mess. If you know me, I cannot stand having a mess! I tried a few different ways of storing the spools in hopes that finally I might be able to keep the twine corralled. One of my ideas that I fell in love with once I tried it was organizing it like my embroidery floss. For those of you that are needlepoint and sewing enthusiasts, this storage solution might seem familiar to you!
I used embroidery floss cards and wrapped the twine around the cards; most spools of twine fit on a single card. For larger spools I needed two or three cards. After winding all the twine onto my floss cards, I was able to then fit them into the Darice Floss and Needle organizer. This bin is inexpensive and comes with floss cards! For me, it is a must have.
TIP #5: MINI TINS
My final tip for today is for organizing mini ink cubes. I personally use mostly large ink pads in my studio because I like the larger size. However, I do have a few minis and I know they are all the rage right now in the crafting world. Because of that, I wanted to share this tip with you in today’s post.
For my small collection of mini ink cubes, I have a Tim Holtz Mini Distress Ink tin. This is perfect for storing my minis and tucking the container on a shelf with other inking supplies. If I were someone that used the minis over the full size ink pads, I definitely would make sure that I had these to store all of them. One of my favorite feature of the tin is that it is “lockable”, which is very handy for klutzy crafters like me! ;)
So I hope you will check out the video below to see all these tips in action! Thanks for stopping by and visiting me today. I will be seeing you again very soon! Bye!
WATCH THE VIDEO
SUPPLIES
 |
 |
 |
 |
 |
 |
 |
 |
 |
 |
 |
 |
BLOG CANDY


a lot of fun storage ideas. thanks for sharing.
stamping sue
http://stampingsueinconnecticut.blogspot.com/
Really great organizational ideas!!!
Really great ideas!!
Love organization videos! Thanks for sharring.
Wow thanks for sharing your organizational tips with us. really love how you keep your twine:)
Great tips Nina-Marie!!!
I love storage tips & tidy up tips; structured chaos isn’t suppose to be forever…right?
I always appreciate help with this and seeing how other paper crafters handle the topic is just plain fun!
Wonderful storage tips. I have my buttons in trays like you use. I need to get my twine organized.
Melissa
“Sunshine HoneyBee”
Great tips! I just bought a bunch of magnet sheets to transfer my dies, but I need those sleeves to put them in. I can’t imagine rewinding all that floss! Yikes! But a great tip I may just do myself – at least for the small spools. lol
Thank you for the wonderful tips.
Great tips! I use most of those same methods for my stash as well. :-)
Thanks for the great tips. Really loving the idea of the magnetic tray by Tim Holtz. I’m thinking this is going to be going to be a great solution for me when I’m using multiple dies for a project(s). Thanks for the share.
So many great ideas. Crafting is more fun when I am organized.
Loving the tips!!! I especially love the bakers twine tip, I never found a good solution till now! Thanks for sharing!!!
Great tips. I store my ribbons by color in see through storage containers. My bakers twine goes in the correctly colored bin along with the ribbon.
Beautiful storage ideas!Thank you for the tips
Fabulous organization ideas! Love them all!
They’re not only great organizational tips, their rainbow prettiness would make any craft room beautiful.
If I only had a space (even a little corner) for my craft supplies I would definitely use these tips. For now everything needs to squeeze into two drawers.
Thanks for the great ideas!! I’m organizing my craft room right now!!
Organization is a never ending process! Thanks for the tips!
Always great to hear some more tips for organising all our supplies!
Thanks so much for the great tips. I already use the magnetic sheets and I have floss bins for my floss but it’s an awesome idea to use it for my twine. I’m certainly going to do that. I have my buttons in an old garage drawer organizer and I really like your bigger bins but since it doesn’t have a lid I’m not sure it would work for me. I like the 12×12 idea for fun foam. Thanks so much. I’m off to watch the other organize viseo too. Tis the season to refresh and organize!
Great idea for the twine! I was just looking at my ‘twine basket’ this morning ~ I think I’ll be fixing that today! Thanks!!
Something for every craft room. thanks
Great tips! I have all of the TH mini Distress Inks and have them in the TH tins. I have sorted them into color families and I label the tins with the colors on the front of the tin (each row has its own line of colors) and I have them labeled on the side as #1 TH Distress , #2 TH Distress and so on. I keep them on top of my OrganizeMore! ink pad holder.
Thanks for sharing these tips!
Thanks for all the great organizing ideas. I am in the middle of trying to organize my supplies and this was really helpful.
Fabulous tips! Thank you!!
Some very valuable tips here Nina. Organization is KEY within a craft room. I am always looking for new and improved ideas as I acquire more products so I appreciate this info you’ve shared. Thank you!
My craft room needs to be organized for sure. Thanks for the ideas!
Love the look of the Darice organiser! TFS
I never thought to store buttons by color
Great storage ideas! Thanks!
Thanks for all the tips, hope to see more because who doesn’t like to be organized.
I’m in the process of reorganizing my space now–thanks for all of the hints!
I love the TIm Holtz mini tins, I use them for all my mini ink pads. Thanks for the storage ideas.
Great storage ideas!
Thanks for the very useful ideas.
Great ideas. Love the button storage idea.
Wonderful ideas, thank you! I love finding new organizational tips & these are great!
thanks for the reminder of storing twine
that is on the little cards in the
embroidery boxes. I have several
boxes that are empty – now I can put
one of them to use.
Great tips.
thanks for sharing.
Really great ideas! Which magnetic sheets to you use?? I really need them to organize my dies especially the die sets that have so many little pieces. Thanks!!
You have organization down to a science! Thanks for sharing your ideas!
Great ideas! Thanks!
Wonderful ideas, thanks for the tips, have a wonderful day!
Thanks for the great storage tips video!
Thank you so much for the tips!
I really like the idea for the twine.
Thanks for sharing. I am in the process of setting up my crafting area for this new craft (card making) and am boxing away a lot of the older craft things I used to do. It is always good to hear and see new storage ideas.
Great tips – I am always modifying and refining my organization. thanks
Great tips, thanks for sharing.