
Watercolor Peonies
Hi friends! Happy Easter Sunday! Please join me in welcoming back special guest Anna-Karin Evaldsson! We are very honored that she inspires us weekly on our Monday Challenge blog as well, so be sure to check out her Layers of Ink blog too! For now, read on for this GORGEOUS Peonies panel tutorial! Enjoy!
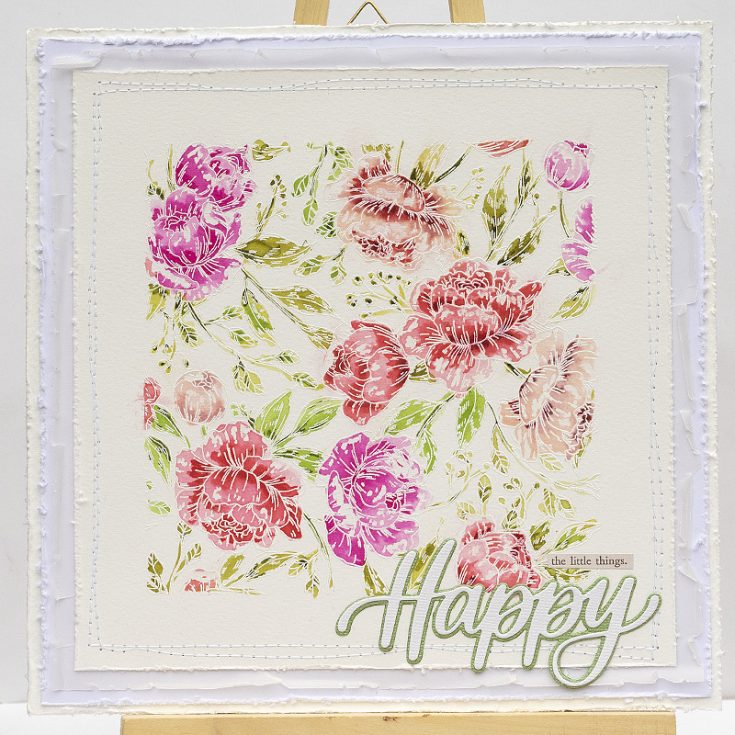
Hi everyone! I am so happy to be here today with a fun and easy tutorial, perfect for spring and summer projects. When I saw the Pretty Peonies background stamp, I knew I wanted to turn it into the focal point of a project. It is such a pretty stamp. We will be doing a watercolor technique, with some simple masking.
I started out planning to make an art journal page, but after having colored the flowers, I changed my mind and turned the panel into a wall-hanging instead. But, you can of course make a card or an art journal page instead, or use it as a background for a scrapbooking page. The wall-hanging would make a great Mother’s Day gift, or you could do three of them in different colors and use as home décor.
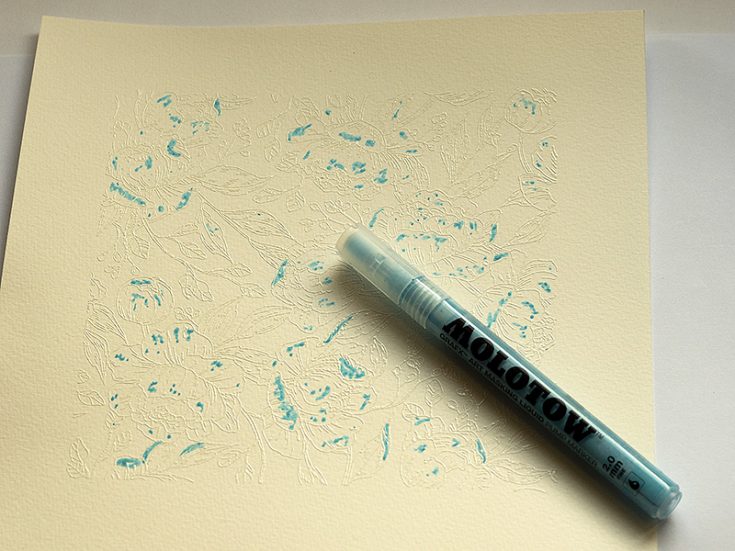
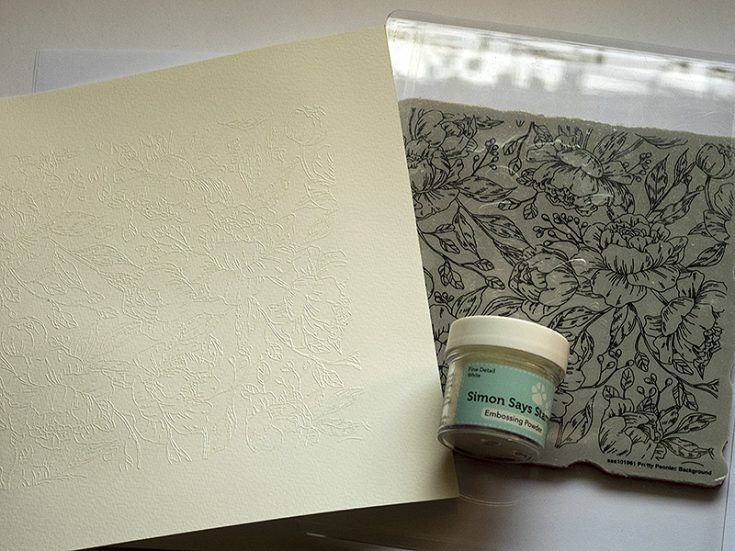
Start by white embossing the Pretty Peonies stamp on a square piece of watercolor paper (7.3 x 7.3 in). Always be careful when using a heat gun so that you don’t burn yourself. For the masking, I used a Molotow masking pen. You can also use a white oil-based wax crayon or a white candle. Or you can skip the masking all together.
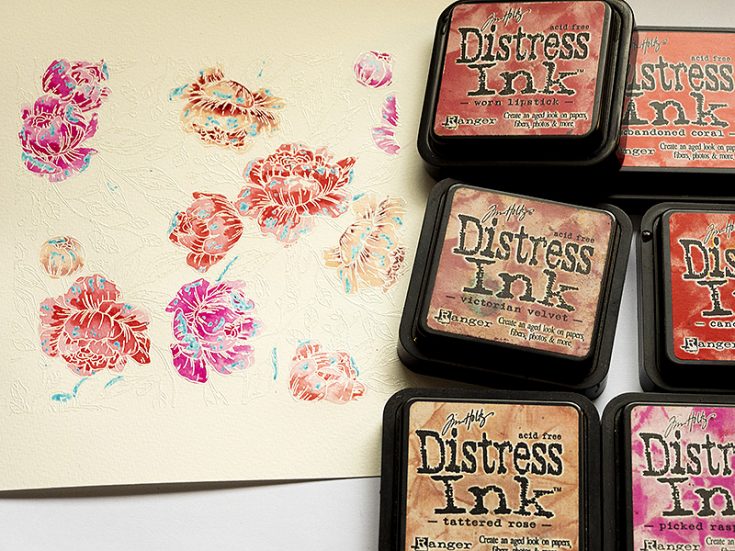
I used Distress Inks for the watercoloring, but you can also use watercolor paint. Smear the inks on a non-stick craft sheet. Mist with water and pick up with a paint brush. By varying the amount of water, you can get different shades of color from the same ink pad. Watercolor the flowers, using two or three shades on each flower, to create depth and dimension. I like having the stamp next to me so that I can see the printed design since some of the white lines might be hard to see.
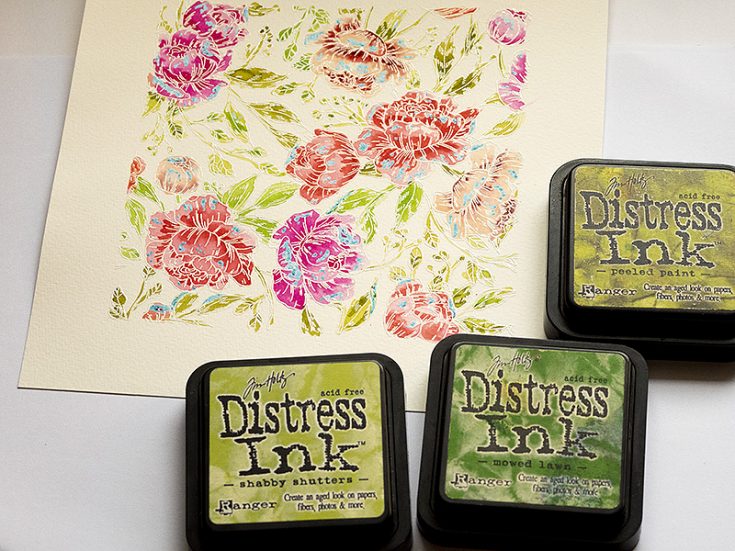
Continue with the leaves. Don’t worry about perfection, going outside of the lines just looks good, since it makes the white embossing more visible.
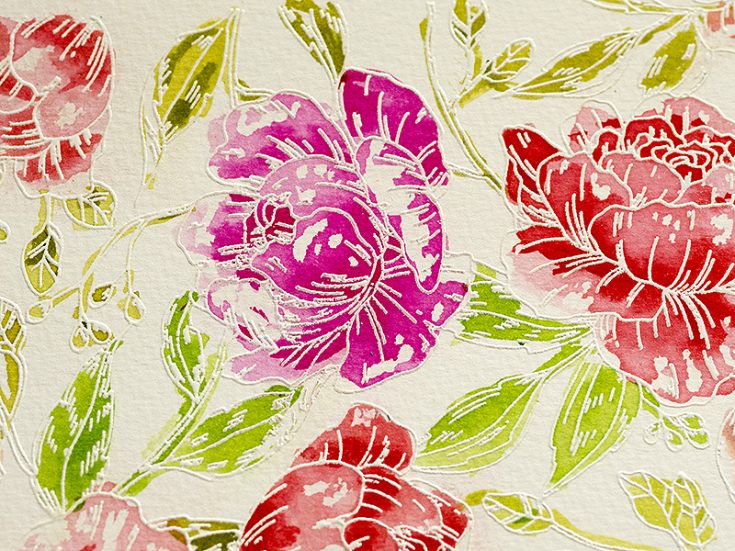
When the ink is dry, carefully rub off the masking liquid, giving your flowers great highlights. If you are not happy with one of the white areas, you can paint it over – but that doesn’t work if you have used an oil crayon or a candle for the masking.
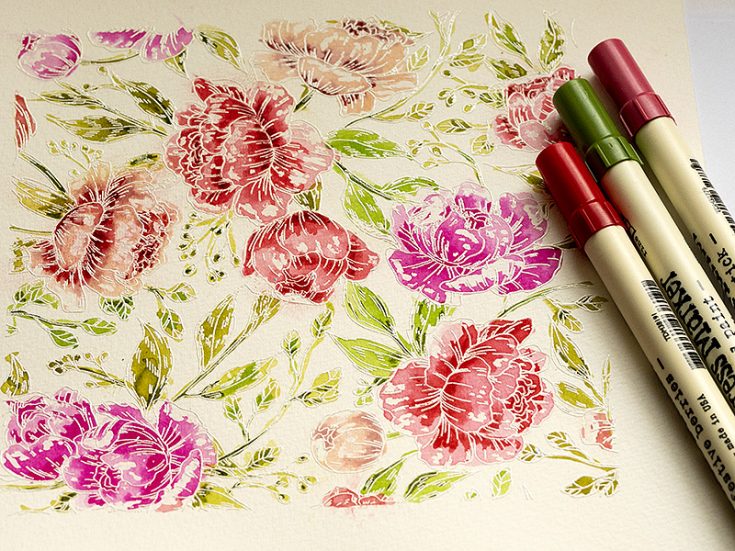
I used Distress Markers to darken the colors in some areas.
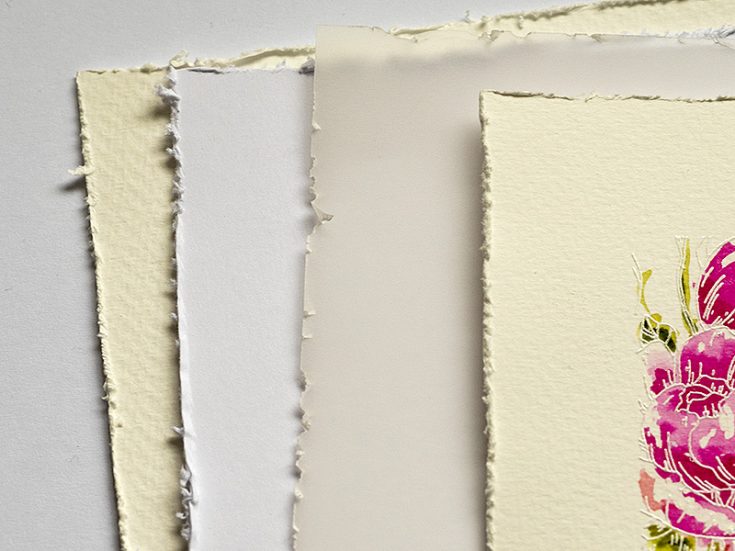
When I was done coloring, I didn’t want to add too many other details to this piece. To add interest, I layered and distressed various types of white papers: vellum, bright white paper, and another piece of watercolor paper.
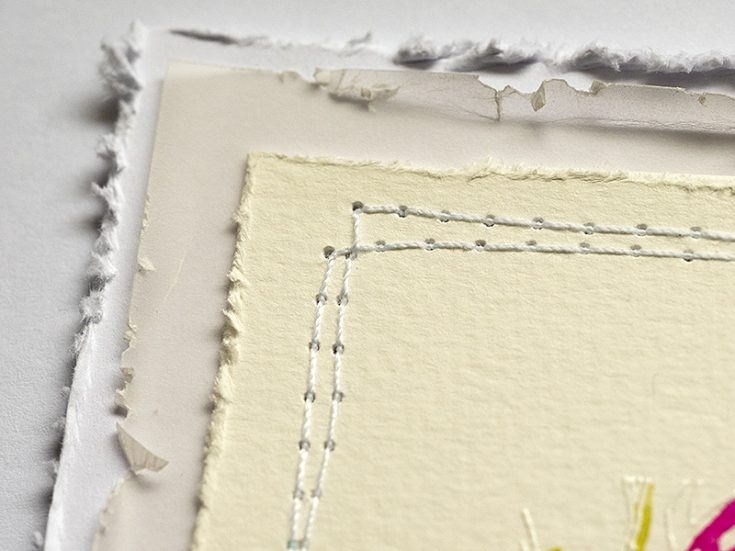
Apply tape in the center areas only and stitch around the main panel with a sewing machine. I mounted everything on chipboard to give it strength.
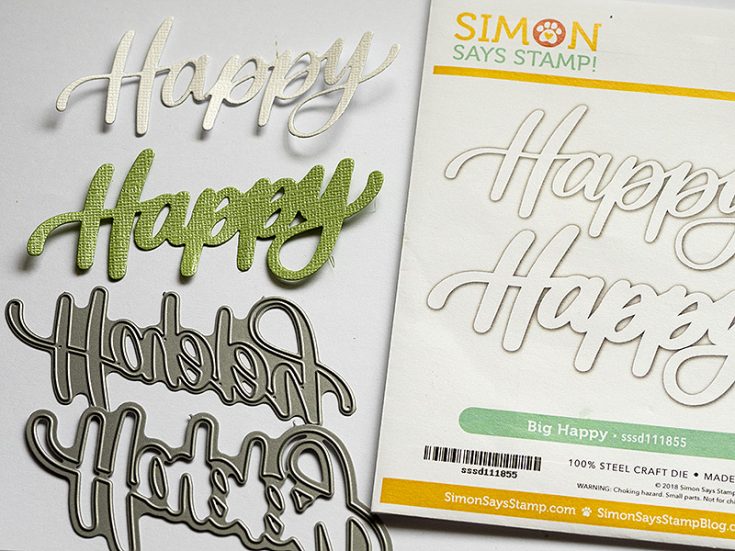
Die cut the sentiment using the SSS Big Happy die. I die cut it from White Diamond and Spring Green glimmery papers.
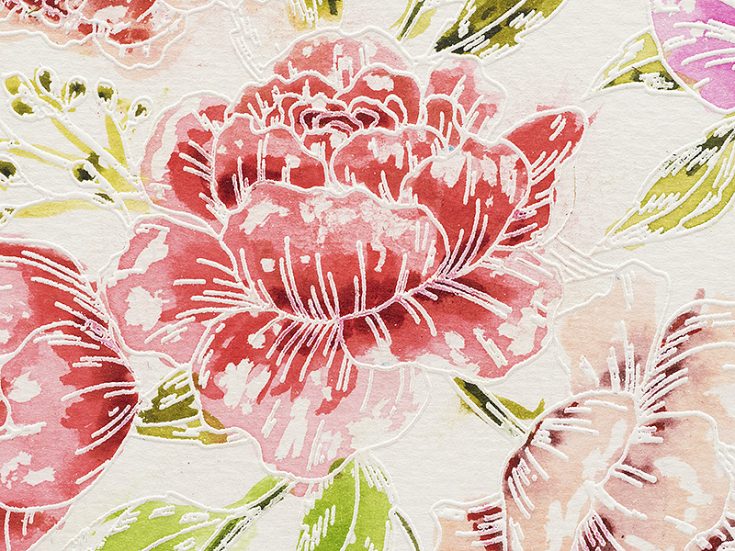
You can also cut out the peonies and use them on card.
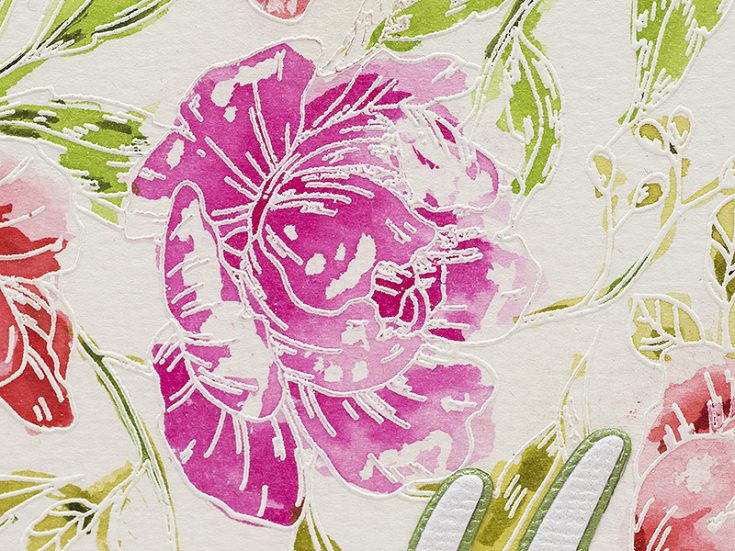
The masking liquid technique is easy to do, and adds great highlights. You don’t need to worry about leaving some of the white paper showing while coloring.
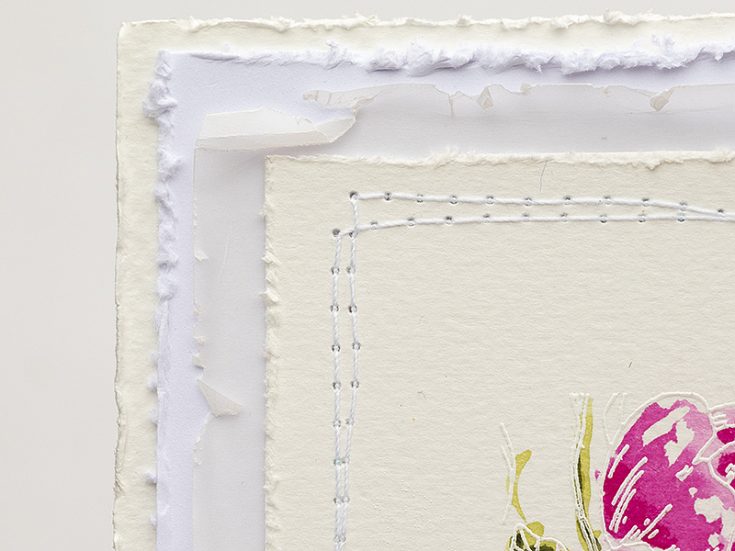
The Simon Says Stamp glimmery papers have such a nice shine, which you can see better here.
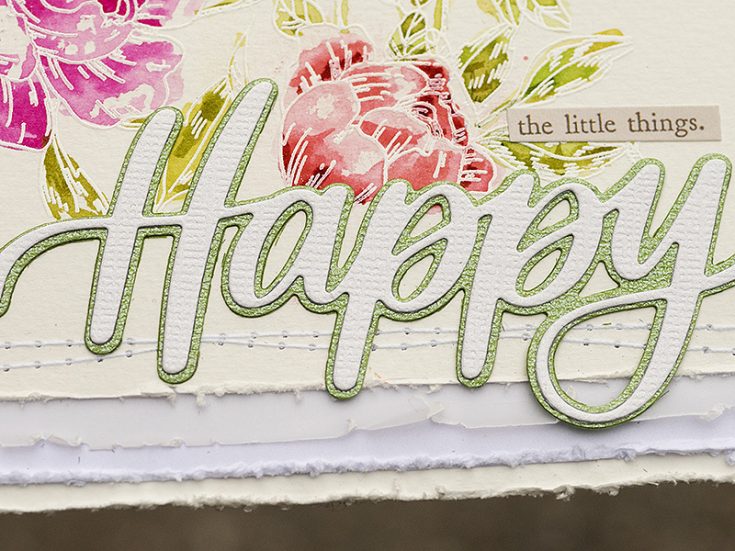
Layering different shades of white and cream papers, adds interest without stealing attention from the focal point.
I hope this tutorial inspired you to try out some loose watercoloring in combination with masking.
Thank you so much for looking! Happy crafting! -Anna-Karin
SUPPLIES:
|


Thanks so much for stopping by and thanks to Anna-Karin for being our guest!

Blog Candy Alert!! Follow our blog via email and comment on this post for a chance to win special blog candy!








Oh wow, this is just so pretty
What pretty flowers. The white space on the flowers is a nice look, too.
Beautiful! Loved learning about the masking fluid what a unique look it allows for.
I really love the watercoloring. So beautiful. This is a great Wall hanging. It would look great in my home.
wow this is such a stunning project!!
Gorgeous! Love the colors!
Have a great day!
Marilyn❤️
These are so beautiful!
I absolutely love this!! So lovely!! I have this stamp and I enjoy it!!
Absolutely BEAUTIFUL! Thanks for the inspiration!
Beautiful work! I love the layers! :)
WOW! Gorgeous creation, love the extra highlights using the masking!
Gorgeous water color project. Thanks for sharing!
So soft and lovely! I am a huge fan of background stamps. Just beautiful!!!!
Beautiful, and love the technique!
Very pretty. Thanks for sharing.
Linda D.
What a beautiful work of art! I love everything about this. The stamp, watercoloring, masking. Nicely done!!!!
Beautiful! Great tutorial!
So beautiful
Beautiful wallhanging! I recently read another tutorial which mentioned using masking fluid. Such a great idea.
I have this stamp but haven’t used it yet. Thank you for the inspiration.
This is simply beautiful! I love the idea of a wall hanging and I know what my Mom is getting for Mother’s Day! Thank you for sharing your creativity and inspiring me.
This is one of the most stunning pieces I have ever seen!!!! I absolutely love it and never would have thought to use the masking pen in this way!!! So thanks for the tip. I am blown away by how beautiful this painting is!!! You did an amazing job on this!! Thanks so much for sharing!!!! Big Hugs!!!!
This is so, so pretty! I love the texture you’ve created with the tone-on-tone layering.
Beautiful! I also liked the layers of matting you used: they really enhance the layer in the foreground. Lovely
so gorgeous!!
Happy Easter! So excited to see Anna-Karin back with another stunning tutorial. Her work is always so inspiring, and these watercolor peonies are absolutely gorgeous. Can’t wait to try this technique myself—thank you for sharing such beautiful creativity!
I appreciate the decorations on the materials; they are colorful and different. They are both well-made and gorgeous.
Happy Easter Sunday! 🌷 I’m so excited to see Anna-Karin back with this beautiful tutorial! The Pretty Peonies stamp is truly stunning, and I love how you’ve transformed it into a wall-hanging. The watercolor technique sounds like a fun way to add depth and dimension to the flowers, and I appreciate the tips on masking and using Distress Inks. I can’t wait to give this a try—what a perfect gift idea for Mother’s Day! Thank you for sharing such inspiring ideas and for the chance to win blog candy. Happy crafting, everyone! 🎨✨
Happy Easter Sunday! 🌷 I’m so excited to see Anna-Karin back with another fantastic tutorial! The Pretty Peonies stamp is truly stunning, and I love how you’ve turned it into a wall-hanging piece. Your watercolor technique looks so fun and easy—I can’t wait to give it a try! The idea of using this as a Mother’s Day gift is just perfect! Also, the layering of different papers adds such a lovely touch. Thank you for sharing your creative process with us! I’m definitely inspired to experiment with some loose watercoloring myself. And of course, I’ll be sure to follow along for a chance at the blog candy! 🎉 Happy crafting, everyone!
Happy Easter, everyone! 🌷 What a delightful tutorial, Anna-Karin! The Peonies background stamp is absolutely stunning, and I love how you transformed it into a wall-hanging. Your watercolor technique looks so approachable, and I appreciate the tips on masking. I can already envision creating some unique Mother’s Day gifts using this method! The layering of different papers adds such a lovely touch, too. Can’t wait to try this out for myself. Thanks for sharing your creativity with us! 🎨💖
Happy Easter Sunday! 🎉 What a beautiful tutorial, Anna-Karin! The way you transformed the Pretty Peonies background stamp into such a stunning wall-hanging is truly inspiring. I love how you incorporated the watercoloring with different shades to create depth — it really makes the flowers pop! The masking technique sounds so fun and effective for highlighting those details.
Happy Easter Sunday! 🎉 What a beautiful and inspiring tutorial, Anna-Karin! The Pretty Peonies background stamp is truly stunning, and I love the idea of using it as a focal point for a wall-hanging. The watercolor technique sounds like so much fun, especially with the added dimension from the masking.
What a delightful tutorial, Anna-Karin! The Pretty Peonies stamp is indeed stunning, and I love how you’ve turned your project into a beautiful wall-hanging. Your step-by-step instructions make it so approachable, and I can’t wait to try out the masking technique with my own watercoloring. The idea of using different shades for the flowers is
What a delightful way to celebrate the day with such a beautiful tutorial! I absolutely love the idea of using the Pretty Peonies background stamp as a focal point for spring and summer projects. The watercolor technique combined with masking sounds like a fun challenge, and I can’t wait to try it out! The suggestion of turning it into a wall-hanging or a Mother’s Day gift is fantastic—I might just have to make a few for my friends and family. Thank you, Anna-Karin, for sharing your creativity and inspiring us all!
What a delightful surprise to see Anna-Karin back with us! I absolutely love the Pretty Peonies stamp, and your watercolor technique sounds so fun and refreshing for spring projects. The idea of turning it into a wall-hanging is brilliant—what a thoughtful Mother’s Day gift that would make! I can’t wait to try the masking technique and see how the different shades of color come together. Thanks for sharing such a detailed and inspiring tutorial!
Happy Easter Sunday! 🌷 What a delightful surprise to see Anna-Karin back with us! I’m so excited to dive into this gorgeous Peonies panel tutorial. The watercolor technique sounds like a fun way to celebrate spring, and I love how versatile the project is—perfect for gifts or home décor! Your tips on using different shades and the masking technique are super helpful, and I can’t wait to try it out myself. Thanks for sharing such inspiring ideas and for the chance to win some blog candy! Looking forward to more creative challenges! 🎨✨
Happy Easter Sunday! 🌷 What a beautiful tutorial, Anna-Karin! The Pretty Peonies stamp is absolutely stunning, and I love how you transformed it into a wall-hanging. Your tips on using Distress Inks and the masking technique are super helpful! I can’t wait to try this out for a Mother’s Day gift. The layering of different papers really adds such a nice touch too. Thank you for sharing your creativity with us! I’m definitely going to check out your Layers of Ink blog for more inspiration. Happy crafting, everyone! 🌼✨
What a delightful tutorial, Anna-Karin! The way you transformed the Pretty Peonies background stamp into a stunning wall-hanging is truly inspiring. I love how you incorporated the watercolor technique with the masking—it’s such a clever way to create depth! Your tip about using different shades for the flowers really elevates the piece. I can already imagine how beautiful this would look as a Mother’s Day gift. Thank you for sharing your creative process and those handy tips! Can’t wait to try this out and maybe even explore using the peonies on cards too! Happy crafting! 🎨💖
What a delightful tutorial, Anna-Karin! The Pretty Peonies background stamp truly is stunning, and I love how you transformed your initial plan into a beautiful wall-hanging. The watercolor technique and masking sound like a fun way to add dimension to the flowers! I can’t wait to try this out for my Mother’s Day gifts. Your tips on using different shades and layering papers really help bring the piece to life without overwhelming the design. Thank you for sharing your creativity with us! Looking forward to more inspiration from you! 😊💖