Quick & Simple Love Cards (No Special Occasion Needed!) Yippee for Yana

Hi friend! Please join me in welcoming back the oh-so-talented and amazing Yana Smakula! (Please note: our dear friend Yana is Ukrainian. To show support to our brothers and sisters in Ukraine, please see Yana’s post HERE.)
Creating cards that express love and appreciation does not have to be limited to Valentine’s Day. In today’s Yippee for Yana video, I am sharing how to stretch your love-themed stamps to create elegant, heartfelt cards that can be sent any time of the year. These designs work beautifully for partners, friends, and family members, and they are easy to make, mail-friendly, and full of personality.
For today’s cards, I focused on simple layering and relaxed coloring techniques that keep the process approachable while still delivering polished results.

Stamp Sets Used
I worked with two Simon Says Stamp sets for these projects. The first is Love Is In The Air, a stamp set filled with charming outline images and thoughtful sentiments. This set is ideal for quick coloring and storytelling scenes. The second set is Groovy Wishes, which features playful, quirky fonts that are perfect for building subtle sentiment backgrounds. While both sets have coordinating dies available, I skipped using them for my cards today.
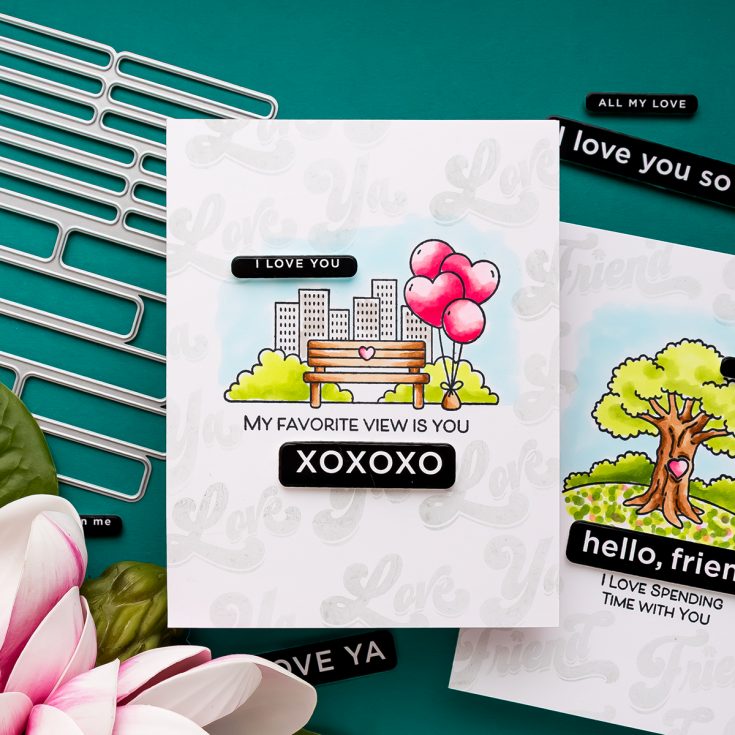
These designs are mostly one-layer cards with just a single sentiment layer added on top. This makes them easy to mail while still giving them a finished, dimensional look.
Relaxed Coloring for a Soft, Artistic Look
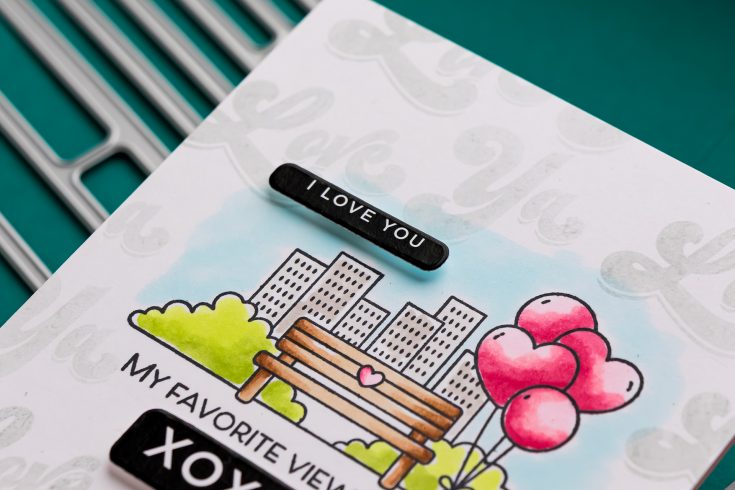
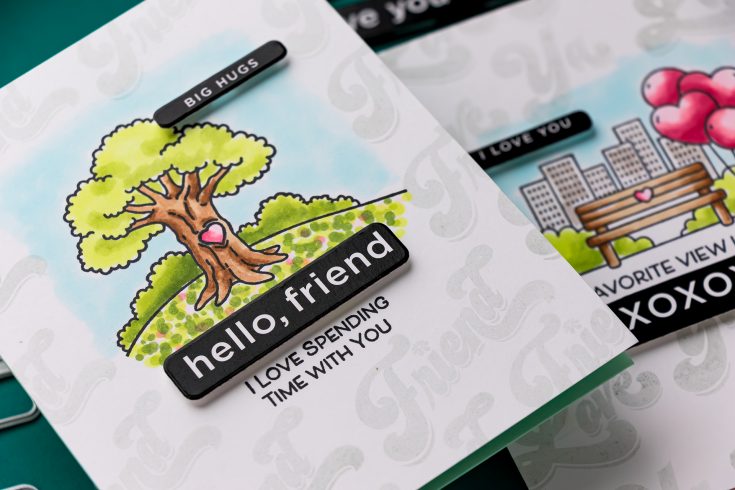
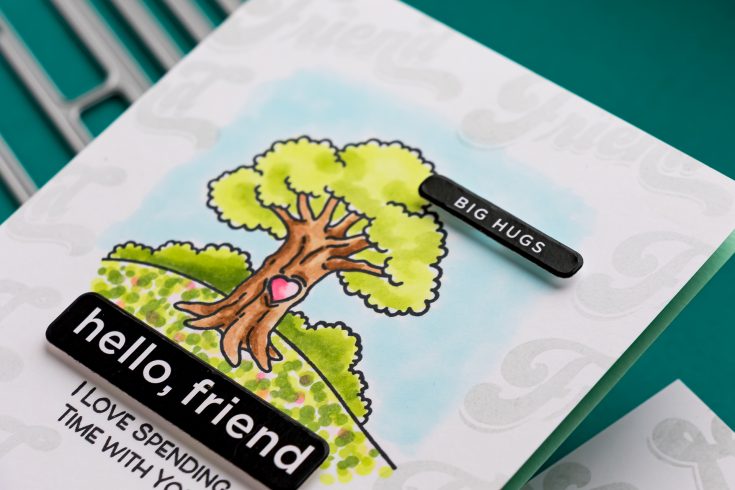
I stamped my images using Memento Tuxedo Black Ink since I planned to color with Copic markers. The coloring approach here is intentionally loose and low-stress. Instead of filling in each image completely, I added color while leaving small areas of white space and staying slightly away from the stamped outlines.
This technique creates a soft, fluid look that feels almost watercolor-like, even though alcohol markers are used. It is a great option if you want quick results without worrying about perfect blending.
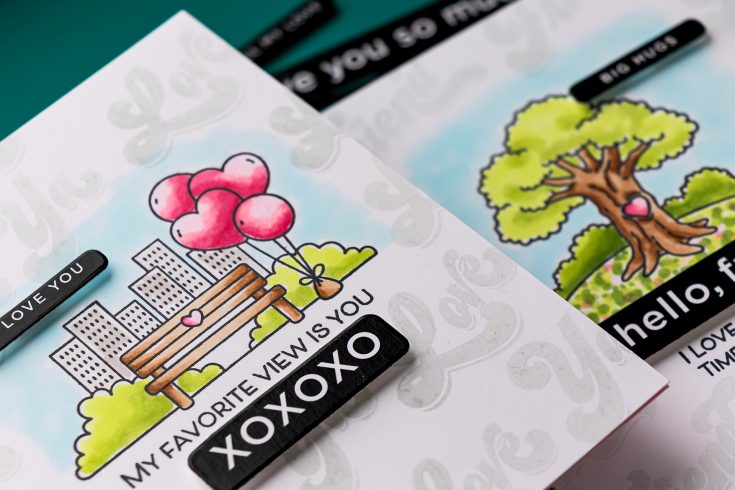
For this card, I used a limited marker palette. The grass was colored with YG03 and YG01. The balloons and small heart accents were colored with RV14, RV13, and RV00. For the bench and other brown elements, I used E37, E33, and E31, extending the lighter shades toward the center to soften the look. The buildings in the background were colored with warm gray markers, W1 and W3, and the sky was added using B000.
One of my favorite things about this image is that the scene has no defined borders. This allows you to decide how large or small your scene will be. I added the sky color freely around the image to indicate where the scene ends, which keeps the design open and airy.
Adding Subtle Background Interest
To add texture without overpowering the main image, I stamped the love you sentiment from the Groovy Wishes set diagonally across the background using a very light gray ink. This extra layer of stamping adds interest and helps tie the entire design together while keeping the focus on the scene.
This step is optional, but it is a technique I often use when I want to add depth to a card without introducing additional layers.
Finishing with Bold Sentiments
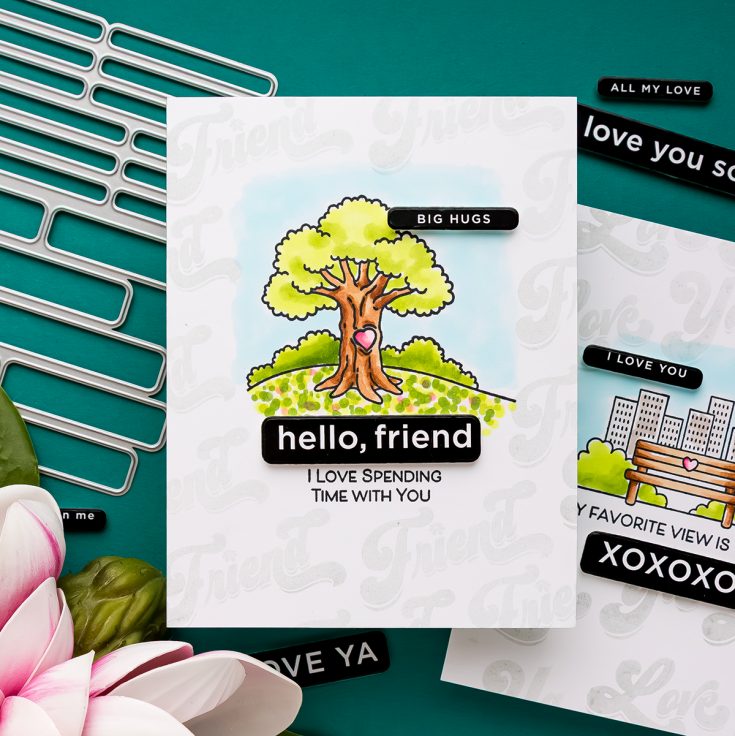
To complete the cards, I used sentiment strips from Cathy Zielske’s Reverse Love EZ Strips. These pre-printed sentiments add instant contrast and make finishing a card fast and easy. I cut them using the Easy Strips Rounded Rectangles Dies, which complement the rounded shapes found in the stamped images.
I added one larger sentiment to the bottom center of the scene and a smaller sentiment in the corner for balance. Using a ruler helps keep everything aligned and clean.
Card Bases and Final Touches
For a final pop of color, I adhered the finished panels onto Simon Says Stamp Cotton Candy and Mint card bases. While white card bases always work, using soft colored cardstock adds interest to the back and inside of the card and makes the design feel extra special.
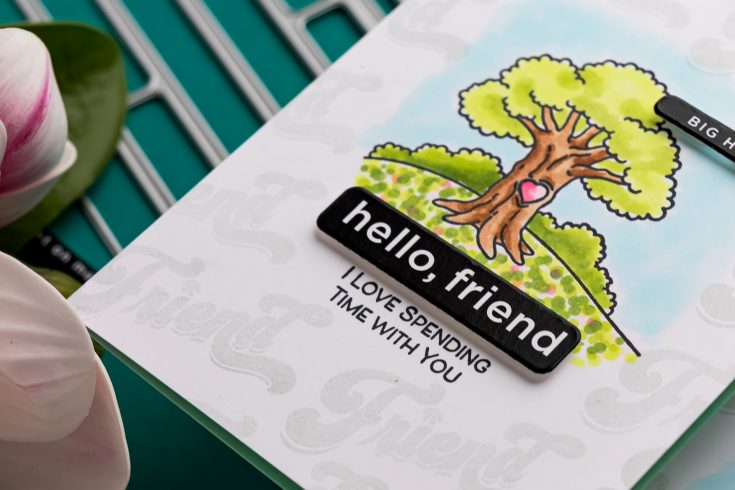
I also created a second card using another image from the Love Is In The Air stamp set. For that card, I added a dotted technique under the tree to create grass with tiny flowers, using multiple shades of green and pink for texture.
These cards are a great reminder that love-themed stamps can be used far beyond holidays. With a few simple techniques and thoughtful color choices, you can create meaningful cards that are perfect for any time of year.
Thanks so much for crafting along with me today, and I will see you again soon for another Yippee for Yana project.
WATCH THE VIDEO:

SUPPLIES:
|


Ways to support Ukraine:
If you are looking for ways to support Ukraine, we encourage you to visit this page on Yana’s blog:

A big thank you to YOU, our reader — and to Yana for being our guest!


Gorgeous cards, love the brightness of them. You’re right love should be shown every day not just Valentines Day.
Oh wow I love these