Easy Layered Ornament Christmas Cards with Glitter Backgrounds: Yippee for Yana

Hi friends! Please join me in welcoming back the oh-so-talented and amazing Yana Smakula! (Please note: our dear friend Yana is Ukrainian. To show support to our brothers and sisters in Ukraine, please see Yana’s post HERE.)
Hello, crafters, this is Yana Smakula for Simon Says Stamp! Welcome back for another Yippee For Yana video! Today I’m back with a project that leans joyfully into holiday sparkle. And I have a question for you right out of the gate: Have you ever used glitter cardstock as the entire background of your card?
If your answer is “No glitter… yet,” I think today might just convert you. If your answer is “Yes glitter,” then welcome, fellow sparkle enthusiast, you’re absolutely among friends here.
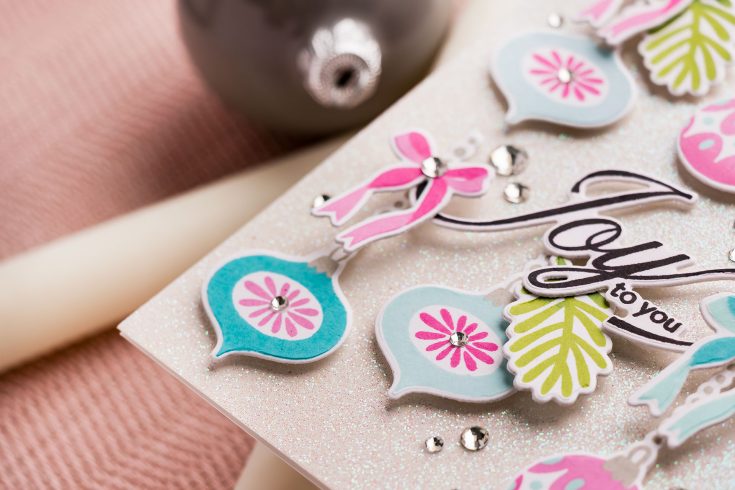
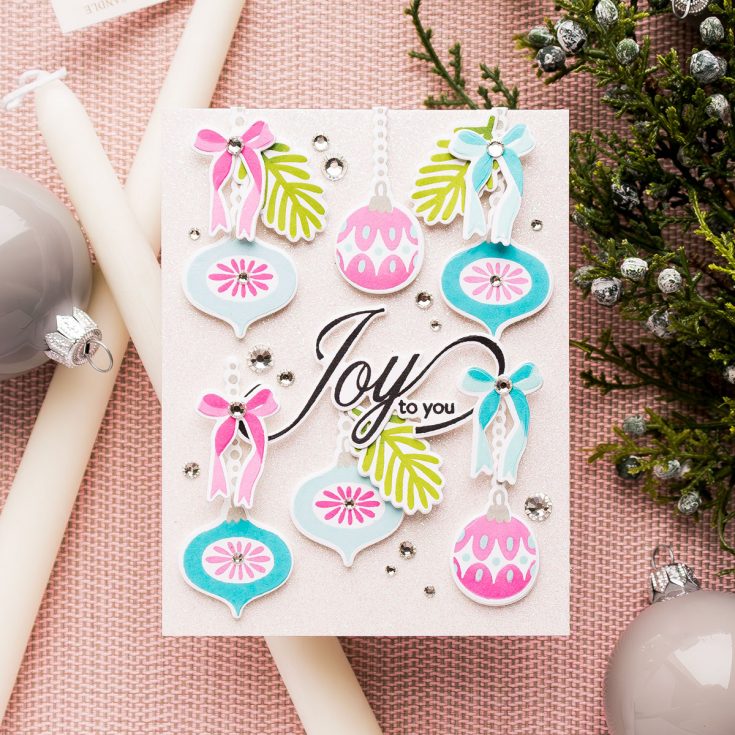
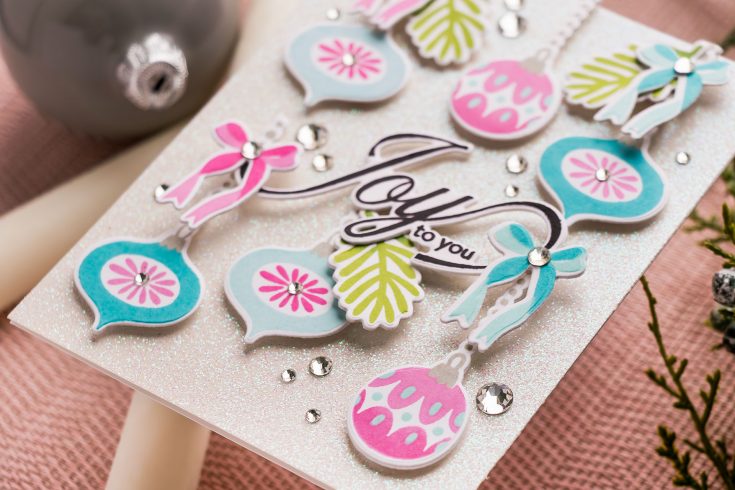
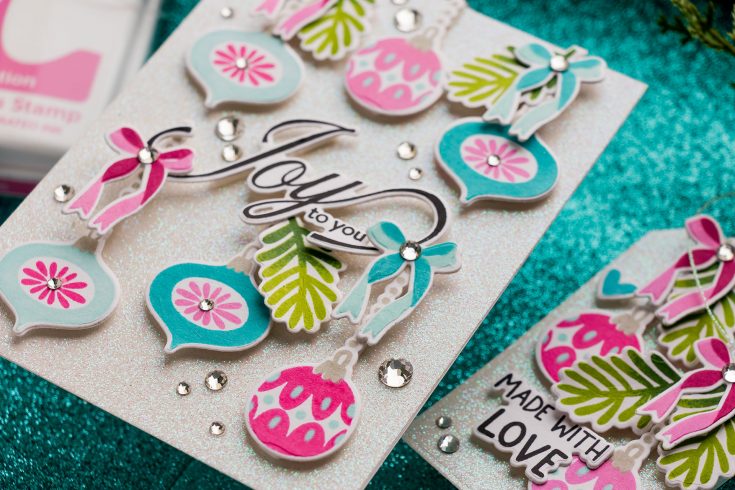
I’m creating a shimmering Christmas card and matching tag using three stamp-and-die sets from the And Everything Nice release: Festive Merriment, Nostalgic Christmas, Warmth and Wonder.
These sets play beautifully together, and today I’m mixing ornaments, bows, branches, and a classic Christmas sentiment for a dimensional holiday look
Building the Ornaments
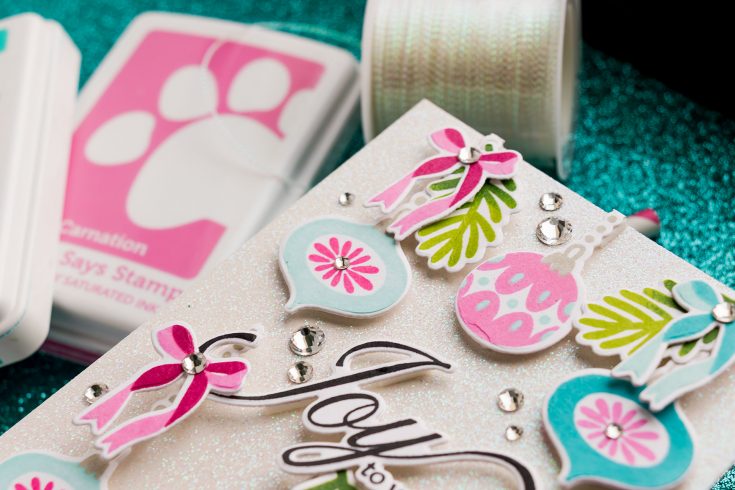
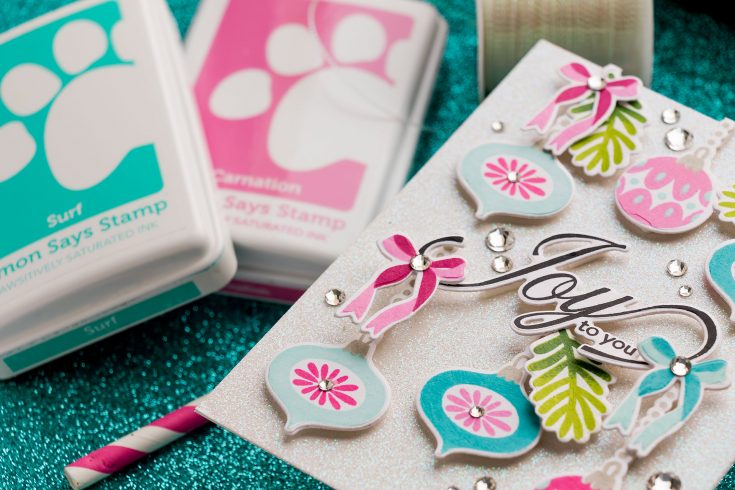
One of my favorite things about the Festive Merriment set is that it’s a builder set – each ornament has multiple layers, so you can stamp them in gorgeous color combinations. I went with a fresh and playful palette: Carnation, Peony, Seafoam, Surf, plus Fawn for the toppers and Nocturne for the sentiment.
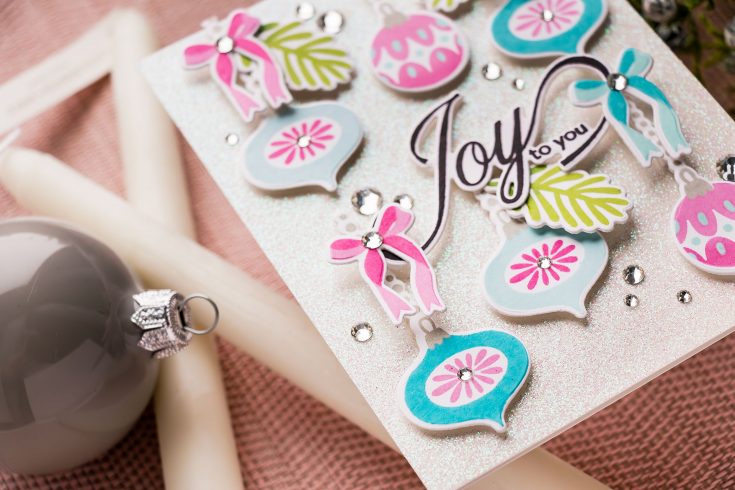
I stamped two styles of ornaments, in pink and teal. For perfect die-cutting alignment, I placed the coordinating die over each ornament before stamping the string and topper. It’s a tiny trick that saves a lot of grief later and gives flawless results every time.
Adding Extra Details
To balance the ornaments, I stamped a few greenery branches, adding simple ink blending for color variation. Then came the bows from Warmth & Wonder, stamped in coordinating pink and teal shades.
My original plan was to alternate pink ornaments with teal bows and vice versa, but as often happens in crafting, I let the card tell me what it wanted.
The Sparkling Background
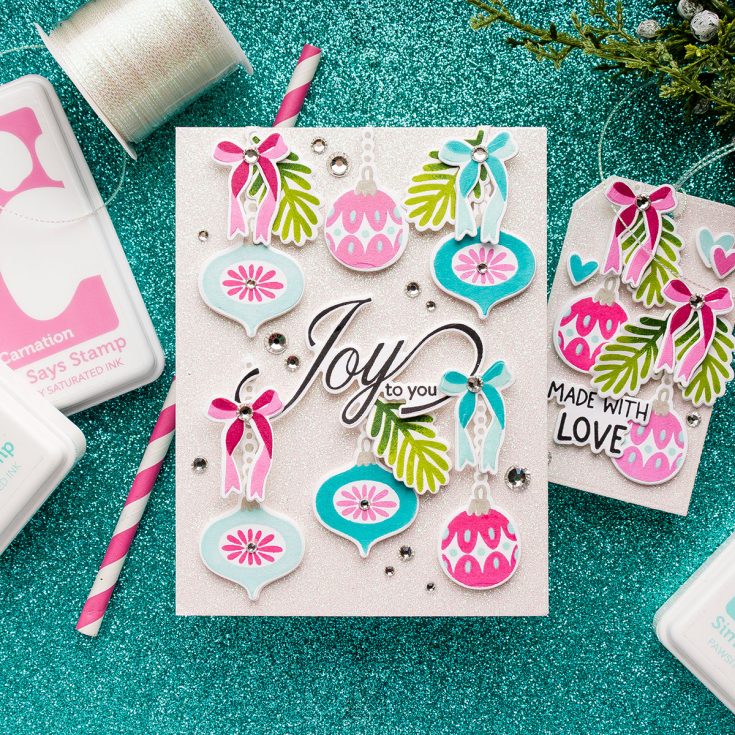
Time for the glitter! I trimmed a piece of glitter cardstock to 4″ × 5.5″. A whole glitter background feels magical and more than fitting for holiday cards. It catches the light, adds energy, and frankly makes the whole project look like it’s humming Christmas music.
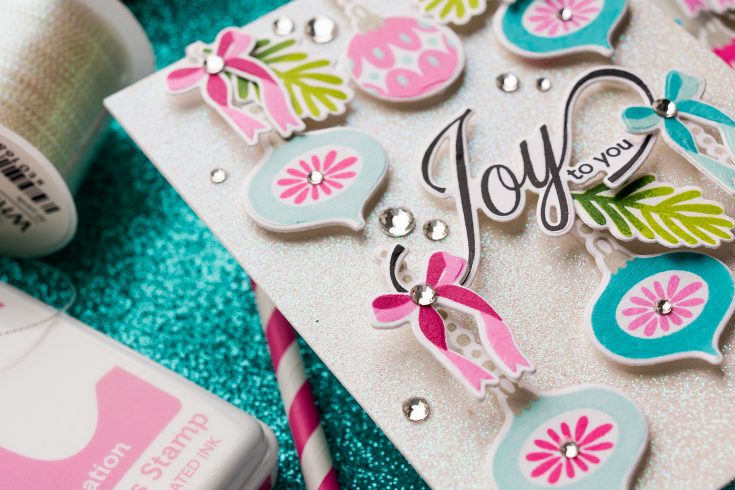
I began by foam-mounting the “Joy to You” sentiment (from Nostalgic Christmas) right in the center of the glitter panel. The loops of the lettering make the sweetest little “hooks,” so I arranged three ornaments above it and three below, trimming one string so everything sat in harmony.
Then I tucked in branches, added bows, and finished with silver gems, yes, on the glitter cardstock. Normally, I avoid combining glitter + gems, but for a Christmas card? Bring on all the festive shine.
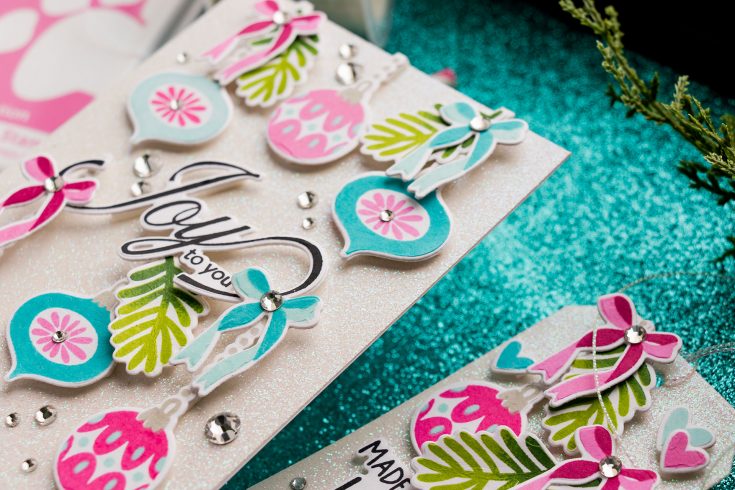
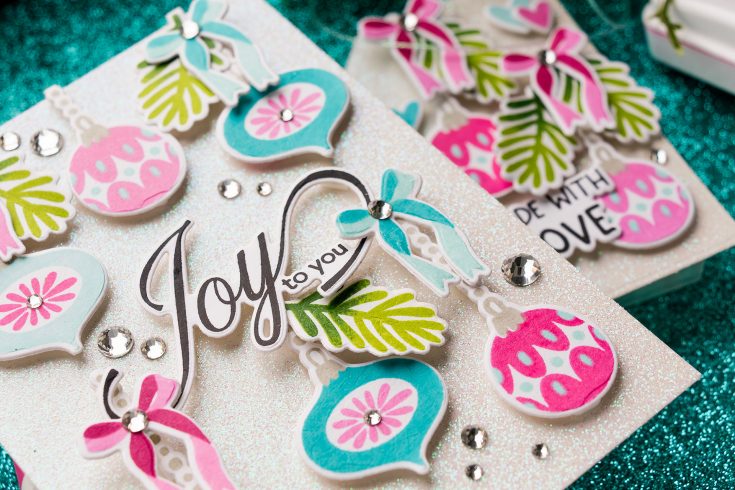
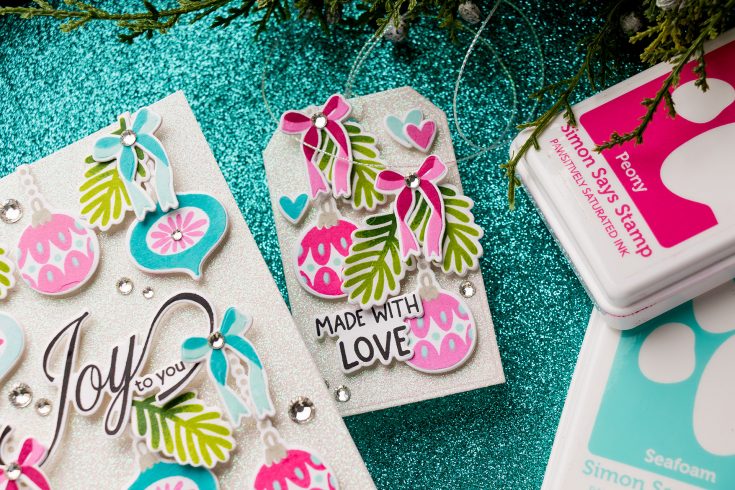
Bonus: A Matching Tag
I had extra ornaments, so I used a tag die to create a coordinating glitter-stock tag. A bit of iridescent cord at the top completed the set. A gift tag and card that match? That’s holiday crafting bliss.
Here they are – my sparkling ornament card and matching tag, all dressed up in pink, teal, glitter, and joy.
I hope today’s project inspires you to play with glitter cardstock in a bold new way. If you haven’t used it for backgrounds before… is this the year you give it a try?
Let me know down in the comments – I absolutely love hearing what you’re experimenting with!
WATCH THE VIDEO:

SUPPLIES:
|


Ways to support Ukraine:
If you are looking for ways to support Ukraine, we encourage you to visit this page on Yana’s blog:

A big thank you to YOU, our reader — and to Yana for being our guest!

ENDS TONIGHT!!

2-DAY DEAL! Limited Time Offer! $20 Bonus BOGO Gift Card!
Hi friends! Now is the perfect time to purchase a gift card! In celebration of the gift giving season, we’re sharing the richest promotional gift card deal we’ve ever done during this season!If you purchase any gift card valued at $100 or more, you will get a bonus $20 gift card for FREE! (Please note that the bonus gift cards will expire on 1/31/26). You can spend your bonus gift card like CASH, or gift it! Totally up to you! Please enjoy!!
Our Create Together Merry and Light Class with Gina Krupsky is LIVE!

A Huge THANK YOU to Everyone Who Joined Us Live for Our Holiday Merry and Light class taught by Gina Krupsky with our star student Heidi!
We had an absolute blast Creating Together with all of you, and we hope you enjoyed it just as much as we did! Your energy, creativity, and enthusiasm made this class unforgettable, and we’re so grateful to have shared this special experience with such an amazing community.
Missed the class? No worries! You can catch all the fun whenever it’s convenient for you. Just click or tap the image above to watch the class on-demand—pause, rewind, and rewatch as much as you’d like to soak in every detail and technique!
Want even MORE inspiration? Click or tap HERE! Please share what you’re making on this gallery, and if you post on social media include the hashtag #SSSMerryandLight
Here’s another look at the AMAZING cards and Tags by Gina Krupsky:
Rewatch the class:

Missed the kit? Shop select individual components available:
|


Want some BONUS inspiration?