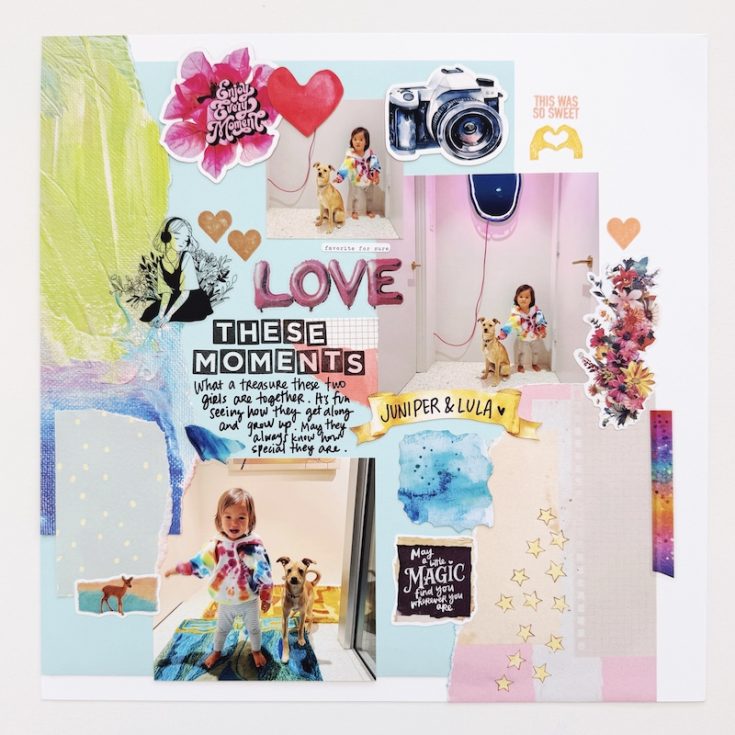
Amy Tangerine’s Playful Scrapbook Layout with NO Measuring ✨
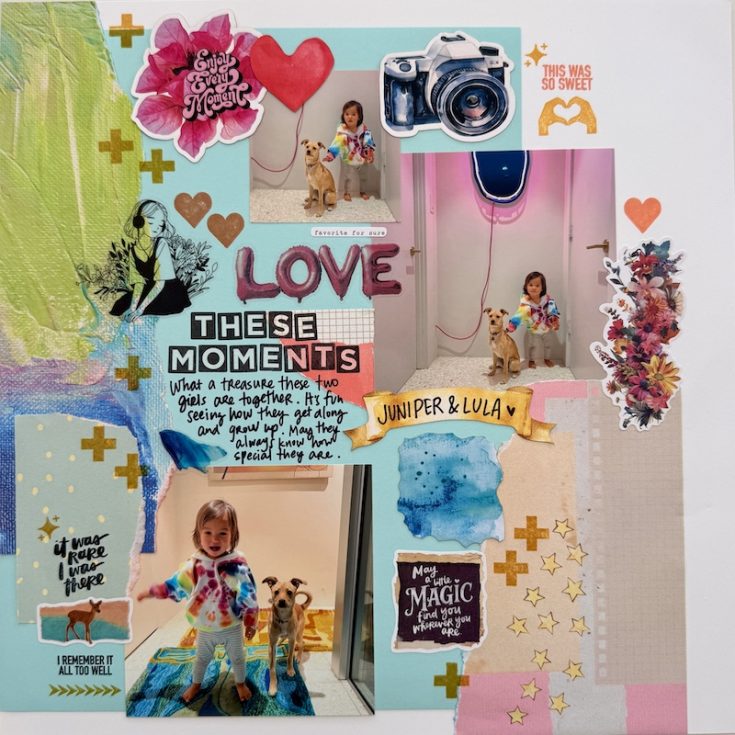
Hi friends! Happy Sunday! We’re beyond delighted to welcome back special guest Amy Tan of Amy Tangerine back to the blog today to share this gorgeous scrapbook layout of her daughter and pup featuring some of her newly released goodies and some favorites that have returned including:
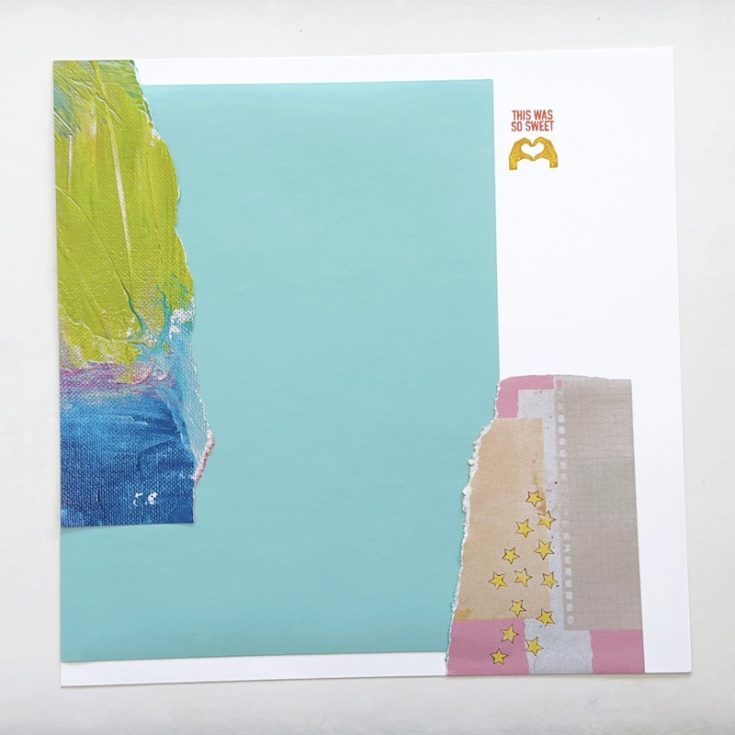
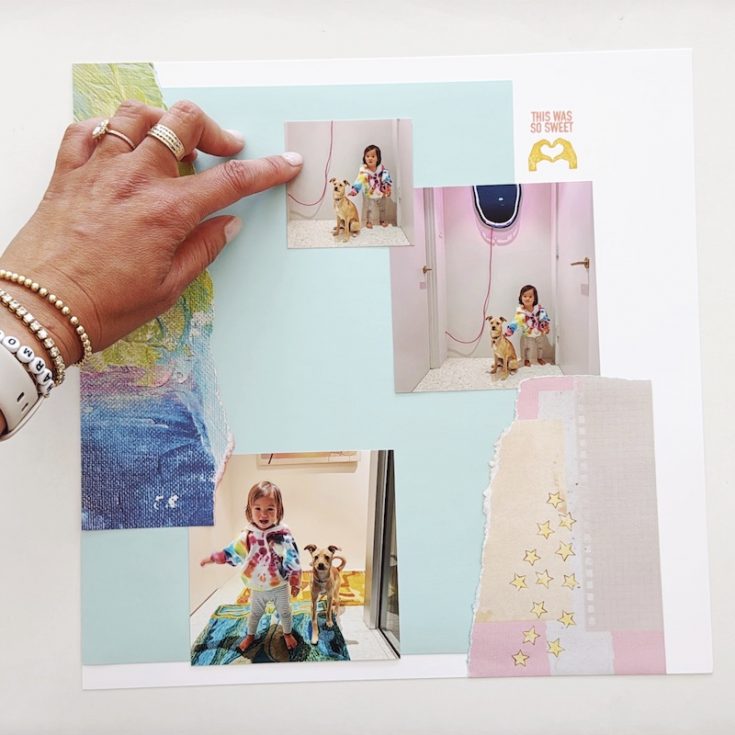
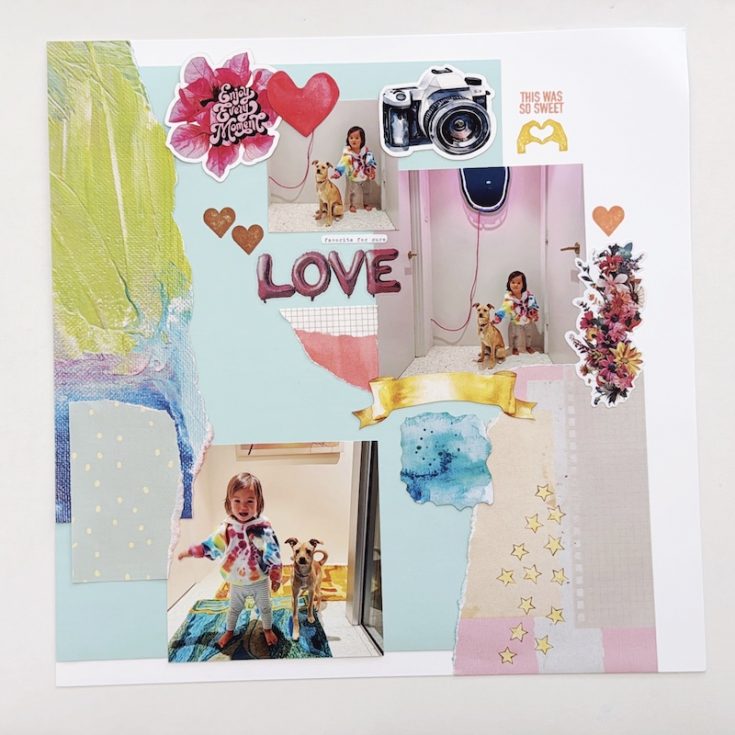
Take a look at a few photos showing the creative process:
For an even better understanding of Amy’s process check out this video:
WATCH THE VIDEO:

SUPPLIES:
|


Thanks so much to YOU our reader for stopping by, and to Amy for being our guest!
DEAL ALERT!
Big savings on our exclusive products going on NOW!

2 NEW Card Ideas: Monochromatic with a Pop of Color
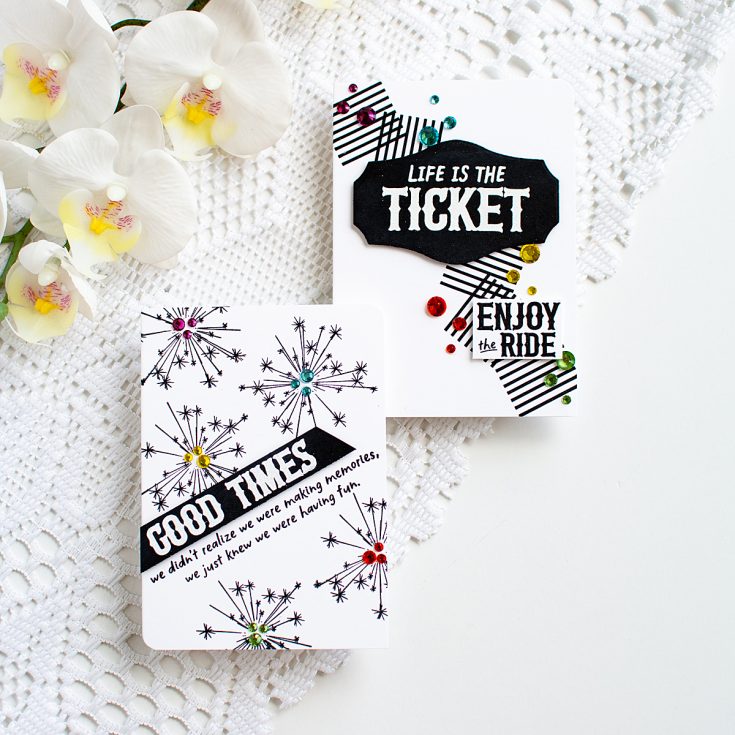
Hello everyone! Heather Hoffman here today, and I can’t stop creating with the amazing June 2026 Card Kit: Step Right Up, (editor’s note: this kit is SOLD OUT, but many individual components are still available!!) not to mention the many amazing add-on options to the kit! Today I went with a crisp and modern vibe, with pops of bright color!
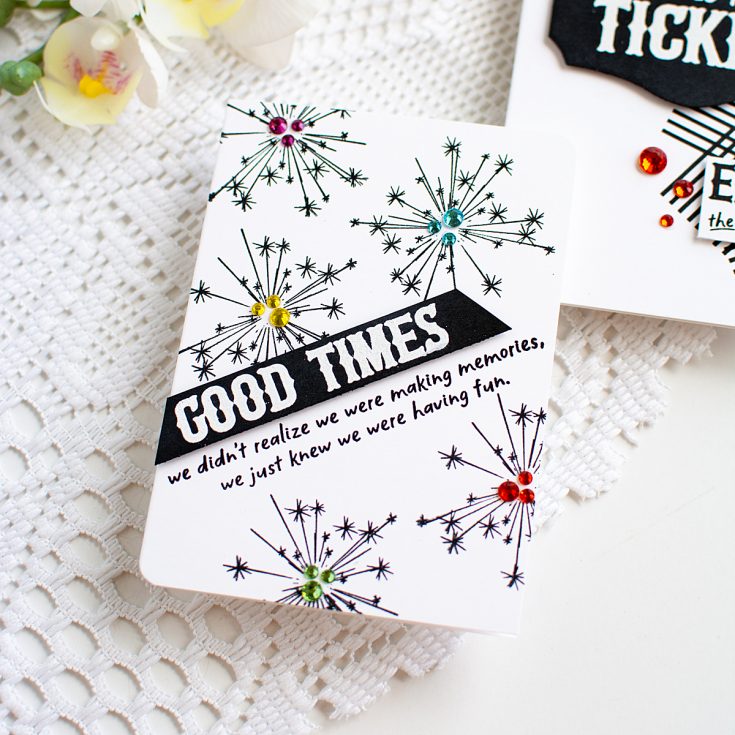
The base element for these cards is the Having Fun stamp set in the kit. I chose one element for each card to stamp a background on the adorable little notecards in the kit – so these cards are even fun sized smaller ones! I used Nocturne ink for nice, crisp, black stamped images.
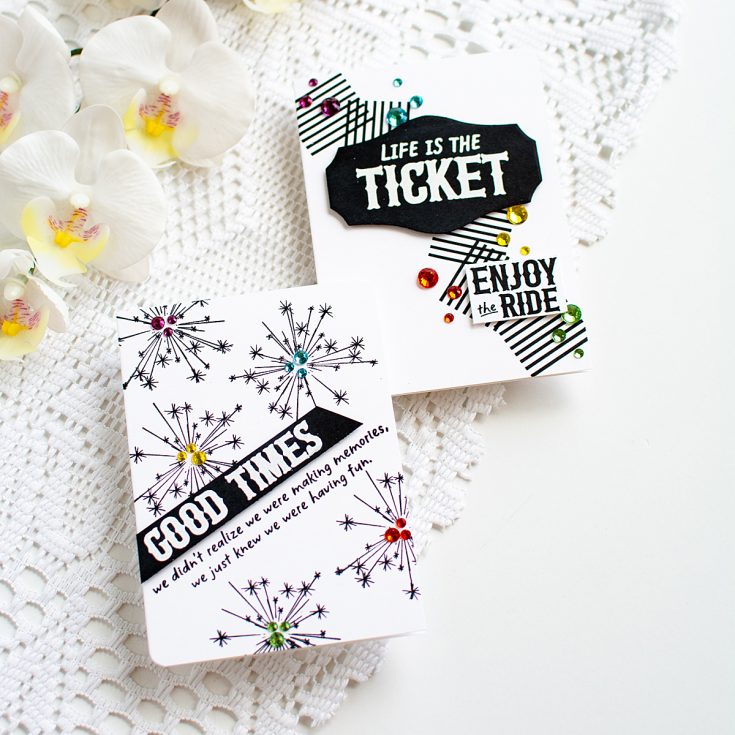
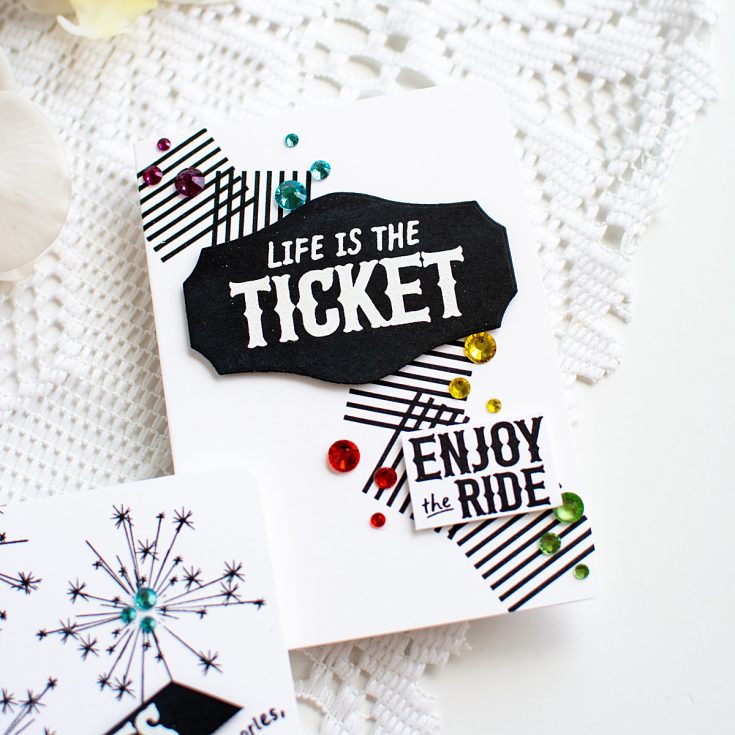
Next, I selected a few sentiments from the kit. I heat embossed the larger sentiment by stamping in white pigment ink on black cardstock, then heat embossing with white embossing powder – this gives me the best image in my opinion! I die cut one with the center die from the add-on Marquee Sign wafer die, and trimmed the other one into a strip, angling off the end.
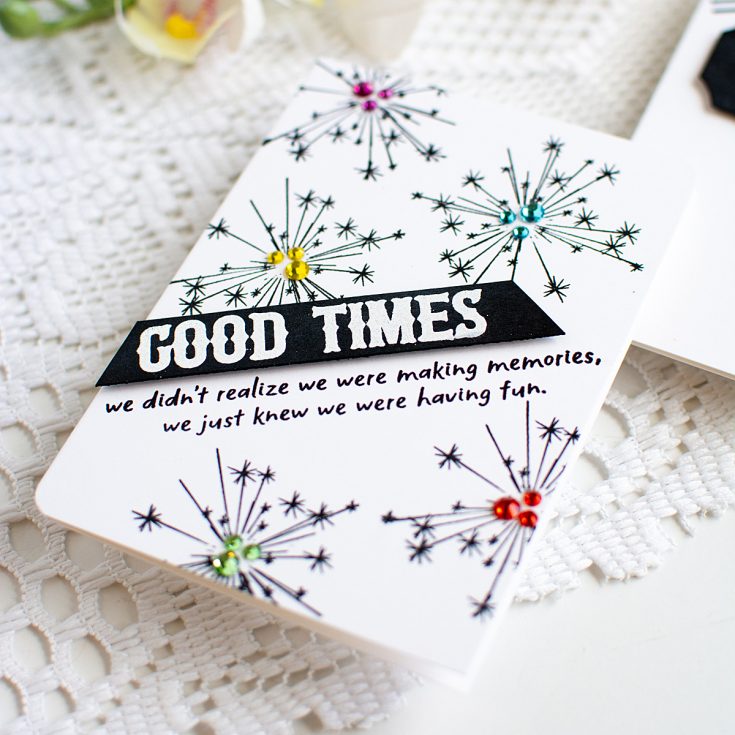
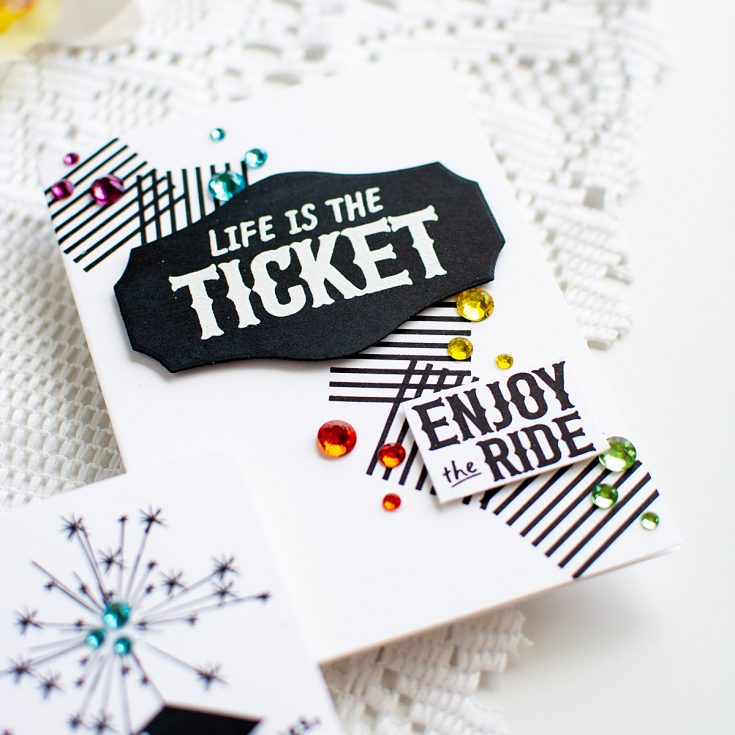
I added secondary sentiments, stamping one directly on the card base, and trimming the other to pop up on foam adhesive. The larger sentiments were adhered with foam adhesive as well. I also rounded off two corners of each card to add a bit of interest. And finally – the FUN part! Adding a sprinkle of Dazzling gems for a pop of color and sparkle! I used Taffy, Surf, Sunbeam, Mandarin, and Sprout, and clustered them in little trios. I love how they brought these cards to life!
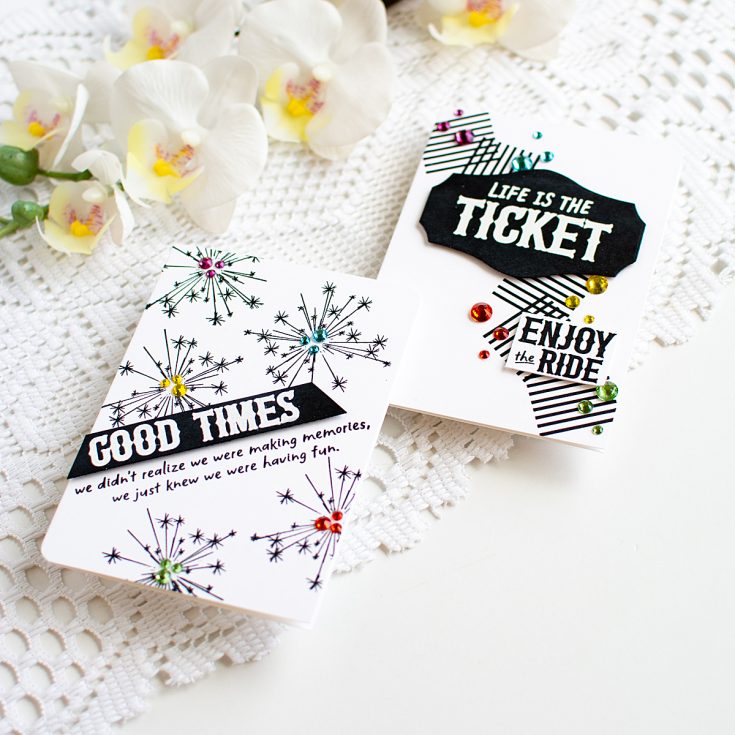
Have you ever created a card with almost no color, then dazzled it up with a bit of bling?
SUPPLIES:
|


Thanks so much for stopping by, I hope you have a wonderful day!
Did you know?! We’ve made our card kit subscription BETTER THAN EVER!

Here’s what makes our new service a crafting paradise:
Exclusive Access: As a subscriber, you get first dibs! Each month, you’ll get an exclusive sneak peek at our new kit, with the option to add more coordinating items to your cart, including handy replenishable supplies, all shipped together for your convenience.
Hassle-Free Payments: Say goodbye to monthly billings! Our automated system smoothly charges your preferred card, ensuring an uninterrupted flow of crafty goodness – unless you decide to pause, of course!
$5 Off Magic: Enjoy a special $5 discount off our kit’s retail price, exclusive to our beloved subscribers – no codes needed, just automatic savings!
Crafting Inspirations: Dive into a sea of creative ideas monthly, all tailored around your kit, to keep your inspiration flowing endlessly.
Flexibility First: Fear of commitment? Not here! Our subscription is as flexible as it gets – pause or cancel anytime, no strings attached.
Why wait? Step into the realm of our NEW Simon Says Stamp Monthly Card Kit service. Welcome a box full of crafting marvels, right to your doorstep. Craft with ease and let creativity come to you!
Ready to elevate your craft? Subscribe Now and open the doors to boundless creativity!
We’re thrilled to have you in our crafting community and can’t wait to embark on this renewed creative adventure together!
DEAL ALERT!
This weekend only, save on in-stock Simon Says Stamp exclusive items!
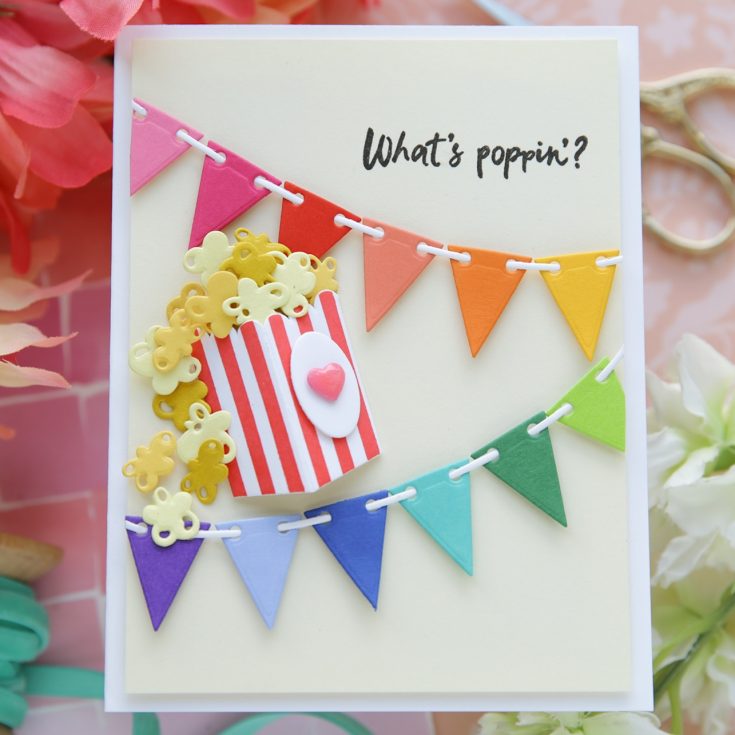
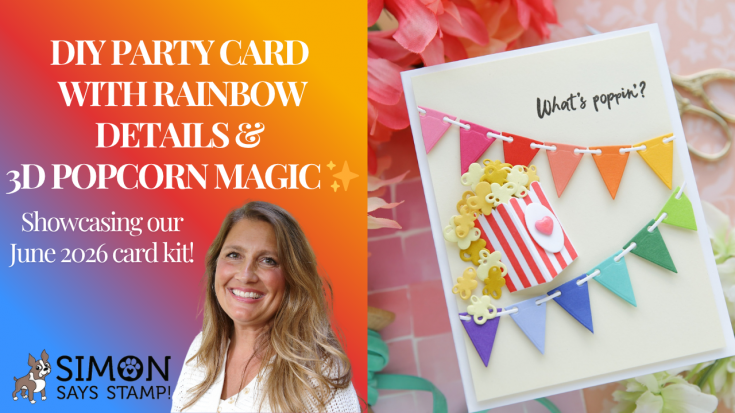
DIY Party Card with Rainbow Details & 3D Popcorn Magic ✨

Hi friend! Happy Friday! We’re delighted to welcome back special guest Laura Bassen with this FUN card featuring components of our June 2026 Card Kit, Step Right Up! This kit sold out super fast! We’re so excited you loved it! If you missed it, you can still purchase individual components to create what Laura made! Be sure to watch the video for all the details, and enjoy!

WATCH THE VIDEO:
SUPPLIES:
|


A big thank you to YOU, our reader — and to Laura Bassen for being our guest!
Did you know?! We’ve made our card kit subscription BETTER THAN EVER!
Here’s what makes our new service a crafting paradise:
Exclusive Access: As a subscriber, you get first dibs! Each month, you’ll get an exclusive sneak peek at our new kit, with the option to add more coordinating items to your cart, including handy replenishable supplies, all shipped together for your convenience.
Hassle-Free Payments: Say goodbye to monthly billings! Our automated system smoothly charges your preferred card, ensuring an uninterrupted flow of crafty goodness – unless you decide to pause, of course!
$5 Off Magic: Enjoy a special $5 discount off our kit’s retail price, exclusive to our beloved subscribers – no codes needed, just automatic savings!
Crafting Inspirations: Dive into a sea of creative ideas monthly, all tailored around your kit, to keep your inspiration flowing endlessly.
Flexibility First: Fear of commitment? Not here! Our subscription is as flexible as it gets – pause or cancel anytime, no strings attached.
Why wait? Step into the realm of our NEW Simon Says Stamp Monthly Card Kit service. Welcome a box full of crafting marvels, right to your doorstep. Craft with ease and let creativity come to you!
Ready to elevate your craft? Subscribe Now and open the doors to boundless creativity!
We’re thrilled to have you in our crafting community and can’t wait to embark on this renewed creative adventure together!
DEAL ALERT! GOING ON NOW!


