Tissue Paper Tutorial with Anna-Karin
Hi everyone! Anna-Karin here with a fun mixed-media tutorial about how to include tissue paper in your projects. I love to use tissue paper as a background since it adds great texture. But what do you do if you also want to stamp on that uneven background? Tissue paper is the answer again. We’ll be doing a bunch of other techniques here too.

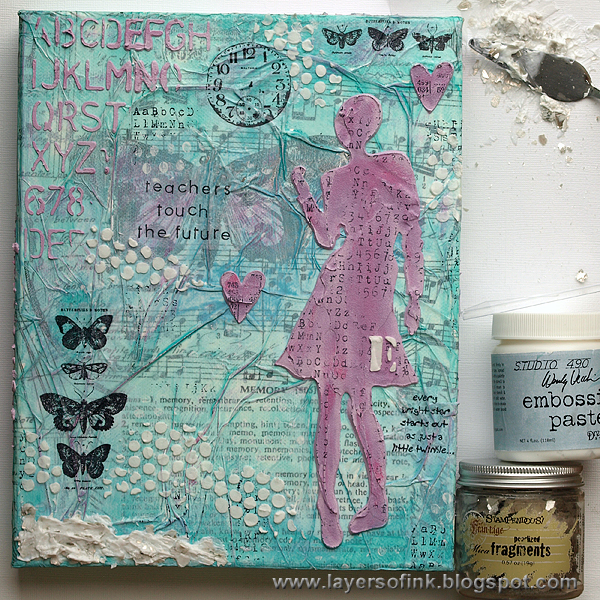
I made a canvas (8 x 10) as a gift to a friend, who is a teacher. The techniques work on many different types of projects, try them on cards, tags, layouts, and for art journaling. You don’t need to work on canvas, but you can use watercolour paper, manila cardstock, grungeboard, and more as long as the surface can handle wet techniques. Let’s get started.
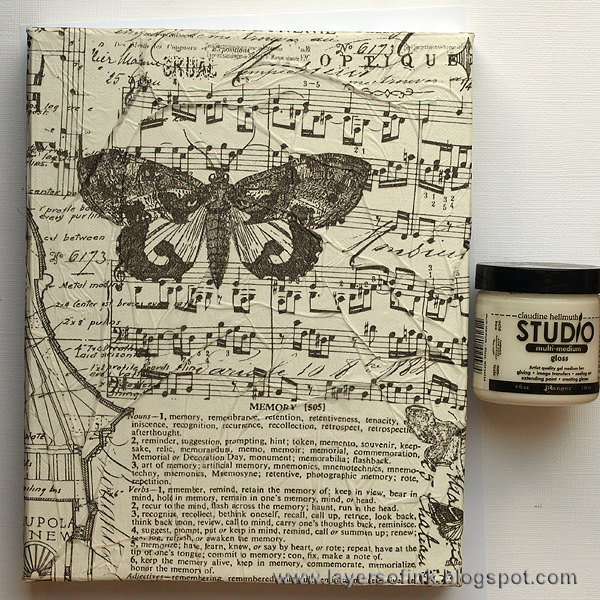
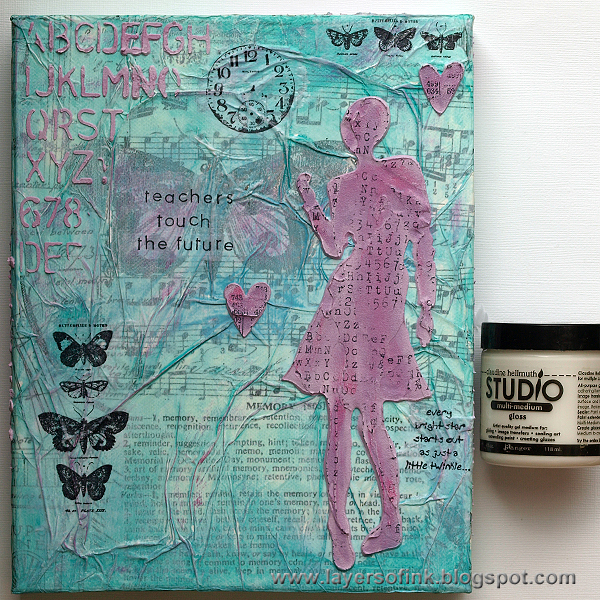
Tissue paper works great as a background, especially if you crumble it up a bit so that it forms interesting folds and lines. You can use white tissue paper, but I like to use Tim Holtz printed tissue wraps, since they also add great background patterns. Tear off a piece that is larger than your surface. Cover your surface with Claudine Hellmuth’s Multi-Medium Gloss (or Matte) and place the tissue paper on top. Pull and form the paper until you are happy with the texture. The multi-medium gives you enough working time to do this. Paint another layer of multi-medium on top of the tissue paper.
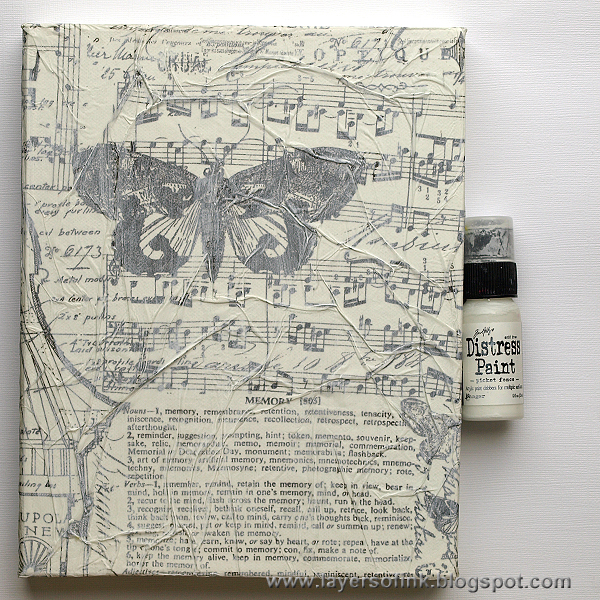
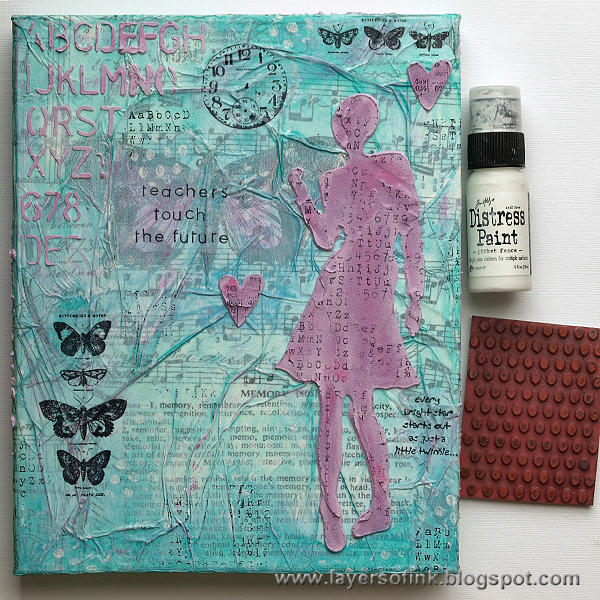
When the multi-medium is dry, paint Picket Fence Distress Paint on the background. This gives a white-wash effect.
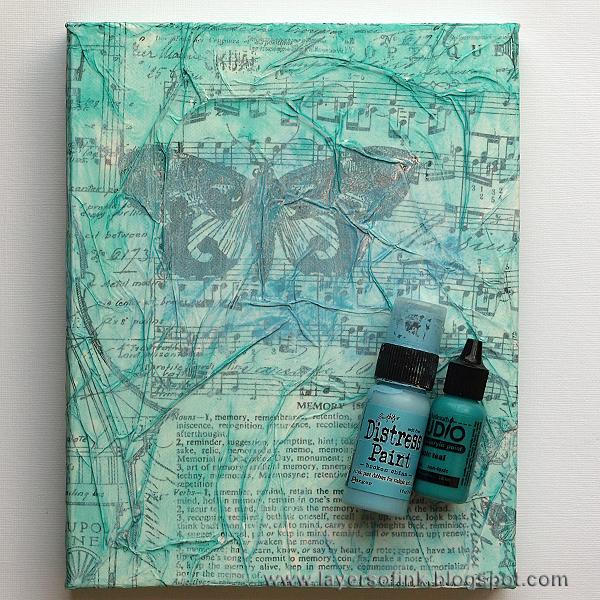
Water-down Studio Classic Teal paint and Broken China Distress Paint and paint on the background. The paint will pool slightly where the tissue paper is crumbled, adding to the texture. Leave to dry.
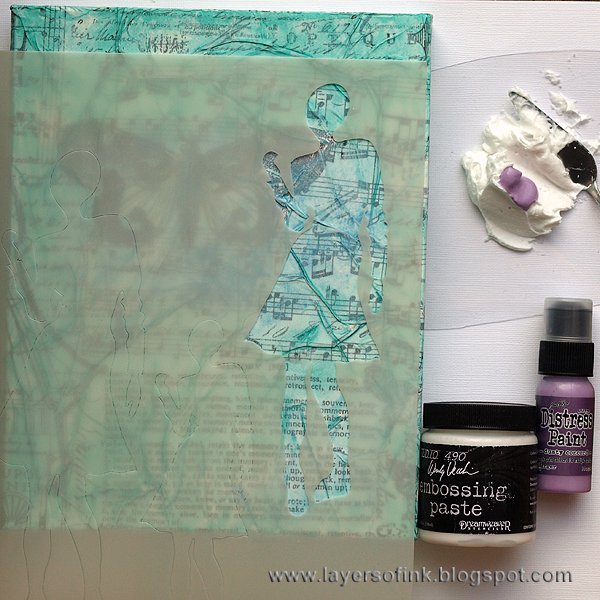
I wanted a woman on the canvas and Dyan Reaveley’s Flossy stencil was perfect for this. As you can see Flossy comes in three sizes, I used the middle one. My friend is very fond of teal and purple, so I mixed a tiny bit of Dusty Concord Distress Paint into Wendy Vecchi’s White Embossing Paste (which I love). Don’t use too much paint, because then you will make the paste too thin.
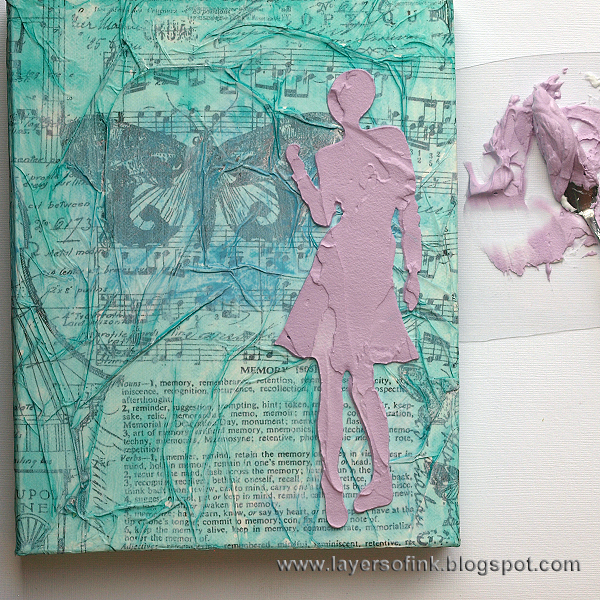
Apply the tinted paste with a palette knife through the stencil, don’t worry about making it totally even, some texture is good. Leave to dry.
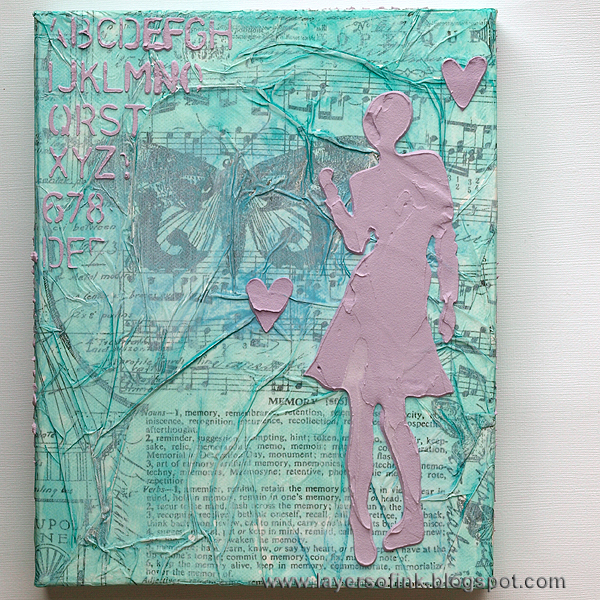
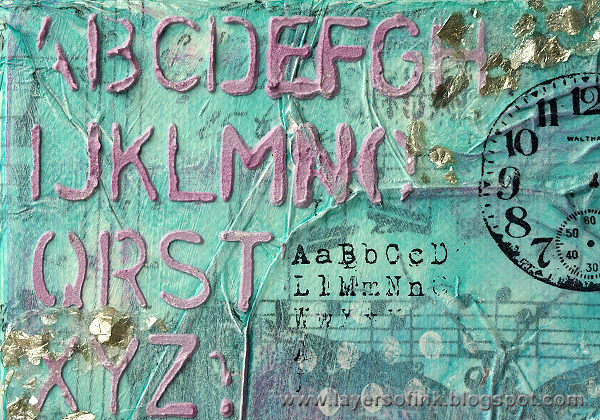
I also used Tim Holtz Schoolhouse and Wendy Vecchi’s Never Enough Hearts stencils. On the edges of my deep canvas, I stencilled more letters and some dots.
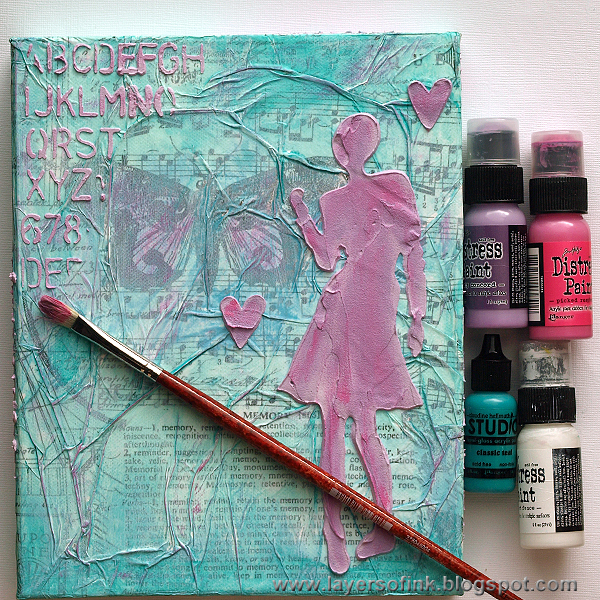
I wanted more paint on the background. The teal was darkened at the base and here and there and I also dry-brushed some Dusty Concord on the background to highlight the texture. Dusty Concord and Picked Raspberry were also dry-brushed on the woman and the hearts, to give them more colour variation. I also added some Picket Fence paint.
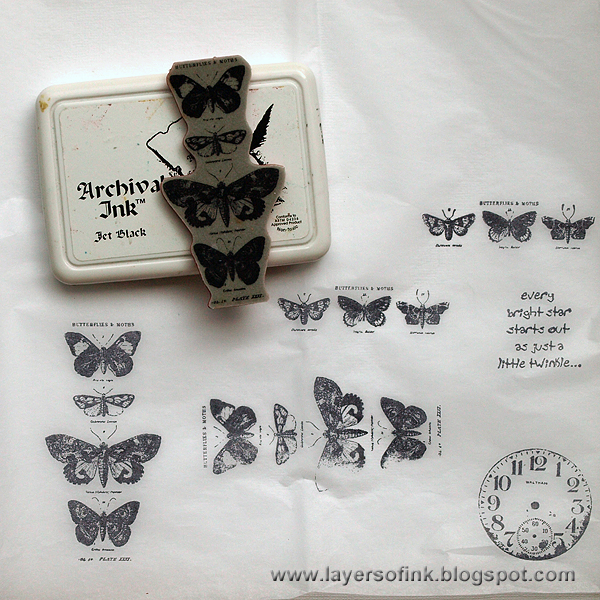
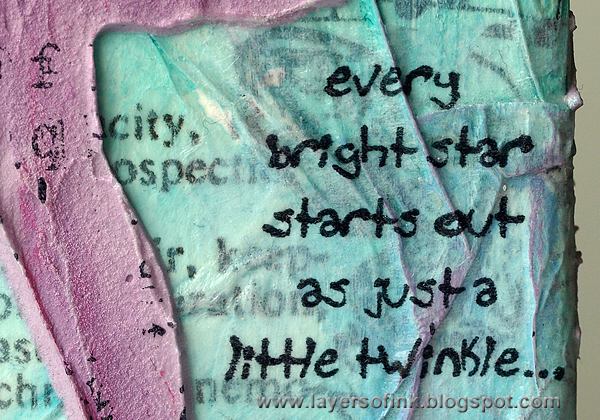
I wanted stamping on the background, but it is hard to get a good impression on such a textured surface, and on a canvas which has give. Luckily, the solution is easy, stamp on tissue paper. I used Archival Jet Black ink, since you need to use a waterproof ink, otherwise it will bleed. Leave to dry for a little while.
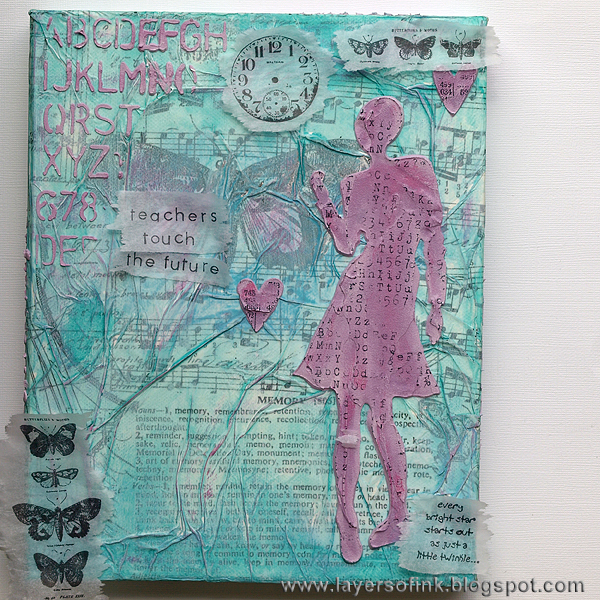
Tear the images you want to use. Tearing is better than cutting because a torn edge disappears easier than a cut edge. Move the tissue paper around until you are happy with the placement. I stamped the sentiment with alphabet stamps. You can stamp on the dry embossing paste, and I used a Tim Holtz alphabet background on the woman and numbers on the hearts. Stamped with Archival Jet Black.
Work on one image at a time and paint Gloss Multi-Medium on the background where you want to place a specific image. Carefully place the tissue down and press it with your fingers. Apply a layer of Multi-Medium on top, to make sure it is stuck. As you can see, the tissue paper disappears and you are left with a perfectly stamped image.
After the multi-medium was dry, I stamped some more letters on the background, this time holding the cling stamp in my hand and stamping directly on the canvas. This gives a great random impression. I also stamped dots using Picket Fence paint. Always clean your stamp directly after using it with paint.
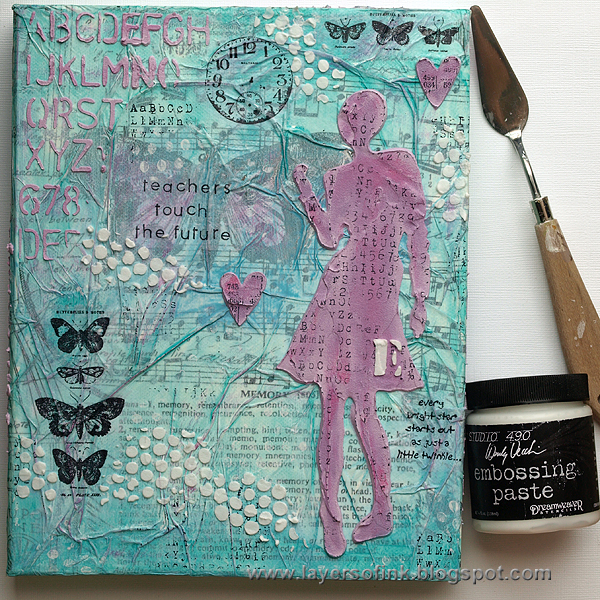
I felt that the background needed a bit of white, and smeared Embossing Paste through Tim Holtz Bubble folder here and there.
And how about some glimmer too. I made my own mica paste, by mixing Stampendous Mica Fragments into Wendy Vecchi’s Translucent Embossing Paste. Smear it on the background with a palette knife, it dries completely clear.
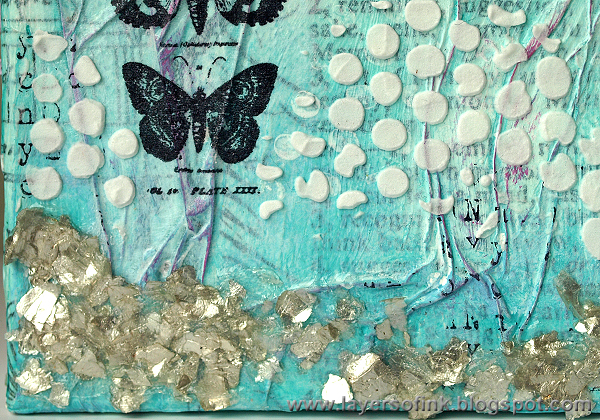
Depending on how thickly you apply the mica paste, you’ll need to leave it overnight or longer, for it to dry completely. It also depends on the climate where you are.
The layers of tissue, paint, stamping, paste and mica makes for an interesting project with lots of depth and texture.
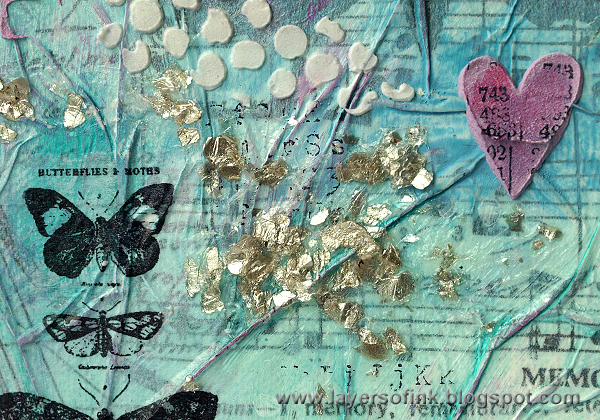
These detailed butterflies with the tiny text would have been really hard to stamp directly on the background, using tissue paper makes it easy to get a perfect impression.
I love this sentiment stamp by Wendy Vecchi and thought it was perfect on a canvas to a teacher.
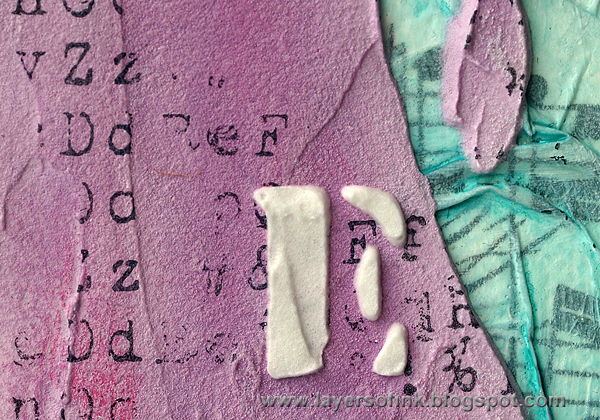
You can stencil additional paste on top of the first layer, and I used white paste and the Cargo stencil to add the recipient’s initial.

I like to continue my canvas on the edges, especially when using a deep edged canvas. The tissue and painted background continues on all the edges and I also added stencilling and mica paste there.
I hope you enjoyed this tutorial! If you change the colours and images, you can adapt it to work with any theme and it is a great gift for someone special, or for yourself.
Happy crafting!!
Anna-Karin
Supplies:
Surfaces: Tim Holtz Idea-ology Melange Tissue Wrap; Canvas 8 x 10 in; plain white tissue paper
Stamps: Stampers Anonymous Tim Holtz: School Desk, Curiosities, Attic Treasures, Tiny Textures; Stampers Anonymous Wendy Vecchi: Art Comforts; Hero Arts: Basic Lowercase Letters LL188
Ink: Ranger Archival Jet Black
Paint: Distress Paint: Broken China, Dusty Concord, Picked Raspberry, Picket Fence; Claudine Hellmuth Studio Paint: Classic Teal
Medium: Wendy Vecchi Stampers Anonymous: White Embossing Paste, Translucent Embossing Paste; Claudine Hellmuth Multi-Medium Gloss
Stencils: Tim Holtz Stampers Anonymous: Schoolhouse, Cargo, Bubble; Dyan Reaveley: Flossy 9 x 12; Wendy Vecchi: Never Enough Hearts
Embellishments: Stampendous Pearlized Mica Fragments

I always am in awe of the stuff Anna-Karin comes up with – this rocks!
Join us this week and show us how you add tissue to your projects! For the full rules, read the “challenge rules” posted in the side-bar here on our blog, and be sure to enter the challenge in the post below this one.
Challenge Badge

Spotlight Badge


Beautiful work and a great step by step tutorial for mixed media beginners – Thank you for the detailed explanations and pictures.
I loved the canvas and techniques shared here..So much to learn..Thanks a lot for sharing a step by step tut !
beautiful piece and such great ideas shown in the tutorial! thanks so much for sharing!!!
So beautiful! Thanks for the cleur tutorial! Found a new idea again! Inky greetings, Gerrina
I must try playing with tissue paper!
Lovely project:)
Such a wonderful project! Love the beautiful textures and great colors. Thank you so much for sharing. :)
Anna-Karin this canvas is wonderful. Thanks so much for the tutorial. I’m formulating an idea for a canvas and you have given me some great ideas. Thanks for the inspiration.
Amazing! Awesome! Wow! Always love Anna-Karin’s work!
Lovely canvas Anna-Karin, the texture is amazing and I love love the colours, so striking. I love the butterflies added to the backdrop and the text is perfect. Tracy x
Glorious textures and layers… wonderful seeing it all build up in your great step-by-step. Thanks for all the inspiration, Anna-Karin!
Alison xx
Love it! Thanks for the great tutorial! Very inspiring!
I love this!!! and what’s not to love about a stellar tutorial? Thanks, Anna-Karin!
Anna-Karin a wonderful tut and I love the canvas it is beautiful….
So gorgeous !!! And thank you for the detailed how-to ! Coco x
I love that this canvas has lots of dimension and not too many colors!
Gorgeous Anna-Karin! Love your mix of colors and textures! Thanks for sharing how to colorize the embossing paste! A must try!
This is lovely – I will need to purchase some products and give it a try! TFS
lots of fabulous textures-love a tissue paper background!!
Stunning work! love the colors and thanks for sharing the technique! Wonderful tutorial! Barbarayaya
FANTASTIC canvas! I love all your elements and thanks for the great tutorial!
Totally awe some. Thanks for sharing.
Fantastic. Love your colours, your layers, your embossing paste and tissue and that mica. Very lovely
Fantastic canvas! I love the texture you achieved with the paste and the stamping over the paste.
amazing. love the newspaper underneath and the dots.
Gorgeous canvas, Anna-Karin. Love the very easy to understand step by step and the wonderful pictures! <3 Candy
As always, a GREAT tutorial! Thanks for inspiring and for also laying it out step-by-step for us visual learners. :)
Wonderful ! I learned so many new techniques in this blog and I can incorporate them into my own work. Thank you so much for sharing your talents, techniques and product names. You are very talented!