Botanical tutorial with Emma
Hello everyone, Emma here with my step by step project that I was inspired to create by my love of antique botanical prints. I absolutely adore the artwork and the elegance of these vintage prints, with their wonderful depiction of nature and botany. So, for me when I saw this challenge I decided I would love to create some botanical bliss of my own using Wendy Vecchi stamps and a few inky techniques to give the effect of aged paper.
To begin with, I applied some Antique Linen, Old Paper and Brushed Corduroy Distress Stains onto my craft sheet and then cut two pieces of Ranger Manila card to measure 4.25″ x 6″ and 6.5″ x 8.5″. I gave the stains on my sheet a good spritz of water and then dragged the pieces of card through the inks to pick up all gorgeous colours.
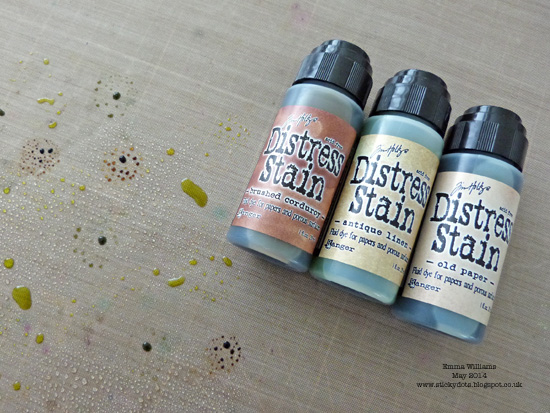
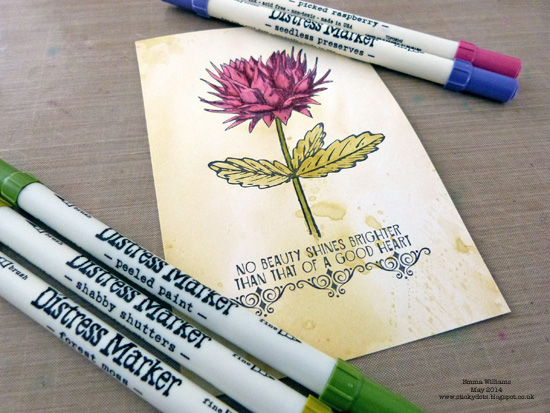
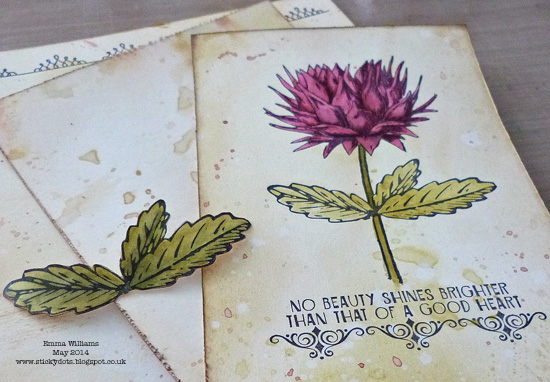
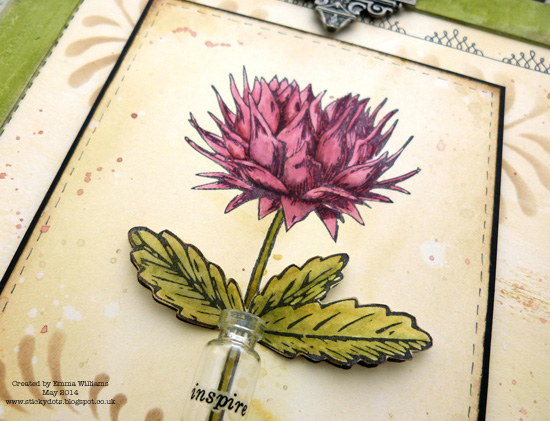
At this point, pick up as much of the stains as you can from the craft sheet because you want the card to look vintage, shabby and aged. Once the card was dry, I then inked up the flower image from The Beauty Of Art stamp set by Wendy Vecchi, and stamped it onto the smaller piece of inked card, together with the quote beneath it. I also stamped just the leaf section of the flower image onto a separate piece of cardstock.

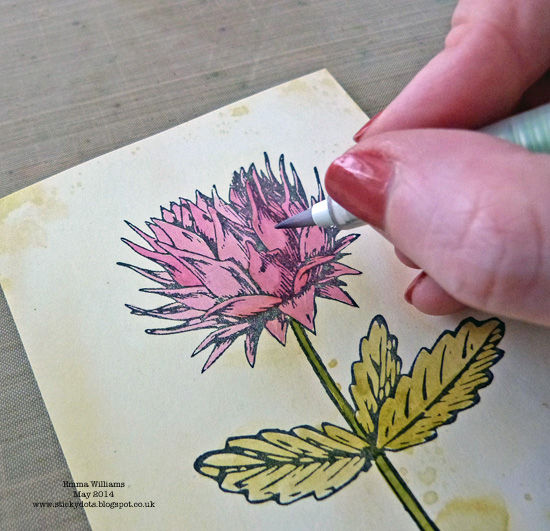
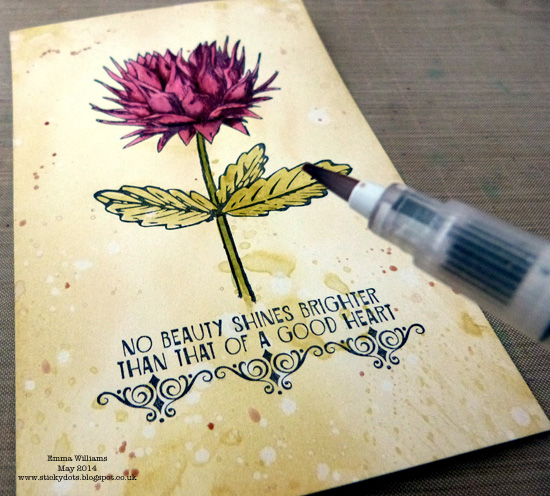
Using Distress Marker pens and a water brush, I painted the leaves that had been stamped onto the separate piece of card and also the main image of the flower and leaves.
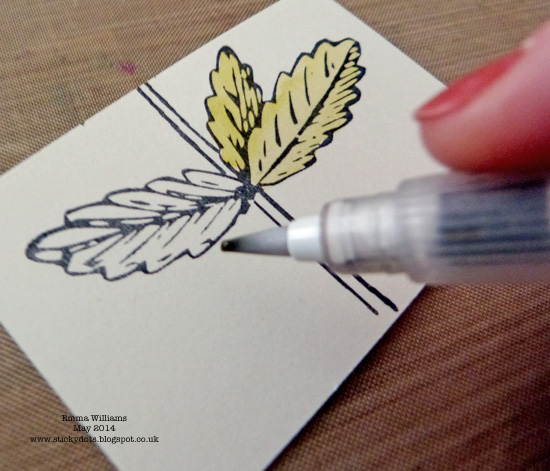
At this point, I like to add a base layer of the palest colour to begin with, dry it with a heat tool, then add another layer of a second, darker colour and gradually build up the tones to create shades of dark and light.
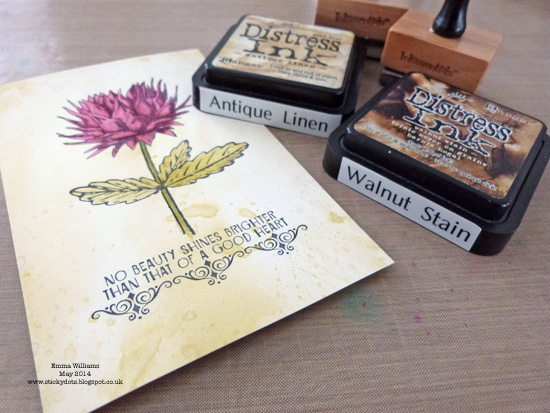
Once all the painting is complete, cut out the painted leaves from the separate piece of card and set these aside until later. Then, ink the edges of the cardstock with Antique Linen and Walnut Stain Distress Ink.
Next, we need to get that piece of card looking really shabby and vintage and for this, I flicked small amounts of water over the top of the inked card and then dabbed them away with a piece of kitchen towel.
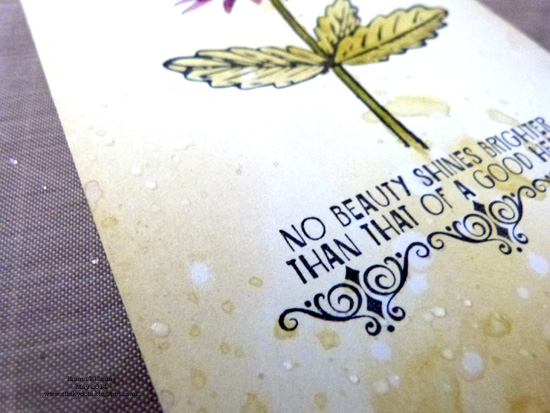
Then, apply a small amount of Vintage Photo Distress Stain onto a craft sheet, add water and using a water brush, pick up some of the stain and flick it onto the cardstock.
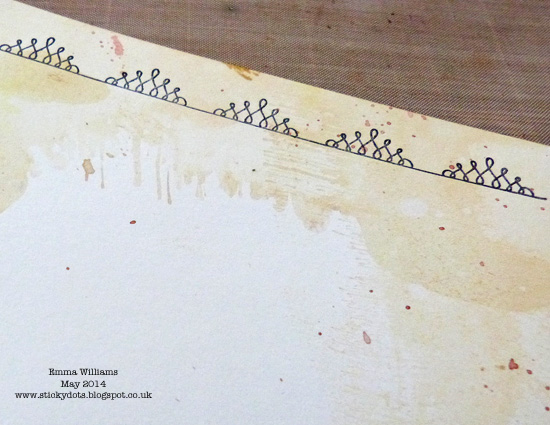
You can now set aside this finished artwork until later and start working on the larger piece of stained card stock. As with the previous smaller piece of card stock, use Walnut Stain and Antique Linen Distress Inks to ink the edges of the card and as with the smaller piece, then flick tiny amounts of water over the surface, before then adding the Vintage Photo ink splatters with a water brush. When the card is dry, ink up the decorative border from The Beauty of Art stamp set, with black Archival Ink and stamp the border across the top, and the bottom of the large piece of card.
You now have your main image, your backing card and the separate cut out section of leaves all completed.
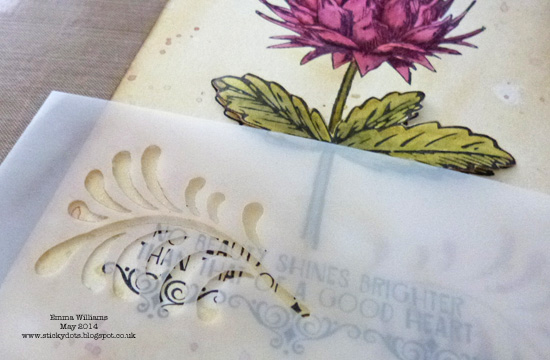
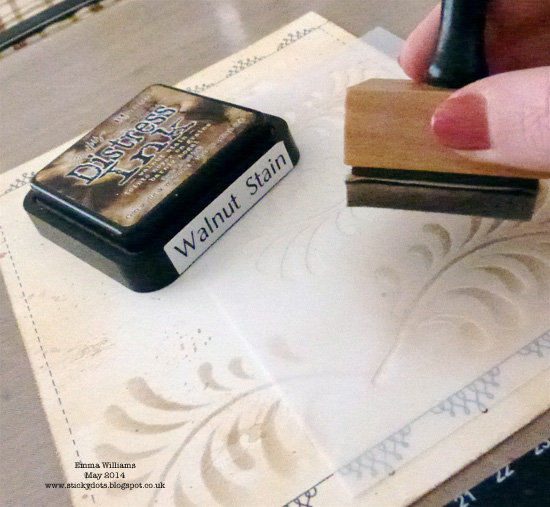
To create some layers to both of my backgrounds, I used the 3 Flourishes stencil by Wendy Vecchi and applied Walnut Stain Distress Ink through the smallest flourish on the stencil, over the top of my wording on the main image.
I then used the largest flourish on the stencil to add layers onto all four corners of the background mat of card.
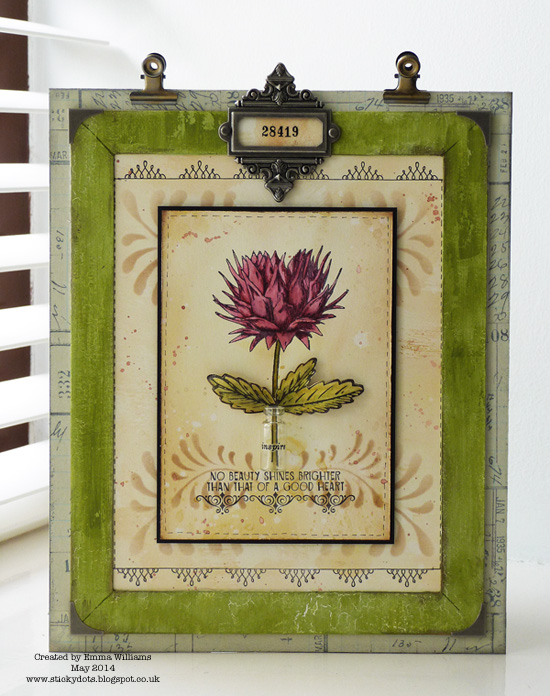
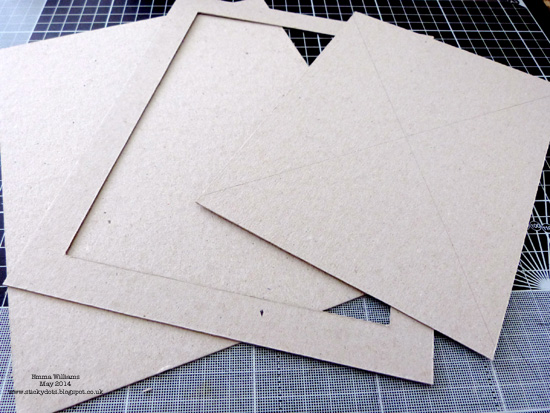
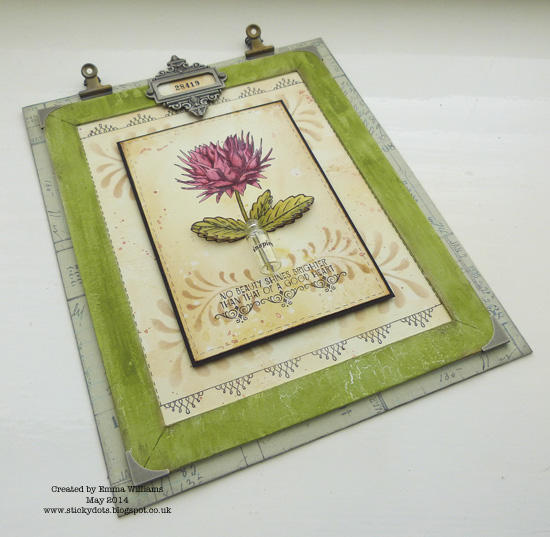
You now need to create the frame for your artwork and to do this, I used two pieces of chipboard cut to measure 7.5″ x 9.5″. I cut the centre out of one of the pieces to leave me with a frame, and a border measuring 0.75″.
I applied a coat of Gesso over the top of the border frame before then applying a coat of Snowflake Fresco Finish paint from PaperArtsy. I wanted to create a very subtle crackled effect to my frame and to achieve this, I used a palette knife to add some PaperArtsy Crackle Glaze over random areas of the Snowflake paint. I let the Crackle Glaze dry, (you can use a heat gun if you’re a bit impatient like me) before then adding a thin coat of the Guacamole Fresco Finish Paint and just watched those tiny crackles appear.
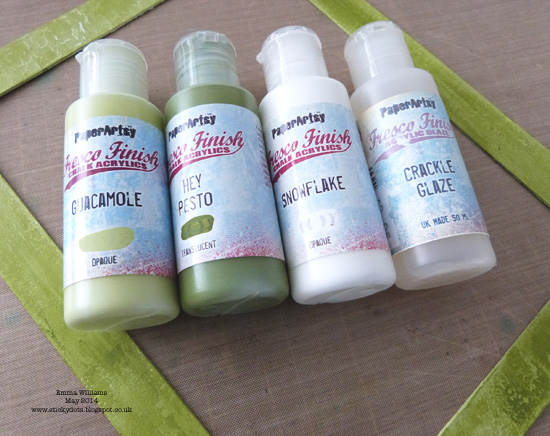
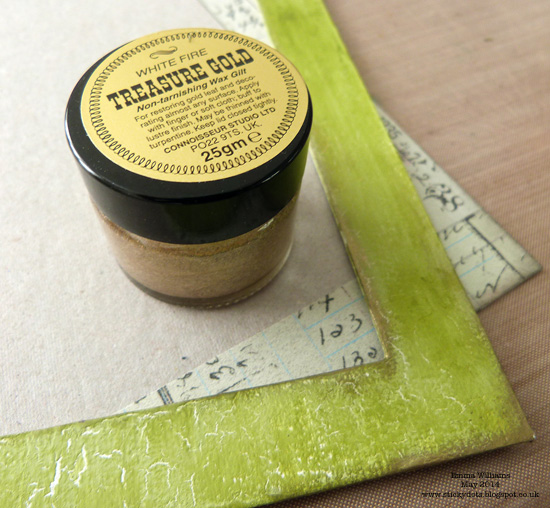
To complete the frame, I added a very light coat of Hey Pesto, wiping away some of the paint around the frame to give a vintage feel and to allow some of the previous coat of Guacamole to show through. Once the frame was dry, I added a touch of Treasure Gold Gilding Wax to give a really nice finish to the overall look of the frame.
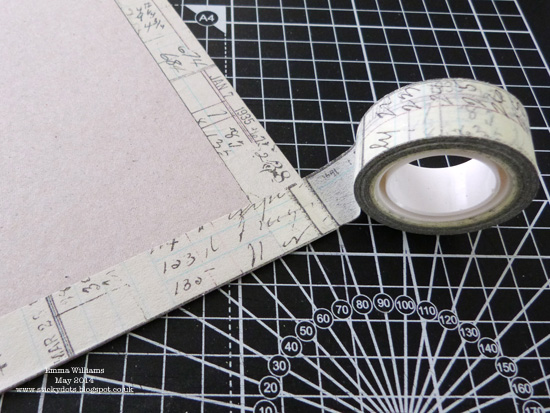
You now just need to create the final section of this frame before the fun part of putting it all together and seeing this artwork come to life and for this section, you just need to cut a further piece of chipboard, 8.25″ x 10″ and add Tissue Tape all around the edge.
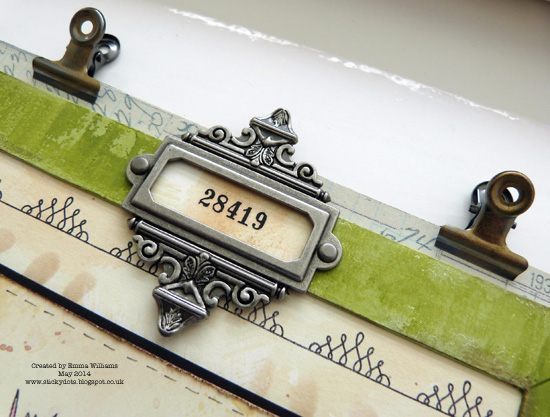
I added some Idea-Ology embellishments onto my frame, including Hinge Clips, Mini Corners and the gorgeous Ornate Plates, applying a Remnant Rub from the Botanical set, in the centre.

Layer up all the sections of your frame onto the Tissue Tape covered section, starting with the backing piece of chipboard, followed by the decorative border backing card and then finally, attach the painted border frame over the top.

Finally, place your artwork in the centre of the frame, add some faux stitching around the edge of the matted card layer and attach the second layer of hand painted leaves over the top of the main image. To complete this piece, I placed a small Corked Vial over the top of the stem, attaching it with Glossy Accents and then adding a Remnant Rub onto the bottle.
… and that completes my framed botanical print and as always, I hope you like what I’ve created, as much as I’ve loved making it!
I hope that you’ve enjoyed my project today – and that you’re inspired to join this week’s challenge!

Thank you so much for joining Emma today! I really hope you’ve enjoyed this tutorial as much as I have. For your chance to win a voucher from www.simonsaysstamp.com be sure to enter this week’s challenge in the post below.
Challenge Badge

Spotlight Badge


Nice frame. Thank you for sharing and the inspiration.
Thank you so much Emma for sharing your gorgeous creation and how you created it with us – thank you so very much!!! Karen x
… here I am, over from Emma’s blog. In time to say Wow! So many products and techniques. Truly artistic and full of merit. I hope TH himself will call by. To the blogs, obviously, not in person! You’d collapse!
Absolutely beautiful!
Fab tutorial hun, and adore your creation……another stunner! Hugs, Ali xxx
This is stunning ! Thanks for the tuto !
Beautiful piece Emma, I love the delicacy of the piece and the delicate ageing. The flower is a beautiful colour and pops against the more delicate backdrop. Lovely piece of art. Tracy x
this is an awesome piece of art work as to your usual standards. interesting that today i was trying to create a vintage background, nowhere near as brilliant as yours though xx
Really really lovely. Hope I can find some time to do something like that. It’s stunning. Thanks for the inspiration.
Love n hugs
Marie
This is a stunning piece and your tutorial is brilliant!
Beautiful work, Emma! I love the finished piece. Beautiful!
Beautifully balanced and subtle artwork Emma that is gorgeously evocative of vintage botanical prints. Very impressive indeed. Thanks for sharing wonderful details. Nicola x
What a wonderful piece of art! Love the frame!
It looks beautiful! So many technics; you inspire me to go use my stains again soon and who nows mayby more of the materials you’ve used! Thanks for that, Gerrina
Lovely, really looks like an old botanical print. Great!
Such a beautiful creation, Emma. Love your great inspiration!
Wonderful piece Emma! Your tutorial is totally fantastic! Thanks for this great inspiration!Barbarayaya
Lovely project, very beautiful and great tutorial thank you very much.
Beautiful!! Love the way you layered everything and the way the frame was painted and finished!!
Oh Emma!! I am in awe. Worth every one of the many moments it took to complete.
This is SOME Kind of GORGEOUS!!! Amazing!
This is a wonderful tutorial, very helpful! Your art is so lovely! Have a great day!
Gorgeous! Love the tutorial on the coloring of the flower and the frame is fabulous!
Gorgeous project Emma! Love all the techniques you combined and your attention to detail! Thanks for sharing your creative process!
Gorgeous piece, Emma! Love the step by step! Hugs, Sandra
Such a gorgeous project Emma and a great tutorial. Love all the layers, the frame, wonderful flower and the great idea of adding the corked vial. Thank you for sharing!!
Gorgeous project, Emma, and I so appreciated the step-by-step photos! Your pieces always have such amazing attention to detail and I adore how this one turned out!
such a lovely project!!!
Beautiful! Absolutely beautiful!
the flower is so realistic. Beautiful job of shading. Thanks for the tips.