Japanese Washi Technique with Michelle

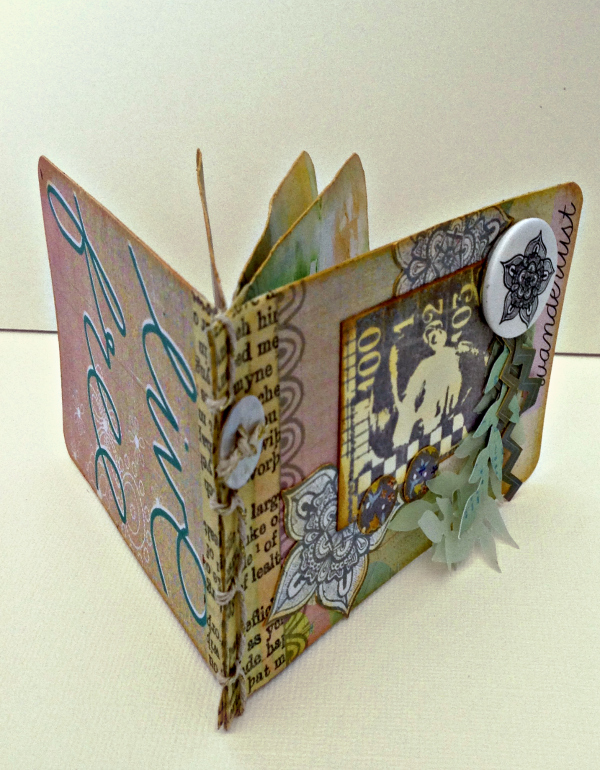
This particular journal was inspired by Prima’s new Free Spirit line of papers and embellishments. I love the soft colors and funky, artistic prints. Instead of using black ink, I did my stamping with Hero Art’s Soft Granite grey. It matches wonderfully with the grey in the Prima patterns.
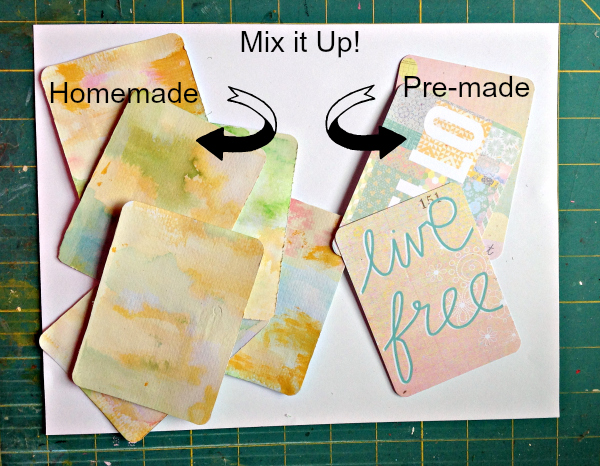
Pocket journaling, or Project Life, has become a popular scrapbooking trend. Manufacturers in the paper crafting industry have produced numerous lines of beautiful papers in smaller sizes to meet the demands of these crafters. I personally don’t scrapbook that way, but I do love pretty papers! For my book, I used Prima’s 3×4 cards for pages as well as some water colored pages I created with my Tim Holtz Distress Inks.
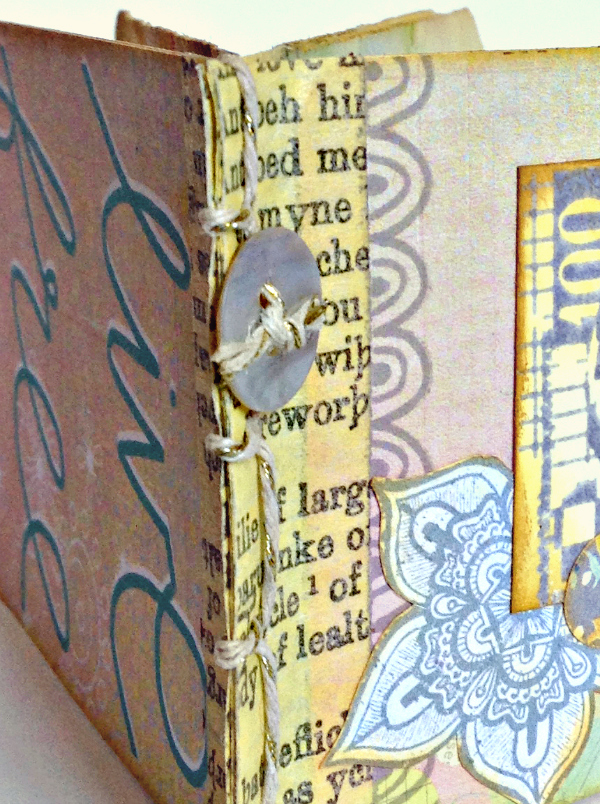
Look closely at the binding and you will see that it was created with twine and washi tape. The binding stitches are based on the Japanese Stab 4 Hole Binding technique.
Since I am utilizing washi, or paper tape, I am going to call this the Japanese Washi Technique. I have never seen it done this way before, so to the best of my knowledge, you’re seeing it on the Simon Says Stamp Monday Challenge Blog first!
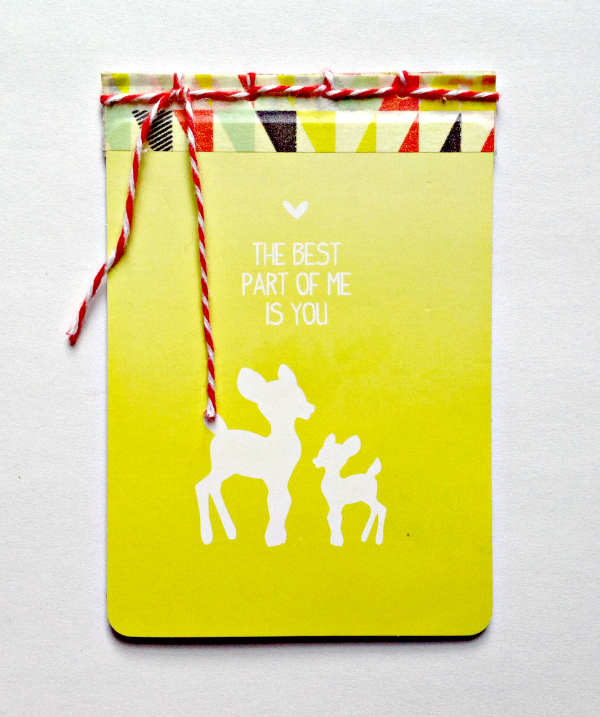
After completing my project, I realized that the muted colors would be hard to distinguish in a tutorial, so I am using the Glitz Designs Finnley papers and embellishments to show you how to create this Japanese Washi Technique. This is an easy technique. This is what the book will look like when I am finished.
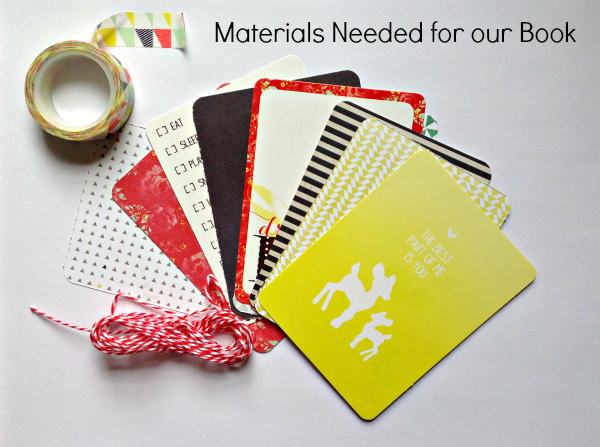
First, prepare your materials. You’ll need the items pictured, plus a needle with a large eye, scissors, a binder clip, a ruler and something to punch holes through the tape with. A small hole punch or awl will work fine.
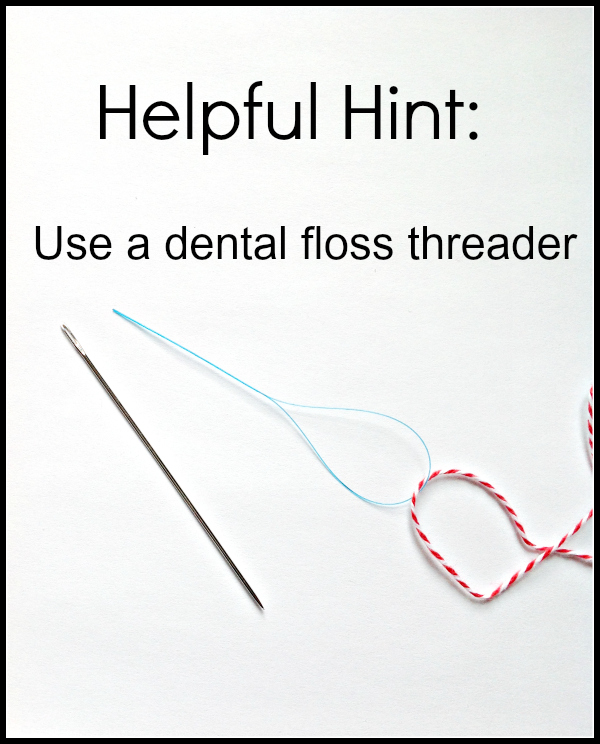
I have found that when threading the needle, it helps to use a dental floss threader. You can find these in the toothpaste aisle.
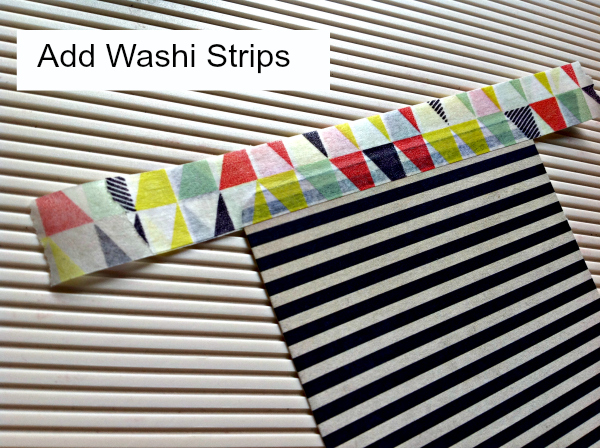
Let’s prepare the pages by attaching the washi tape to the top of each card. Place the tape approximately 1/4″ on the card. The majority of the tape will be hanging off of the edge. Place a strip on the front as well as the back. It is important for each card to be done the same so that the tops will align.
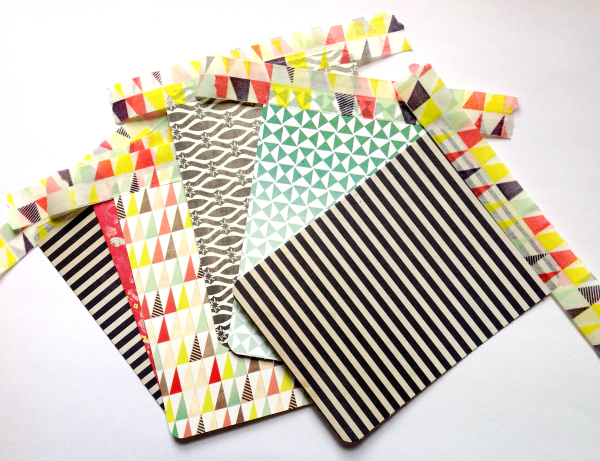
Once you have attached the washi to each card, trim the sides even.
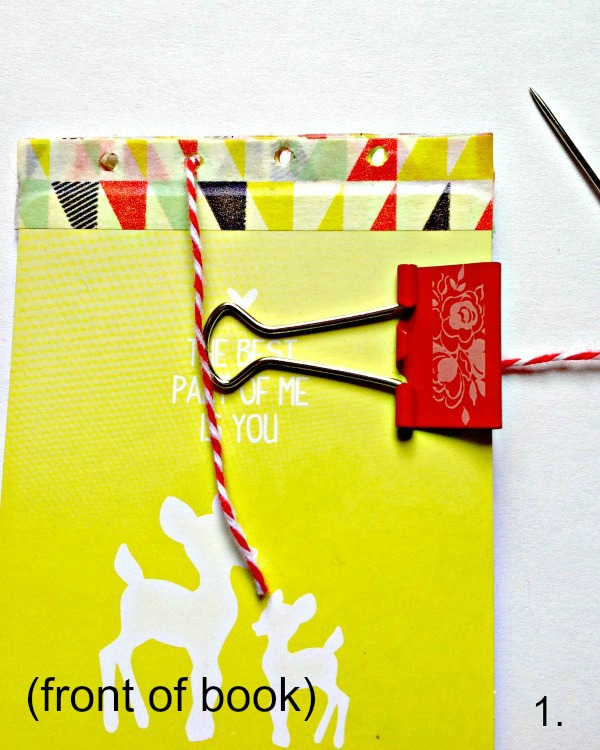
Clamp the pages evenly together and mark the placement of four evenly placed holes. Poke or punch the holes through all layers of the washi. Do not poke through the card itself.
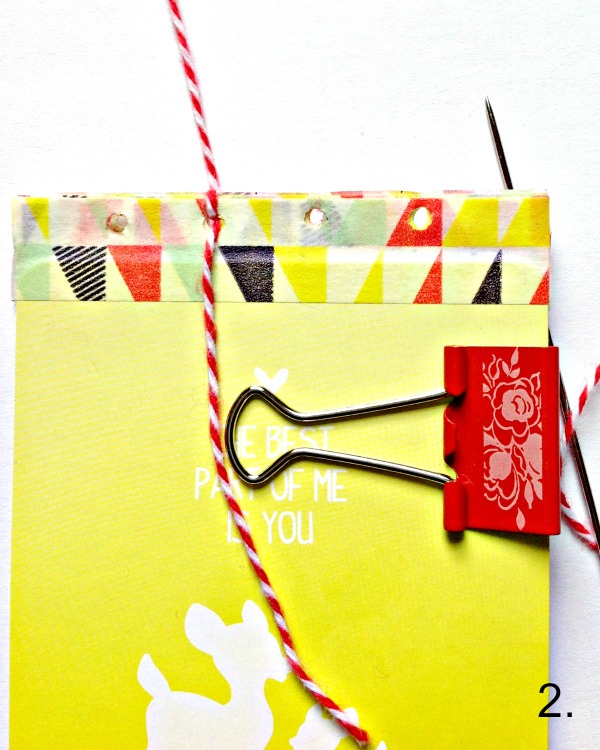
Now you are ready to sew. Insert the needle through the second hole from the left. Take it from the front to the back. Leave a tail on the front about 3 inches long.
Your needle is now on the back. Take the needle from the back over the top spine and through the same hole so that it is in the back again. Similar to a blanket stitch.
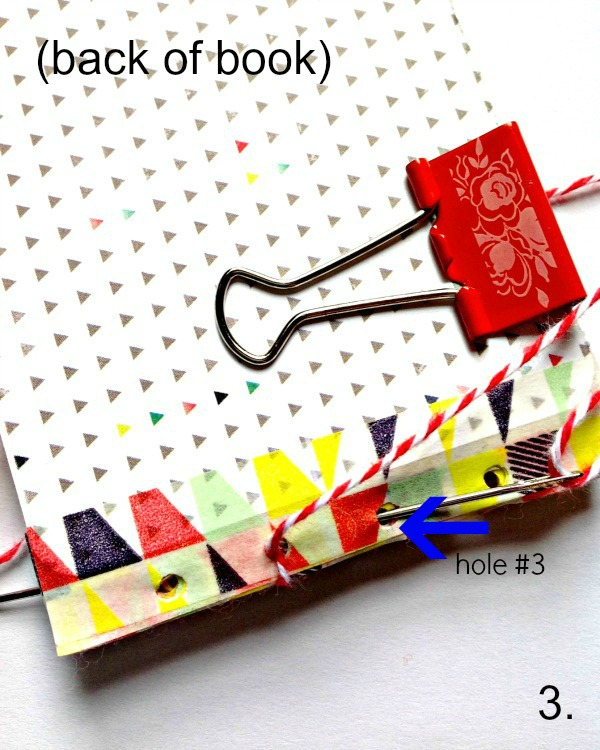
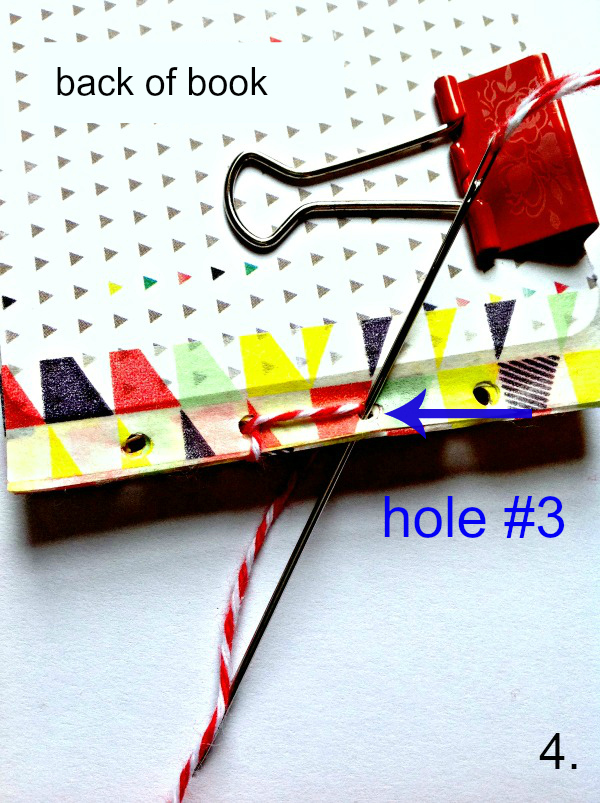
Flip the book over to the back. Insert needle in hole #3. Bring the thread to the front.
Again, insert needle through hole #3 and back around the spine. End with the thread in the front.
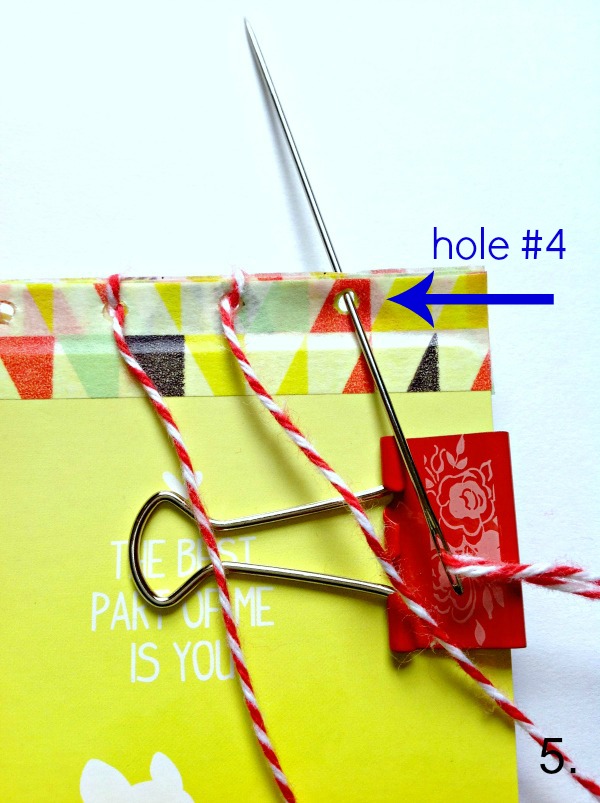
Stitch from hole #4 to hole #5 on front. (See photo 5) Needle will now be in the back.
Bring needle from the back around the top of the spine and back through hole #4. Your thread will be in the back. (see photo #6)
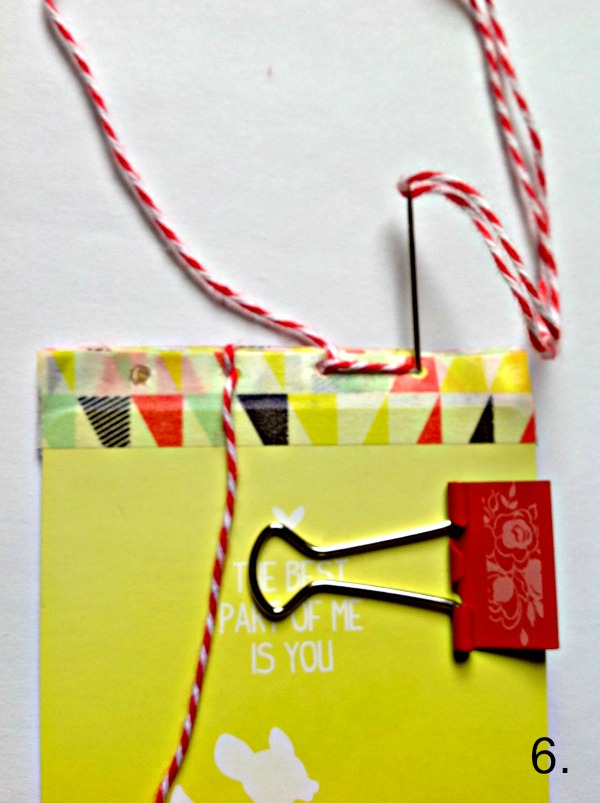
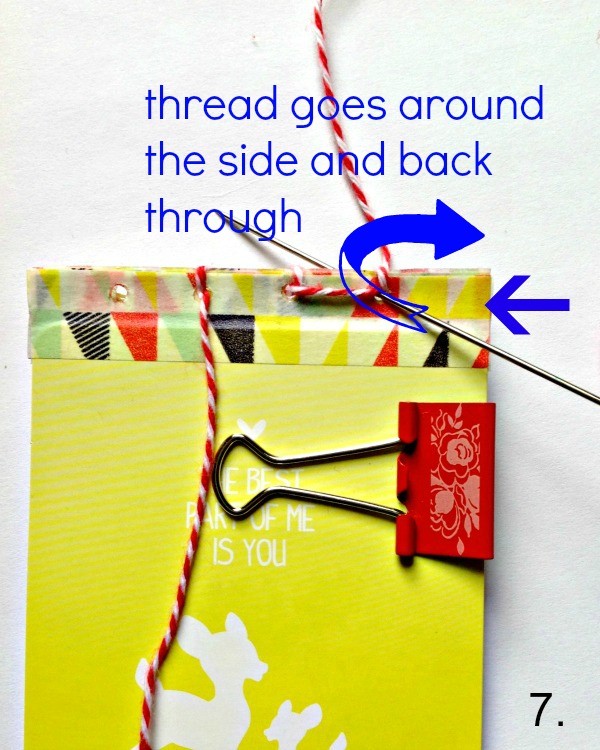
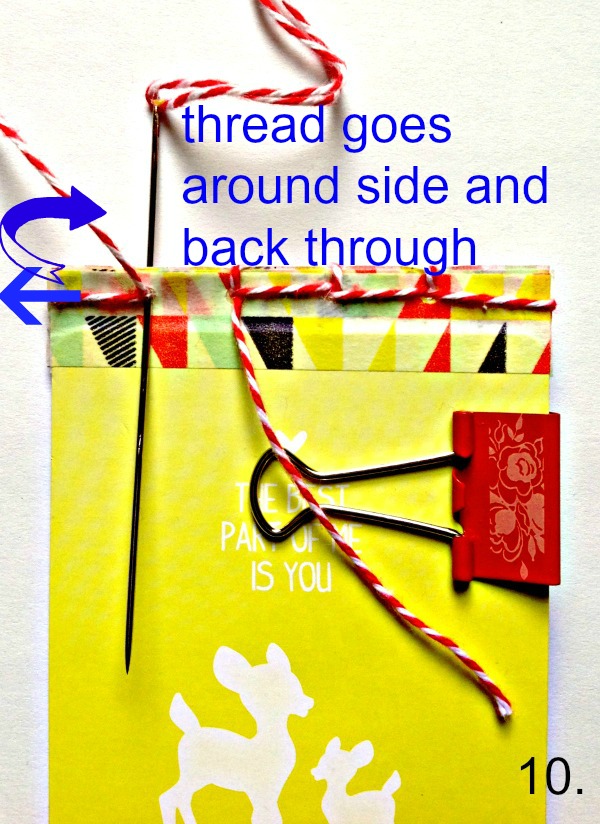
Bring your thread around to the front again by going around the right side of the spine and through hole #4. (see photo#7)
The needle is on the back. Stitch through hole #3. The needle is now in the front.
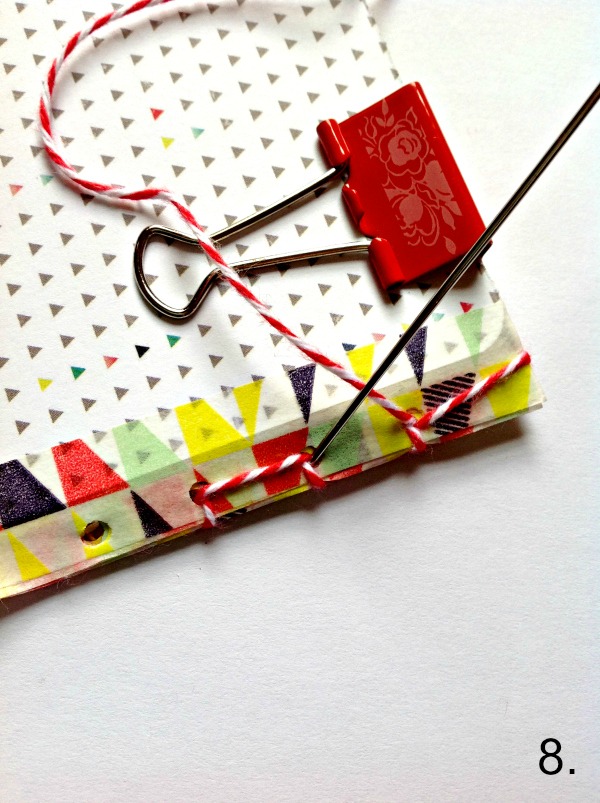
Stitch from hole #3 to hole #2. Your needle is now on the back.
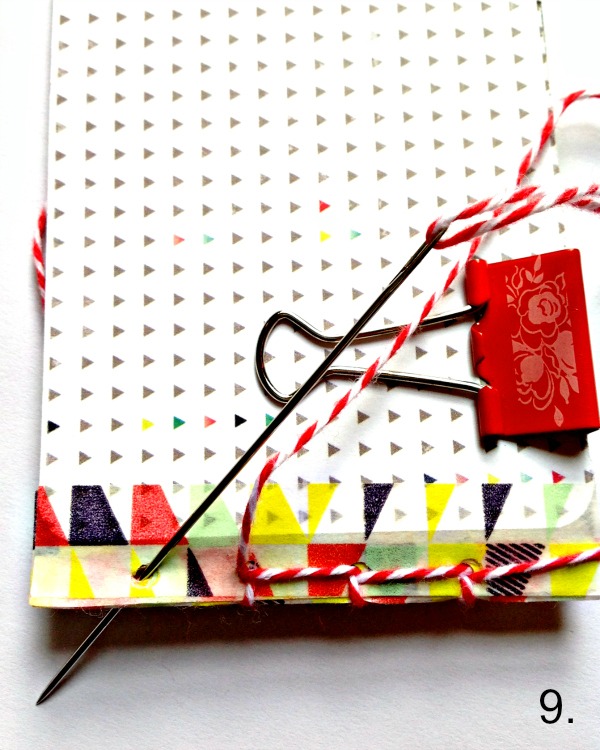
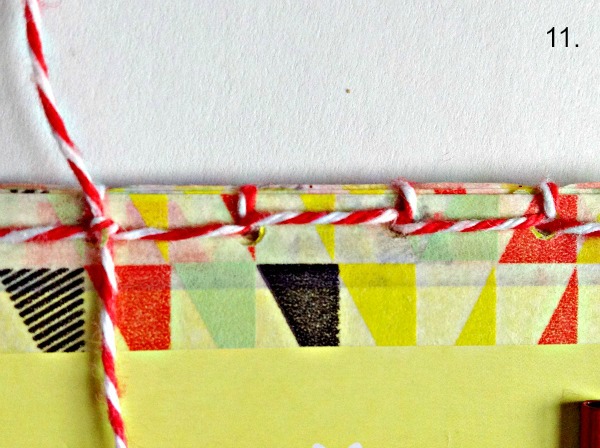
With needle on back, insert through hole #1. Needle is in front. Wrap thread around the left side of the spine and bring back through hole #1 in the front.
Now you can tie the two ends to complete your binding. (see photo#11)
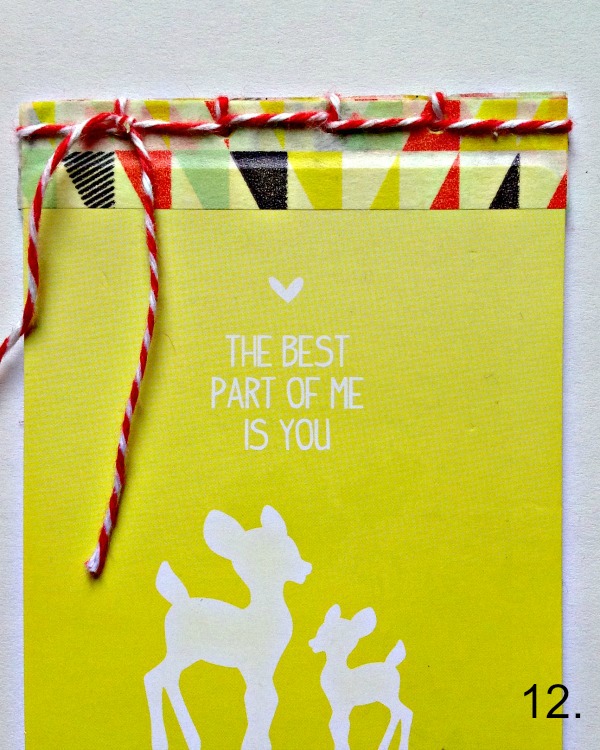
Your binding is now finished! You can add a button, or leave it like it is.
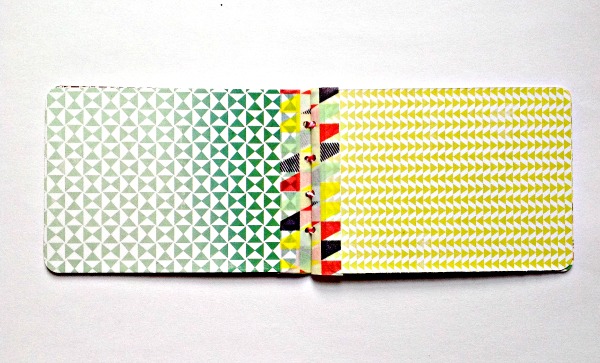
When you open the book, it will lay relatively flat.
Once you’ve made one of these, you’ll want to make more.
Thank you for allowing me to share this technique with you this week as I journeyed into bookbinding. I hope I’ve inspired you to journey to new place with your creative endeavors. Link your project to the Simon Says Stamp Monday Challenge blog for the opportunity to win a $50 voucher to Simon Says Stamp. Your project could also be chosen to be featured in our weekly designer spotlight. Enjoy!
Journey Tutorial Products Used:
Prima Flowers FREE SPIRIT 3 X 4 ATC Cards
Prima Flowers 6 x 6 Paper Pack FREE SPIRIT
Prima Flowers FREE SPIRIT Flair Buttons
Studio Calico LEMONLUSH Solid Vellum
Hero Arts Mini CUBE INK PADS Set SUMMER SPLASH
Lawn Fawn BELINDA’S BORDERS Clear Stamps
Tim Holtz Distress Ink Pad MOWED LAWN
Tim Holtz Distress Ink Pad VINTAGE PHOTO
Tim Holtz Distress Ink Pad WORN LIPSTICK Pink
Tim Holtz Distress Ink Pad SALTY OCEAN
Tim Holtz Distress Ink Pad SQUEEZED LEMONADE
Ranger Inkssentials INK BLENDING TOOL Applicator
Paper Artsy MINI 12 Rocket Scientist Rubber Cling Stamp
Tim Holtz 9 GRID ACRYLIC BLOCKS Set to Cling Stamps
7 Gypsies PAPER TAPE GLOBAL
We R Memory Keepers 3 X 4 CARD PUNCH Round Corner Tool
Tim Holtz Sizzix Die REGAL CREST Bigz
Sizzix BIG SHOT MACHINE
Glitz TRIANGLES Washi Tape
Glitz FINNLEY BITS & PIECES Die-Cuts
Glitz 6 x 6 FINNLEY Paper Pack
Hemptique CANDY LANE Cotton Bakers Twine
Ranger Inkssentials COLLAGE GLUE STICK Adhesive
Royal Langnickel Essentials 5 x 7 WATERCOLOR ARTIST PAD Paper
Lawn Fawn GOLD SPARKLE Single Cord Trimmings
Challenge Badge

Spotlight Badge


Thank you for doing such a fabulous tutorial. Your step by step instructions with photos are wonderfully easy to follow and the final product is really adorable!
That dental floss threader hint was terrific (and your tutorial, as well)! I’ve done some book stitching myself and also with other projects, I’ve faced the dilemma of my thread being too fat for the needle’s eye. Many thanks for a helpful hint I’ll never forget.
You know that I think! You are totally original! OMG dental floss… Incredible! wonderful tutorial and amazing project! BArbarayaya
How fantastic! I’m going to try this with ATCs to make a book. Thanks for the inspiration!
What great detailed instructions for a very cool project. TFS.
This is absolutely GORGEOUS! Pinning!!!!!
i.love.this.
awesome tut and LOVE the idea.
This is such a fabulous project, Michelle. Fun and inspirational. Thank you so much for sharing. :)
great tutorial, thanks for sharing!!!
Completely fantastic tutorial, Michelle – thank you… I’m bookmarking this so I can come back and follow it later!
Alison x
WOW…I’m sure I can do this!!! You’ve made it so simple…what a great tutorial. Thanks so much!!!
Wow Michelle this is fabulous! Thank you for sharing that great binding technique and the dental floss tip. Love the happy cards and colours.
Wonderful Tutorial! So excited, can’t wait to make some!
Fabulous journal Michelle, wonderful use of colour which gives your piece a real cheery feel. Love the binding. Great tips. Tracy x
Thank you for sharing this adorable and innovative idea for threading a book binding. It’s very sweet and useful. GREAT tutorial, and I am so grateful.
Karen
http://www.karen-mycuprunnethover.blogspot.com
Fabulous project Michelle and I love the bright and happy feel you’ve captured and the use of dental floss…genius! It’s just gorgeous and thank you for sharing it with us… xo
Love this tutorial! The step outs are fantastic. Love your beautiful books!
Oh my word, these projects always amaze me.
Thank you. This is a good technique for making small journals or little cards with more extra pages.
Such an awesome tutorial Michelle! Thanks for sharing your creative process!
Fabulous tutorial, Michelle! Thanks for the clear pics, well-written instructions and of course, the inspiration!
This is most fabulous! What a great tutorial… so inspiring!