Challenge: Transparent
This week DT member Anna-Karin challenges us to be transparent. Will you use vellum? perhaps share all the details of your project leaving no secrets unseen? Add a layer of frost film or use mediums that are not opaque? The choice is yours!
Barbara wows us with a tag this week.
![]()
The theme of the challenge, this Monday is very charming and it was easy to think about a project in which they were present more ‘transparent elements. The cage is the main element and I used it because of its shape! It restricts the space but leaves open the mind through her bars that in my tags are golden! For the background I created a stencil with a Tim Holtz’s small heart which I then filled with a stamp and the flower is so delicate and translucent thanks to Frosted film, a wonderful material which has found its perfect place!
Ashli was inspired by a recent family project and some memorabilia for this week’s layout:
![]()
One of my favorite uses for Vellum is as a memorabilia pocket. This allows your treasures and papers to be seen, but not dominate the design. We just finished yet another project here at our house and I wanted to include my husband’s architectural drawing on my page. So, with lots of Vellum, I created my pocket and design. I then added more see-through elements with some Amy Tangerine alphas and Maggie Holmes Rub-Ons. I just love how the vellum elements “blocks” add to the story of the page!
Michelle used an over-lay on her pocket card.
![]()
The card is actually a pocket made from a Simon exclusive button and string envelope. Transparent snippets and over-lays are trendy, fun elements commonly seen in many popular scrapbook lines. They’re not just for scrapbookers! My stamped bird from Hero Arts is colored with Distress Markers and perched on a transparent snippet from the Persimmon line.
Meihsia upcycled her kids toy packaging and created this transparent card with beautiful sunshine.

Most toy and gift packaging is recyclable. This week, I decided to use the toy packaging as the card base, and create this simple and fun card. The packaging was cut into a standard card size (4.25″ X 11″ and folded in half using bone folder) and decorated with Prima Flowers, American Crafts Chipboard Stickers, Vintage Trinkets and Say It in Crystals.
Mona was inspired to create a project featuring a transparent Tattered Floral.
![]()
First I created a background using a combination of the following products: stamps, patterned paper, Distress ink and a stencil. Once completed, I adhered a die cut crackled finish chipboard window then embellished with a beautiful transparent Tattered Floral that was made using Frosted Film, Modeling Film and ink.
Sandra Mouwen went almost completely transparent in her art journal
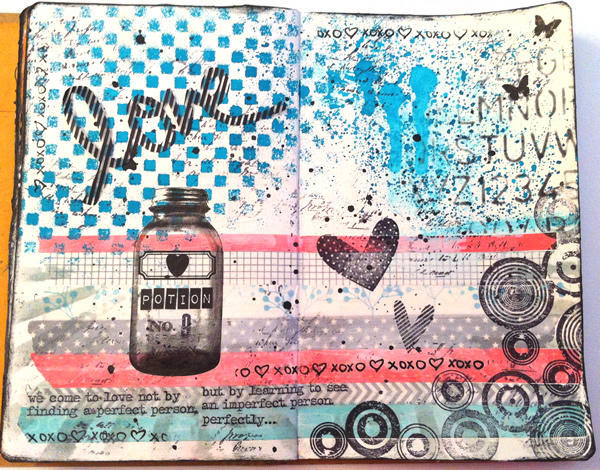
I used almost only transparent or semi transparent products for this weeks project. I started with making a background out of lots of different Washi Tape. It was a bit to bright so I washed it down with some Gesso mixed with a little bit of water. I love rub ons and when I was browsing through them I saw this Jar from Jenni Bowlin and needed to use it! Along with the Love Scripty Words the theme of these pages came together.
Emma adored this week’s challenge and used acetate and Wendy Vecchi’s Clearly For Art to create the transparency on this shabby wallhanging.
![]()
As soon as I saw this challenge, I immediately thought of Wendy Vecchi’s Clearly For Art Modeling film and used this to create the wings on my stamped butterflies and moths. After inking the paper and colouring the image with Distress Markers, I then created a frame for the butterfly image using PaperArtsy’s Snowflake Fresco Finish Chalk Paint for a shabby look and added acetate to replicate the glass. To complete the wallhanging, I attached a Melissa Frances decorative scroll hanger.
Inspiration lead Tracy to create an artsy canvas with a touch of transparency.
![]()
Wendy Vecchi’s Clear Clearly For Art seemed the perfect starting point for my Canvas used to create a wonderful dimensional transparent bloom combined with the Tattered Floral Die, coloured around the edges with Aquamarine Reinker. My whole design was based around this flower and things slowly developed from there into an artsy canvas filled with many less transparent additions!
Dan combined the transparency of stamped images with the sheer nature of tissue tape in his birthday card for a friend.
![]()
I coloured my background card before I stamped on it, allowing the colour to show through the transparent areas of the stamped image. When placed on a patterned background, the white parts of tissue tape are practically transparent too, allowing the background to show though. I used some Merriment tape here with that effect. The sentiment was from the Simon Says Stamp exclusive stamp set Inside & Out Sayings, as well as the Remnants and Weathered Textiles sets.
I (May) went transparent with my embossing powder.
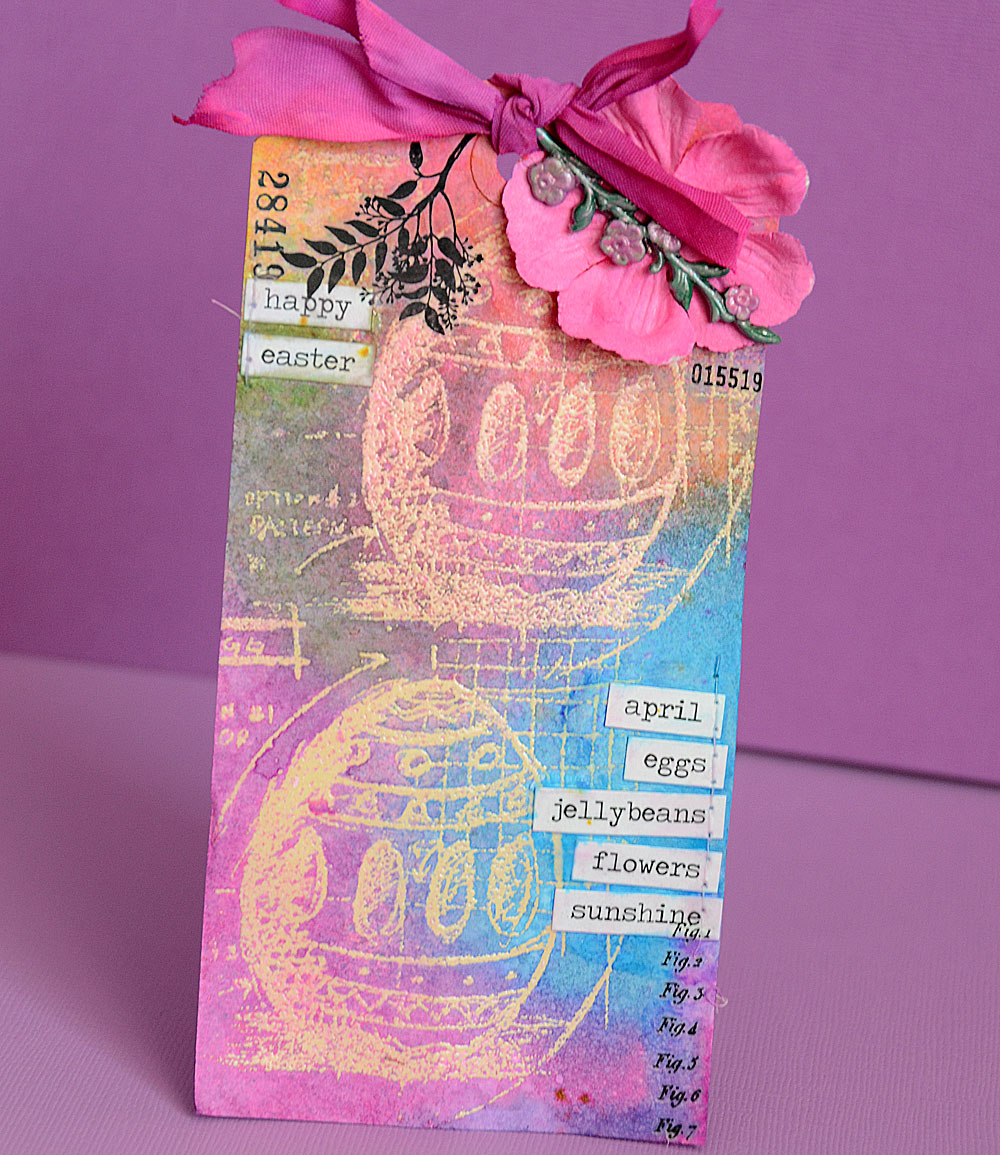
The spring set of Tim Holtz Blueprint stamps are among my all time favorites! To really make this colorful I went transparent with my stamping with embossing powder and then colored them with abandon using Dylusions sprays. I love how the original tag color shows through and the translucent sprays blend and layer to create this spring confection that will top a special present.
Andrea decided to experiment with transparent party favor boxes filled with crafty things for her crafty friends.
![]()
My crafty friends are truly a rare and wonderful breed. They never ask for the total of how much I spent on a “necessary” tool and they squeal in delight at the mere mention of gesso. As a gift for them, I made some crafty party favors for our next get-together. They were a snap to make with these Simon Says Stamp clear pillow boxes, which I carefully (emphasis on carefully) heat-embossed with this white powder and this fabulous Wendy Vecchi stamp image from her Busy Making Art set.
Suzz was inspired by the thought of peeking through a transparent layer.
![]()
I decided to play with the concept of peeking through a transparent layer to a hidden background. I created a series of tags using the Hero Arts Acetate Tag . I added some texture with the Wendy Vecchi White Embossing Paste and the Tim Holtz Honeycomb layering stencil. This inspired a sunny flowery scene with a few bees and hidden messages popping out.
Stay tuned for Wednesday when Anna-Karin will show you ideas about how to use a whole bunch of different transparent products.
![]()
For more inspiration click on our design team’s blog links so you can see more photos (and full supply lists) for their projects. Leave them a little comment love while you’re there so they know how they’ve inspired you too, if you’re so inclined.

As always, Simon Says Stamp is giving away a $50 gift voucher that will go to a random entry chosen by random generator. To qualify all you need to do is create a new project that ties in (in any way!) with our theme and post it, along with a link back to this challenge, and add a link here. This challenge will end at 11:59pm on Sunday March 30th Eastern time.
We will also be choosing some of our entries to put in the spotlight – a special honor where we talk about why we loved that entry in particular and award a special badge too!
For the full rules, read the “challenge rules” posted in the side-bar here on our blog.
[raw]
[/raw]
Challenge Badge

Spotlight Badge


way to go DT with all the beautifully detailed projects!!
You guys are rockin the creative challenges! Thanks for keeping us inspired with your creations!
Great DT inspiration!! Thanks for the fun challenge
Have a blessed day
DIANA L.
dianamlarson.blogspot.com
So many beautiful inspirations, thanks to the DT for sharing such great work.
Thank you for the fun challenge and all the inspiration!! Hugs, Darnell
Wow Anna-Karin’s and the DT’s creations have left me speechless and inspired! I hope I get time to make a second project for this challenge x
These creations as simply rock in this challenge…thanks for the inspiration…
Hugs
Nancy T.
Une très belle idée de challenge, beautiful creations
Lots of great projects to inspire us.