Heffy Doodle Snail Mail!
Hi friends! Happy Thursday! Please welcome back special guest Lesley Oman of Heffy Doodle to share a special snail mail card with us today! I have always loved the literal and punny version of snail mail and I feel with as our world continues to get more fast paced, the importance of ‘snail mail’ also increases! Read on and be sure to watch the video and enjoy!
Its Lesley here, from Heffy Doodle. I hope you are all having a super crafty day today!
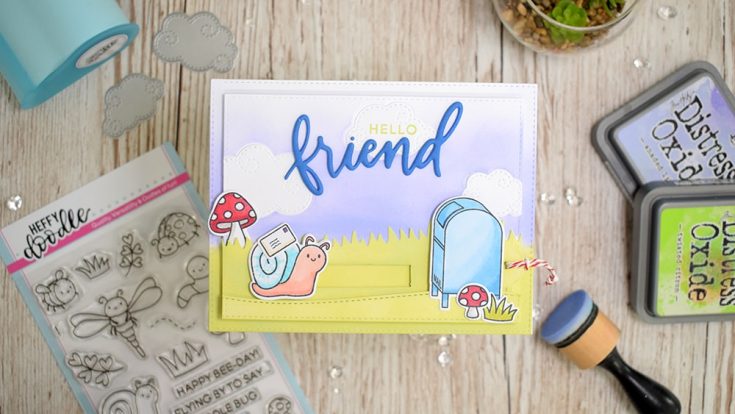
One of my favorite things to do is to mix and match stamps. It’s a fun way to stretch your supplies, and often you can come up with some fun creative combinations! Today I have paired up the Big Bug Hugs stamp set with the Yappy Happy Mail stamps to create this cute snail mail card. I have also used a variety of Heffy Doodle dies to create my own interactive element on the card! Don’t worry, I have a video to show you how I created the whole card, but let me take you through the main steps of how this cute card came together!
To build my card, I used a variety of dies to create a panel to go onto a card blank, first, an A2 rectangle from the Imperial Stitched Rectangle dies, and then two panels using the second largest die from this set. I kept one of these smaller rectangles to be a layering panel, and the second piece I used to cut down a grassy edged panel (using the Grassy Lass dies) and a curved panel (using the Stitched Slopey Joes dies). Of course, these panels needed some color, so I used the Twisted Citron distress oxide and a foam blending tool to make them a beautiful, bright green color.
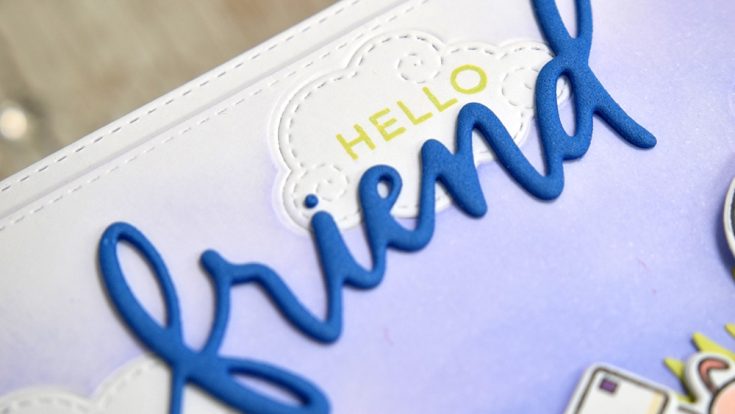
For the sky, I wanted something a little different, so I reached for my Swirly Cloud dies. I used these with a tan embossing mat to deboss these onto the sky piece of my card panel. Next, I cut out some cloud shaped masks using the Heffy low tack memo tape, covered the debossed clouds and then inked on the sky. Today I wanted a fun purple sky, so I used some Shaded Lilac for a soft purple tone. My favorite bit is definitely pulling away the mask to reveal the bright white clouds beneath!
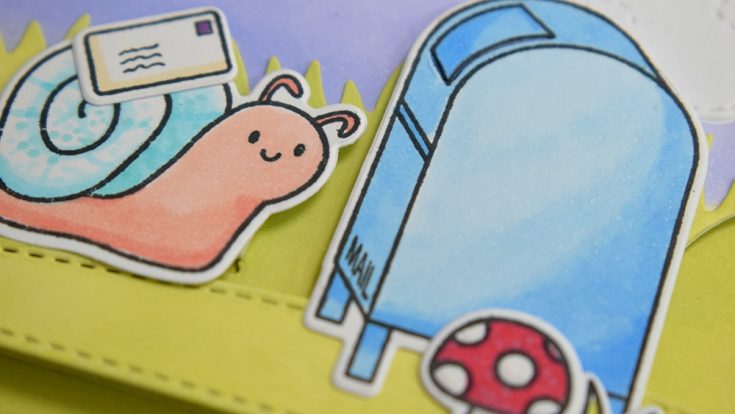
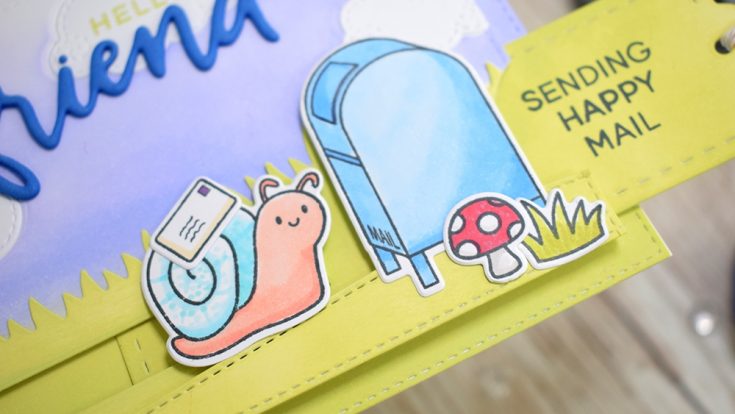
I had the idea to create a slider card where the little snail is carrying his letter to the mailbox, ready to send to his crafty friend! Viva la snail mail!! Haha! I didn’t have a slider die to hand, but I used a banner die from the Heffy Doodle Tag Along die set to create a rectangular channel on the card panel. I then used one of the bookmark dies from the Heffy Doodle Mark My Words die set to create a pull out element. I colored this up using the same Twisted Citron distress oxide so it would blend in nicely behind Mister snail.
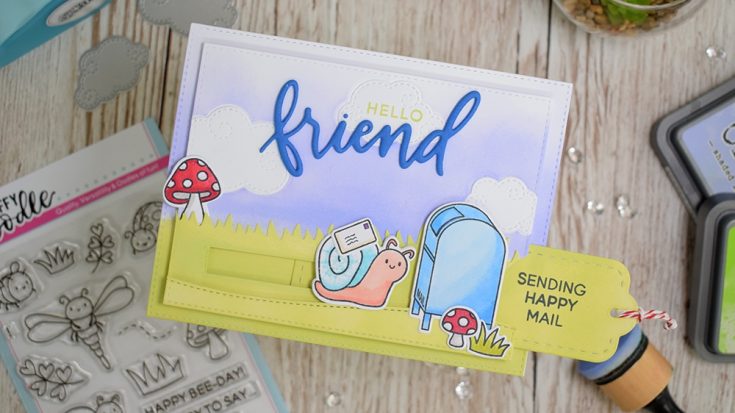
Next, it was time to stamp my images. I used my MISTI tool to stamp everything at once, making it super easy and really quick. The snail, toadstools and grassy images are from the Big Bug Hugs stamp set and the mailbox and letter are from the Yappy Happy Mail stamp set. I colored the images in using from alcohol markers for a fun blended look. To assemble everything, I used some foam adhesive, making sure that there was enough room for the sliding panel to come in and out, and I secured my snail onto the sliding panel with a small piece of foam adhesive also. As the pullout panel is actually a bookmark die, it already had a hole in it, so I simply added a little bakers twine so it was noticeable and easy to grip. I thought it would be fun to add a ‘Sending Happy Mail’ sentiment onto this pullout panel too! The stamps are from the Yappy Happy Mail set. To finish off, I wanted to add a main sentiment to the card. I decided to bring the blue of the mailbox into the card a little more by die cutting the word ‘friend’ out of some blue craft foam which had Stick-It adhesive applied to the back. Then I found the word ‘hello’ in my Veggie Patch stamp set and added this to the cloud just above the die cut word.
It was really fun watching this card all come together, and I hope you have been inspired to look through your stamps and see if you can find any perfect partnerships that would create a fun combination. Now to decide who mister snail should mail this card to! Happy Mail is the best! What was the last Happy Mail that you received? Leave me a comment to let me know!
With big bug hugs to all of you, Lesley X
SUPPLIES:
|


Thanks so much for stopping by and thanks to Lesley for being our guest!

Blog Candy Alert!! Follow our blog via email and comment on this post for a chance to win special blog candy!
Work It Wednesday March 2019: Spring Flowers!

Happy Wednesday, friends! Welcome to Work It Wednesday for March 2019!
In case you’re wondering what ‘Work It Wednesday’ is, let me explain: On the third Wednesday of every month (or towards the end of the month ), we want to see what you’re creating! The Simon Says Stamp community is so very talented, and we want to see more of your cards and projects every month.
Each month we’ll pick a few random participants to win a Simon Says Stamp grab bag! YAY!
The projects and cards that were shared for February 2019 were sparkling with green and gold! Do you want to see all of the cards and projects that were shared for our previous Work it Wednesday? Check them out; if you are looking for new ideas to try or inspiration using new products, it’s a great place to peruse!
The following three participants from our February 2019 Work It Wednesday were randomly chosen to win a goody bag from Simon Says Stamp:
#5 Marcie Sharp!
#13 Ashwini Rao!
#57 Heidi!
CONGRATS TO OUR WINNERS! Please email [email protected] with your mailing address and he will get your prize sent out to you.
We were thoroughly inspired by EVERYONES creative ideas, and we look forward to seeing what you make for our newest challenge!
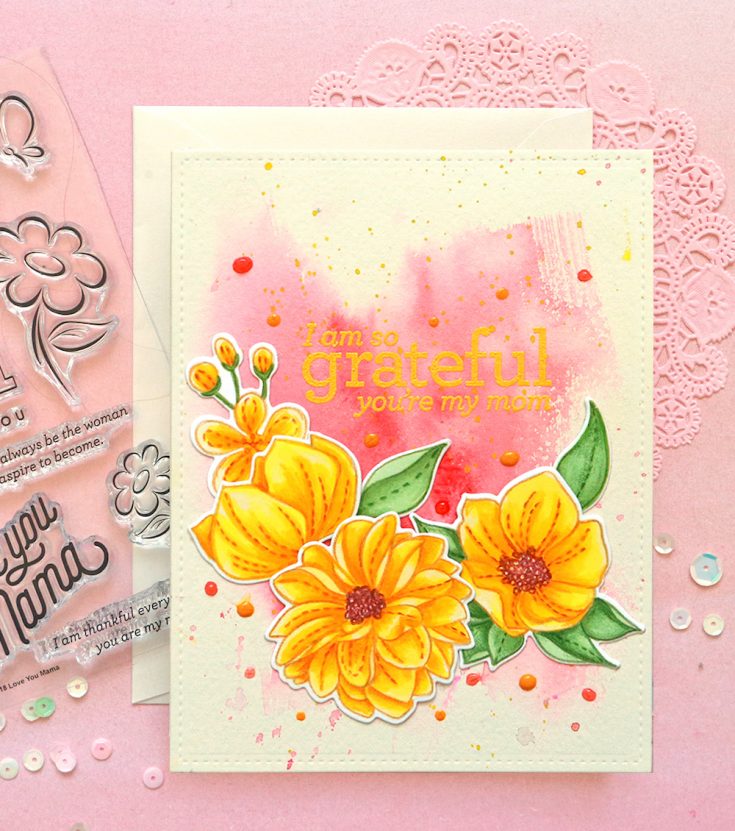
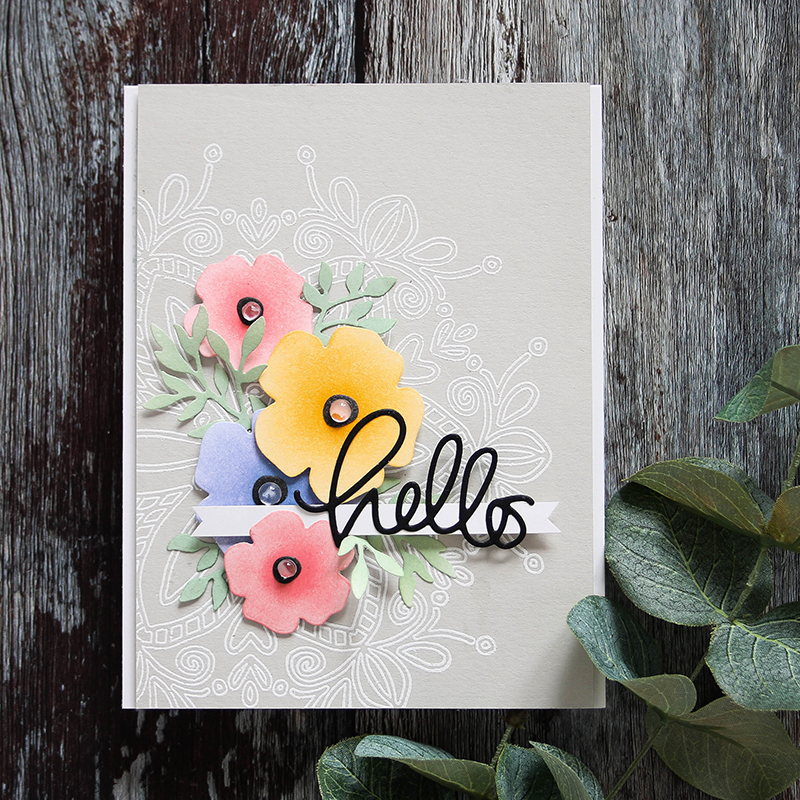
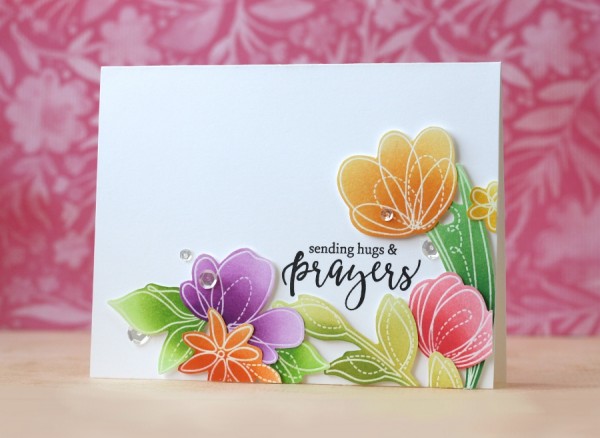
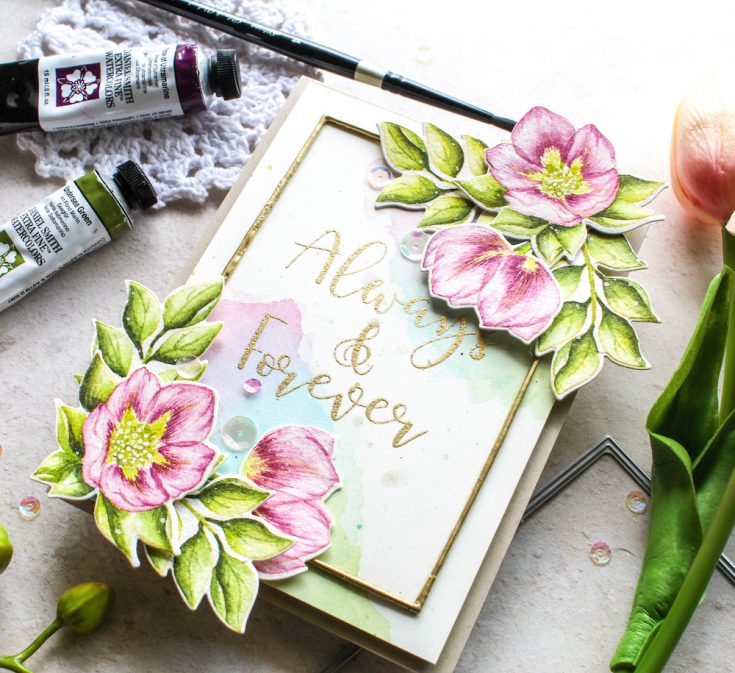
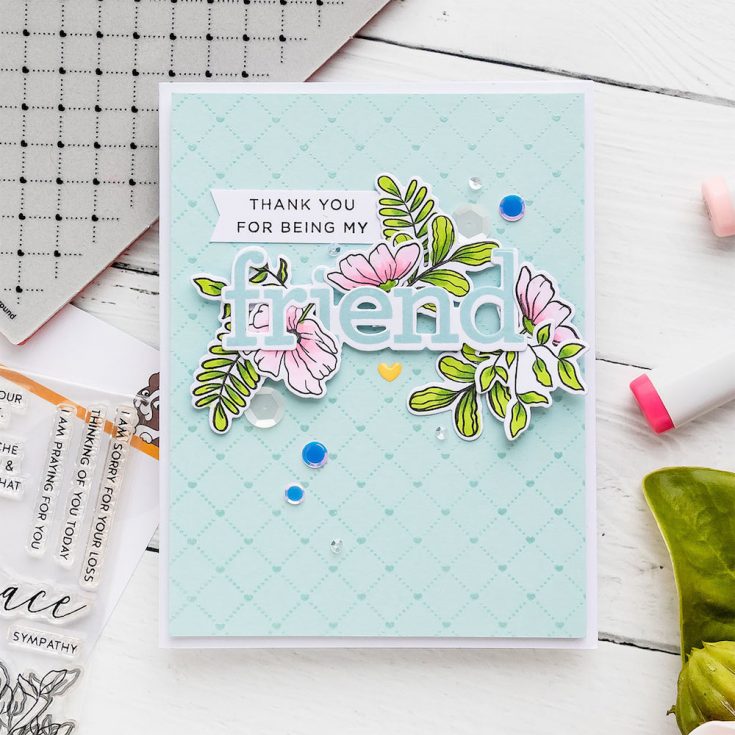
With Spring now here, it only seems fitting to feature an abundance of flowers in this month’s challenge!
Color a garden of blooms, die cut a bouquet of florals, or stamp a sea of wildflowers… Whatever you create this month, make sure Springtime flowers are the focal point of your project! Here are 5 ideas to spark your creativity!
Once you’ve created your projects, make sure you link your creations below!
Please remember to limit entries to 3 per month.
What are you waiting for crafters? WORK IT!

Blog Candy Alert!! Follow our blog via email and comment on this post for a chance to win special blog candy!
Interactive Cards by Jess: Hidden Shadow Box Card

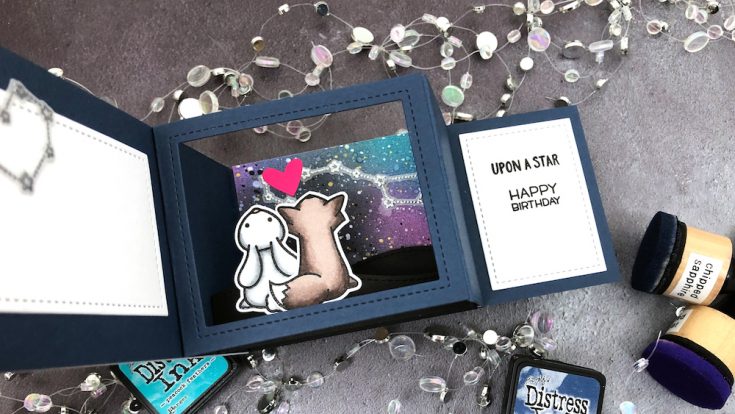
Hi friends! Welcome to the latest edition of Interactive Cards by Jess with very special guest Jessica Frost-Ballas! She has made a super gorgeous light up shadow box by using a variety of darling Lawn Fawn products such as the Upon a Star stamp and die set, Shadow Box die, and Push Here stamps!
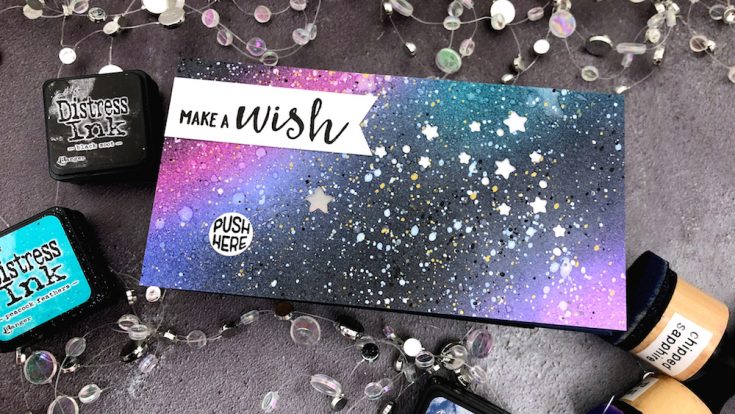
For the super sweet light up feature, Jess used a Chibitronics starter kit! Be sure to watch the video for the full tutorial and enjoy!
SUPPLIES:
|


Thanks so much for stopping by and thanks to Jess for being our guest!
Blog Candy Alert!! Follow our blog via email and comment on this post for a chance to win special blog candy!


