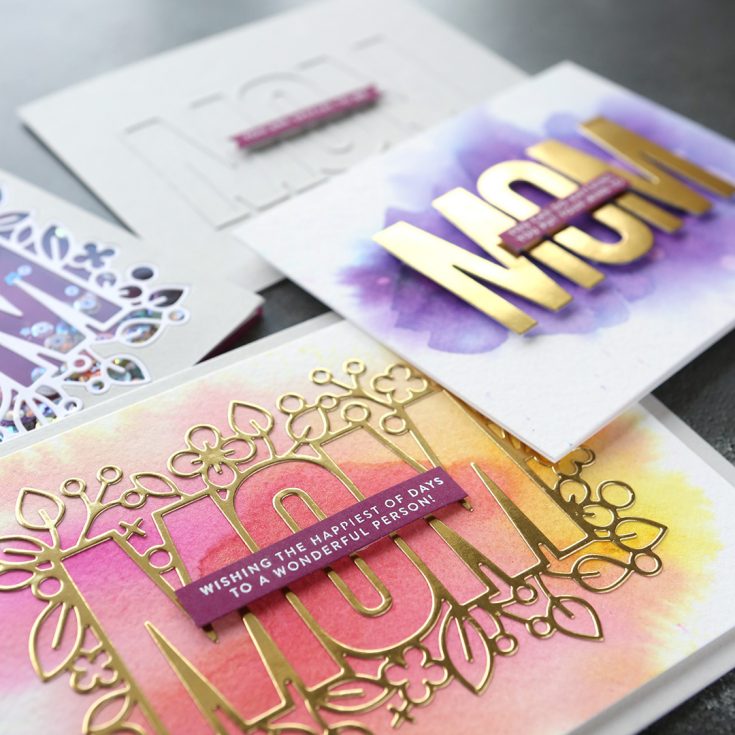
1 die, 4 ways – Outline Floral Mom
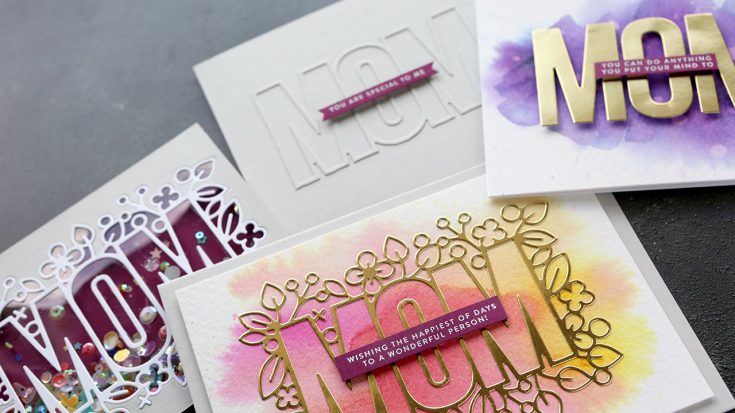
Hello, all! Kristina here! Today I have four card ideas for you featuring the Outline Floral Mom die. This die is fun to work with, especially because of it’s size! It’s perfectly sized for an A2 card.
Gold Die Cut over Watercolor Background
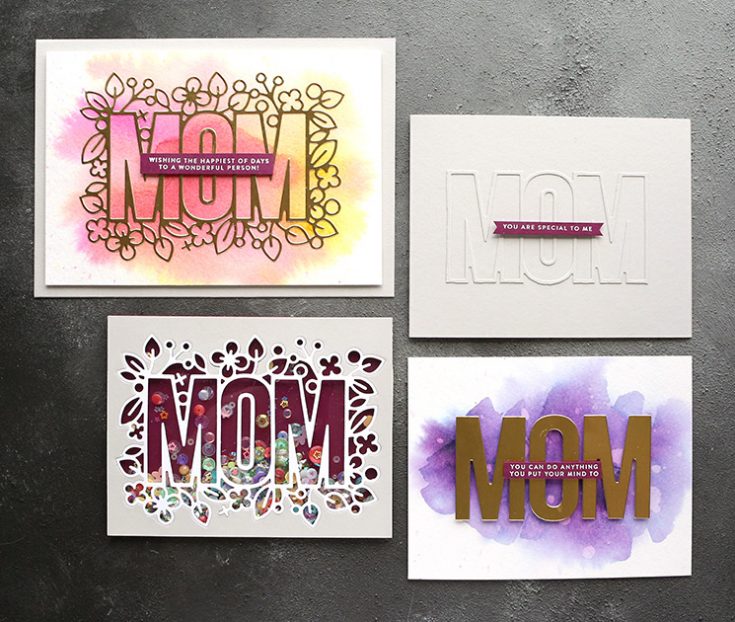
For the first card, I used gold foil cardstock to cut the die. Then I created a watercolor background using two colors of Nuvo Shimmer Powder, Solar Flare and Cherry Bomb.
I adhered the watercolor background to a Fog card base and then stamped a greeting from Simon’s Tiny Words Encouragement stamp set on Hero Arts Hero Hues Premium Cardstock in Plum. I used a bit of foam tape to adhere the greeting to the card.
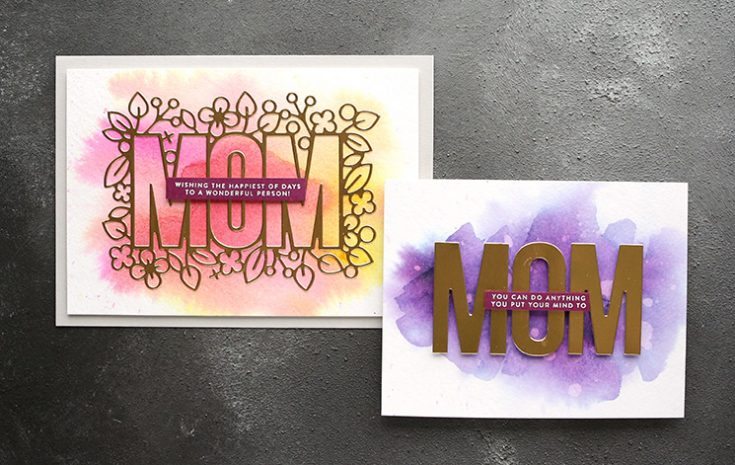
Inner Die Cut Pieces over Watercolor Background
Similar to the first card, I created a watercolorground using one color of Nuvo Shimmer Powder, Violet Brocade. Then I adhered the interior pieces from the gold foil die cutting. The greeting was stamped and adhered using foam tape once again.
Die Cut Inlay Shaker Card
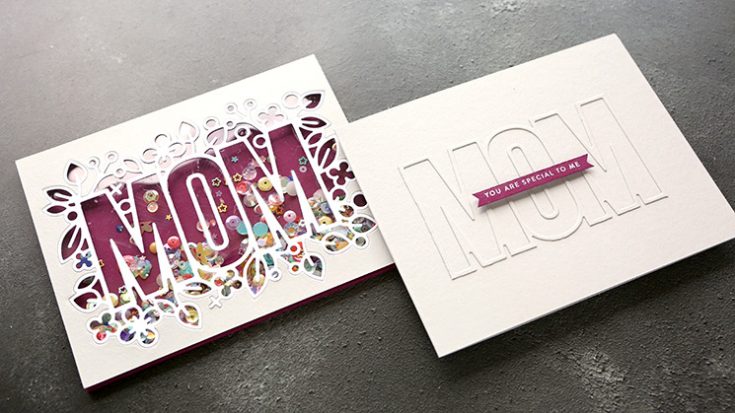
For my third card, I created a simple shaker card. First, I die cut the Outline Floral Mom die out of both white cardstock and Fog cardstock, making sure the die was positioned perfectly on the Fog cardstock since that position is what would be shown on the front of the card.
After the die cutting was complete, I adhered clear acetate to the back of the Fog cardstock piece. Then I turned it over so that it was face side up and inlaid or “puzzle-pieced” the white die cut onto the center area. This created the top area of the shaker card.
To create the dimensional area of the shaker card where the sequins will be, I applied a double layer of foam tape to the back side of the die cut panel (touching the acetate). Then I poured in the Paintbox sequins mix from Little Things by Lucy’s Cards (see many more sequins mixes HERE).
To close up the shaker area, I pressed a card base made out of the same Plum cardstock over the top. This traps the sequins inside and completes the shaker card.
Die “Surgery”
My fourth and final card is very clean and simple. Using the Fog die cut that I cut during the creation of the previous card, I cut off the floral elements using scissors. This left me with a clean and minimal die cut. I adhered it to a Fog card base.
To finish this clean and simple card, I adhered a stamped and embossed greeting from the Tiny Words Encouragement stamp set using thin foam adhesive from Darice.
And those are my cards for today! I hope this gives you some inspiration for using large dies. Thanks for stopping by!
|


May 2019 Brand of the Month: Hero Arts!!

SURPRISE! Our second ever brand of the month is none other than the amazing Hero Arts who not coincidentally are also turning 45 this month! WOW! Check out the stellar projects by their design team member Michelle Short below and keep scrolling for a pretty awesome free gift with purchase this month!

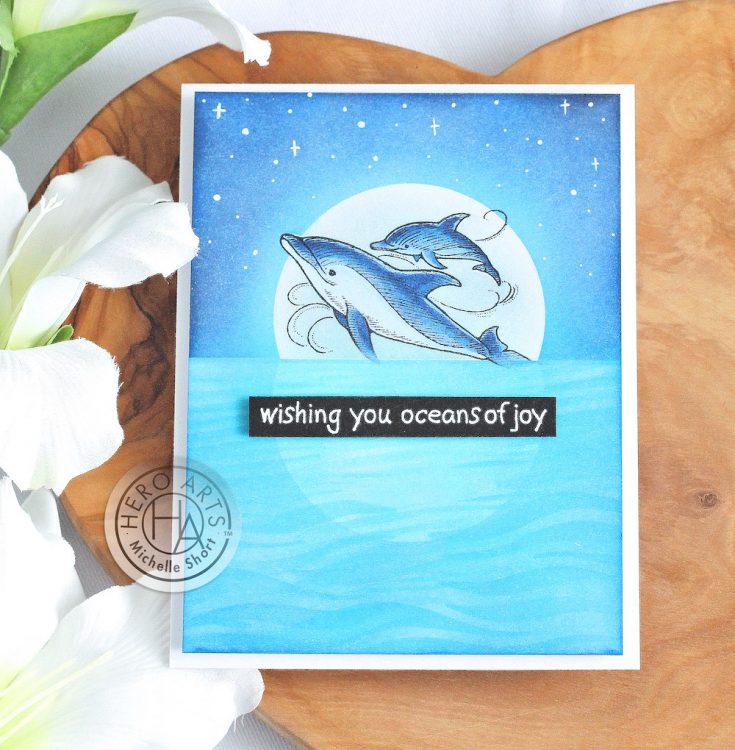
As soon as I saw the dolphins in the From The Vault Beach and Sea set, I thought of dolphins jumping up in the sea with the moon in the background. I thought it would be fun to make two cards using the same design but with different supplies. My first card uses Copic Markers. I stamped the dolphin image with black ink on to a panel of white cardstock. I masked off below the dolphins to create a horizon line. I mapped out where the moon would go and then colored the sky, adding a darker color towards the top and outer edges. I used various blue and purple shades for this. I then colored the moon with light greys, adding in some light purples and blues too. For the water I used various shades of blue Copic Marker, again adding darker color towards the bottom and edges. I added the color more in stripes for this, to try and create the look of ripples in the water. I made sure to keep some areas white for the reflection of the moon. The dolphins were colored with blue-grey markers and then the panel added to a top folding card base with foam tape. To finish off, I added a white heat embossed sentiment on black cardstock to the front and added dots of white Gelly Roll pen for the stars in the sky.
SUPPLIES:
|


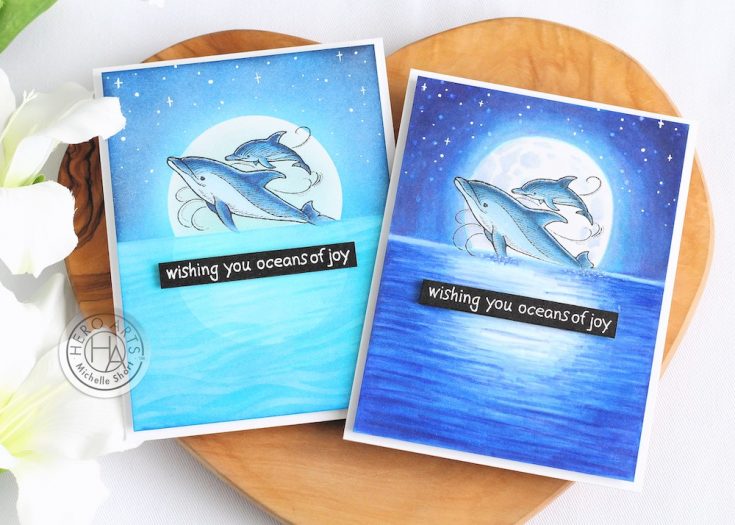
My second card uses the same design but instead of Copic Markers for the coloring, I used ink blending. I first stamped the dolphin image and created a mask for it from masking paper. I then cut two masks from masking paper for the moon too. I placed another mask below the moon for the reflection. Using blender brushes, I first added a light layer of light blue around the moon shape and then blended on darker blues around the edges. I also added some black to the very edges for some added depth. For the sea, I first added a layer of color with mid-tone blue shades before removing the mask for the reflection of the moon. I then blended color on top of the reflection but tried to keep it lighter than the rest of the sea. Using the Mermaid Sea Waves Stencil and also the Woodgrain Stencil, I added lines into the sea to create waves. I removed the moon mask and blended on grey ink. The dolphin masks were then removed, and the dolphins colored using Copic Markers. The panel was adhered to a top folding card base with foam tape. I added the same heat embossed sentiment as the first card, as well as stars in the sky with white Gelly Roll pens.
SUPPLIES:
|


Thanks so much for stopping by and thanks to Michelle for being our special guest!

The awesome folks provided us a limited supply of a super cool 45th Anniversary pin paying tribute to their start in rubber stamps! While supplies last you can receive this special anniversary pin FREE with any Hero Arts branded purchase with code HER45 at checkout! (an $11.99 value!) Enjoy!
Stay tuned~ more fun Hero Arts themed inspiration and surprises to come!!!
Pssst. A NEW Brand of the Month will be announced tomorrow…
Hi friends! Stay tuned! We’re starting a brand new monthly spotlight series on brands that we love! Tomorrow will reveal our May 2019 brand of the month! Any guesses??