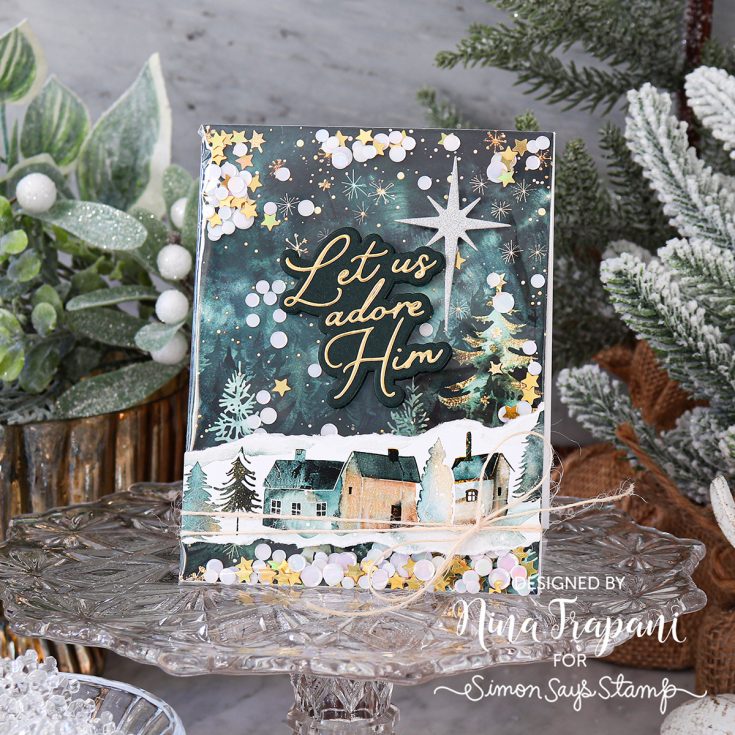
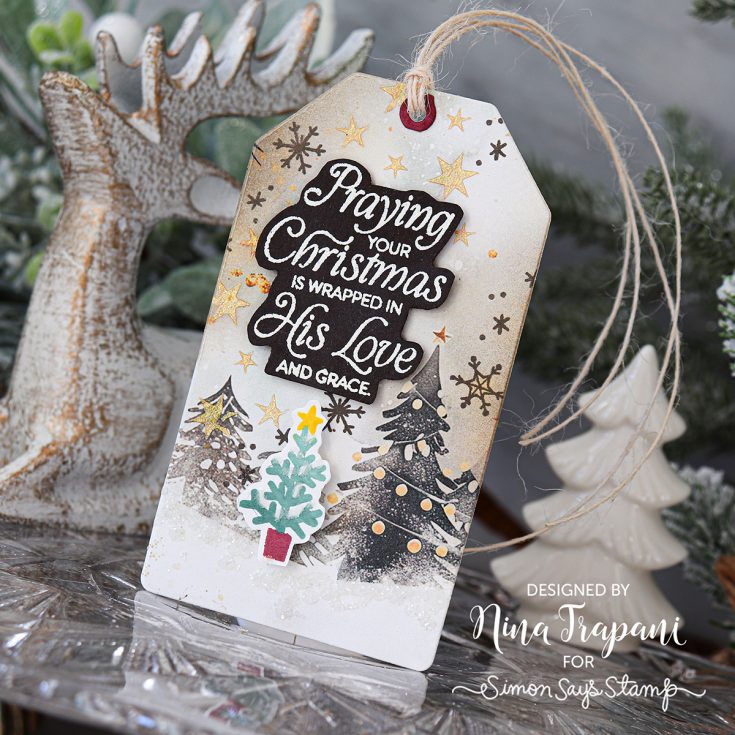
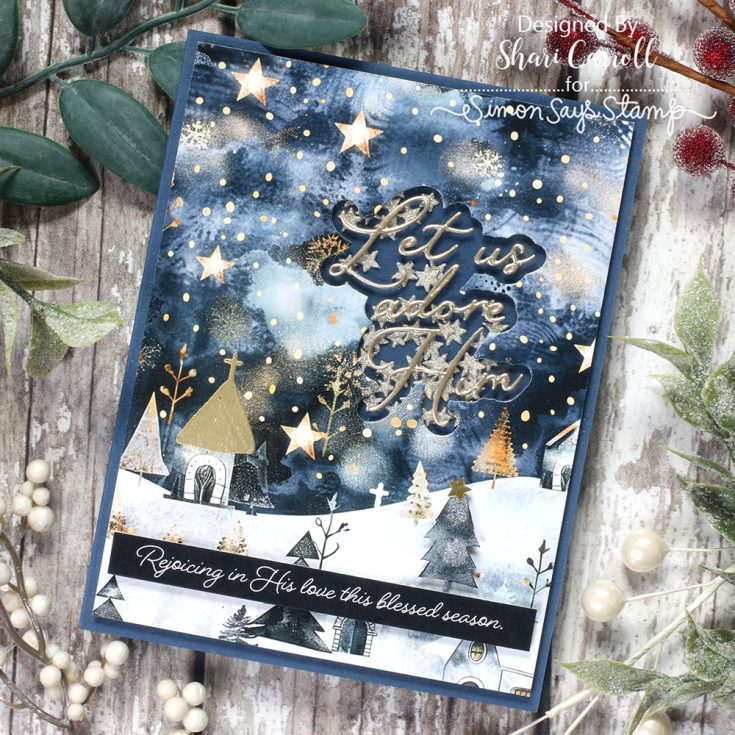
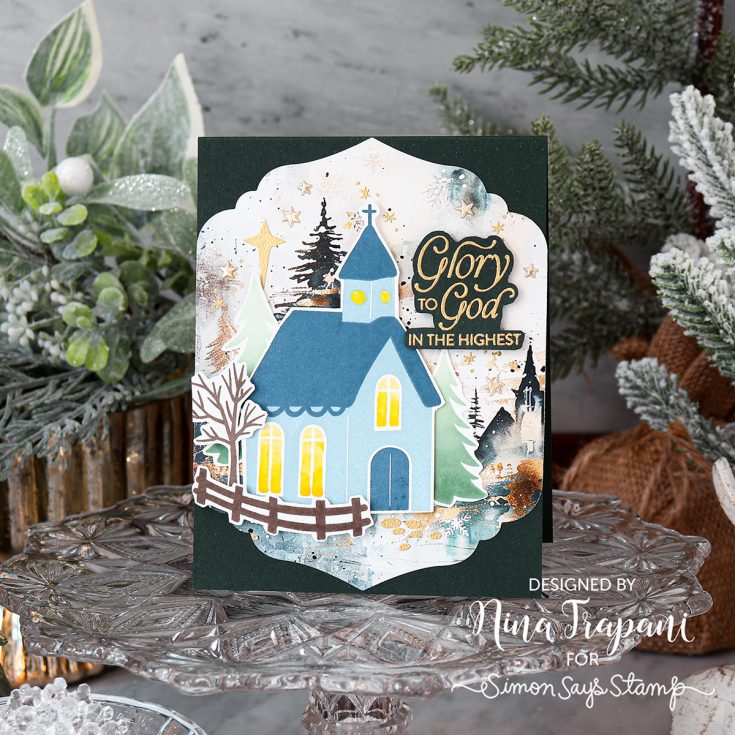
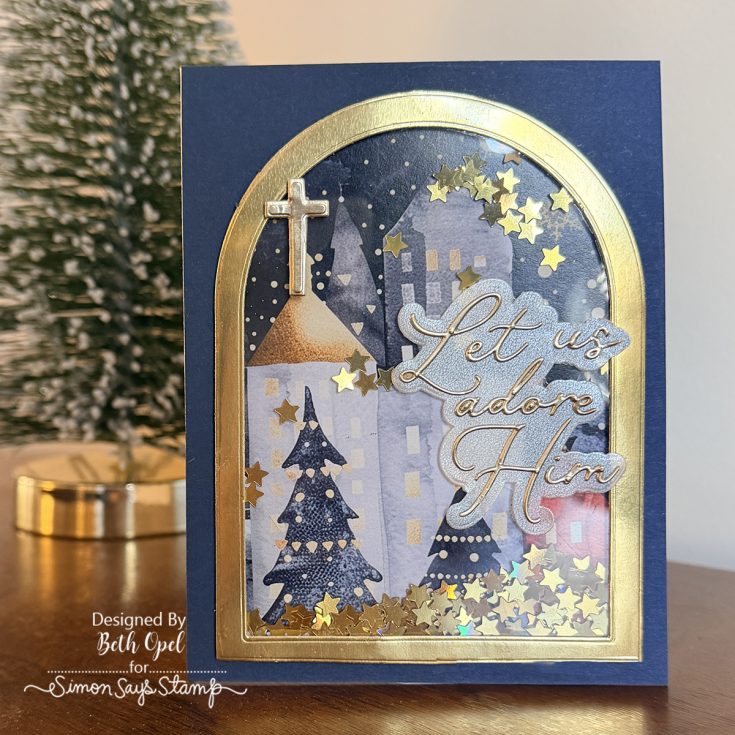
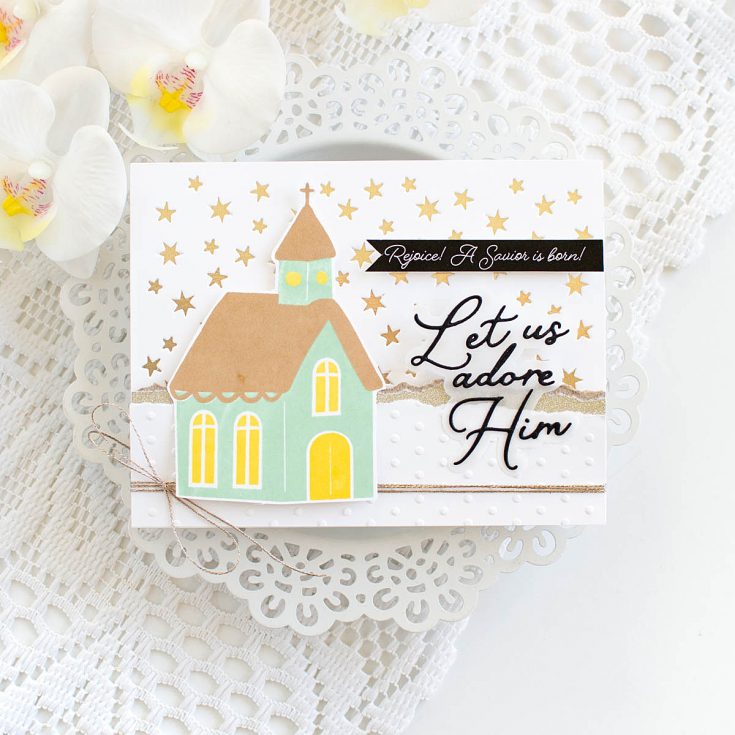
Wrapped in His Love: A NEW Religious Kit for the 2025 Holiday Season is HERE!
Hi friend! We are SO excited to share — back by popular demand! — a special religious edition of our Limited Edition holiday card kits: Wrapped in His Love.
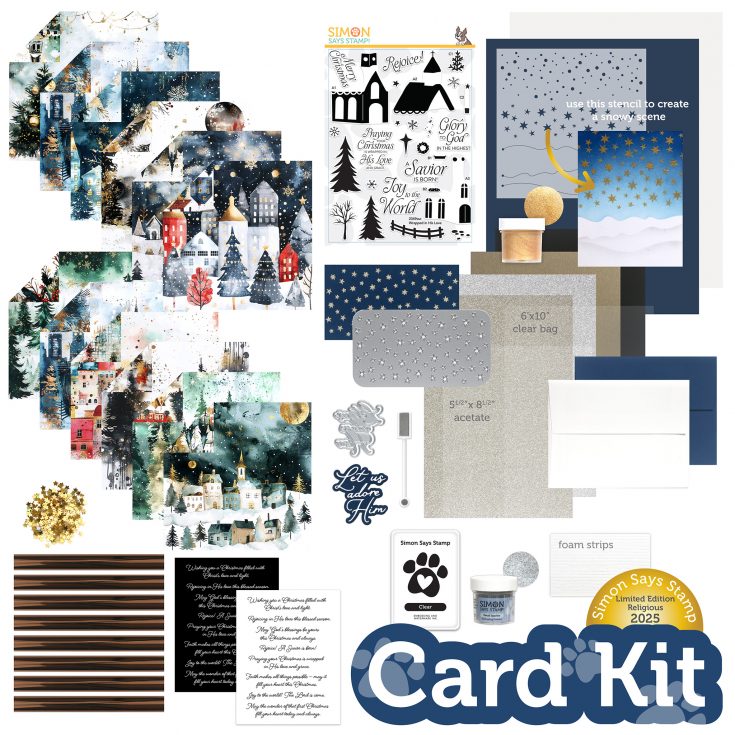
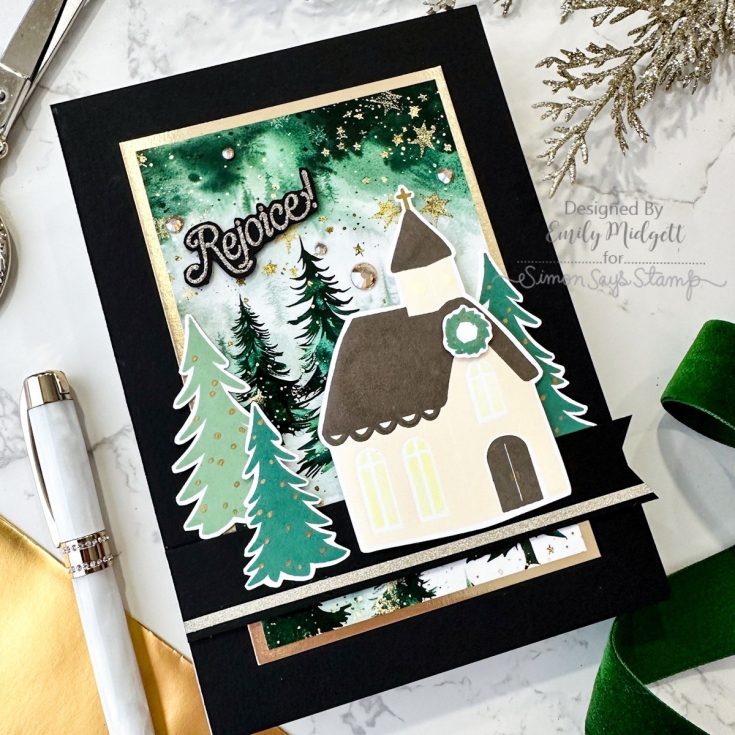
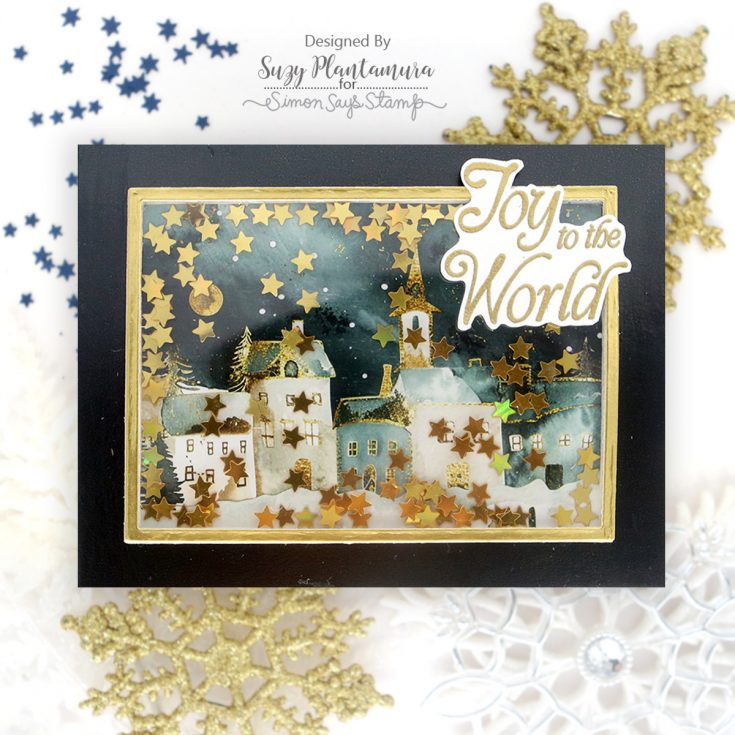
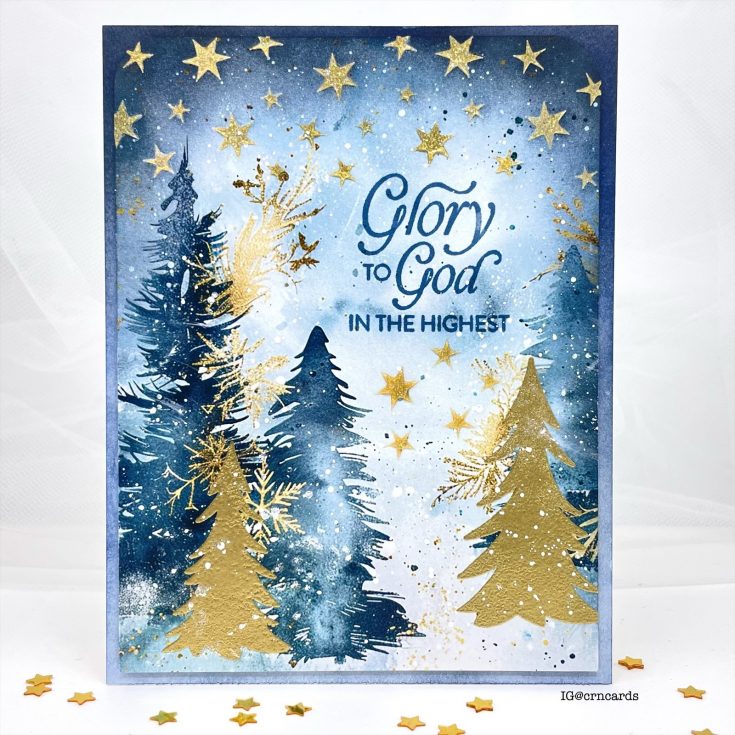
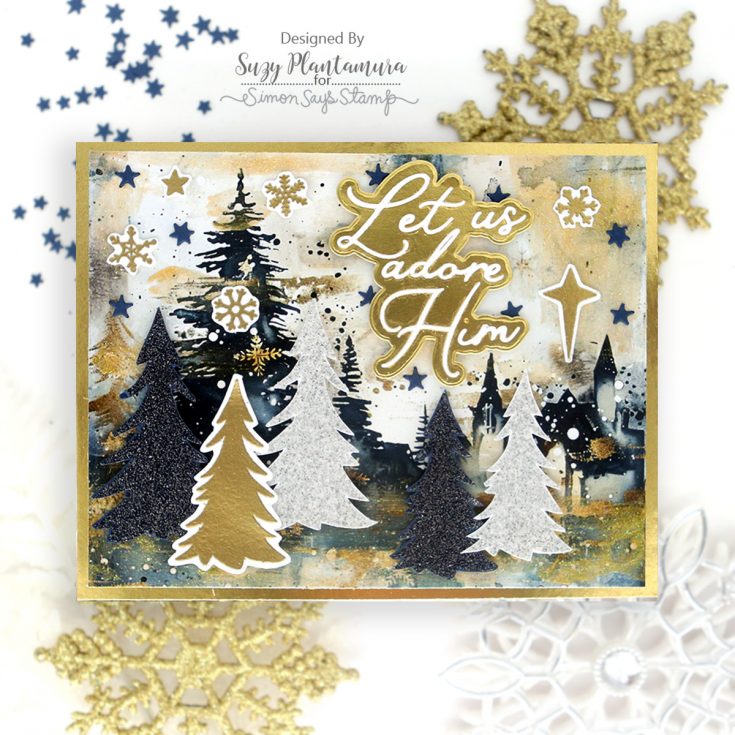
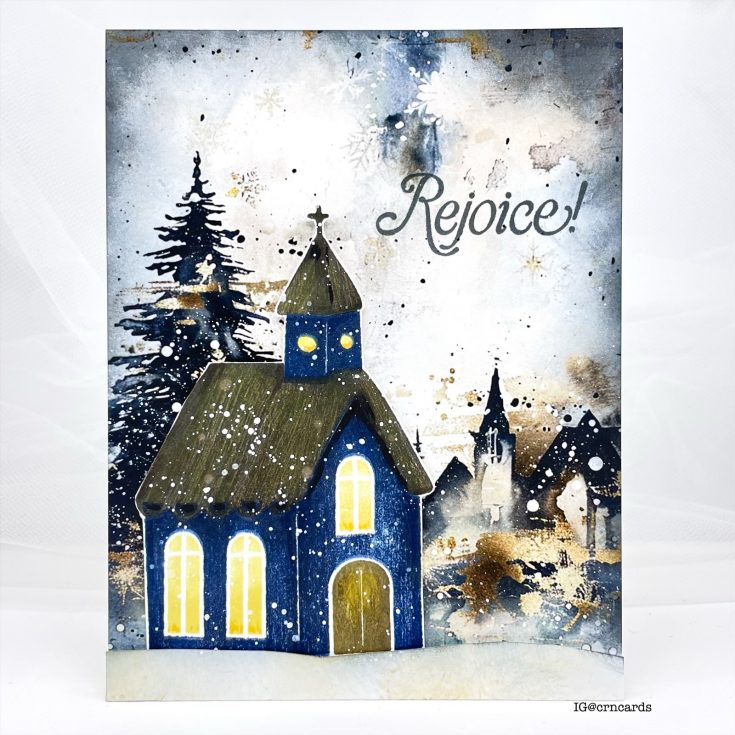
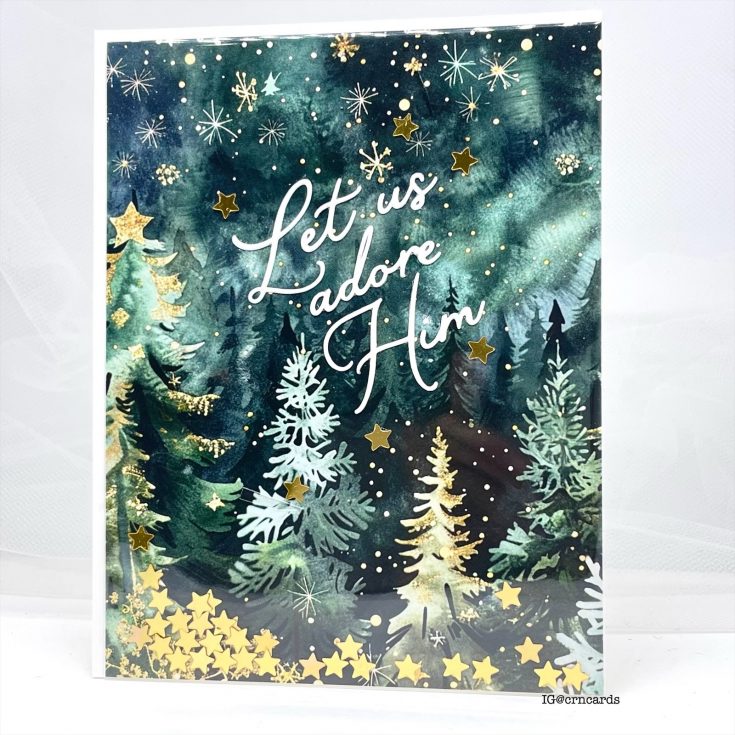
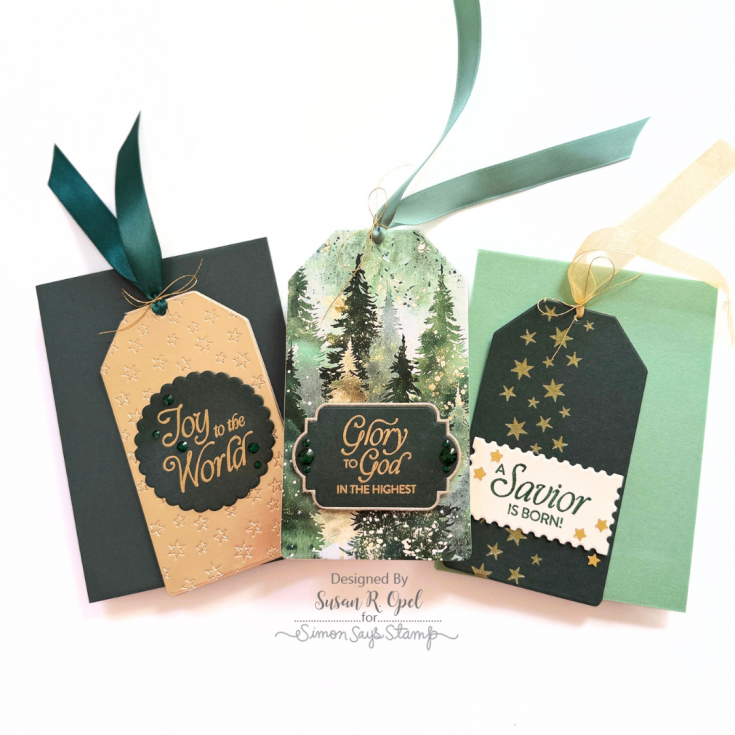
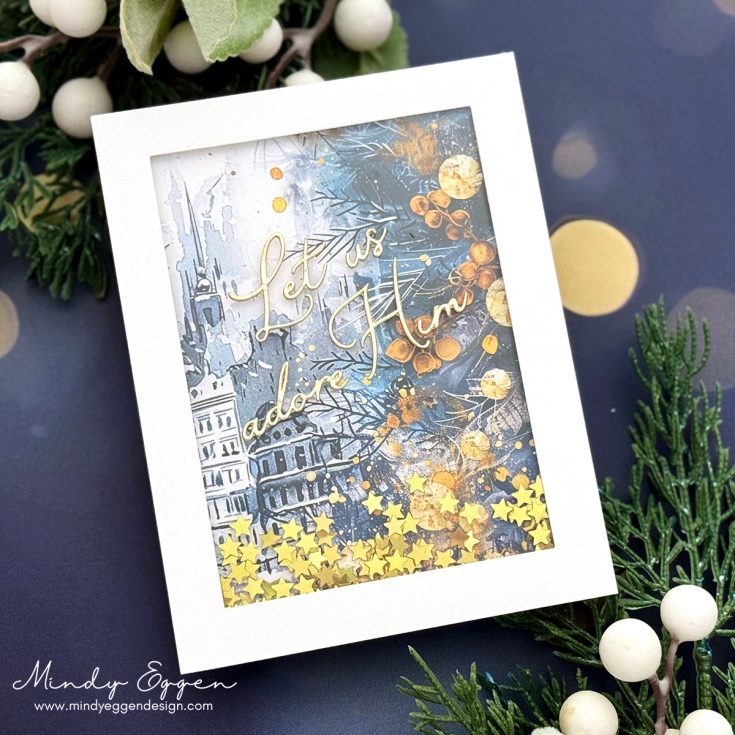
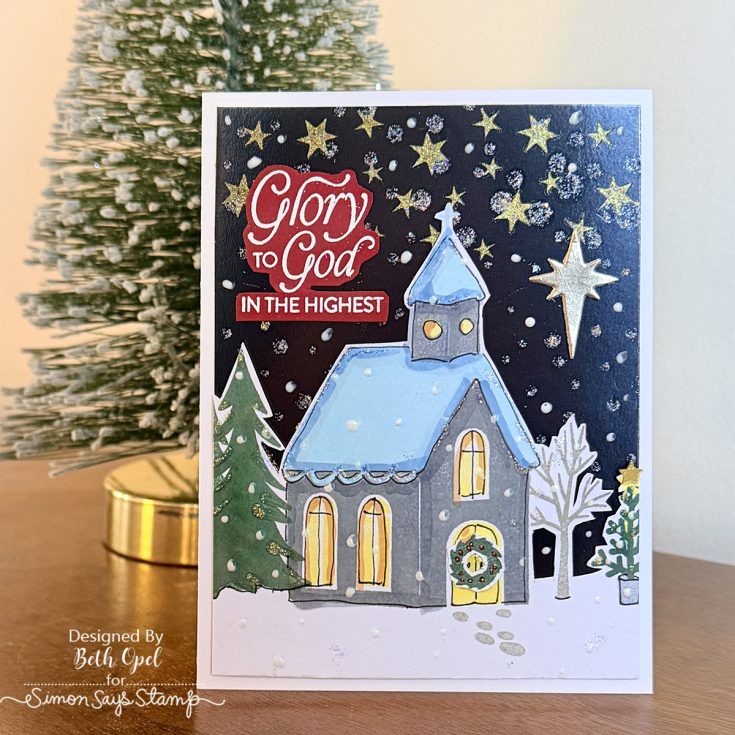
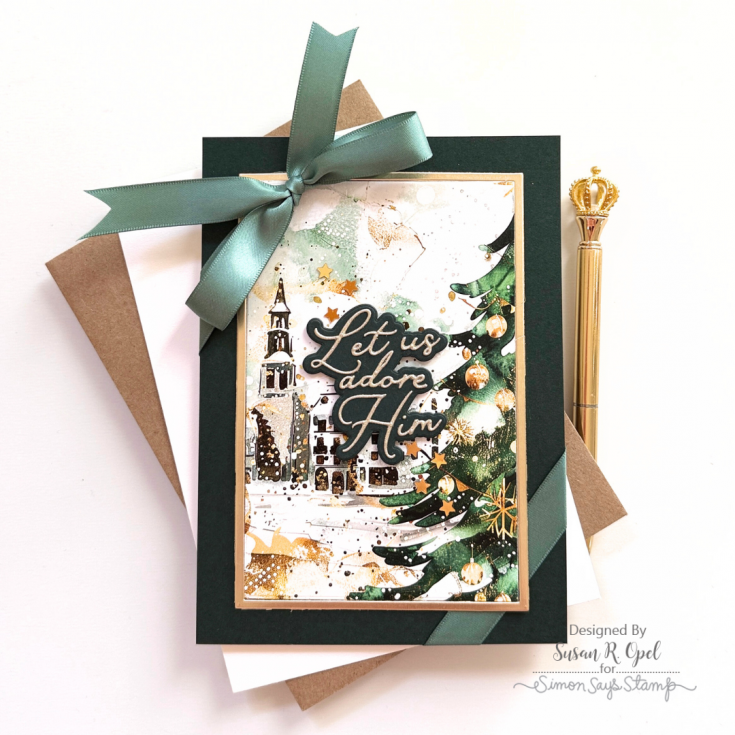
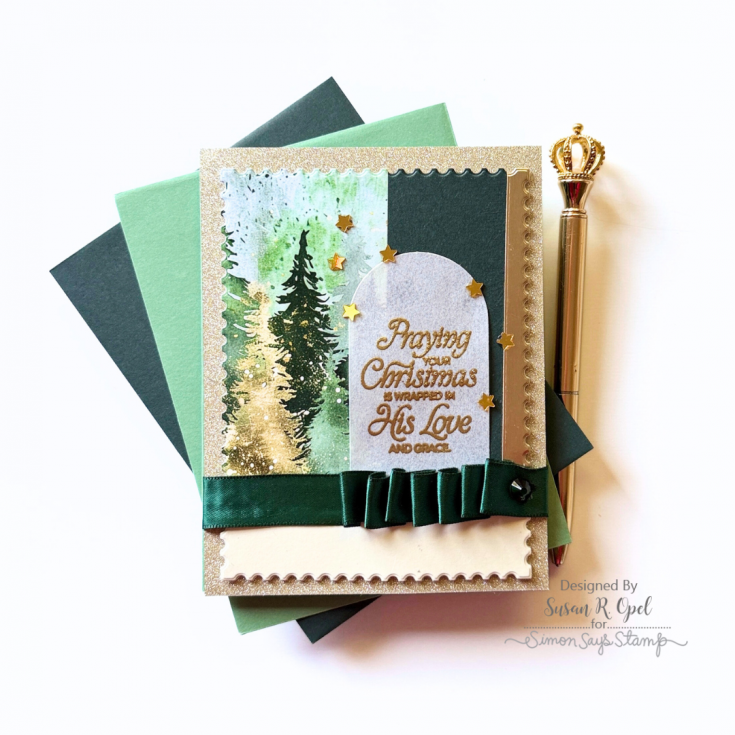
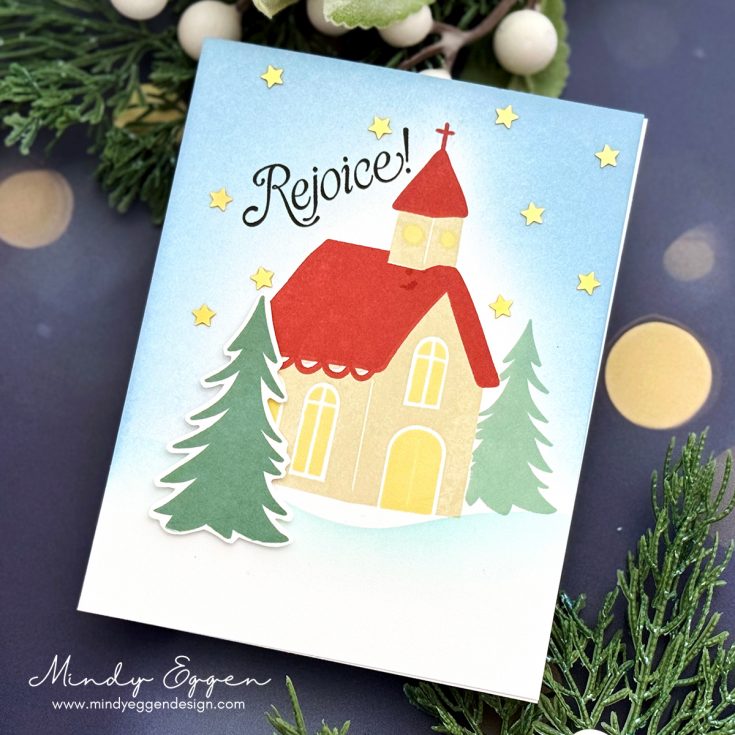
Inspired by the true meaning of Christmas, this heartfelt kit includes SEVEN brand-new exclusive products made to help you create cards that reflect faith, peace, and reverence. Build a snowy church scene and accent it with the beautiful patterned papers from La-La Land Crafts, craft a starry night or shaker card to echo that first holy night, or let the large statement sentiments take center stage for a message of hope and love. However you choose to create, we hope this kit helps you pause and cherish the season.
Please note: This is a special Limited Edition Card Kit and is not part of our Monthly Card Kit subscription program. Available for a limited time, while supplies last. Total kit value is just under $100!
WATCH THE VIDEO:

The contents of this kit include:
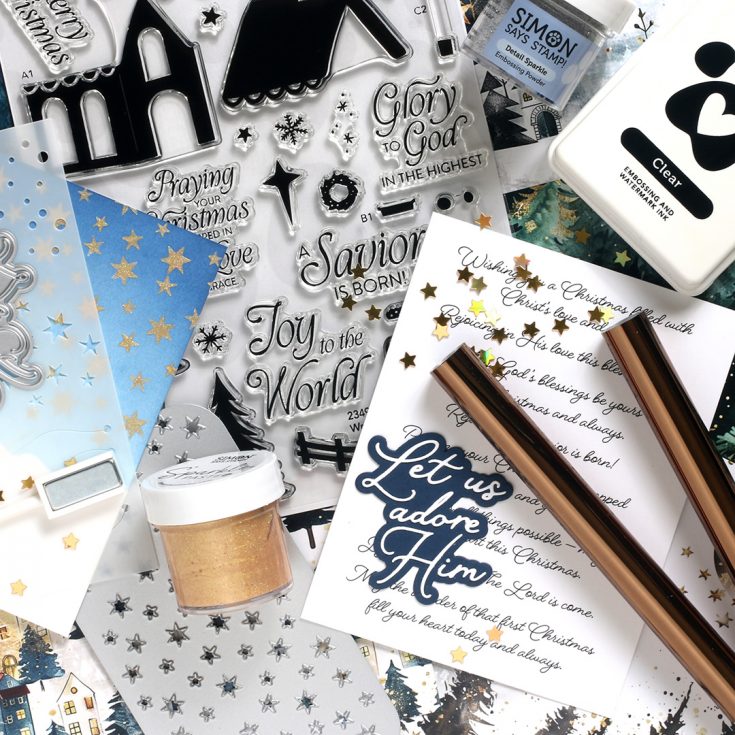
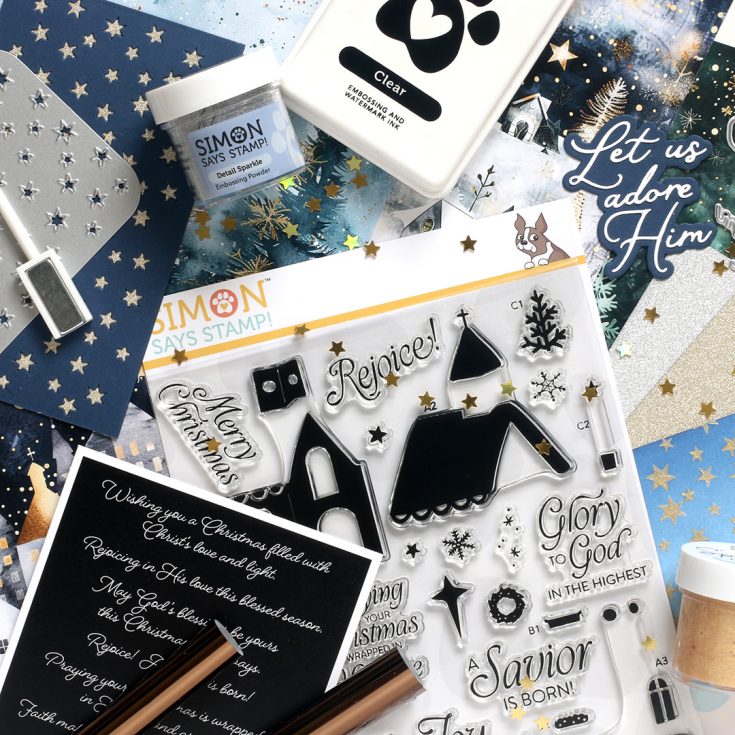
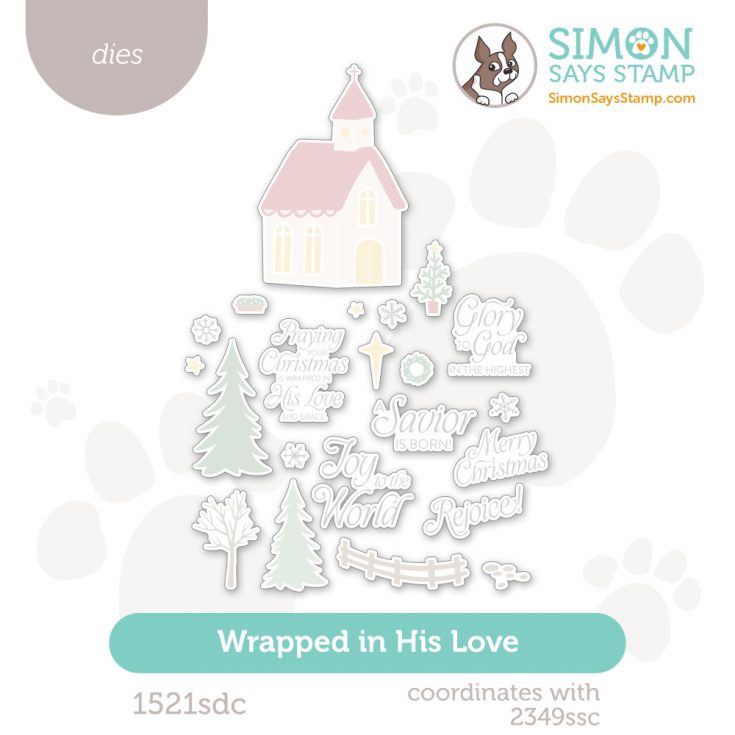
- NEW and EXCLUSIVE Simon Says Stamp Wrapped in His Love clear stamp set
- NEW and EXCLUSIVE Simon Says Stamp A Starry Night die
- NEW and EXCLUSIVE Simon Says Stamp Let Us Adore Him die
- NEW and EXCLUSIVE Simon Says Stamp Snowy Hills Stencil
- NEW and EXCLUSIVE Simon Says Stamp Gold Sparkle Paste
- NEW and EXCLUSIVE Joy to the World Sentiment Strip Sheet
- NEW and EXCLUSIVE Joy to the World Reverse Sentiment Strip Sheet
- 1 sheet of each design of La-La Land Crafts Christmas Eve 6×6 Inch Papers
- 1 sheet of Tim Holtz idea-ology Kraft Stock Sparkle Cardstock in Gold
- 1 sheet of Tim Holtz idea-ology Kraft Stock Sparkle Cardstock in Silver
- 1 Sheet of Tim Holtz idea-ology Kraft Stock Metallic in Black
- 1 Sheet of Tim Holtz idea-ology Kraft Stock Metallic in Light Gold
- 1 6×10 inch No Flap Clear Bag (great for shaker cards!)
- Simon Says Stamp Mini Stars Embellishments
- 1 Simon Says Stamp Magnetic Wand
- 1 Simon Says Stamp Clear Ink Pad
- 1 container of Simon Says Stamp Sparkle Embossing Powder
- 1 half sheet of Simon Says Stamp Acetate
- ½ sheet of Simon Says Stamp Adhesive Foam Strips
- 1 package of 8 sheets of Simon Says Stamp Bronze Foil Transfer Sheets
- 1 sheet of Simon Says Stamp 8.5 x 11 inch Heavyweight Cardstock in Softy Navy
- 1 sheet of Simon Says Stamp 8.5 x 11 inch Heavyweight Cardstock in Ivory
- 1 Simon Says Stamp Soft Navy A2 Envelope
- 1 Simon Says Stamp Ivory A2 Envelope
Enhance your kit!
Did you know? The coordinating dies with the stamp set featured in the card kit are available for separate purchase!
GET INSPIRED!

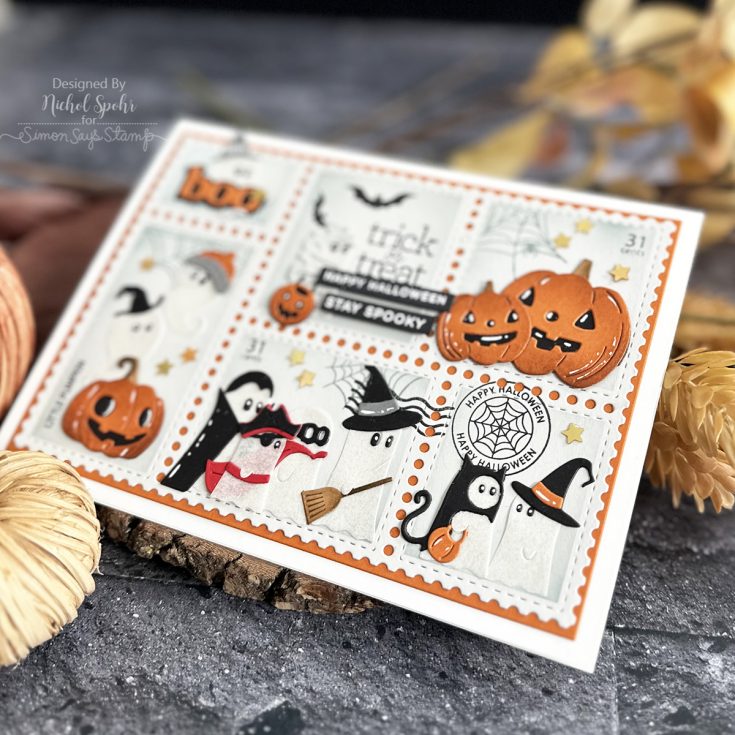
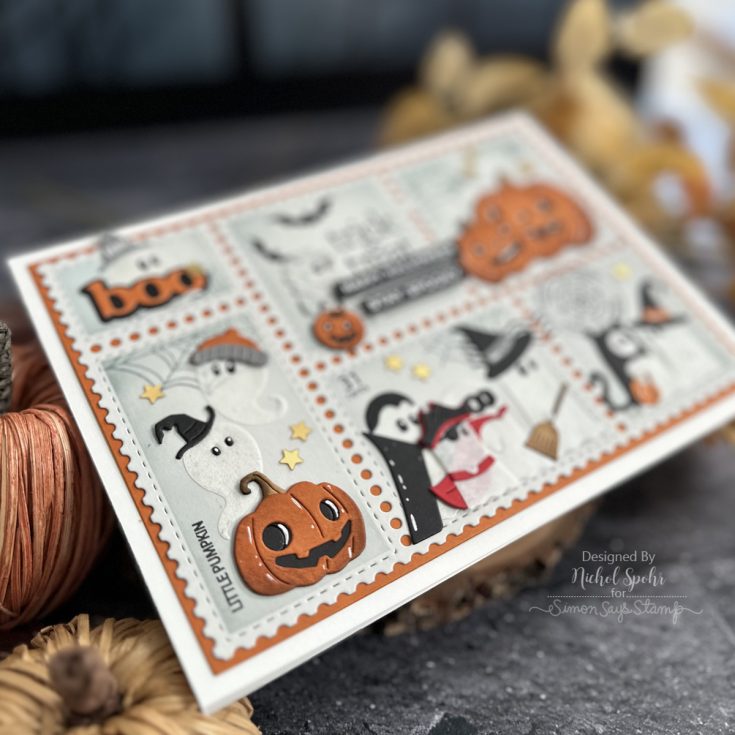
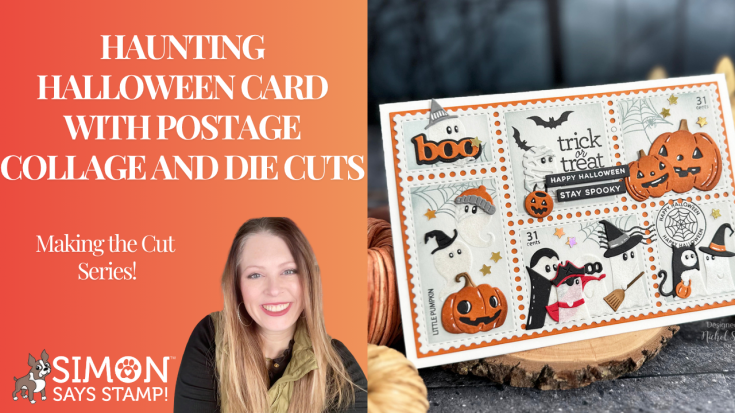
Haunting Halloween Card with Postage Collage and Die Cuts: Making the Cut

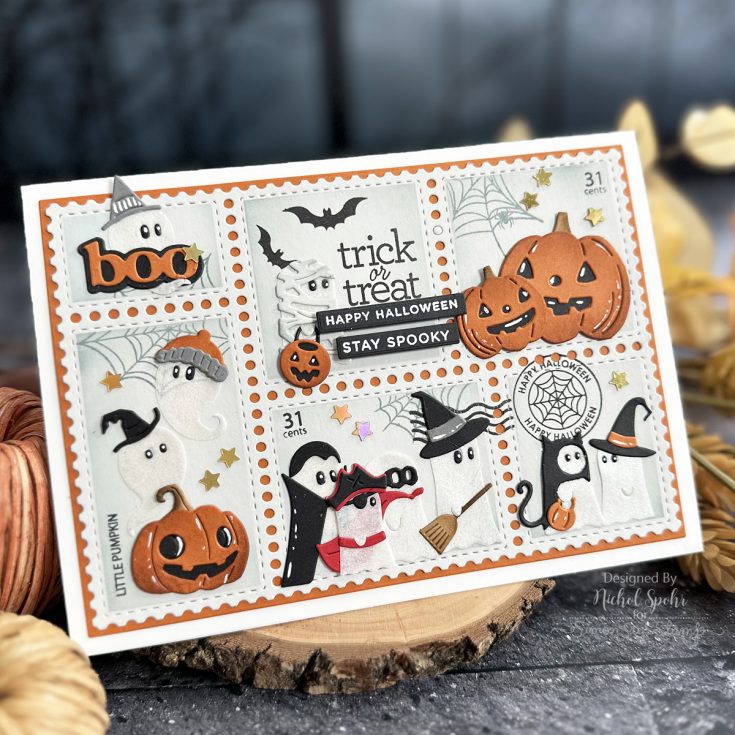
Hi friends! Happy Wednesday! Please join me in welcoming special guest Nichol Spohr to our blog back in our monthly installment of Making the Cut – our monthly blog series that celebrates the love of all things die cutting! Nichol is showcasing some fun Halloween products to make the cutest Halloween collage card including our Haunted Pumpkin, Trick or Treat Ghosts, Costume Ghost Parade, Jolly Pumpkins, Little Boo, and Halloween Basics! Be sure to watch the video for all of the details, and enjoy!
WATCH THE VIDEO:
SUPPLIES:
|


A big thank you to YOU, our reader — and to Nichol for being our guest!
Artistic Stenciled Leaf featuring our November 2025 Card Kit!
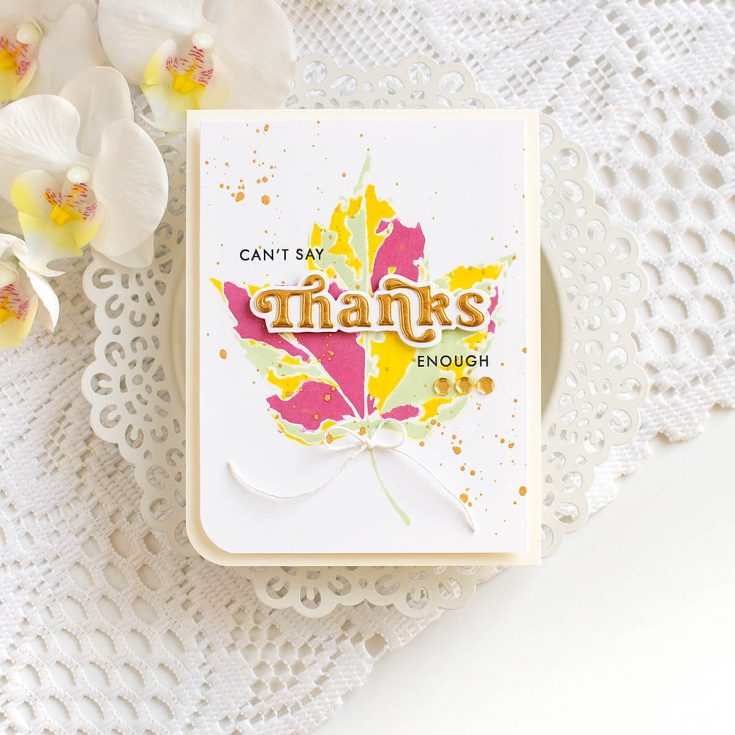
Hello everyone! Heather Hoffman here today, and I had lots of fun playing with the new November 2025 Card Kit: Give Thanks! Keep reading to learn more about how I created this card:
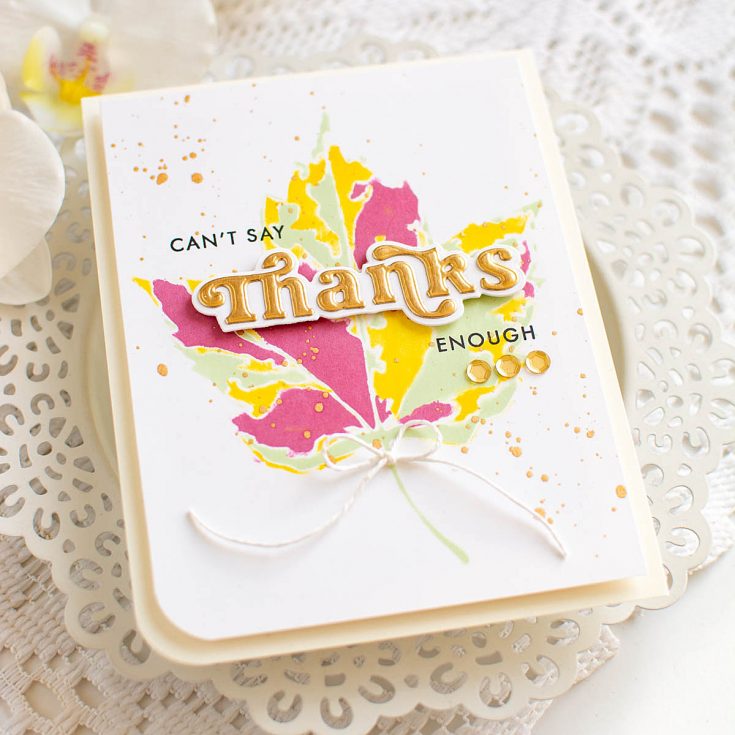
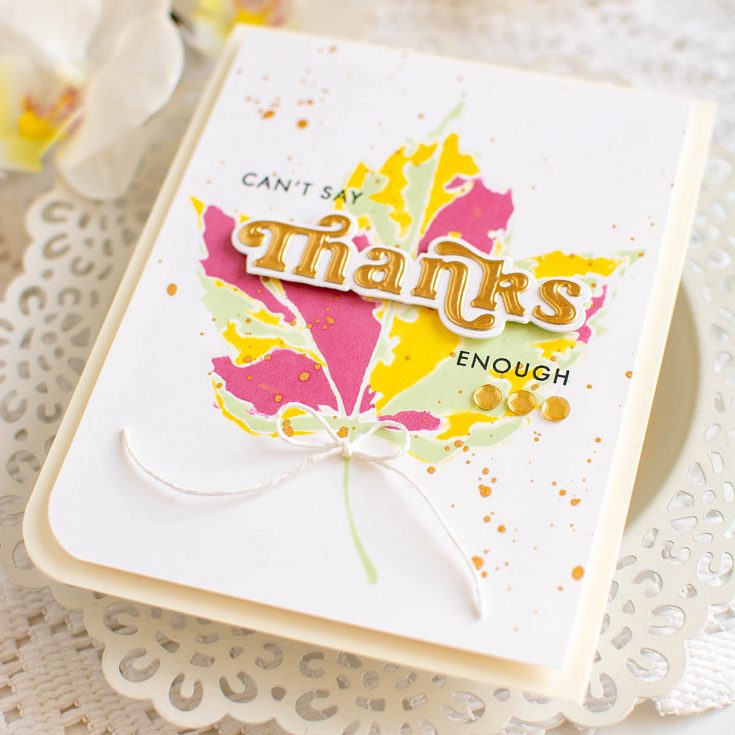
I started off by doing a bit of a creative stenciling technique with the Red Maple layering stencil set included in the kit, and several of the ink cubes. On a panel of white cardstock, I used 3 of the 4 stencils, skipping the more solid layer. Instead of ink blending with blending brushes, I used the mini ink cubes in Sangria, Honey, and Cabbage directly over the stencil, not worrying about perfect coverage, and just very gently pressing and/or gliding over each stencil layer. Doing this meant the ink didn’t go all the way to the edges, but left these slightly open white areas. I love the finished effect!
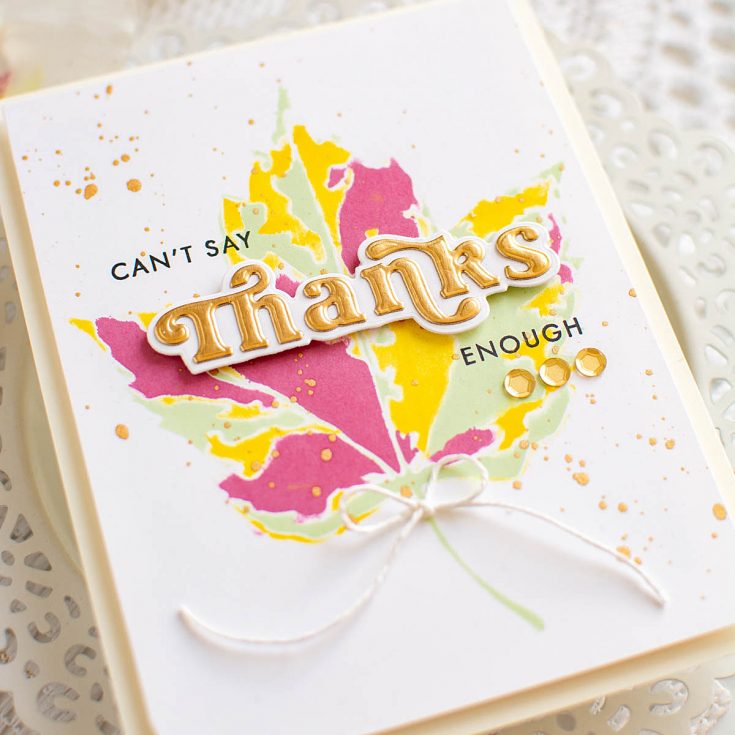
Next up, I added some gold splatters using the Tim Holtz Ranger Distress Tarnished Brass paint. I mixed a bit with some water, then flicked it over my panel with a paint brush. I set that aside to dry, and started die cutting my main sentiment. I used the cute Thanks die that was in the kit, cutting the shadow layer from white cardstock, and the detail layer from the included Tim Holtz Idea-logy Gold metallic cardstock, adhering the layers together with liquid glue.
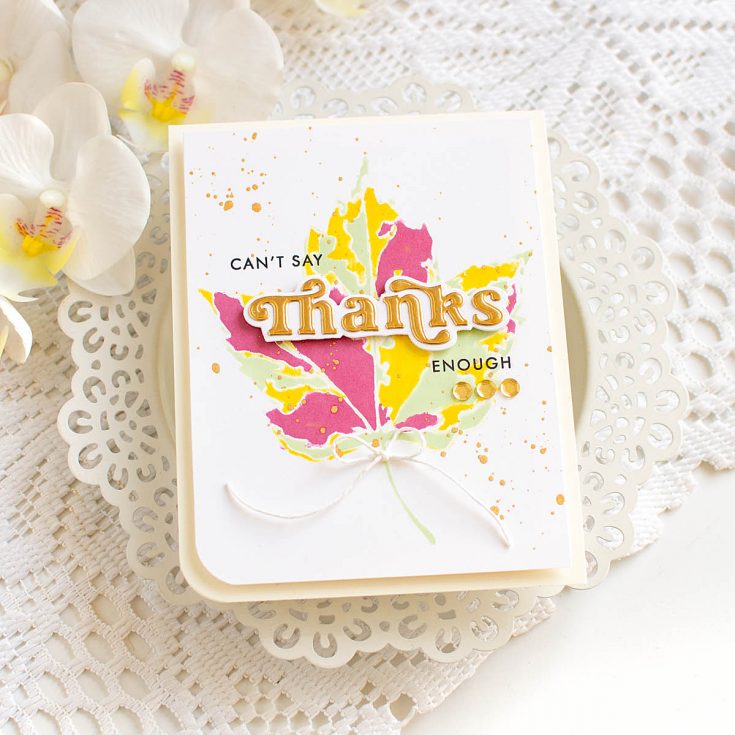
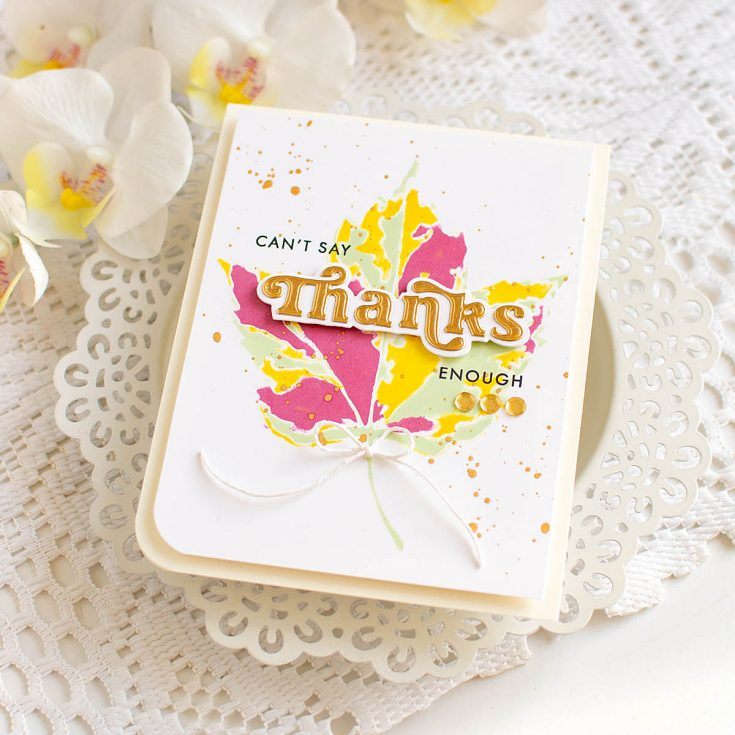
Once that panel dried, I adhered the main sentiment with foam adhesive, then stamped the secondary sentiments from the Small Thanks stamp set directly on the panel. I rounded off one corner, and mounted it with more foam on a card base created with some of the Ivory cardstock in the kit, rounding off the same corner so they matched. I added a few Spellbinders Satin Gold flat sequins, and a tiny bow created with Lawn Fawn white hemp twine!
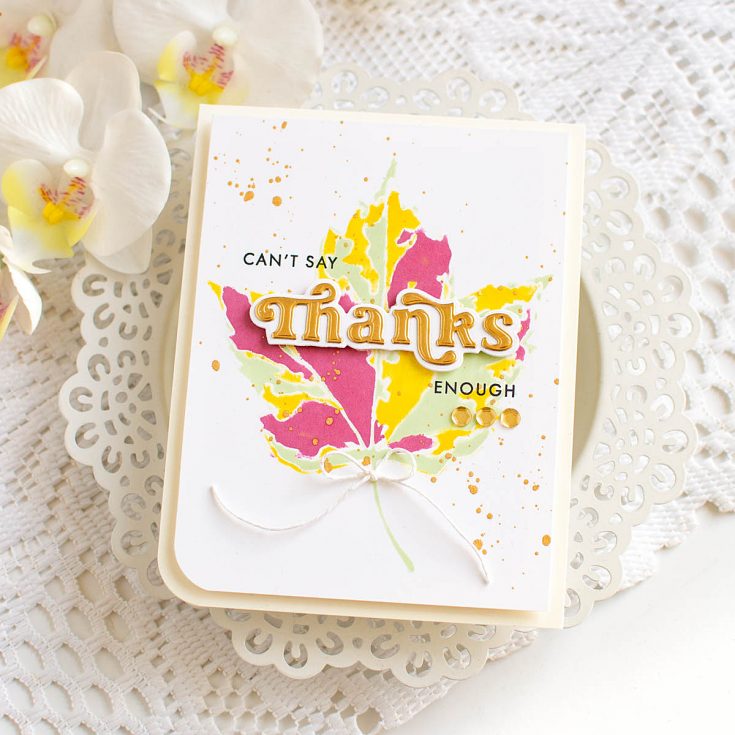
Have you ever tried using a stencil with an ink cube direct to paper? It’s such a fun technique, with unique results! Let me know if you give it a try!
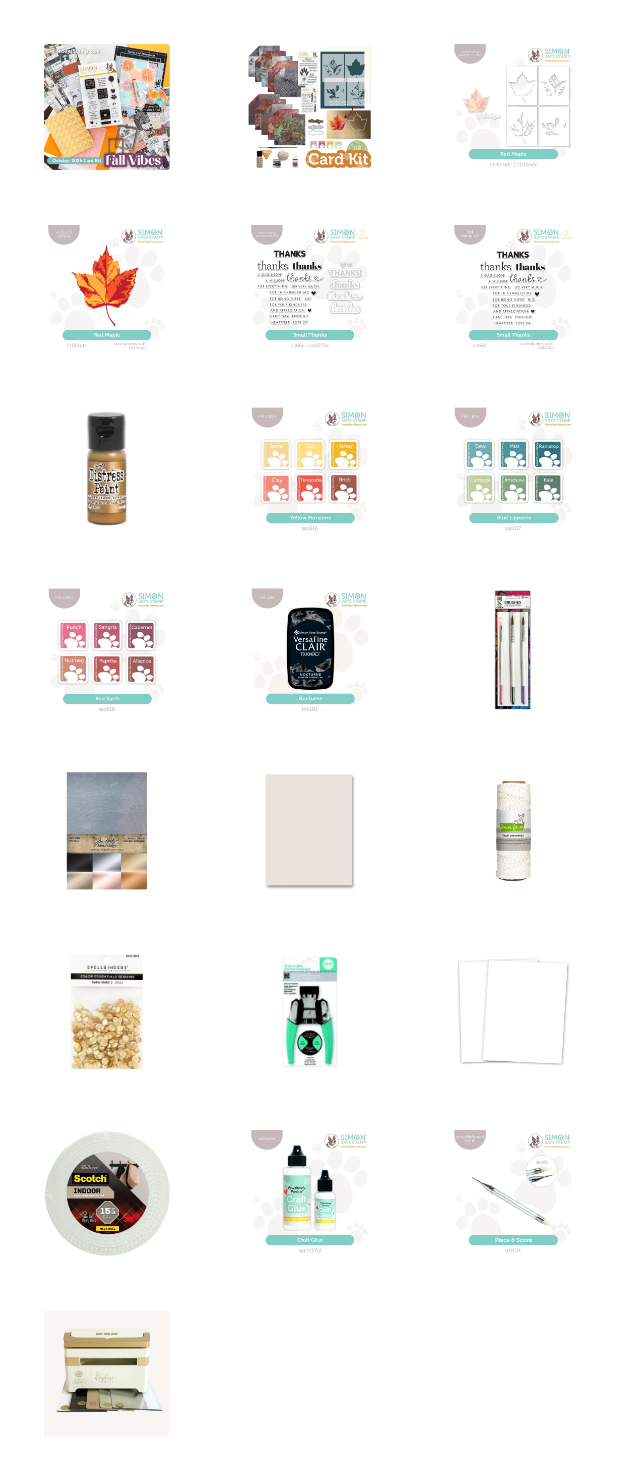
SUPPLIES:
Thanks so much for stopping by, I hope you have a wonderful day!
Did you know?! We’ve made our card kit subscription BETTER THAN EVER!

Here’s what makes our new service a crafting paradise:
Exclusive Access: As a subscriber, you get first dibs! Each month, you’ll get an exclusive sneak peek at our new kit, with the option to add more coordinating items to your cart, including handy replenishable supplies, all shipped together for your convenience.
Hassle-Free Payments: Say goodbye to monthly billings! Our automated system smoothly charges your preferred card, ensuring an uninterrupted flow of crafty goodness – unless you decide to pause, of course!
$5 Off Magic: Enjoy a special $5 discount off our kit’s retail price, exclusive to our beloved subscribers – no codes needed, just automatic savings!
Crafting Inspirations: Dive into a sea of creative ideas monthly, all tailored around your kit, to keep your inspiration flowing endlessly.
Flexibility First: Fear of commitment? Not here! Our subscription is as flexible as it gets – pause or cancel anytime, no strings attached.
Why wait? Step into the realm of our NEW Simon Says Stamp Monthly Card Kit service. Welcome a box full of crafting marvels, right to your doorstep. Craft with ease and let creativity come to you!
Ready to elevate your craft? Subscribe Now and open the doors to boundless creativity!
We’re thrilled to have you in our crafting community and can’t wait to embark on this renewed creative adventure together!


