Ink Blended & Heat Embossed Die Cuts with Kristina Werner
Hello, all! Kristina here. Today I have a fun card for you with ink blending, heat embossing, and die cutting.
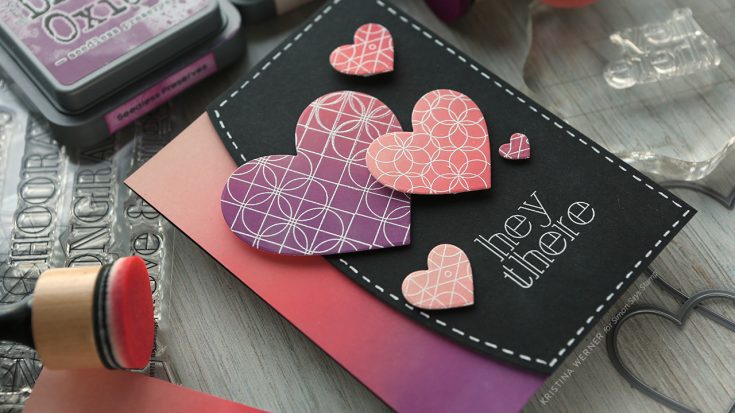
I started out by ink blending a background on a piece of cardstock that was cut to a full card size of 4.25″ x 5.5″. I used three colors of Distress Oxide Ink: Tattered Rose, Abandoned Coral, and Seedless Preserves.
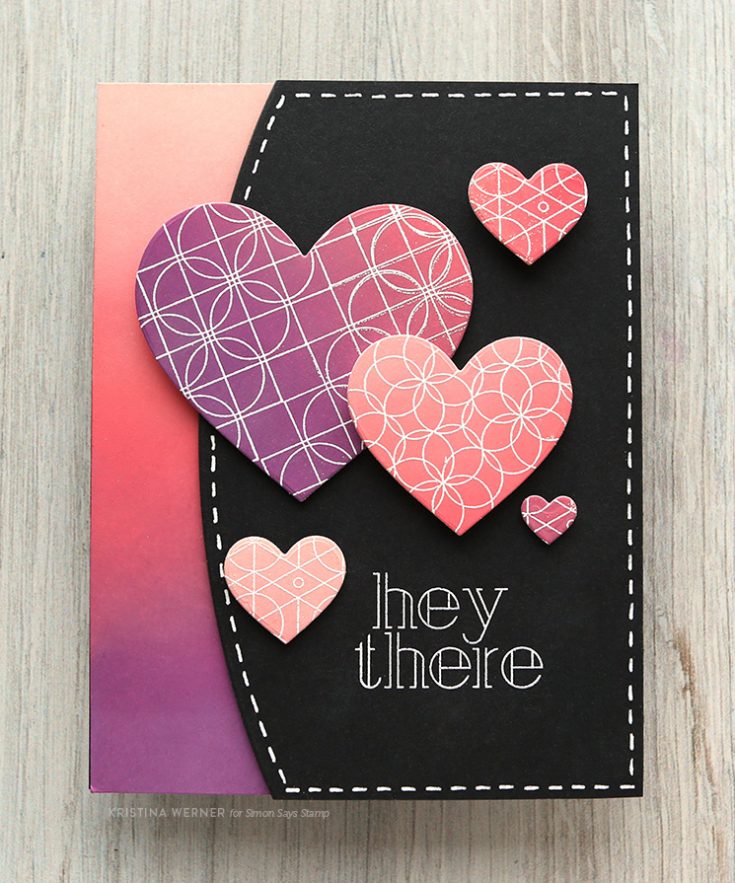
To maximize the entire ink blended background, I cut off a 1.6″ strip off the long side and set it aside for the card front. I used the larger portion for die cutting as many hearts from the Nested Hearts die set as possible. I ended up with five hearts.
I then took the Geometric Pattern Builder stamp set and stamped and white heat embossed the patterns on the heart die cuts.
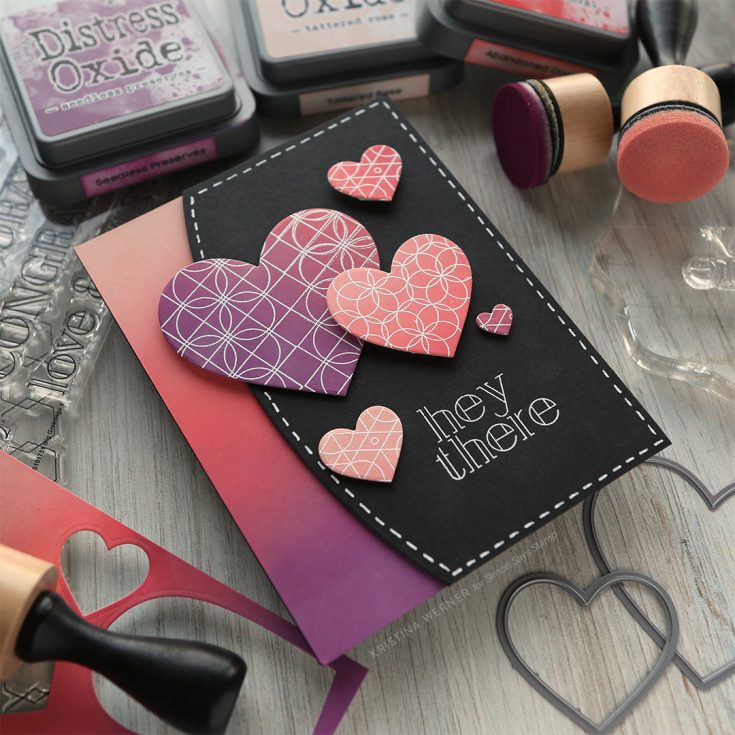
While I had my heat embossing tools out, I also stamped and embossed the “Hey There” greeting from the Big Greetings 1 stamp set onto the a black piece of cardstock cut with the A2 Card Curved Edge die.
Assembly of the card was simple with the ink blended strip adhered to the left edge of the card and the black “hey there” piece adhered with foam squares to the right edge of the card. The hearts were then adhered and a white dashed line drawn using a white Gelly Roll 10 pen.
Thanks for stopping by today! :)
Supplies
|


Amore LauraFadora: Parental Props

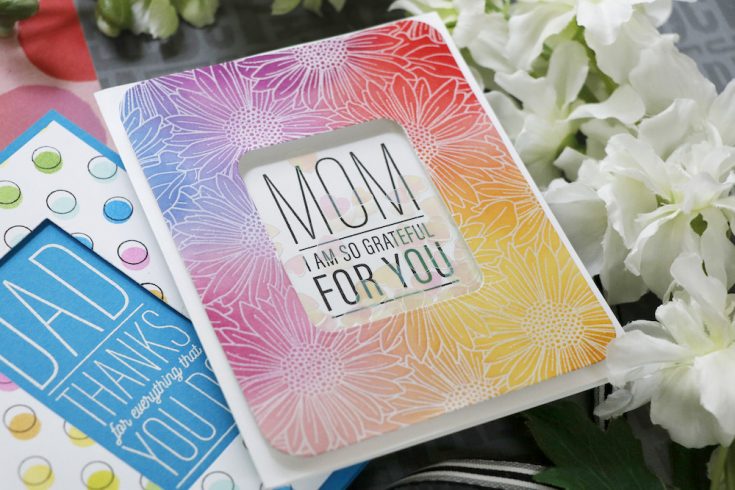
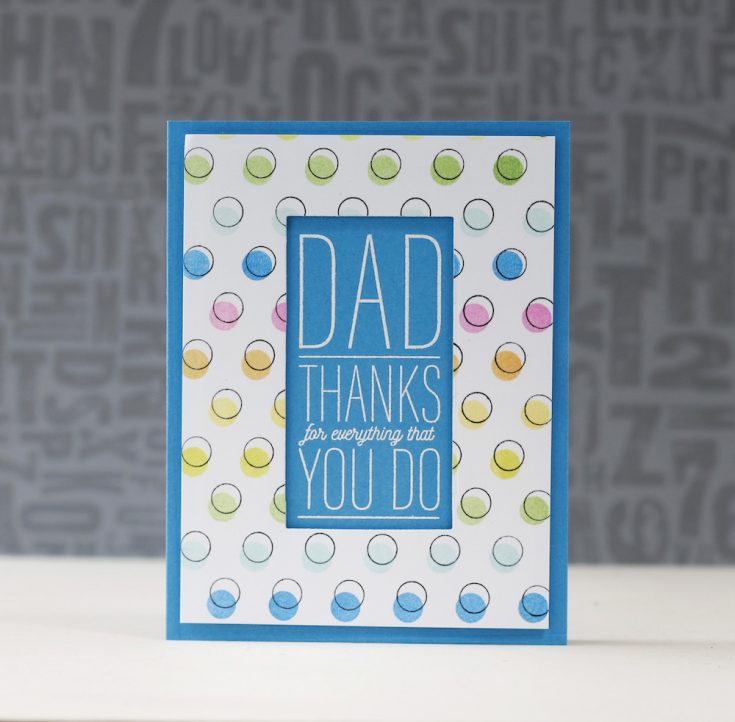
Hi friends! Happy Tuesday! Welcome to the latest installment of Amore Laurafadora where Laura Bassen is back with not one but TWO bright and beautiful cards showcasing the sentiments from our new CZ Design Parental Props clear stamp set and how gorgeous is that emboss resist technique with our NEW Gerbera Daisy background stamp?! Be sure to watch the video to learn more and enjoy!

SUPPLIES:
|


Thanks so much for stopping by and thanks to Laura for being our guest!

Blog Candy Alert!! Follow our blog via email and comment on this post for a chance to win special blog candy!
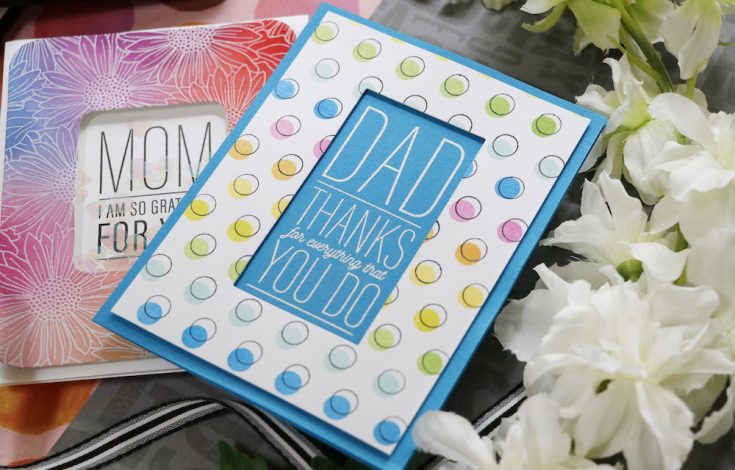
Studio Monday with Nina-Marie: Easy Cards for Dad!

Hello friends! Dad’s special day is right around the corner, and what better way to celebrate our fathers than with a handmade card?!
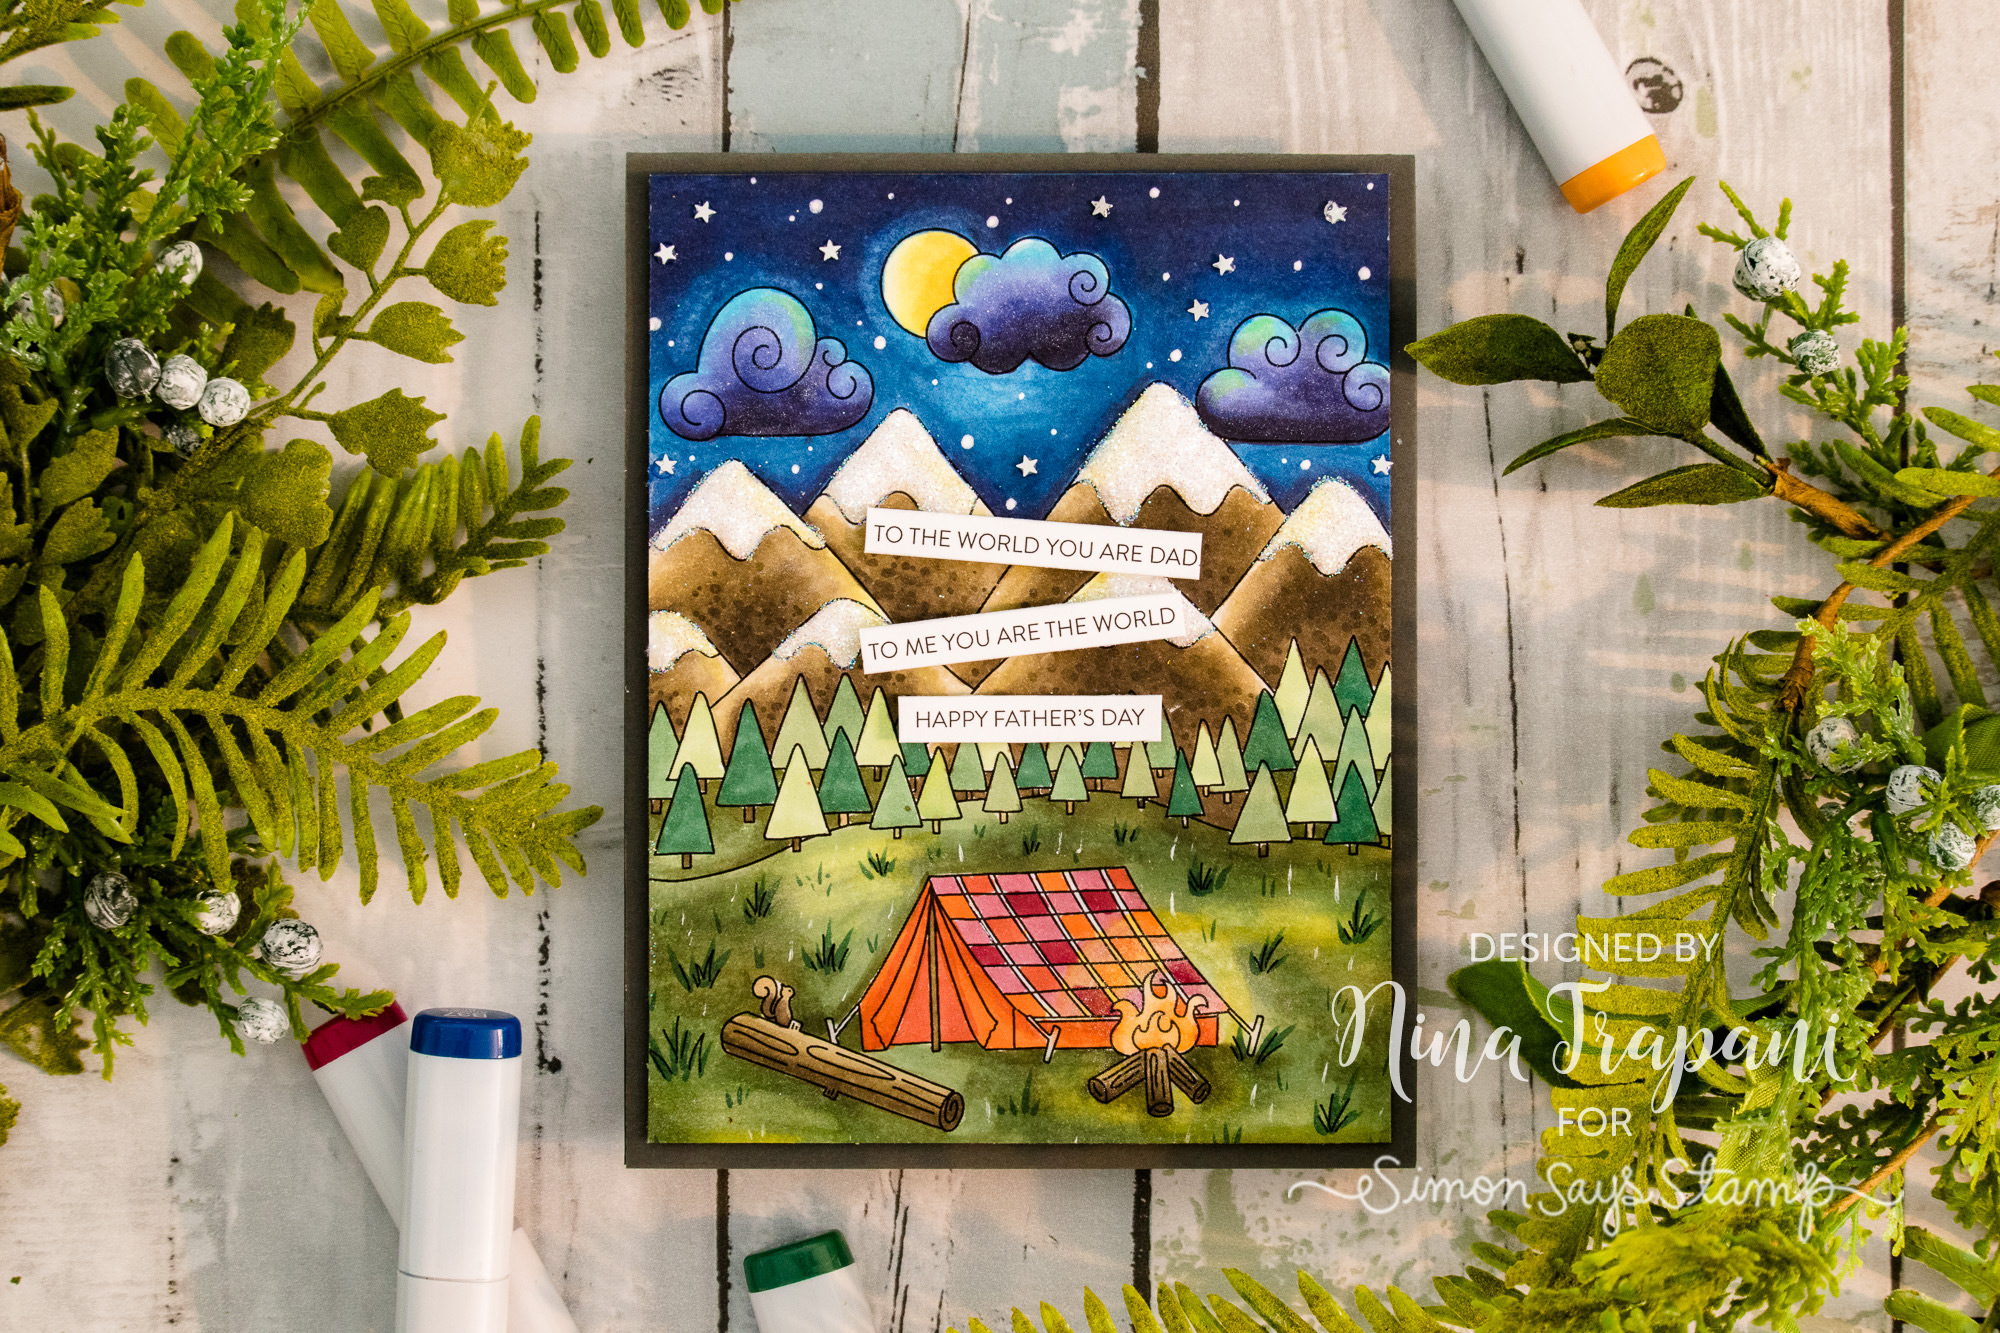
Making a card for dad can be as easy as coloring one of Suzy’s Watercolor Prints! Today I’ll be using the Celebrate Dad set; I’ll show you how I colored this fabulous night scene, plus how I decorated the card after coloring; adding a few embellishments makes this scene stand out like no other! And the best part? You’ll need very few supplies and just a short amount of time to make something that your own dad will adore!
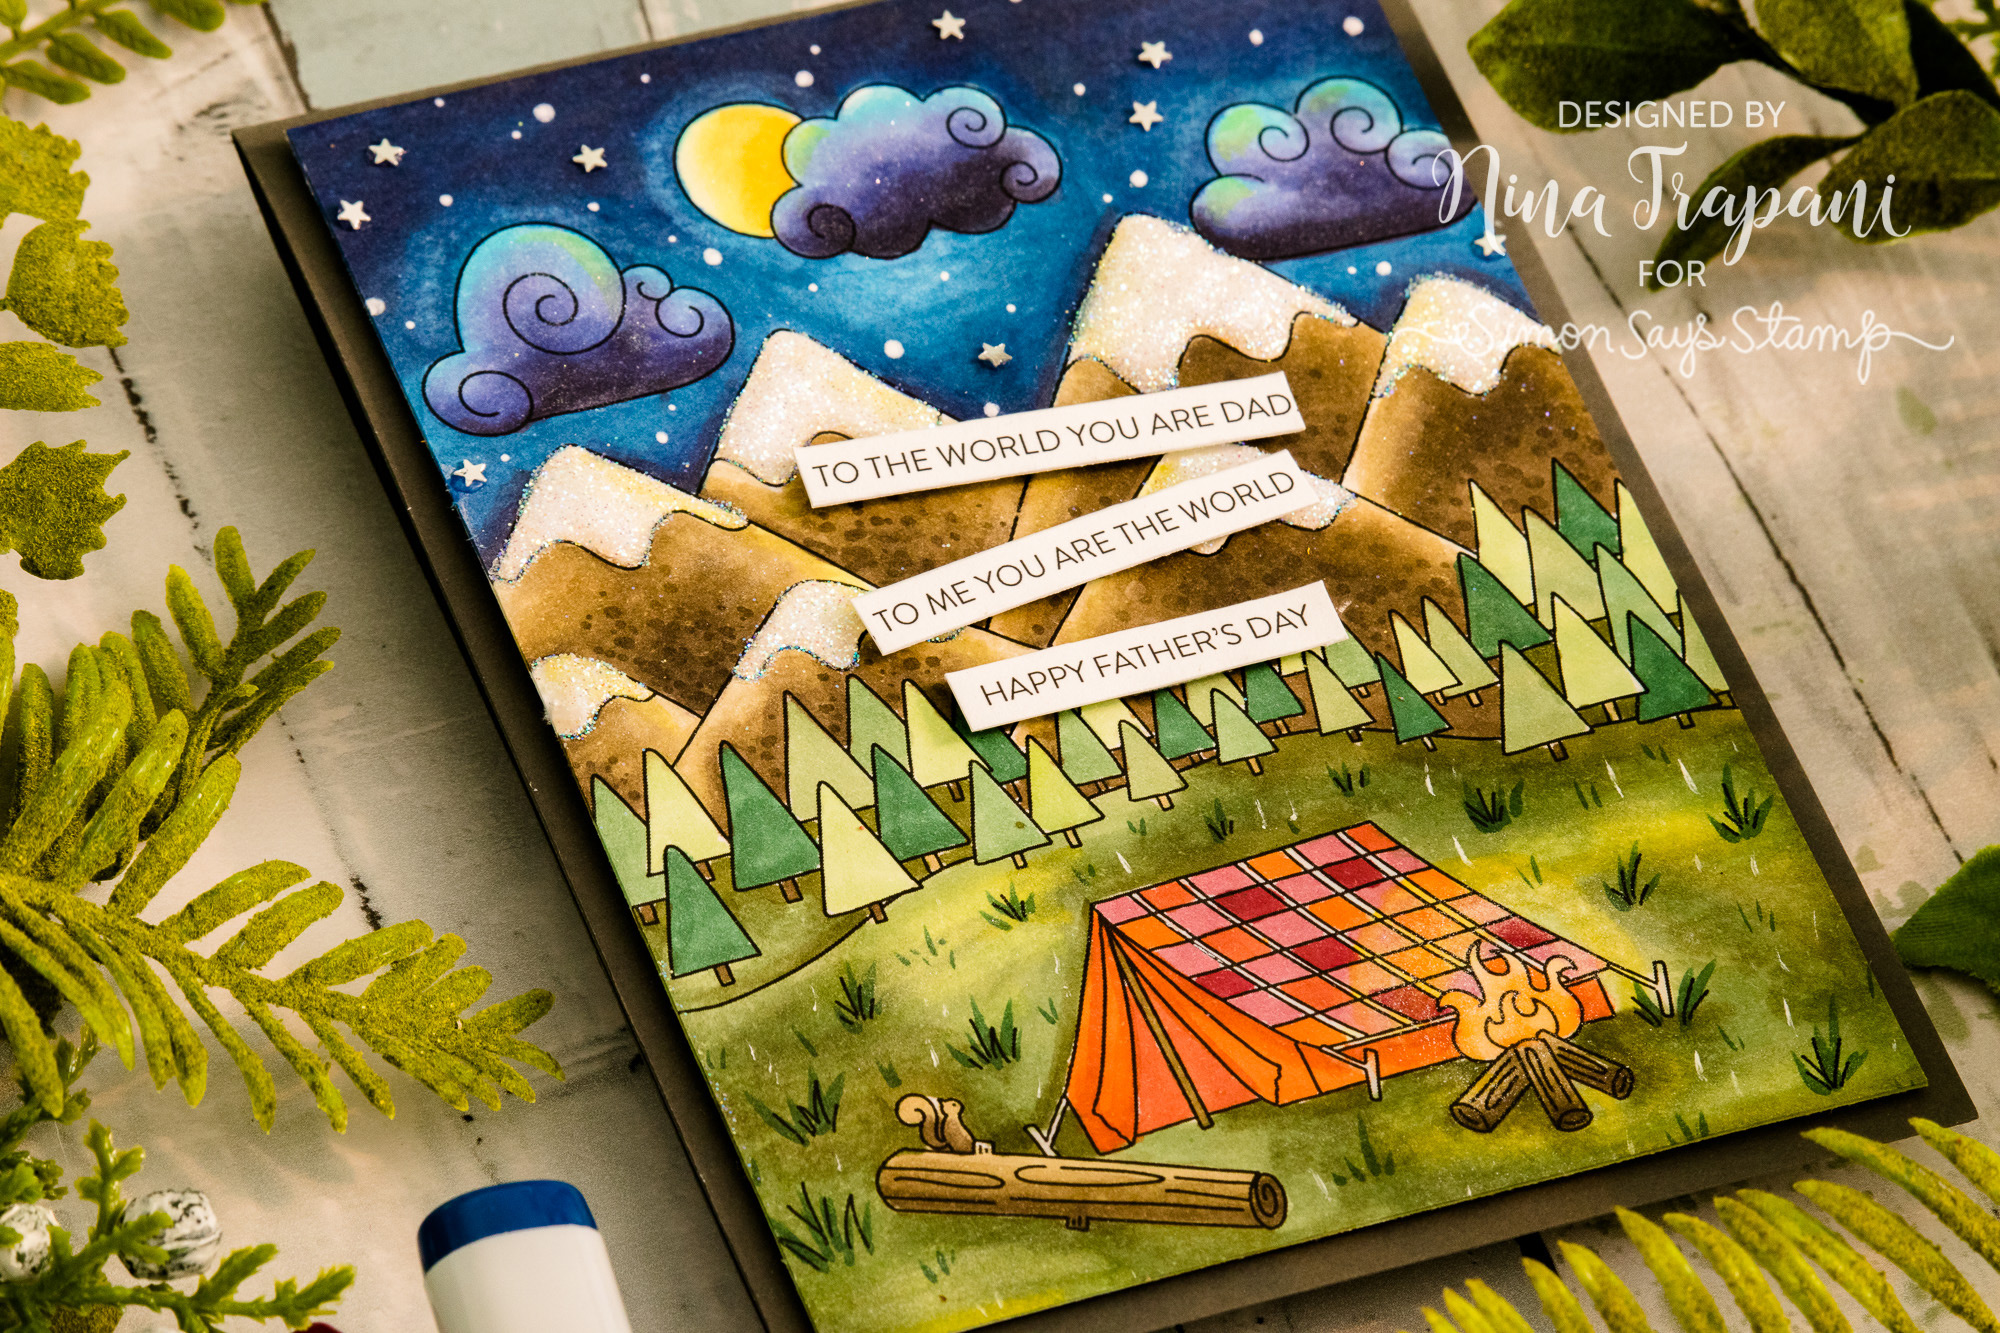
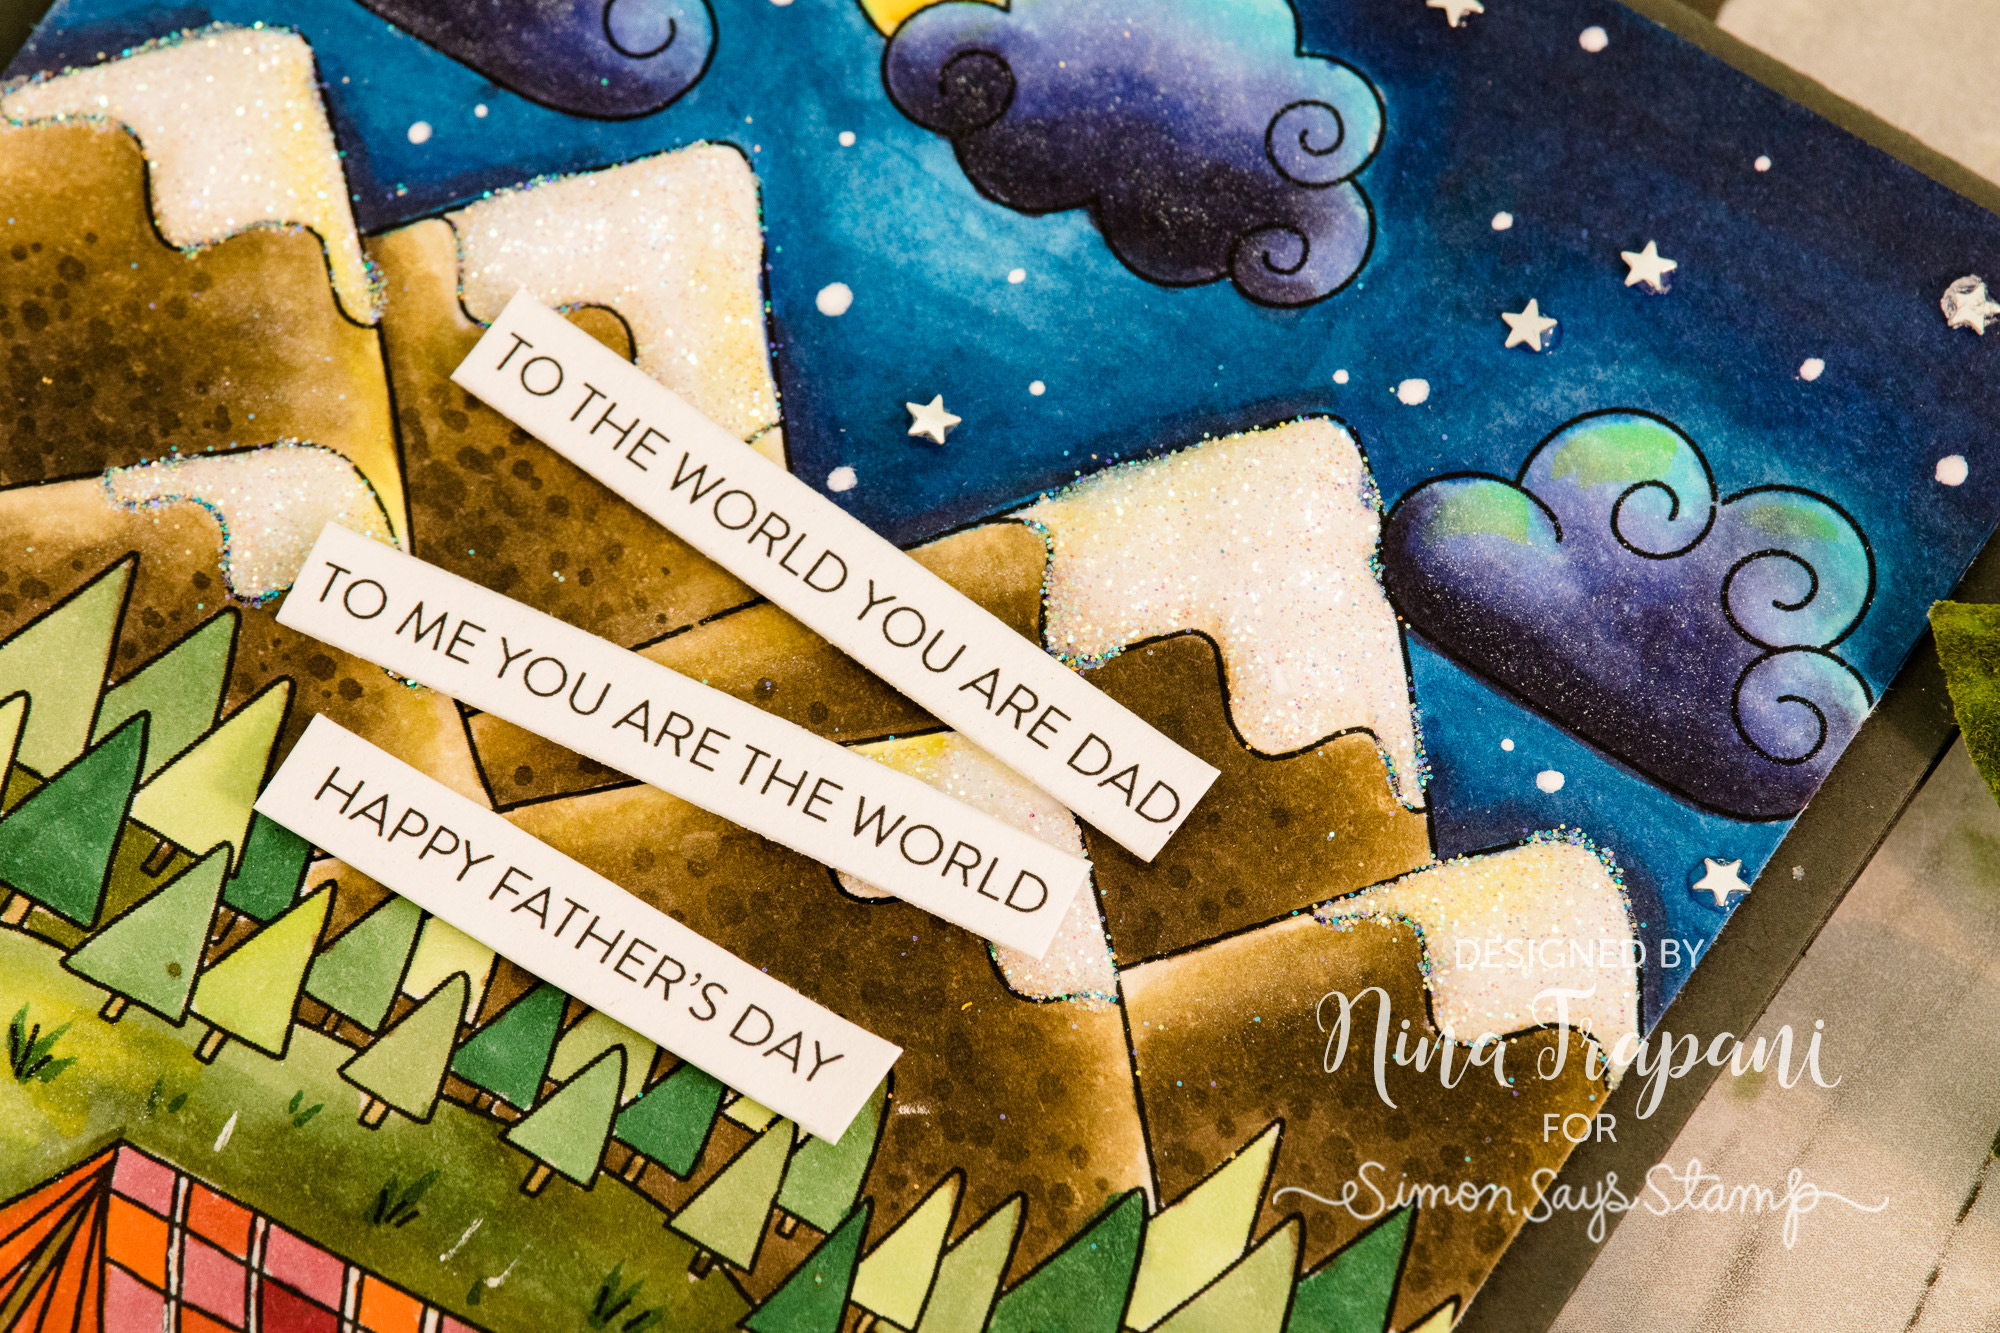
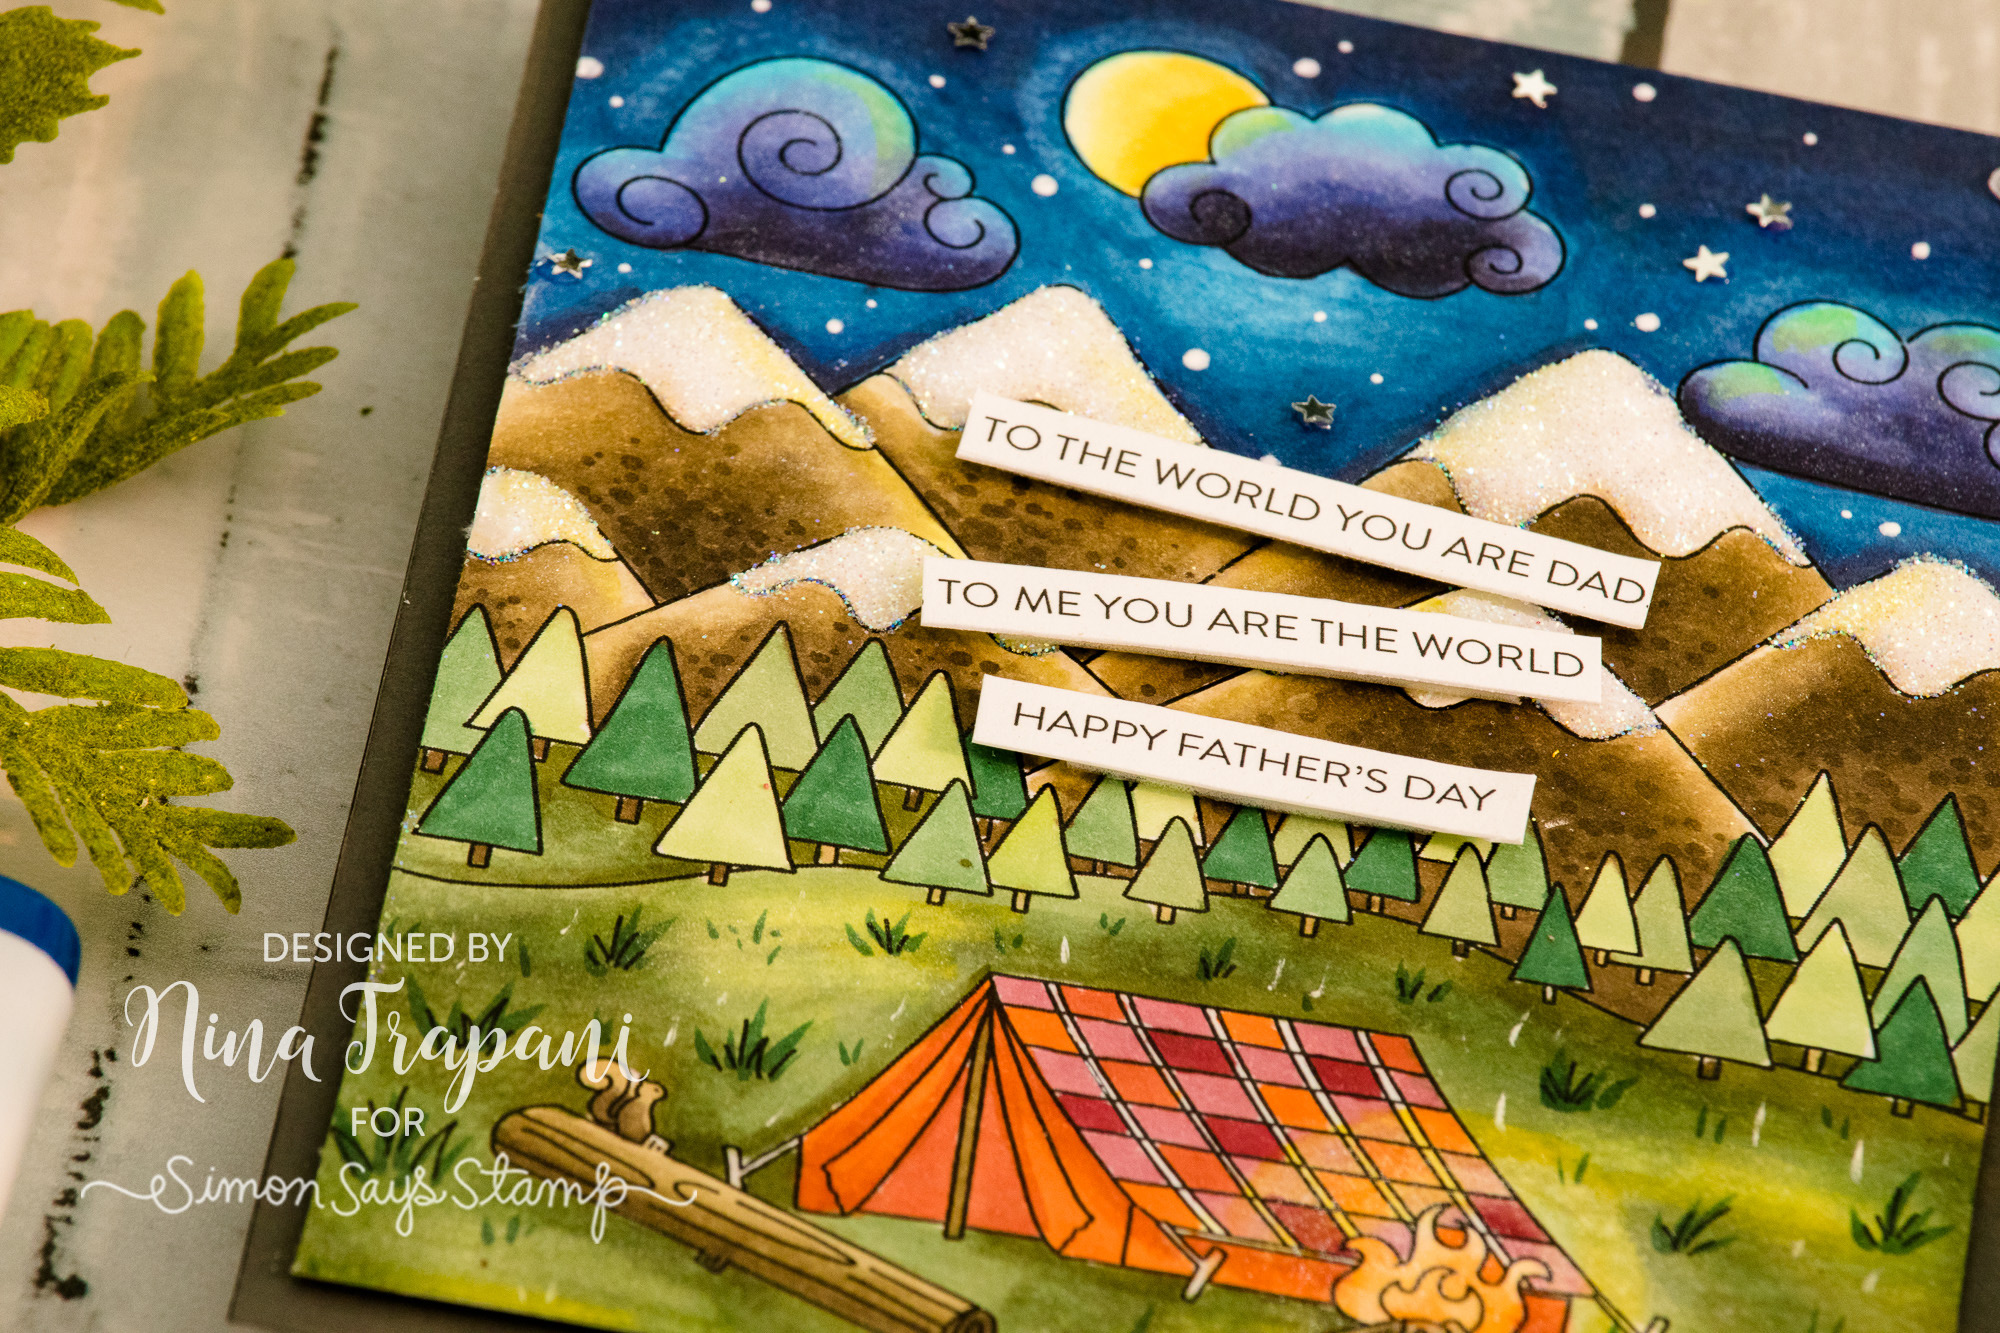
Be sure to watch the video below to see how I made this easy Father’s Day card!
WATCH THE VIDEO
SUPPLIES
|


Blog Candy Alert!! Follow our blog via email and comment on this post for a chance to win special blog candy!
Blog Candy Winners!
Whoops! One die, three cards: Linda Duensing!
Work It Wednesday May 2019: Summer Vibes!: MandaLJ!
Soft & Pretty Leafy Frames: Sue D!
One Stamp, Five Ways: Daisy Bouquet: Danielle Dietz!
Please email [email protected] with the name of the blog you won from, your prize(s), and your address if applicable!


