Copic 25% off Summer Sale!
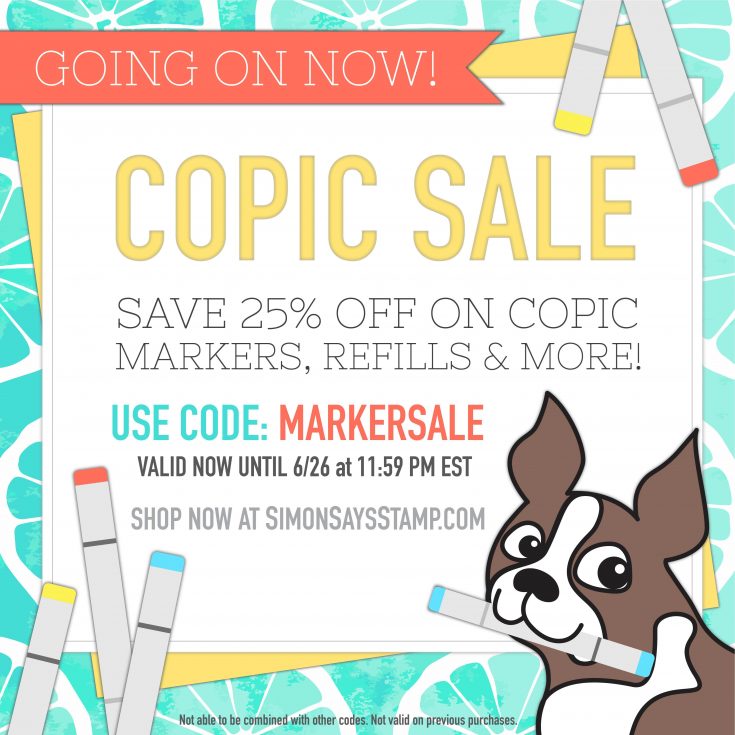
Hi friends! Happy Wednesday! Now is a GREAT time to try Copic Markers or stock up on refills during our 25% off sale with code MARKERSALE! Shop early for the best selection and enjoy!
Yippee for Yana: Monogram Calligraphy Cards

Hi friends! Happy Tuesday! Welcome to the latest edition of Yippee for Yana with the always amazing and creative Yana Smakula! Be sure to read on and watch the video for more info and enjoy!
Hi everyone, this is Yana Smakula, welcome back for another Yippee For Yana video!
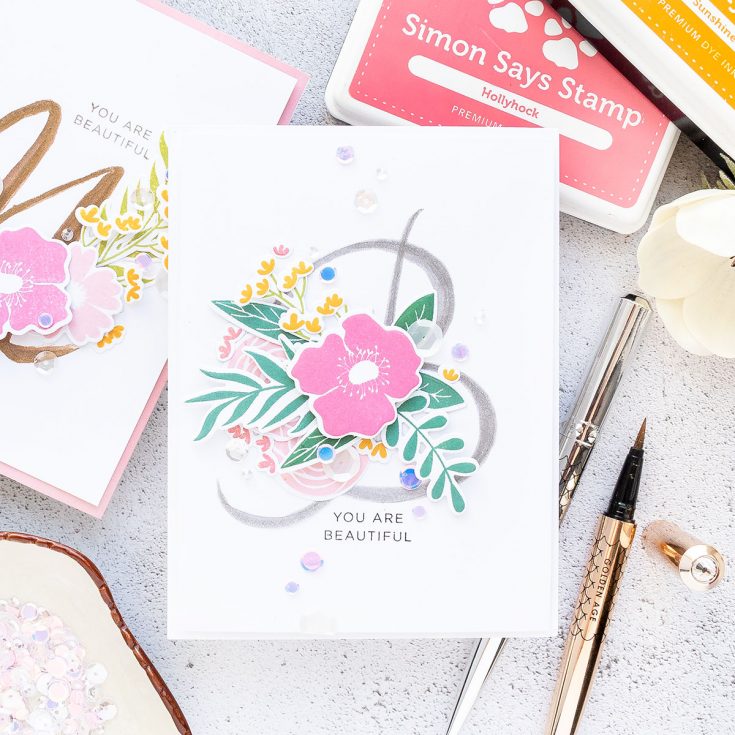
In this episode, I will show you how to do some basic calligraphy to create personalized monogram cards.
I am not a pro when it comes to calligraphy, it fascinates me, but I don’t really have any special skills to be able to do calligraphy beautifully. Still, this doesn’t mean I cannot try.
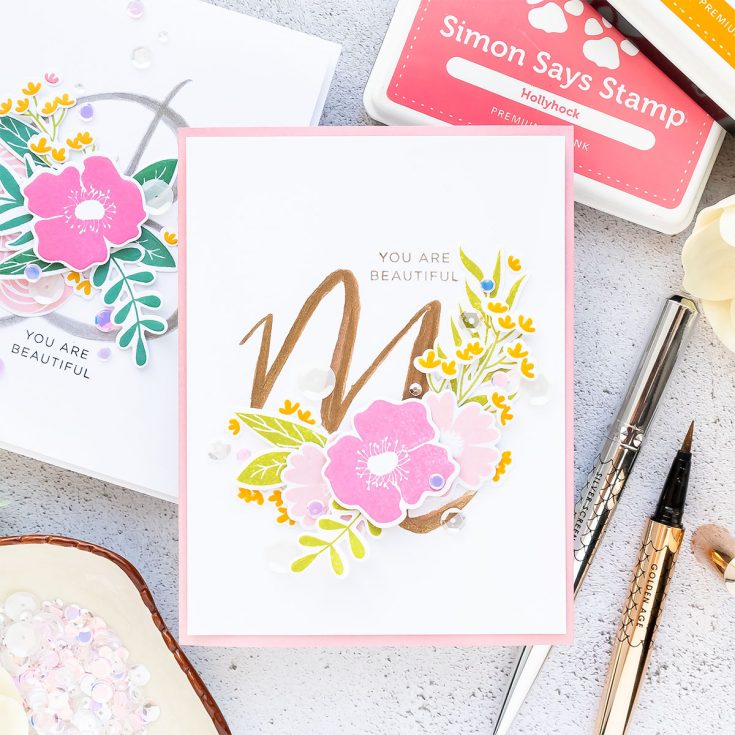
I am using two pens to do my calligraphy today, these are designed to be used as accent pets and not as calligraphy pens, but I wanted to try and see if I could use them to create custom monogrammed cards.
These pens are by Jane Davenport for Spellbinders. They have glitter in them and they are waterproof brush pens. Jane combined a fine and flexible brush tip with intense waterproof color to make the Ultimate Pen for creating smooth, detailed finishing touches to your artwork. These are available in eight colors, including two metallic glitter tones that I am showing in this blog post & video.
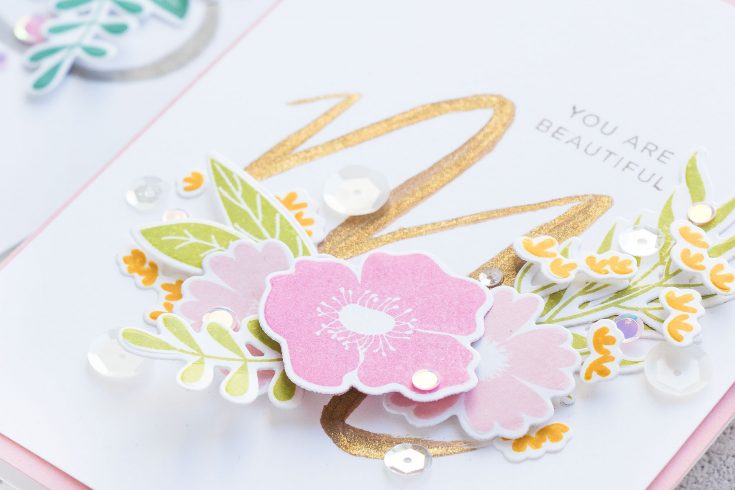
I first used a pencil to sketch out a letter on my paper. Next, used a silver or gold pen and followed the pencil line to create the letter on my card. I was using a very light hand and took my time to have the best result. I went back and thickened some of the lines of the letter while keeping others pretty thin.
The result wasn’t exactly perfect, you can tell that this was hand drawn, but it was the look I was going for and the look I was happy with. Where I had the pencil lines show I used a pencil eraser and gently erased them.
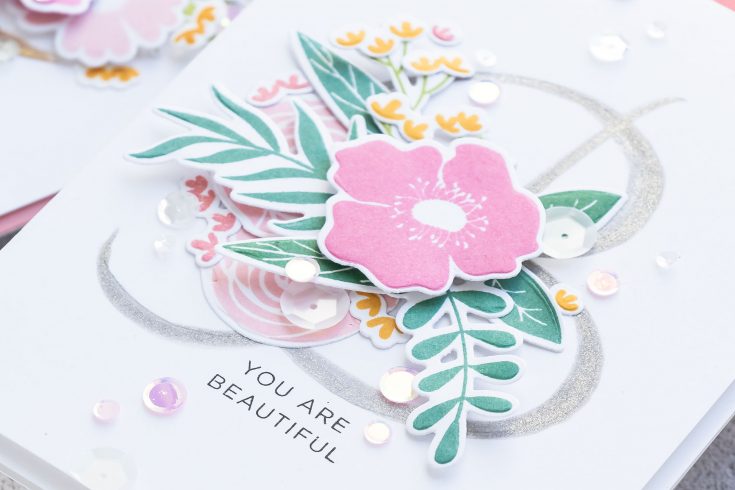
Next, to dress up this monogram and turn it into a card I used one of my longtime favorite floral stamps from Simon Says Stamp -the Bold Flowers. I picked several and stamped them in various light colors of ink. I used Hollyhock, Twirling Tutu and Sunshine for the flowers. To make my stamping easier I used the mini MISTI stamping tool and of course double and even triple stamped some of these to have nice solid impressions. To stamp the greenery, I used Laurel Green ink and also Willow.
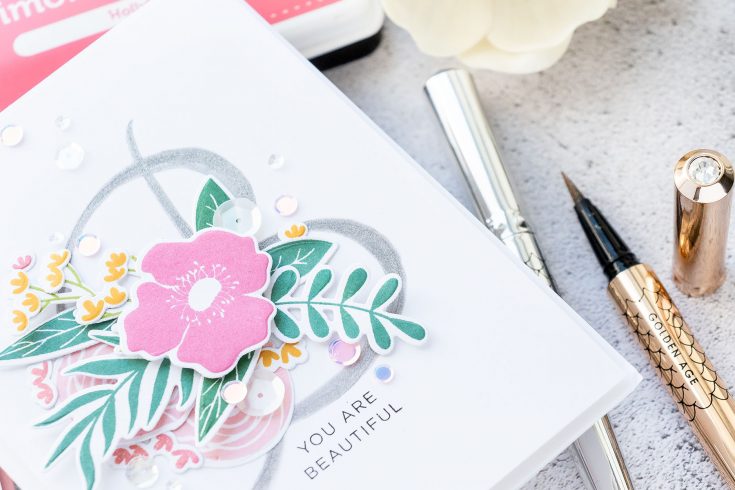
Using coordinating dies I cut these images out and arranged them over the letter to create a beautiful floral cluster. This also helped me to hide any imperfections in my calligraphy. Once the floral cluster was arranged the way I liked it I used foam adhesive and also glue to adhere everything in place. I added many extra tiny flowers stamped in yellow and pink scattering them around the cluster to make it look a bit fuller.
Finally, I stamped a simple sentiment that reads “You Are Beautiful”. I trimmed my background pane to 4 x 5 1/4”, adhered it toA2 white side folding card base and embellished this card using several sequins from SSS from the Girl’s Best Friend mix.
Have fun stamping!
SUPPLIES:
|


Thanks so much for stopping by today, and thanks to Yana for being our guest!

Blog Candy Alert!! Follow our blog via email and comment on this post for a chance to win special blog candy!
Studio Monday with Nina-Marie: Watercolored Frenchie Retirement Card!

Hello crafters, it’s Nina-Marie here with you today! I am very excited to be back again with you this week, sharing a Summery retirement card using our Simon exclusive Chillin’ Frenchies stamp set!
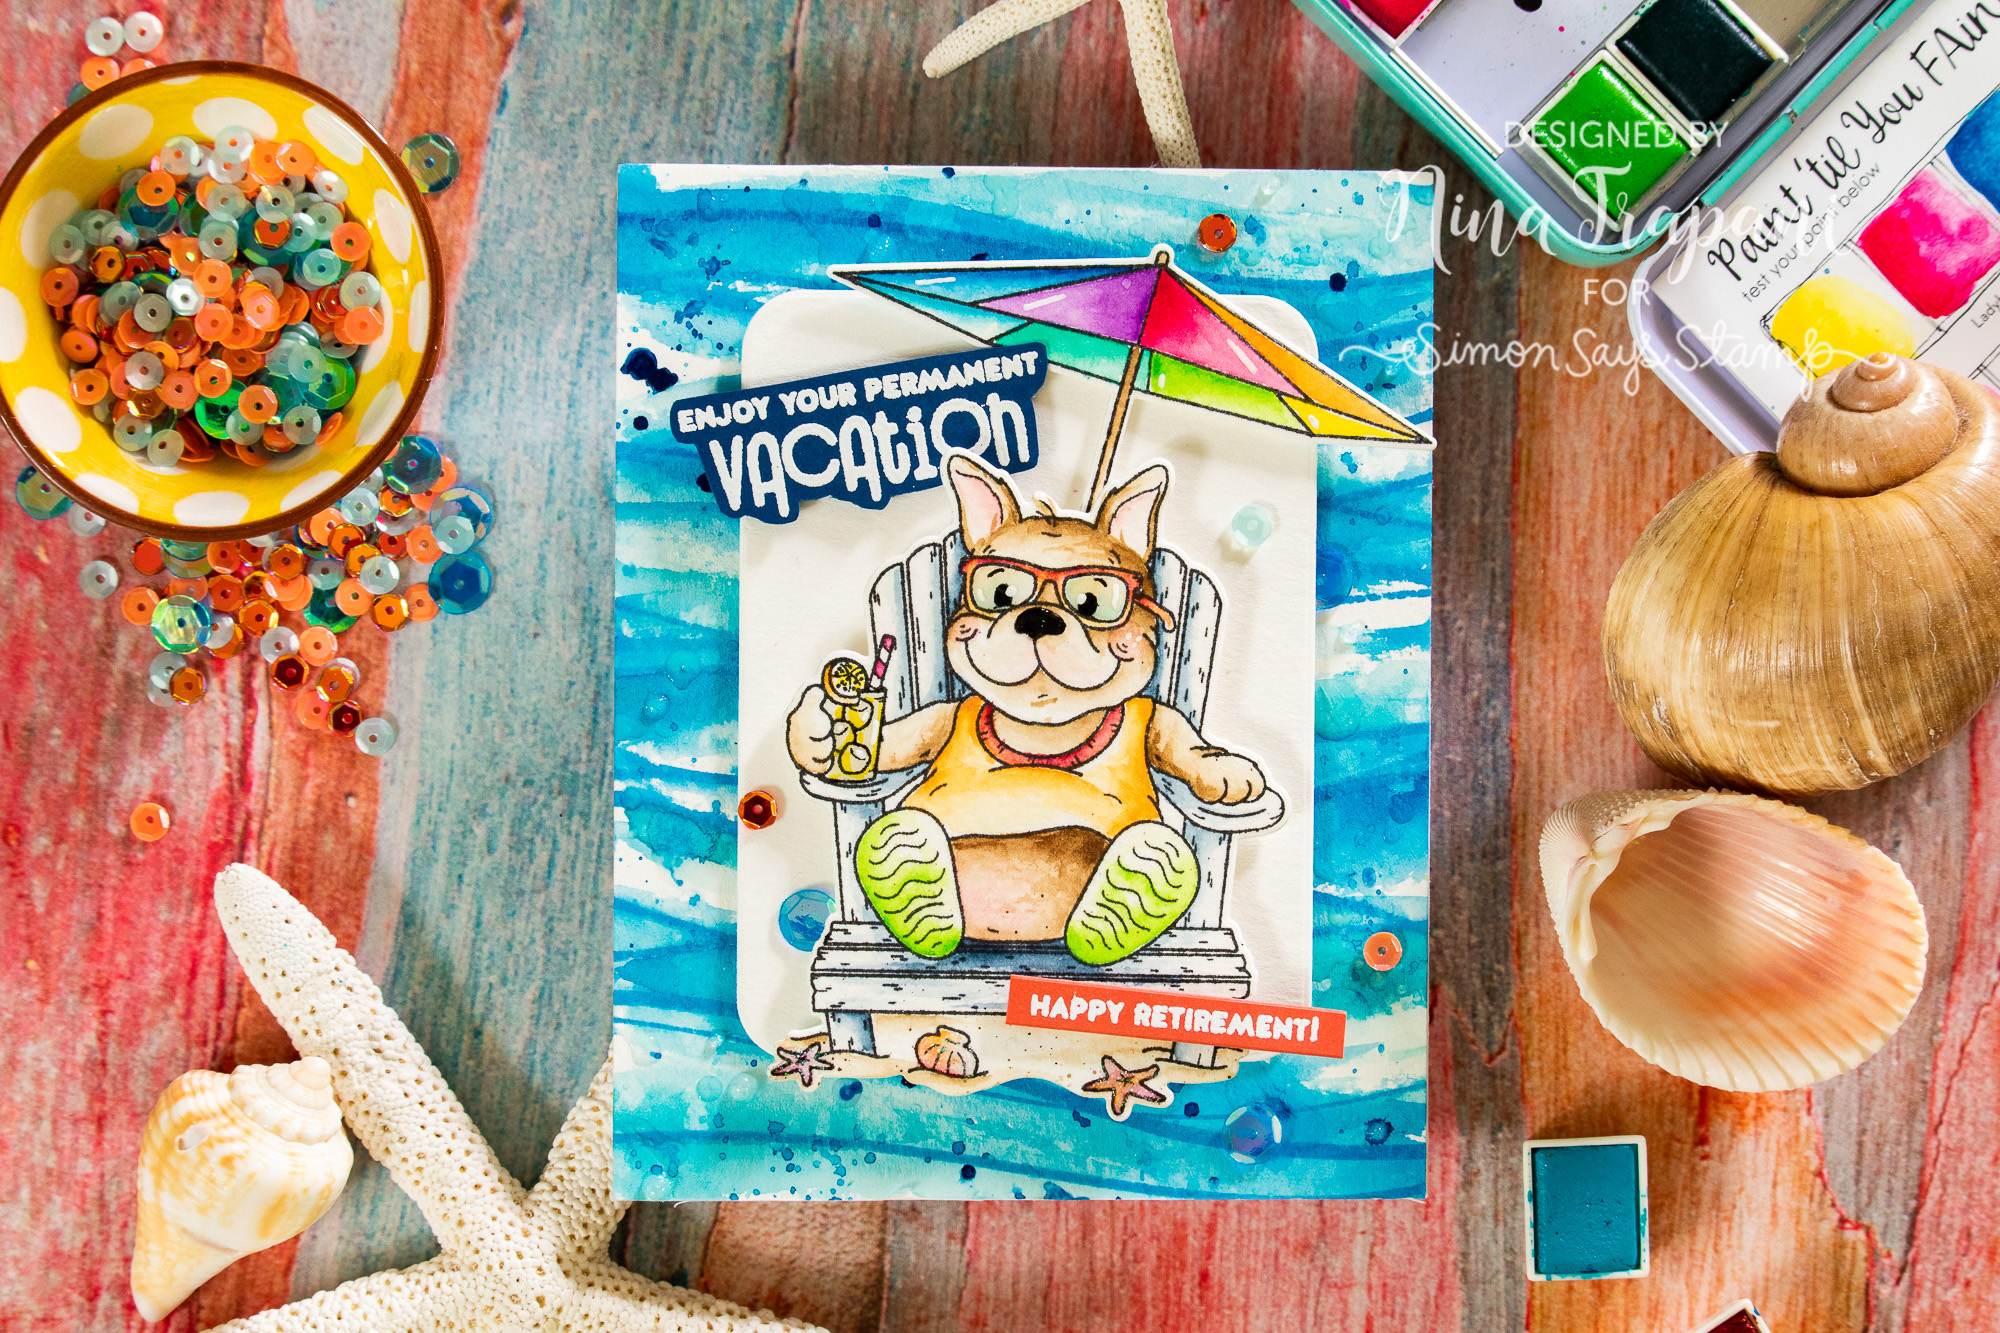
When you retire, I feel like that qualifies as a permanent vacation, right? I know a few retirees that say they are busier now than they were when they worked! But at least if you are retired, you can make your own schedule… so that seems almost like a vacation! :)
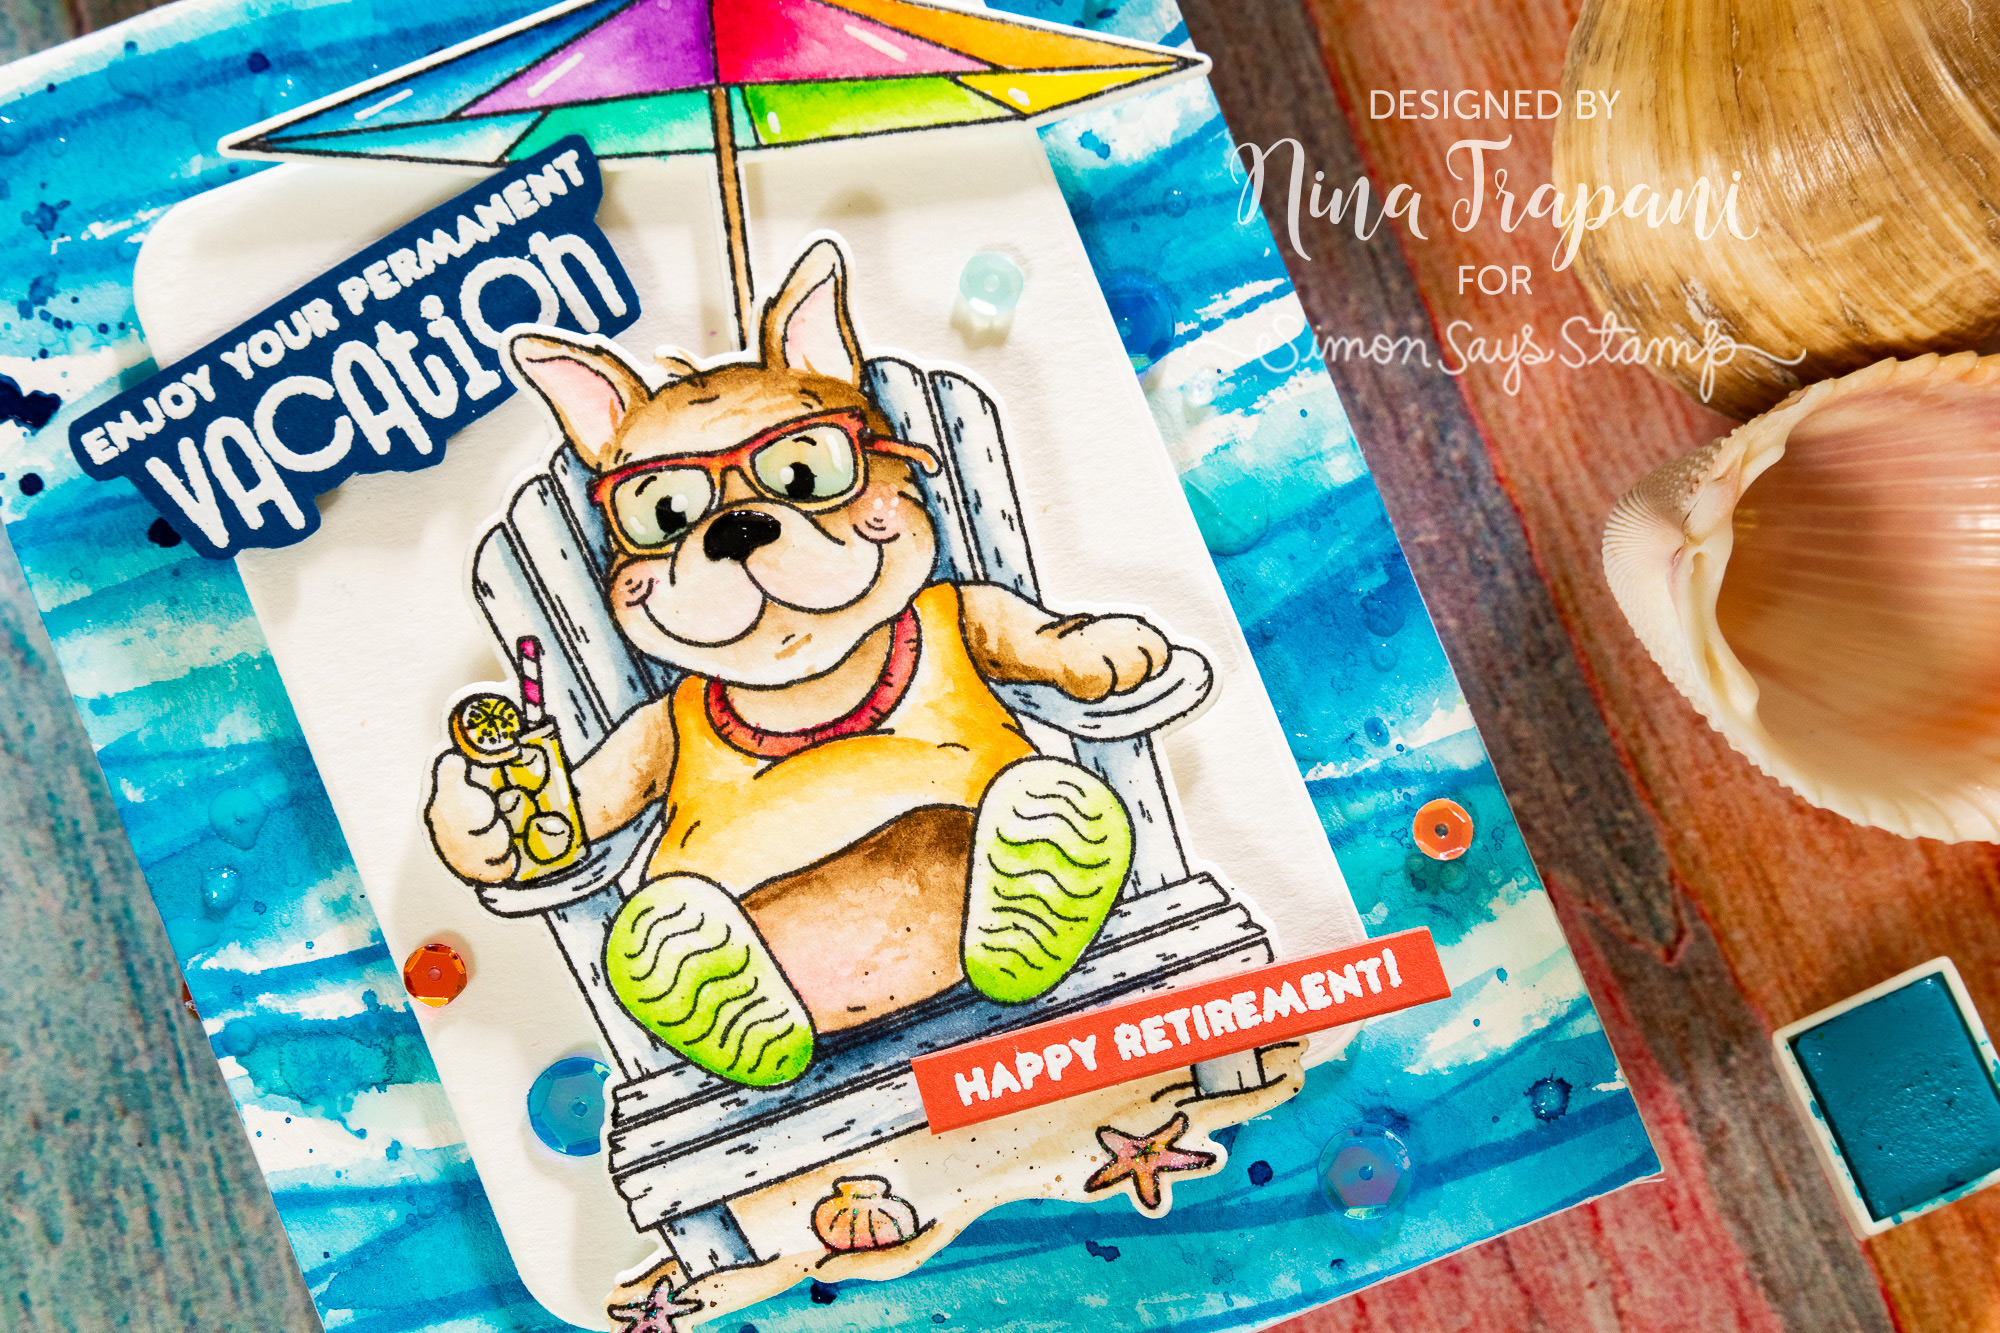
I paired this beach-lovin’ Frenchie with an umbrella from our Simon exclusive Summer Cuddly Critters stamp set, and our new Waves background cling stamp… that watery effect was super-fun to create! I used watercolors and Distress Resist Spray for an beachy waves (or maybe poolside!) feel.
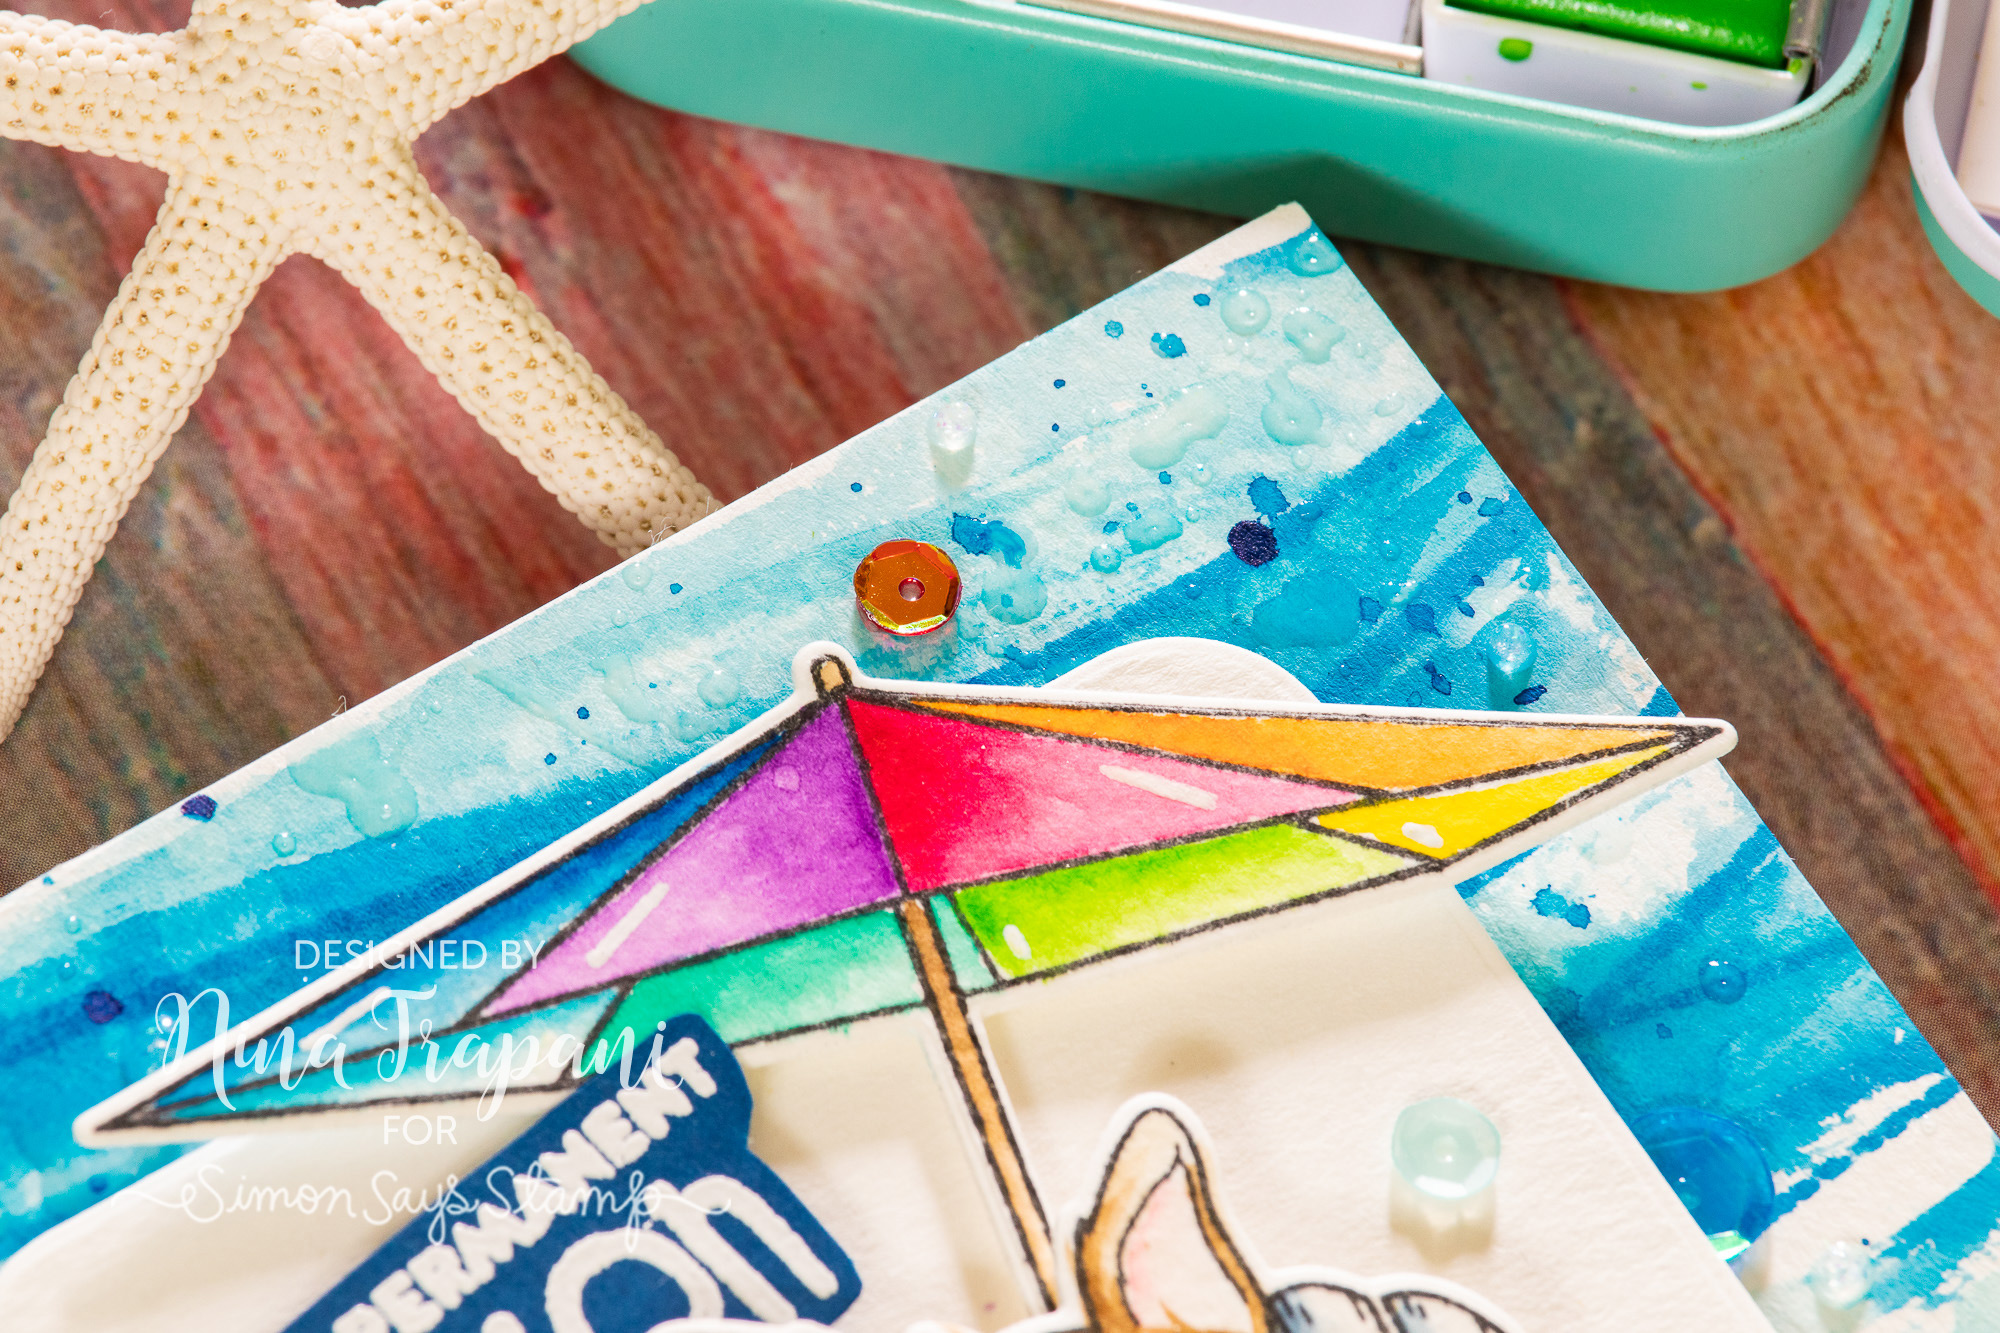
Of course, I couldn’t help but use some fun sequins in my design, so I popped a few of the new Marina sequins around the card, which really tied in well with the rest of the colors I used!
Want to see how I made this card? Be sure to check out the video below!

WATCH THE VIDEO
SUPPLIES
|


Blog Candy Alert!! Follow our blog via email and comment on this post for a chance to win special blog candy!
Blog Candy Winners!
Crafty Quintet: Summer Shades: lee!
Ink Blended & Heat Embossed Die Cuts with Kristina Werner: Avra N Williams!
Amore LauraFadora: Parental Props: Jeanne Beam!
Studio Monday with Nina-Marie: Easy Cards for Dad!: Marisela Delgado!
Please email [email protected] with the name of the blog you won from, your prize(s), and your address if applicable!


