One Stamp Five Ways: Never Quit Swimming
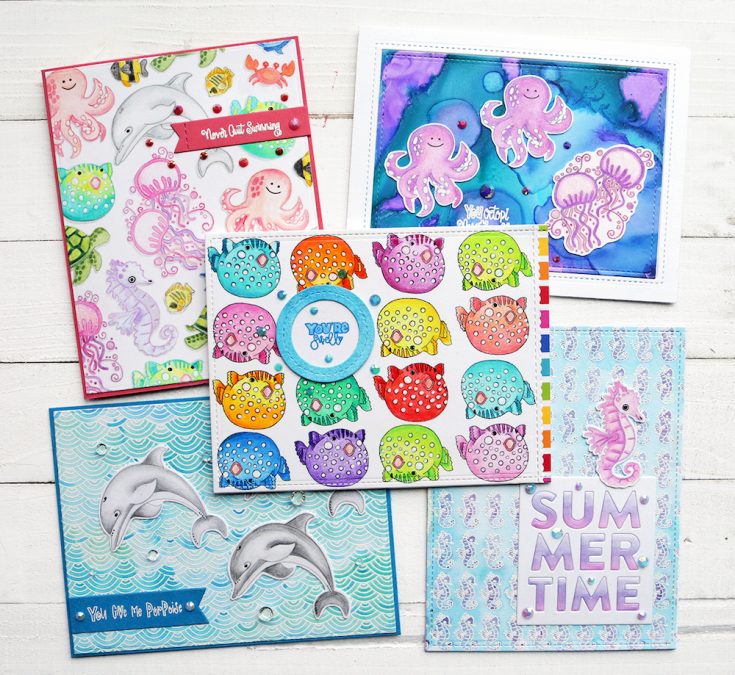
I’m excited to be sharing this “one stamp, five ways” post with you today because I am using a stamp set that I designed – woohooo! This one is called Never Quit Swimming. I also designed the Seahorse Background stamp that coordinates with it perfectly. Both of these sets were part of the recent release called Believe In You. I’ve got five cards to share with you today using this set and I have another five on my blog HERE that I’ve already shared also using this set (yep, I made 10 cards with one stamp hahaha)!
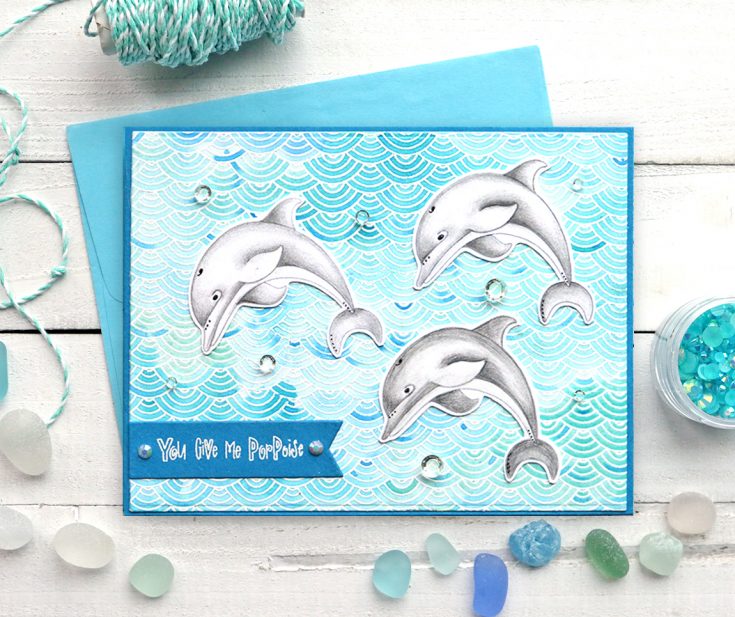
To make the background of this card, I embossed the new Scallop Waves cling stamp with white embossing powder. I then used watercolors to paint over the embossing. While it was still wet, I flicked some darker blue paint over it so it added some splotches. I die-cut this piece into a rectangle and attached it to a blue cardstock base.
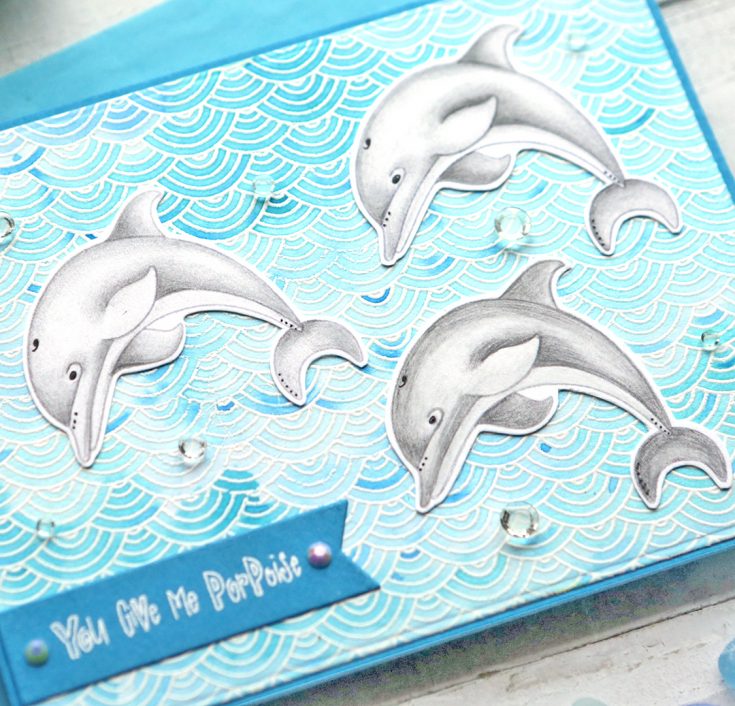
I stamped three dolphins on white cardstock with a light color of ink and colored them in with colored pencils. I cut around the edges and attached them over the background.
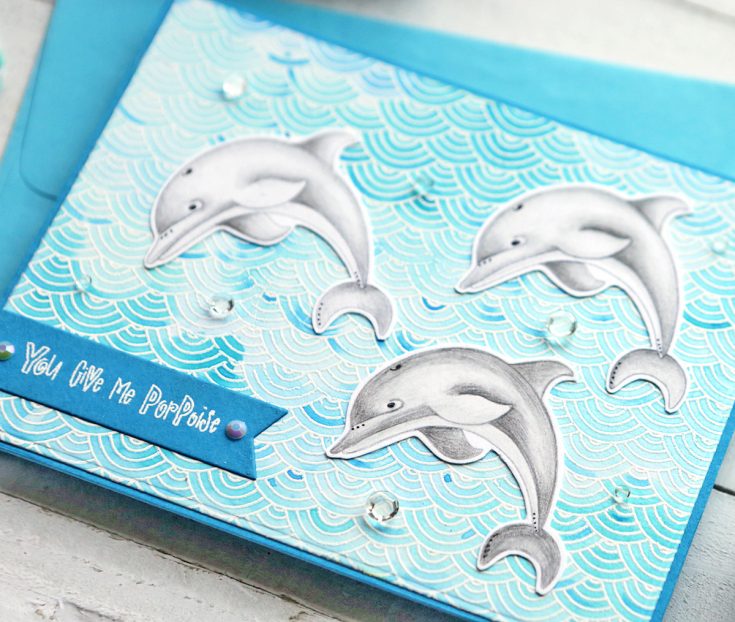
I die-cut a banner out of the same blue cardstock and embossed the sentiment from the stamp set with white embossing powder. I attached some white jewels on the end of the sentiment and some sparkling clear jewels over the water around the dolphins (I turn them upside down so they have more of a clear look).
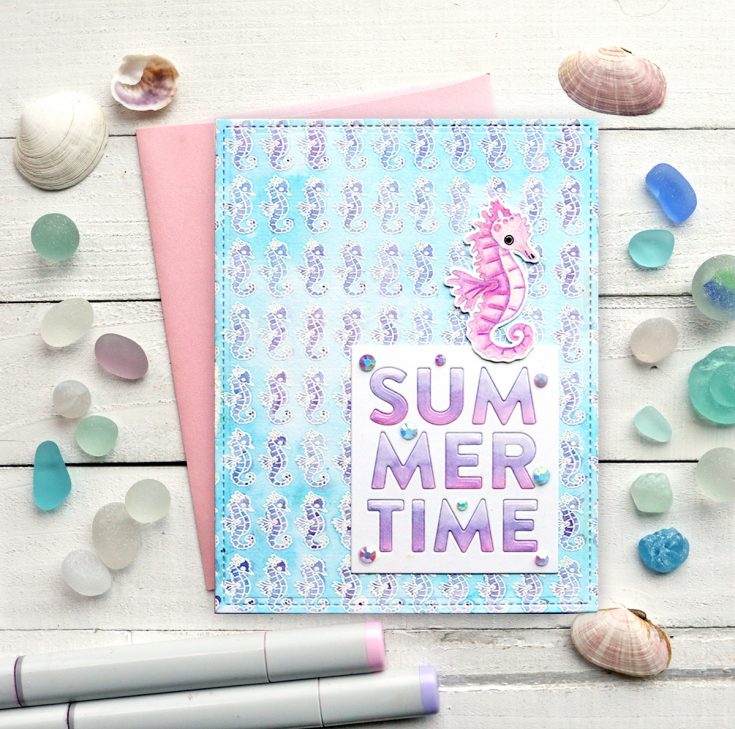
For this card, I embossed my new Seahorse Background stamp on Ranger Watercolor Paper with white embossing powder. I then watercolored over this piece with blue and purple watercolor. I die-cut it into a large stitched rectangle and attached it to a white card base.
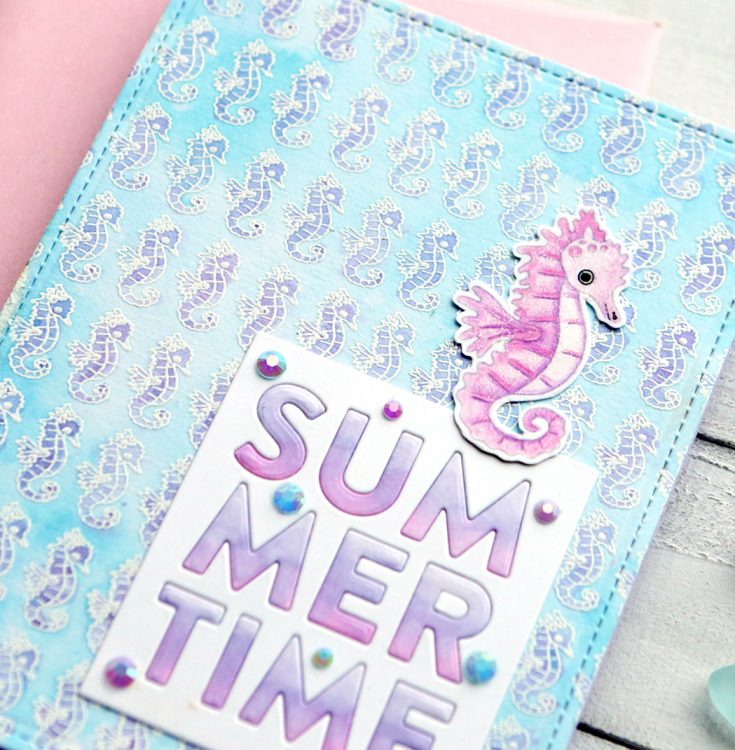
I stamped the seahorse stamp with a light color of ink and colored it in with colored pencils. I used a Nuvo Shimmer Pen over the image so it had a sparkly look to it. I drew around the eye with a black fine tip marker. I cut around the seahorse and attached it to the top of the card.
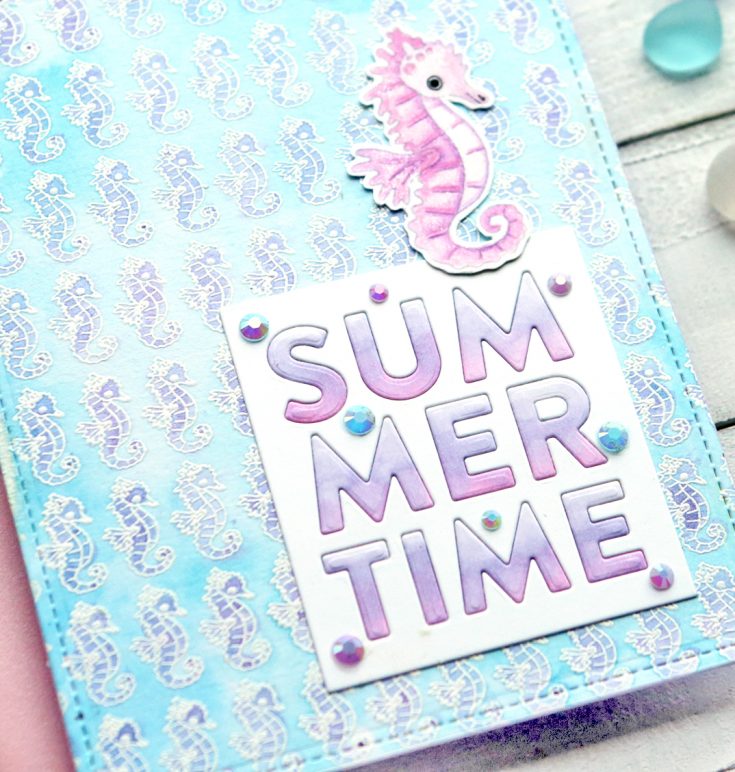
I die-cut the Summertime Wafer Die from white cardstock. I colored the letters a light purple with Copics and then attached it to the bottom of the card. I finished it with some jewels from the Sugar Plum mix.
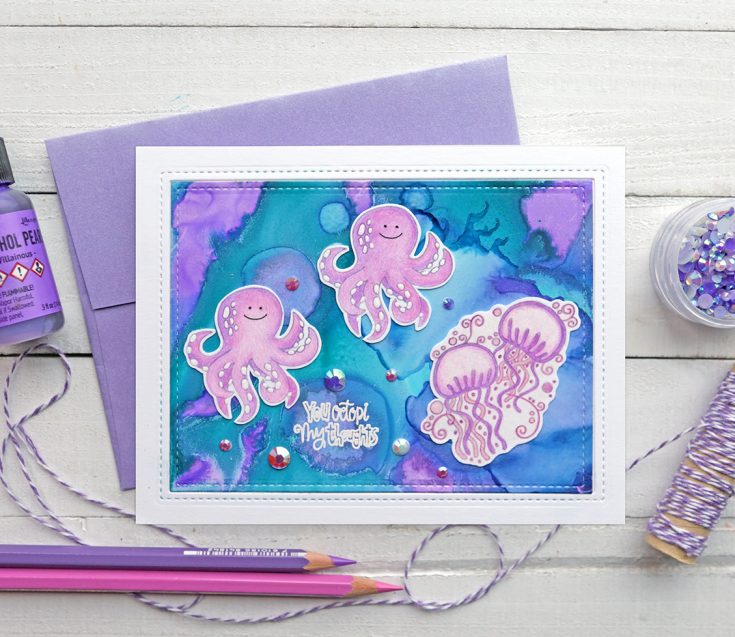
I used Ranger Pearl Alcohol Inks in Villainous and Tranquil to make the background for this card. As I mentioned in my last post, I don’t have much experience using alcohol inks. I just winged it and this time it was a win! I used the mixing solution in large drops on top of the alcohol inks to make the circles. I die-cut the piece with the Pretty Pink Posh Stitched Notes die and die-cut a white cardstock frame with the same die to go around it.

I stamped the images on white cardstock with light color ink and then colored them in with colored pencils. I used a Nuvo Sparkling Clear Glitter Pen over the jellyfish for shimmer. I cut around the images and arranged them over the background.
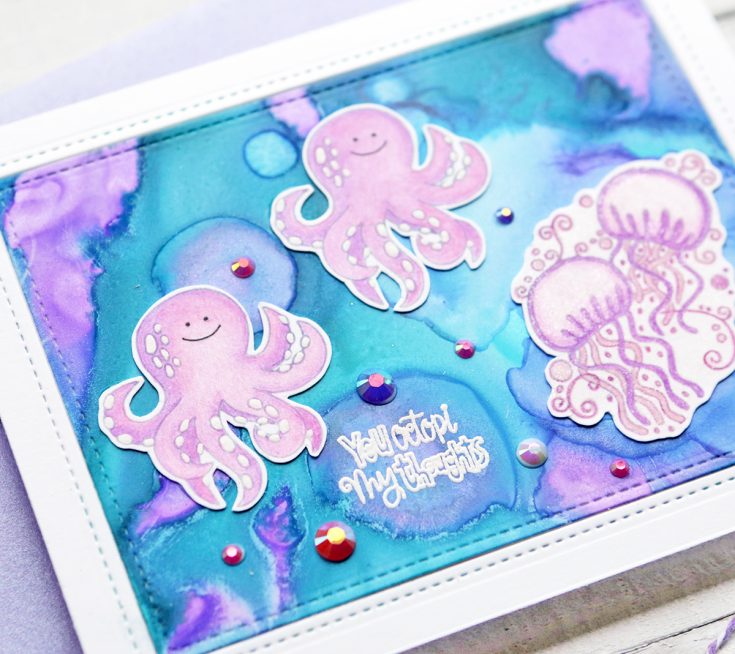
I embossed the sentiment on top of the alcohol ink background with white embossing powder. I have heard you aren’t supposed to emboss over alcohol inks, but it worked fine for me! It’s a little hard to read since it’s such small lettering and is embossed though. I added some Watermelon and Sugar Plumjewels around the sentiment.
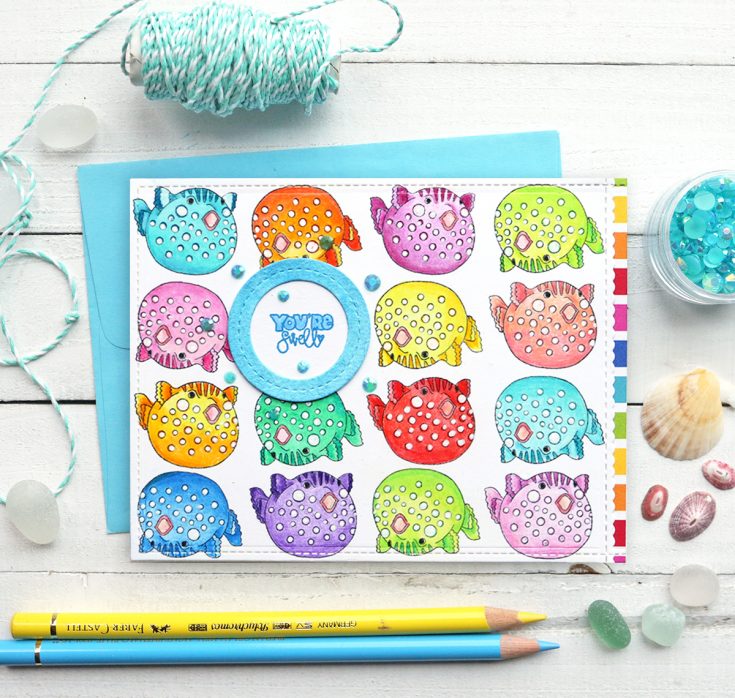
I stamped the pufferfish with black ink in a pattern turning every other one upside down. I colored them all in with colored pencils. I used a white Uniball marker over the spots on each.
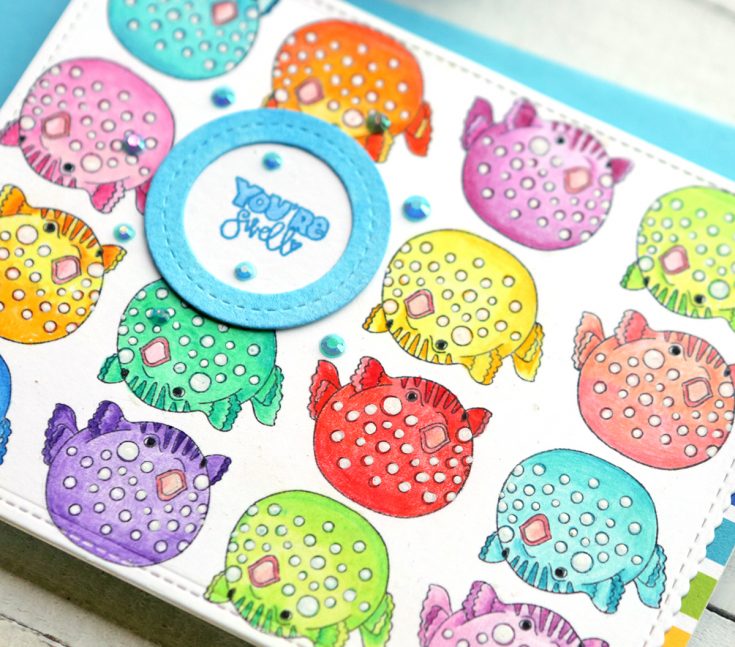
I die-cut this piece with a Lawn Fawn large stitched rectangle. I then die-cut a SSS Scallop Stitches Wafer Die on the edge of the piece (because my pattern didn’t fit across the card evenly)! I used a striped pattern paper behind the edge for a pop of color. This paper was from the August SSS card kit.
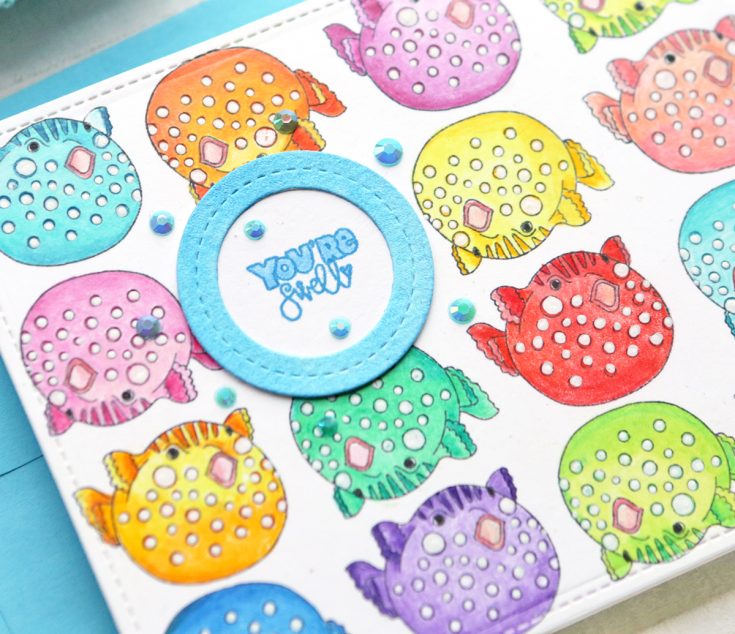
I stamped the sentiment with Lawn Fawn Fish Tank ink and then colored the letters in with a colored pencil. I used a small circle die and added a frame that I watercolored with blue watercolor. I attached this circle over one of the fish. I added some Caribbean Sea jewels around the sentiment. When the sentiments are small like in this stamp set, I use a larger banner or frame and then some jewels around them so they won’t get lost on the card.
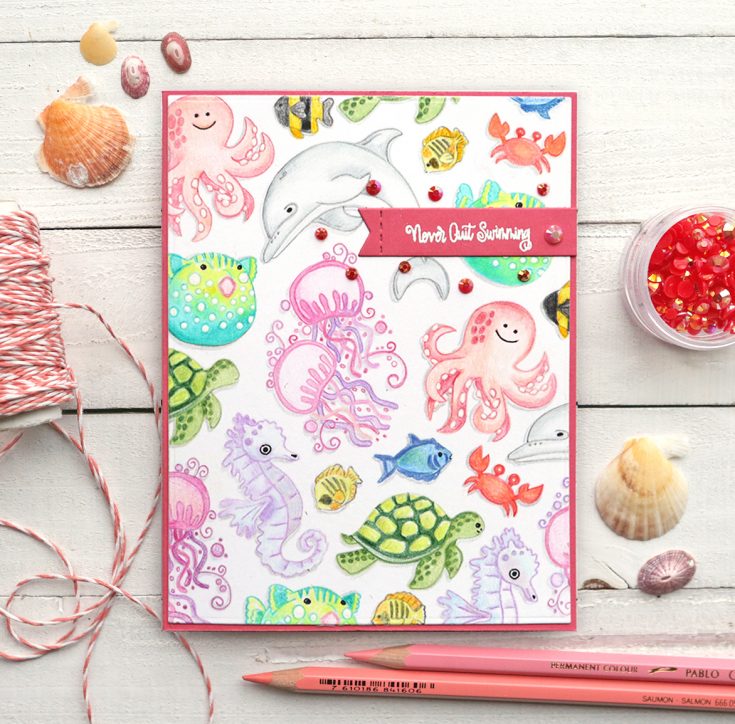
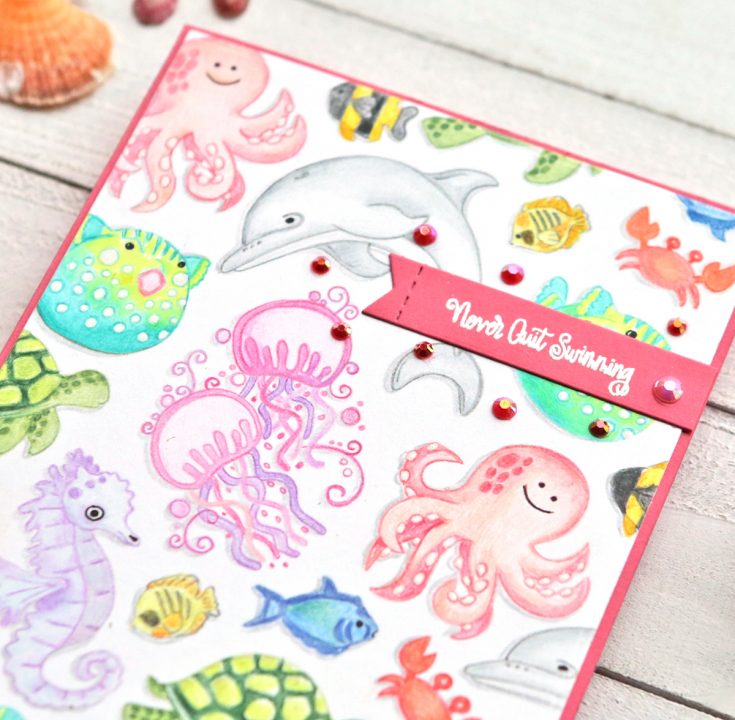
This is my random stamped background card I always like to do. Some people call this technique creating patterned paper. I stamped all of the images on white cardstock with a light color of ink and colored them all in with colored pencils. I added some gray shadows behind each image. I used a fine tip black marker for facial features. (Do sea creatures have faces?!?!?!)….
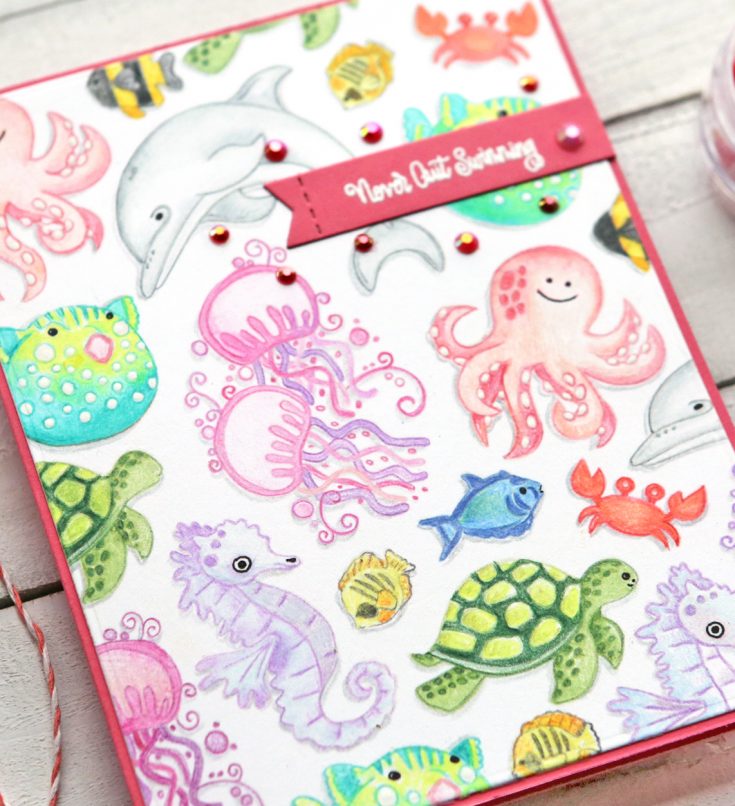
I stamped the sentiment on a banner die-cut from Lawn Fawn Guavacardstock using the MFT Stitched Sentiment Wafer Dies. I used the same cardstock for the card base – it’s my favorite color lately as it is kind of a rosy, yet coral red. I then embossed the sentiment with white embossing powder. I used some Raspberry Jewels around the sentiment.
I love challenging myself to make five TOTALLY different cards with one stamp set. Try it with some of yours that you haven’t gotten your money’s worth out of yet! It gets you to think out of the box and come up with new techniques and ways to showcase the images. Have a great summer friends and thanks so much for visiting today! Suzy
SUPPLIES:
|


Thanks so much for stopping by and thanks to Suzy for being our special guest!

Blog Candy Alert!! Follow our blog via email and comment on this post for a chance to win special blog candy!
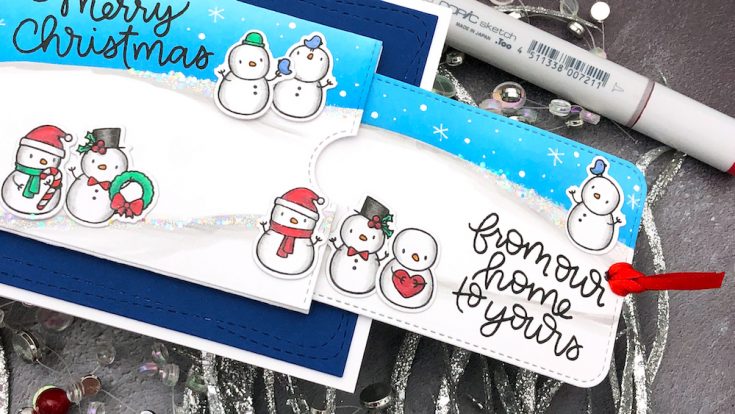
Interactive Cards by Jess: Double Slider Holiday Card

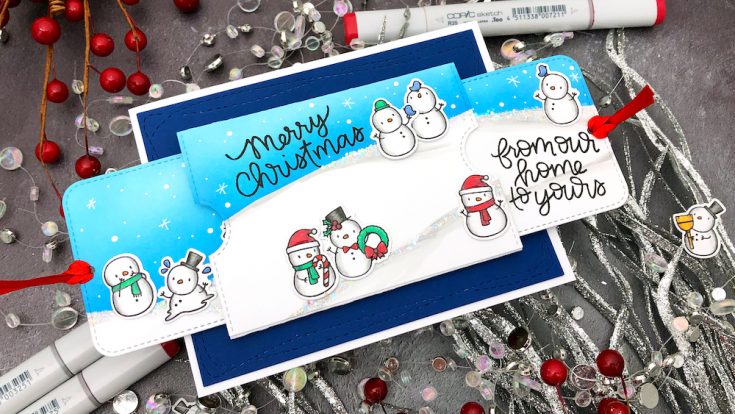
Hi friends! Happy Monday! Welcome to the latest installment of our Interactive Cards by Jess blog feature with special guest Jessica Frost-Ballas! She is celebrating Christmas in July with us by creating this super fun interactive holiday card featuring the Double Slider Surprise dies from Lawn Fawn as well as some adorable Snowmen from Mama Elephant in the Little Snowman Agenda stamp and die set! Be sure to watch the video for more information and enjoy!
SUPPLIES:
|


Thanks so much for stopping by and thanks to Jessica for being our special guest!

Blog Candy Alert!! Follow our blog via email and comment on this post for a chance to win special blog candy!
Mixed Media: Watercolor Rings with Tim Holtz Alcohol Inks

Welcome everyone!! I hope you’re having a great weekend! I’ve been playing around with my Tim Holtz Alcohol inks to create a project for a friend of mine.
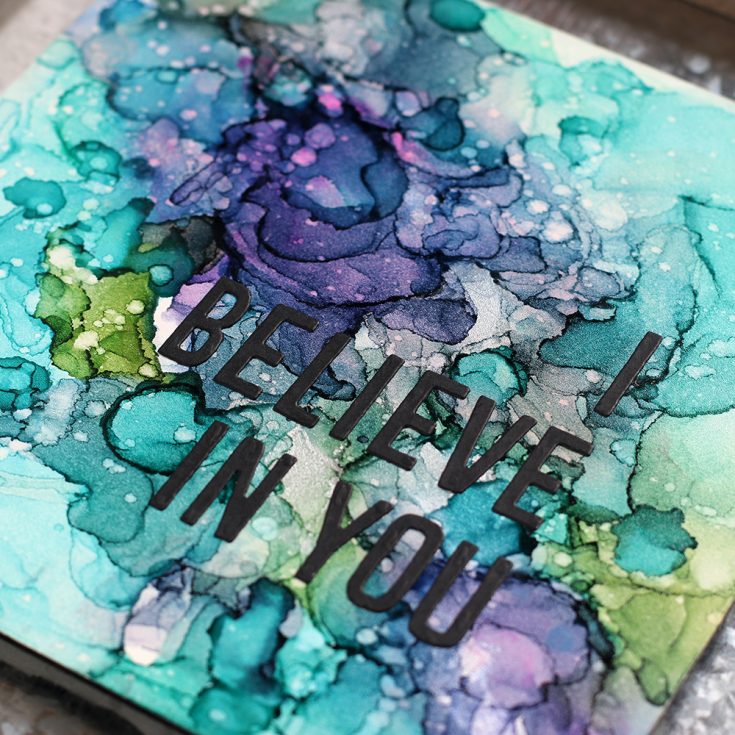
I thought I’d try out the Alcohol Hard Core Art Panels to see what results I would get. The Art Panel is hardboard that has a coating, something substantial that you could frame. I’ve chosen some of my favorite colors to work with and encourage you to do the same.
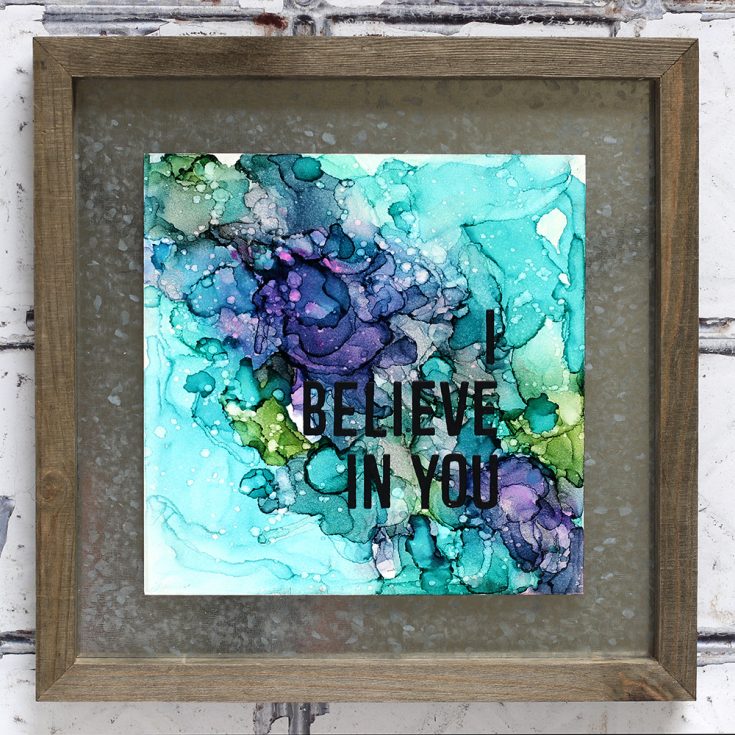
My objective with this project was to get watercolor looking rings and overlapping colors. It turned out close to what I had imagined.
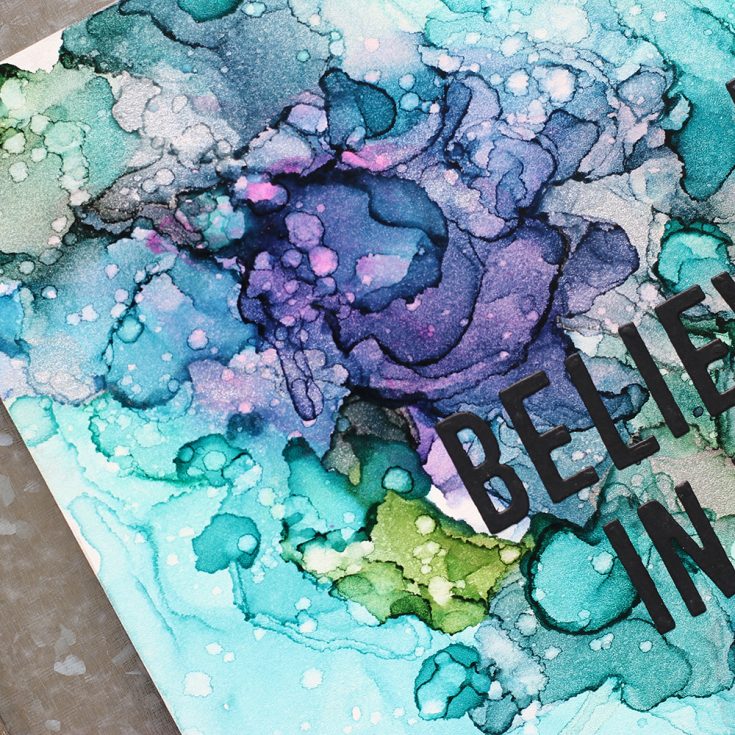
The area of purple at the top looks like a flower with a green leaf poking from behind, I was thrilled about it!! Once I had my background completed, I added my message using Tim Holtz Alphanumeric Letters cut from black cardstock.
I hope you enjoy the process!

Blog Candy Alert!! Follow our blog via email and comment on this post for a chance to win special blog candy!
|


