Studio Monday with Nina-Marie: 3 Ways to Display Enamel Pins

Hello crafters, it’s Nina-Marie here with you, sharing 3 unique ways to display your enamel pins! Enamel pins are extremely popular these days and you may be wondering how to use them. Did you know we recently released a series of our very own, Simon brand pins?! Check them all out here!
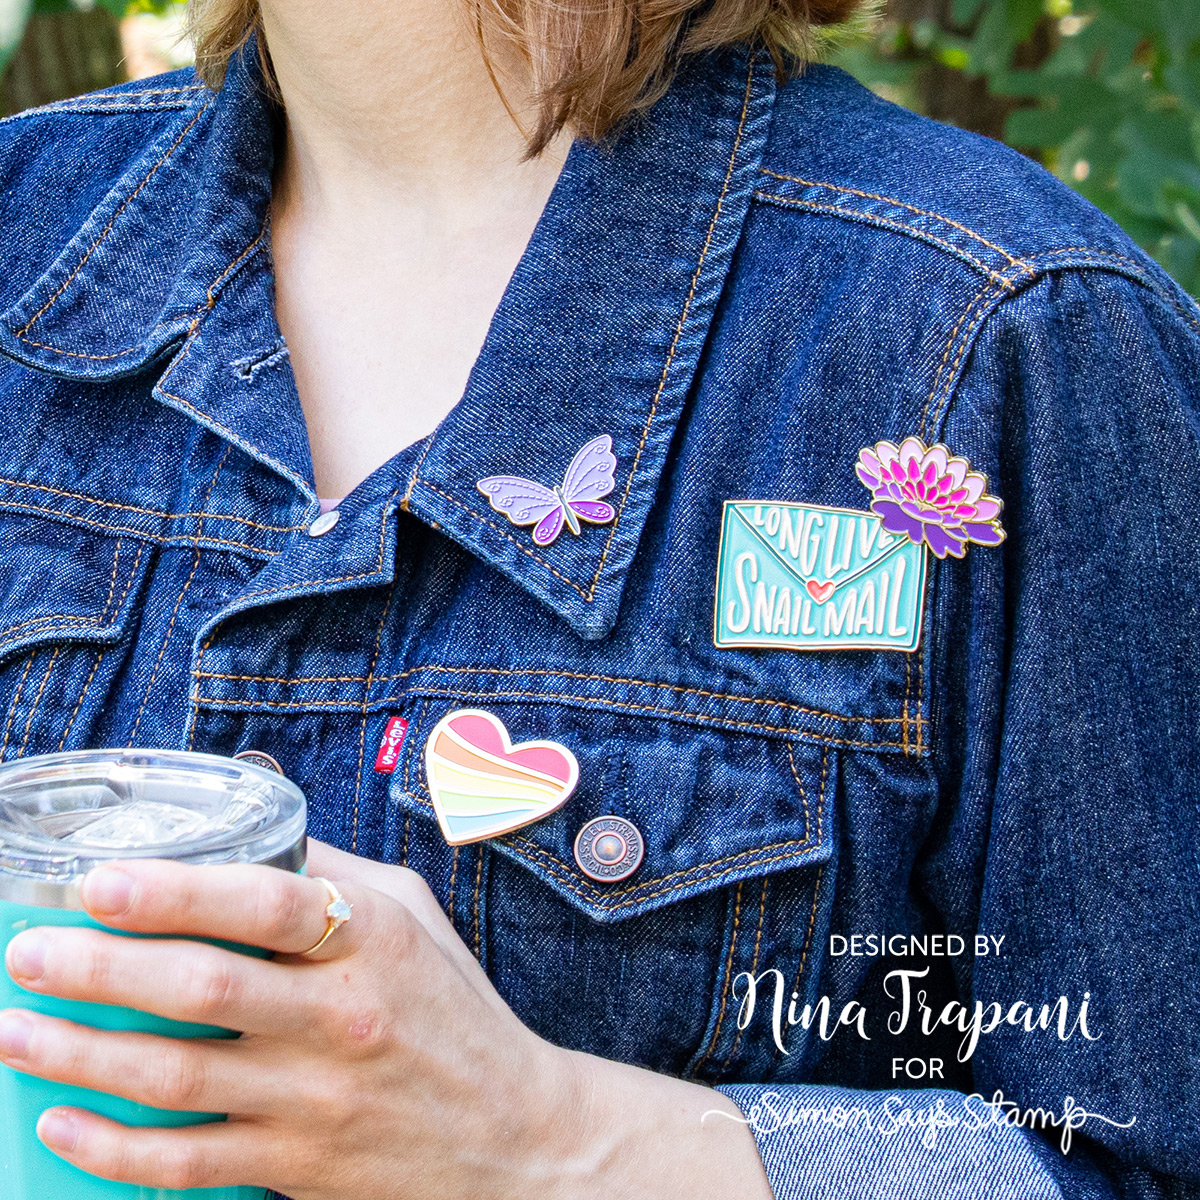
If you love to wear pins, they look great on a jacket; it’s like wearing your creativity on your sleeve, so to speak! ;) Wear one to coordinate with your outfit, or more for a true statement! My favorite denim jacket is a great place to wear them for a fun, crafty accessory.
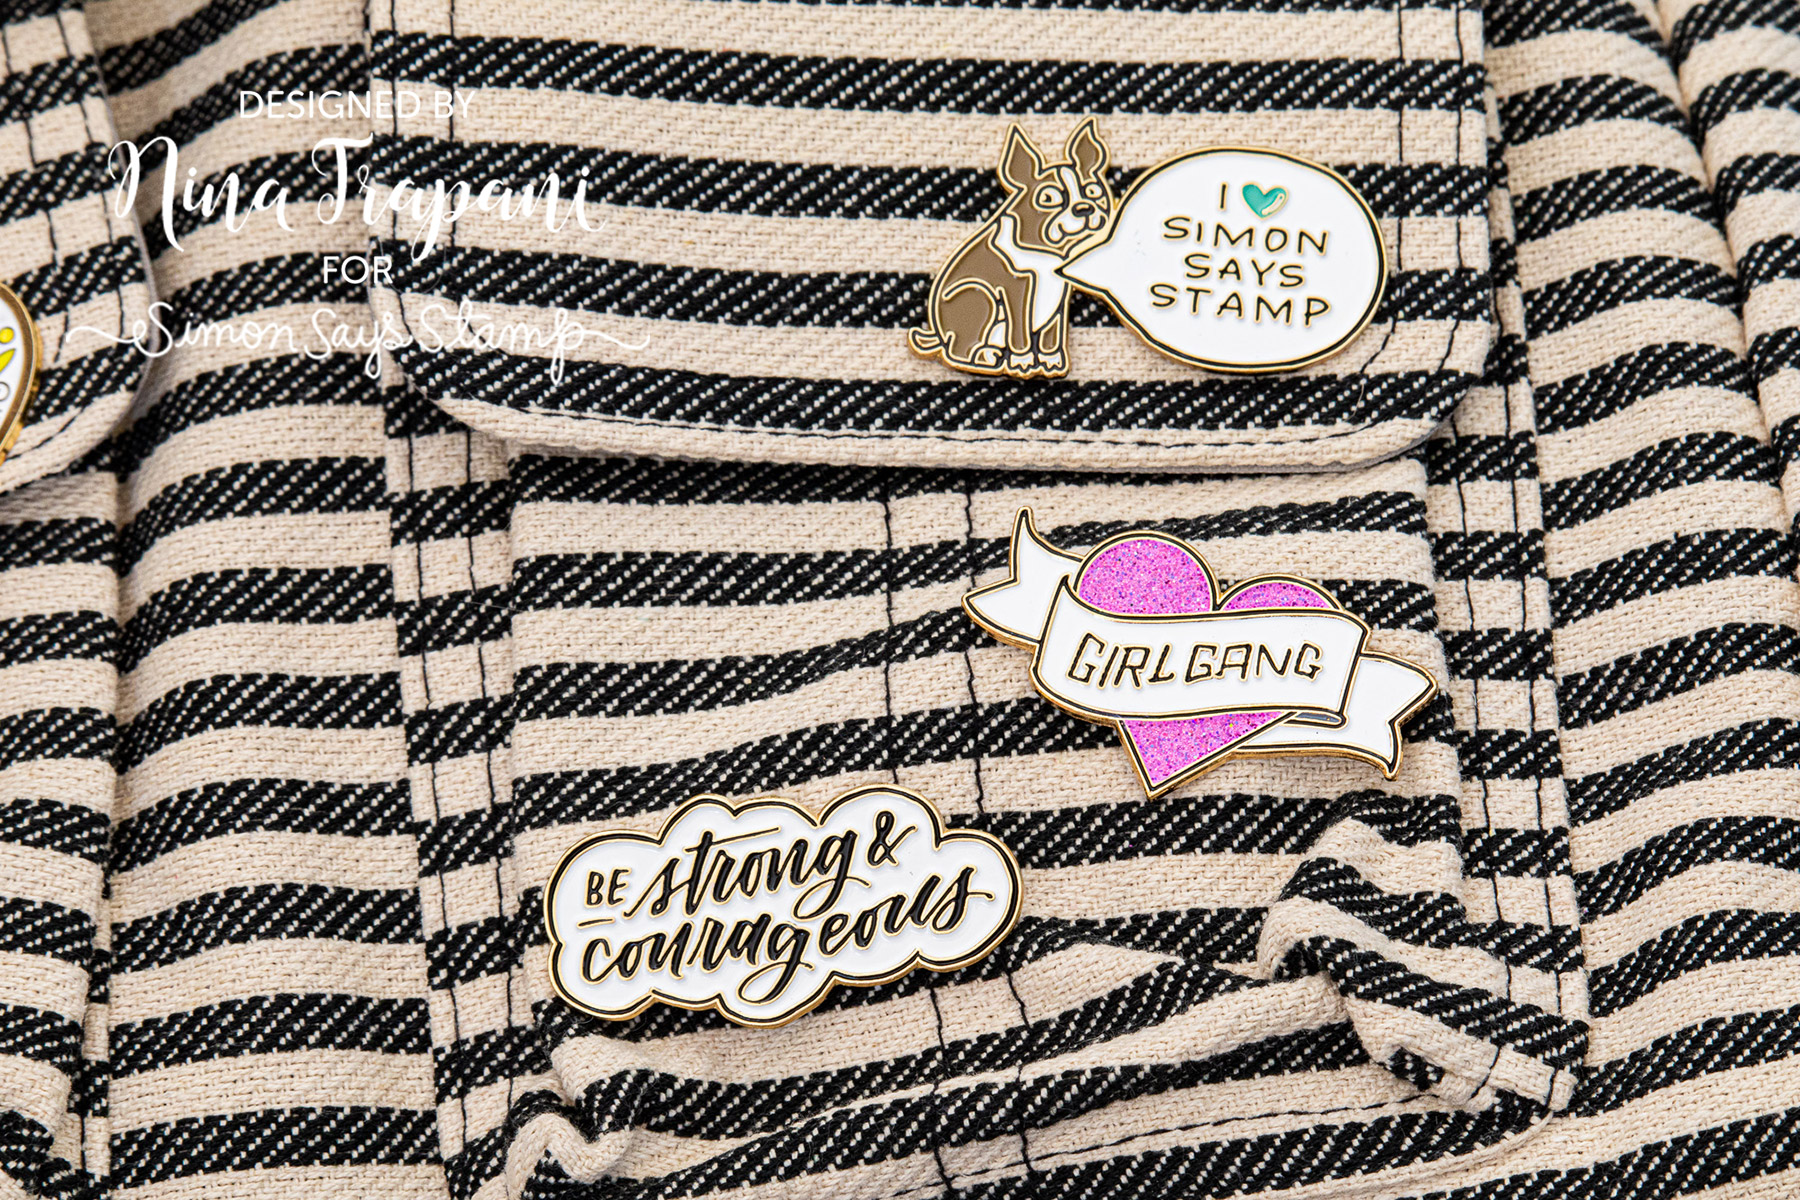
A bag is a great place to display your pins for all to see. I love putting a few on my laptop bag when I am taking my computer with me someplace! They look gorgeous on the pockets and are great reminders of things I love, or inspiration!
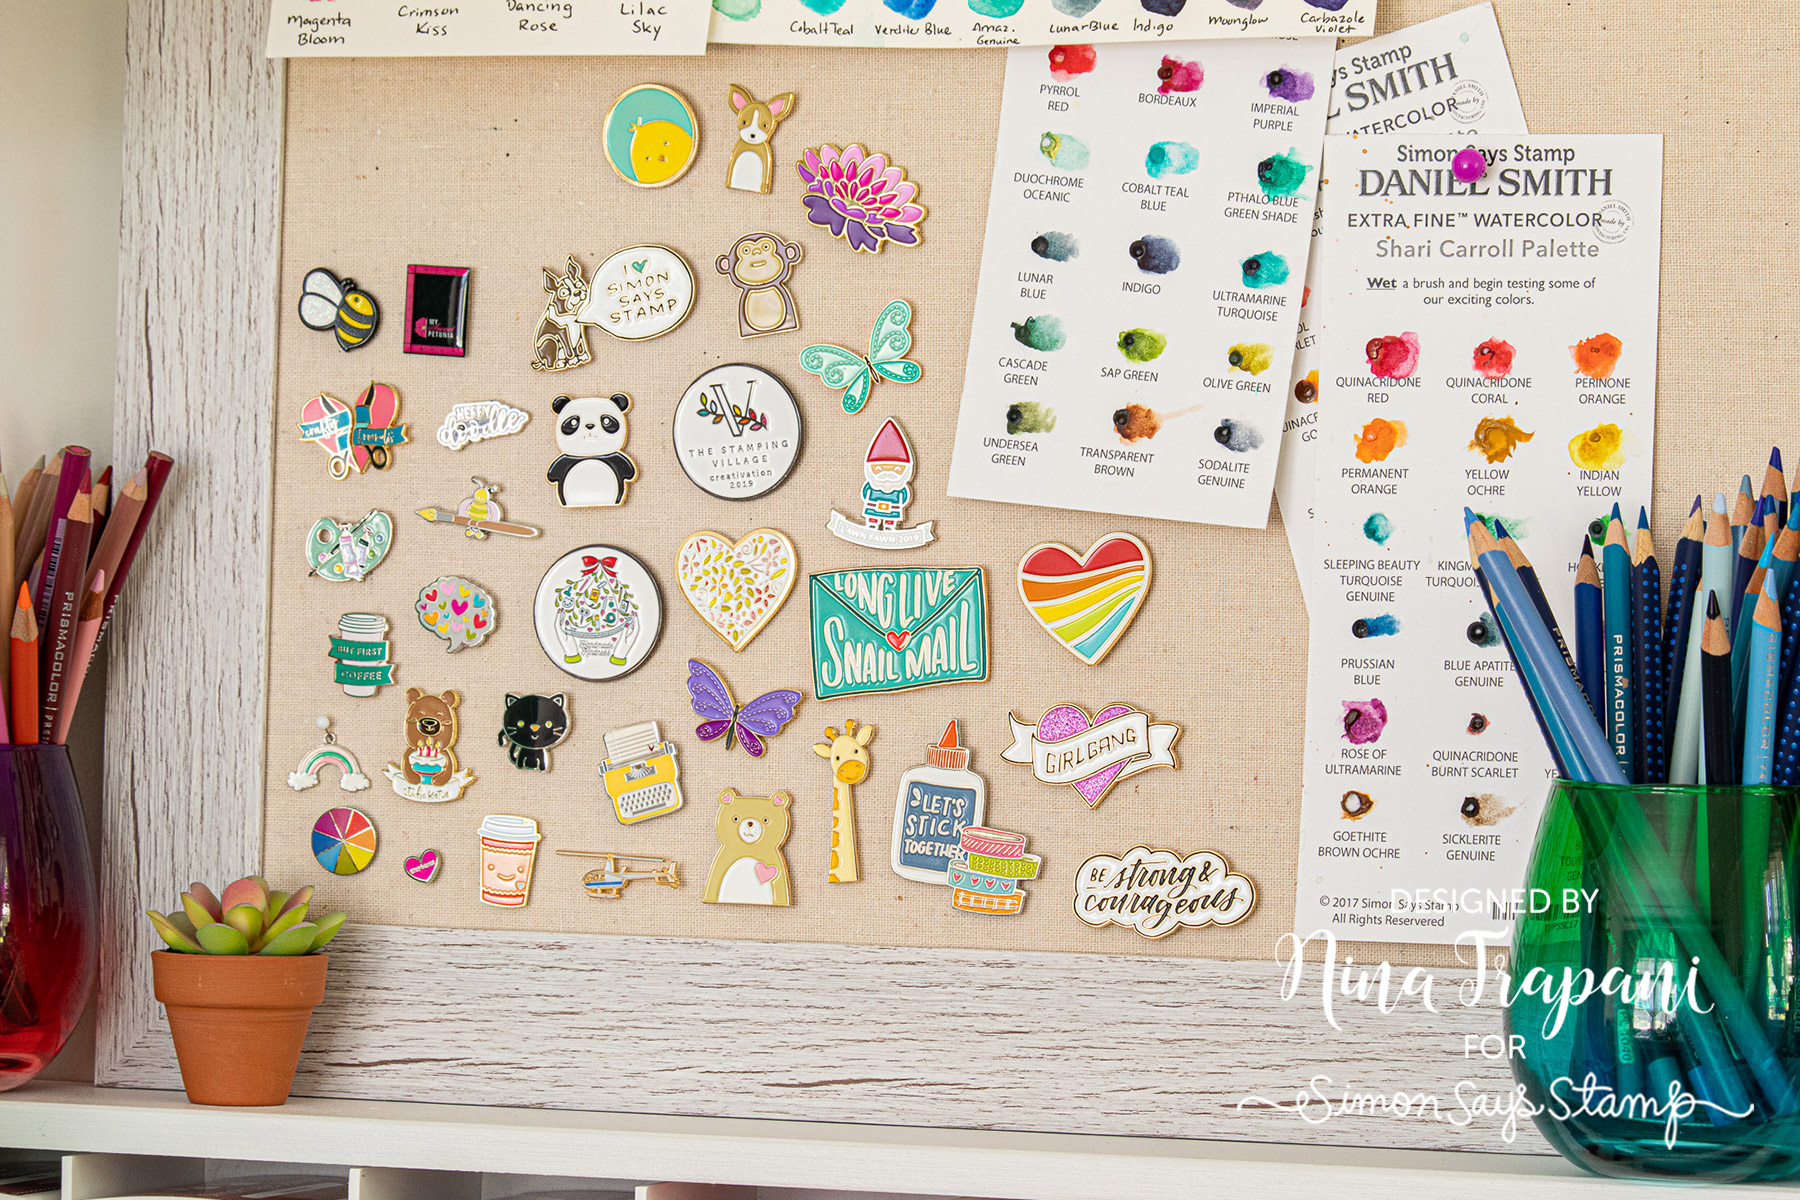
Another fun way to display enamel pins is on a pin board or bulletin board in your crafty space! I have a board in my studio that I use to display color swatches and my growing collection of pins. They also make great “push pins”, too!
How do YOU display your enamel pins? We’d love to hear what you do with your pins in the comments below!
SUPPLIES
|


Blog Candy Alert!! Follow our blog via email and comment on this post for a chance to win special blog candy!
Blog Candy Winners!!
Butterfly Tag by Anna-Karin Evaldsson: Jacqueline Hedlund!
Funny Friday: Creating a Box Card: Mel H!
Doodling with Debby: Making The Most Of Watercolor Prints: Cheriese H!
Studio Monday with Nina-Marie: Therm O Web Flock Sheets!: Lindar C!
Please email [email protected] with the name of the blog you won from, your prize(s), and your address if applicable!
Butterfly Tag by Anna-Karin Evaldsson
Hi friends! Happy Sunday! I’m so pleased to welcome back special guest Anna-Karin Evaldsson as a special guest on our blog! Be sure to stop by her blog weekly for new inspiration in our Monday Challenge! Be sure to read on to learn exactly how she made this gorgeous tag and enjoy!
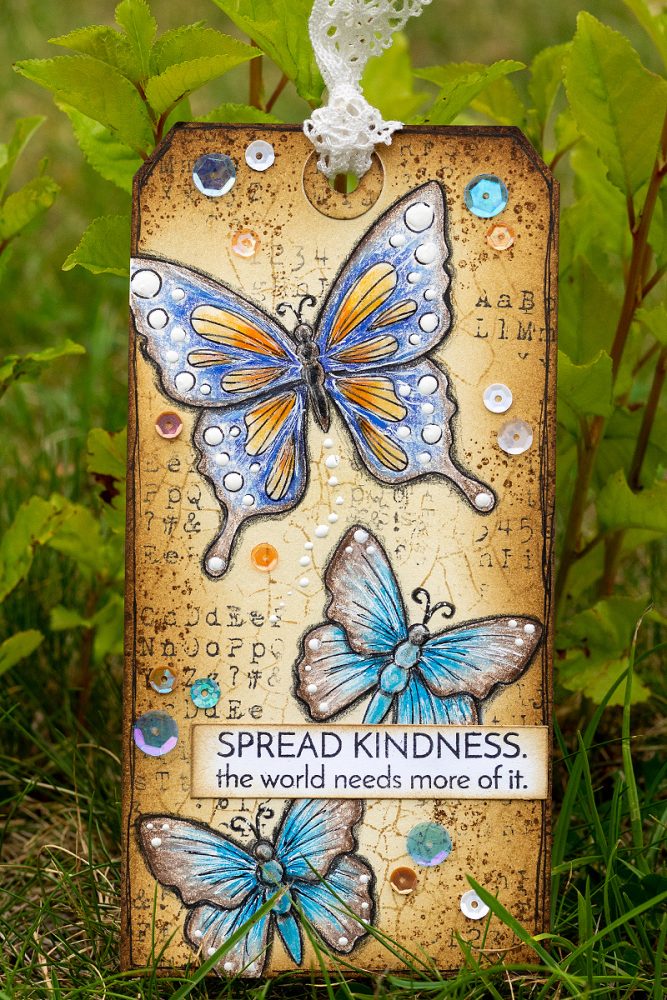
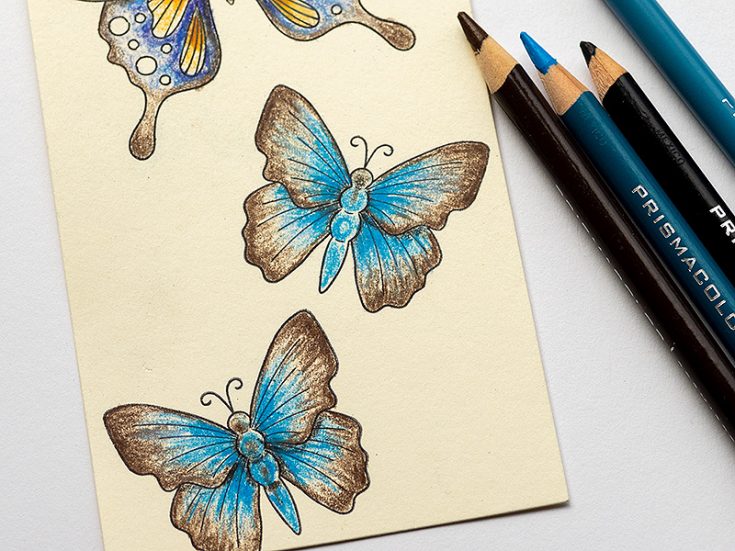
Hi everyone! I am so happy to be here today with a fun and easy tutorial. It is also great to be stamping again, after having had to do a sudden move. My supplies are now unpacked, although still in a somewhat chaotic state. There has been a lot of butterflies around our new place, which inspired me to stamp and color butterflies for this tag. You can use the techniques for any type of project.
Butterflies are always fun to color and you can make them into any colors you can think of. Or use a butterfly reference book and turn them into real butterflies. The butterflies were colored with colored pencils, adding shadows to make them look dimensional. I also did some masking, inking and background stamping.
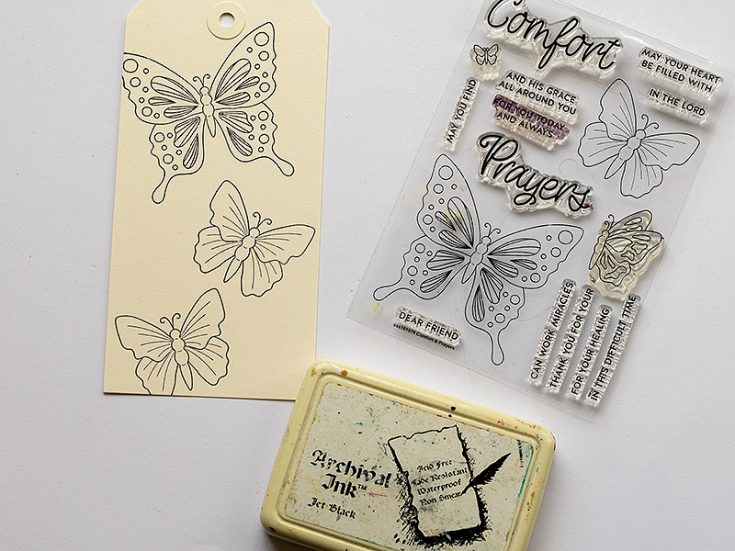
Start by stamping butterflies from the Simon Says Stamp Comfort & Prayers set on a tag, using Jet Black Archival Ink.
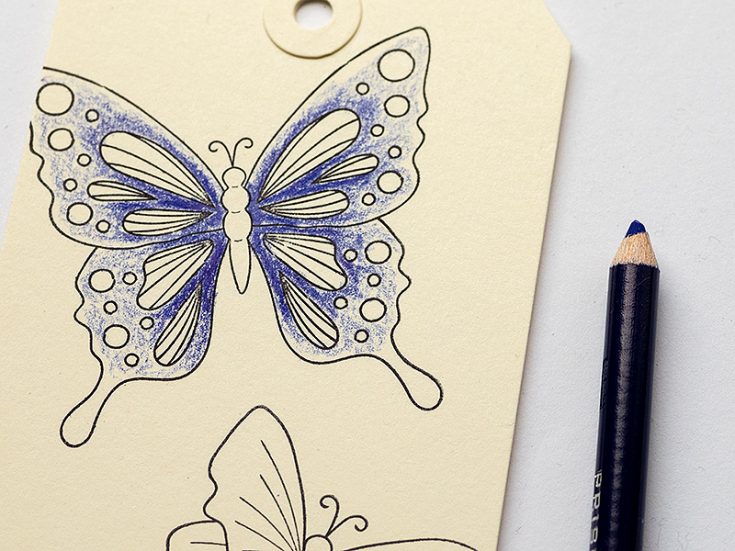
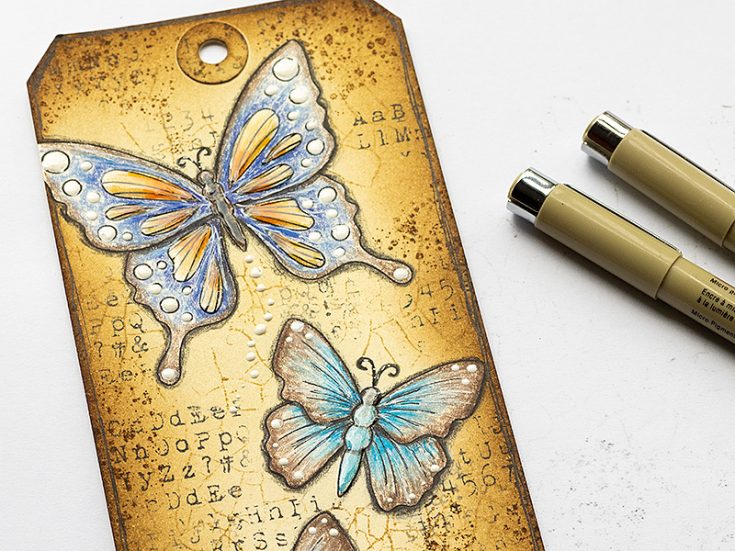
I used Prismacolor pencils to color the butterflies, and my pencil sharpener only showed up when I was almost done with the tag, which is why some of the pencils look a little blunt on the photos. Start by pressing lightly with the pencil, and then add more pressure to build up darker shades.
Continue adding color until you are happy with the look.
Here you can see the first lighter application to the left, and how darker shades were built up using the same pencils to the right.
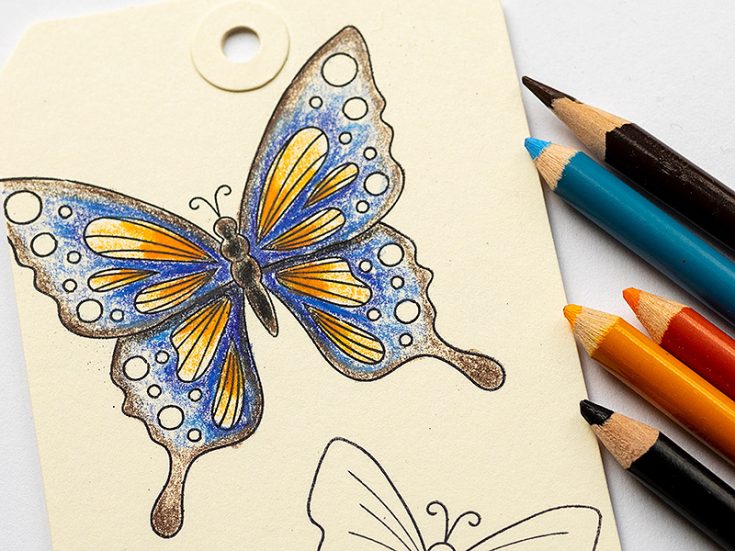
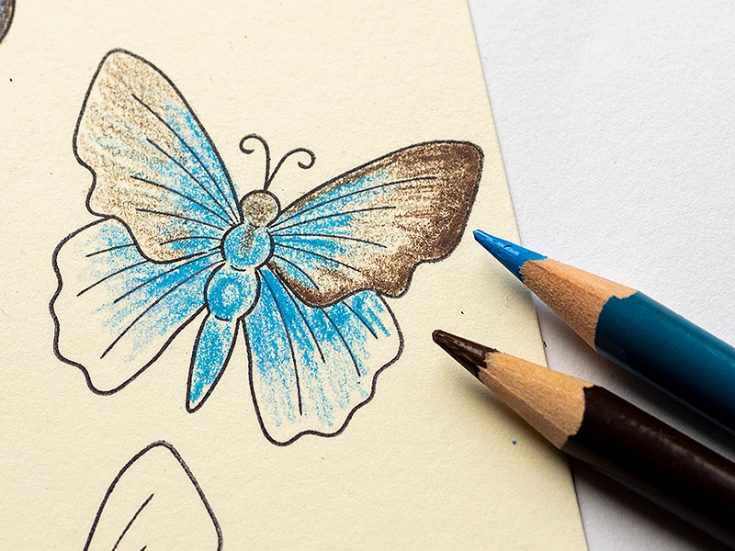
Continue in the same way as the third butterfly.
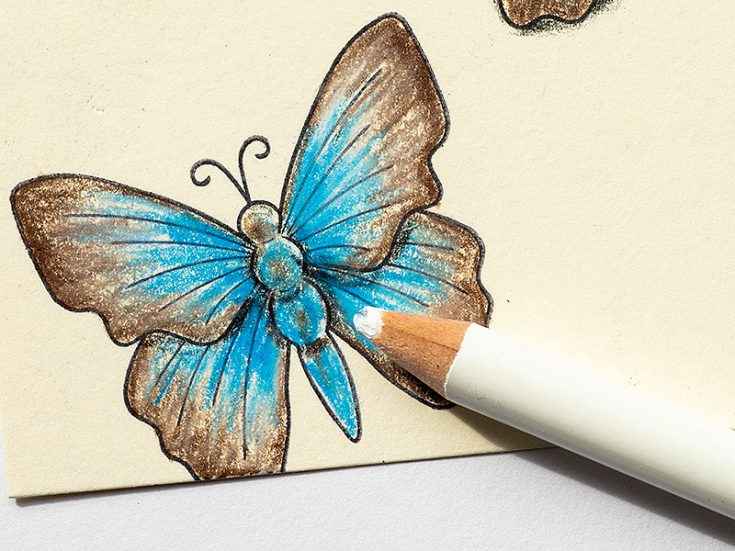
If you want to smooth out the colors, you can go over them with the white pencil.
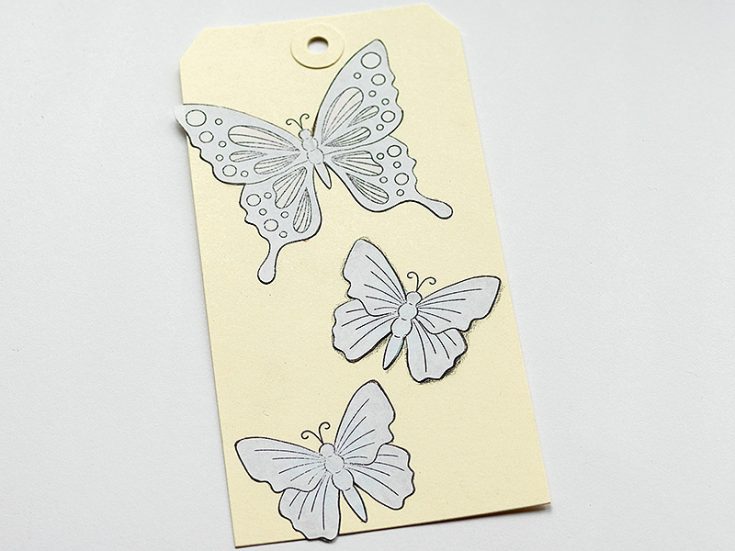
Stamp the butterflies on SSS Masking Paper and cut out. Place them on the tag.
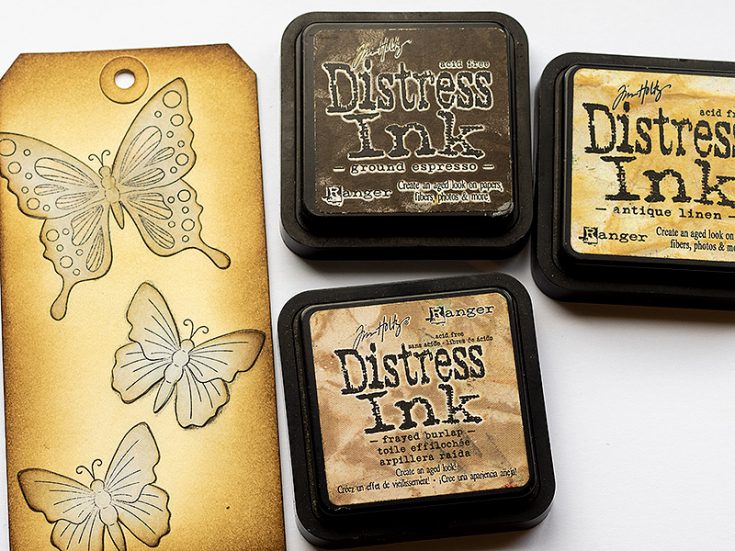
Ink the tag with Distress Inks, starting with the lighter shade. The masks stay perfectly in place.
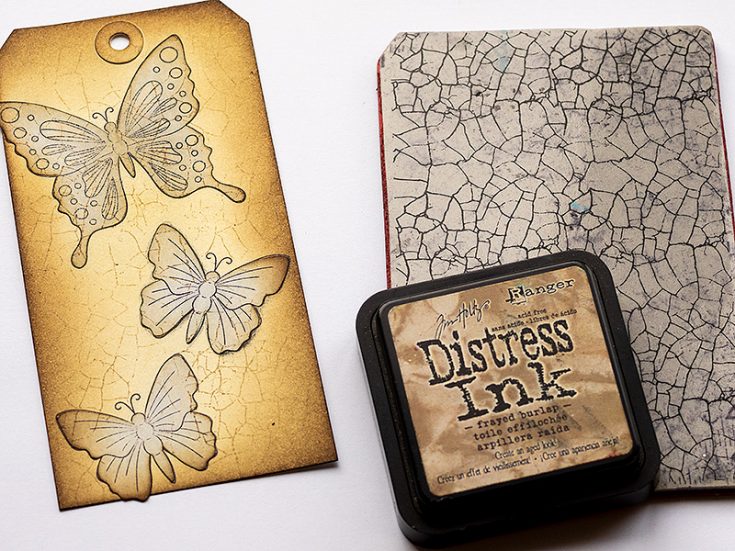
Stamp with Tim Holtz Cracks background stamp and Frayed Burlap ink.
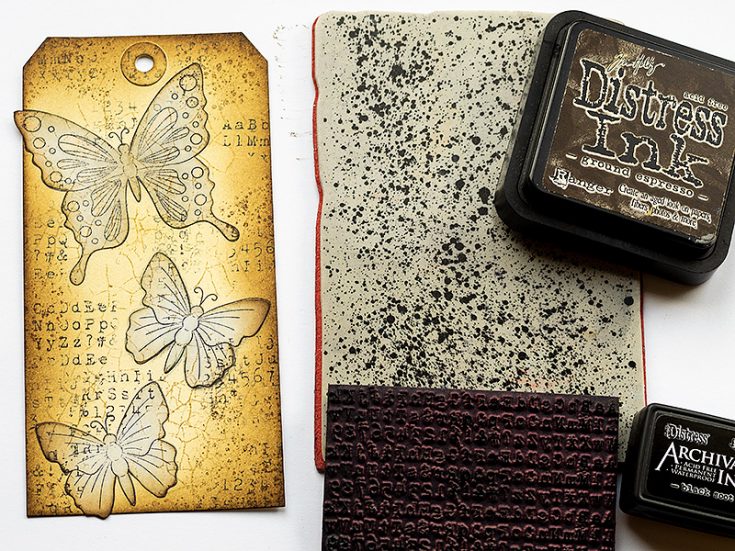
Use a darker brown together with the Specks stamp, and finally add some black stamping with Tim’s alphabet background from the School Desk set. This is one of my all-time favorite stamps.
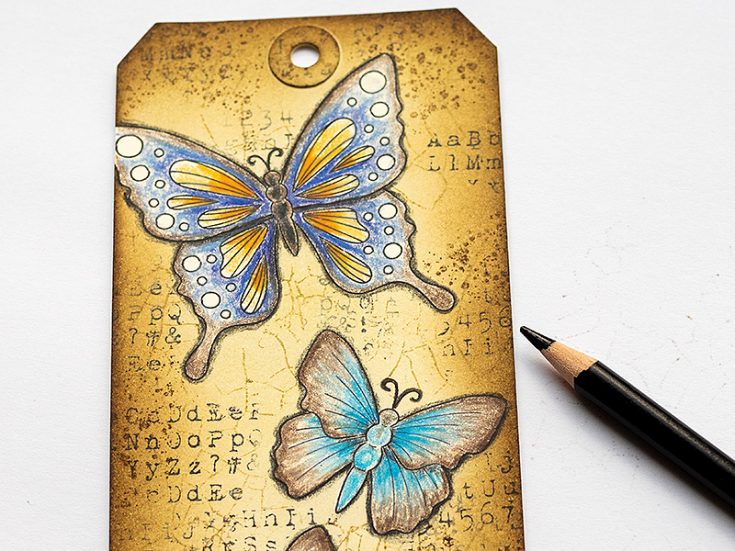
Use a black pencil and add a shadow to the butterflies. Start with a light application and then make it darker closer to the butterflies. This gives a dimensional look.
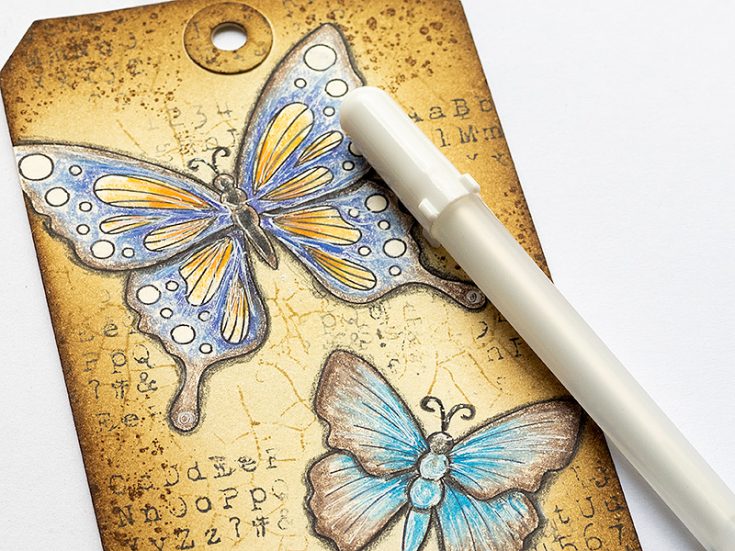
Add details and highlights with a white gel pen.
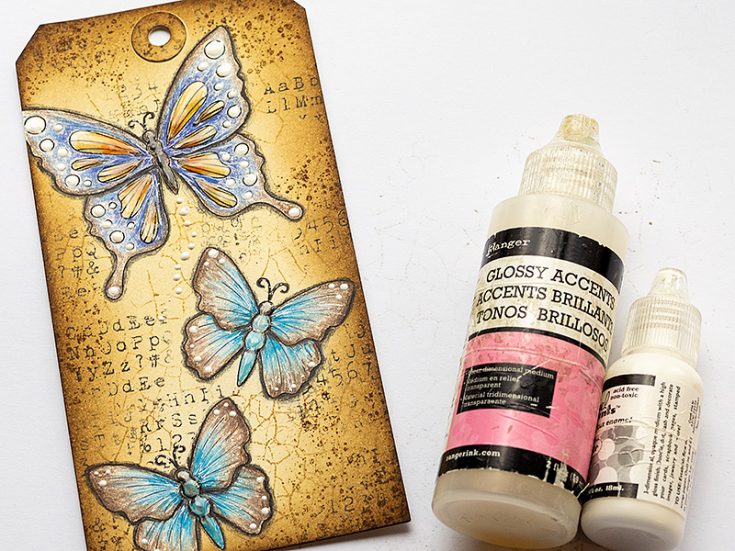
To make the butterflies even more interesting, I decided to use Glossy Accents and white Enamel Accents on some areas. Set aside to dry.
Add some details with a black pen, and doodle a border around the tag.
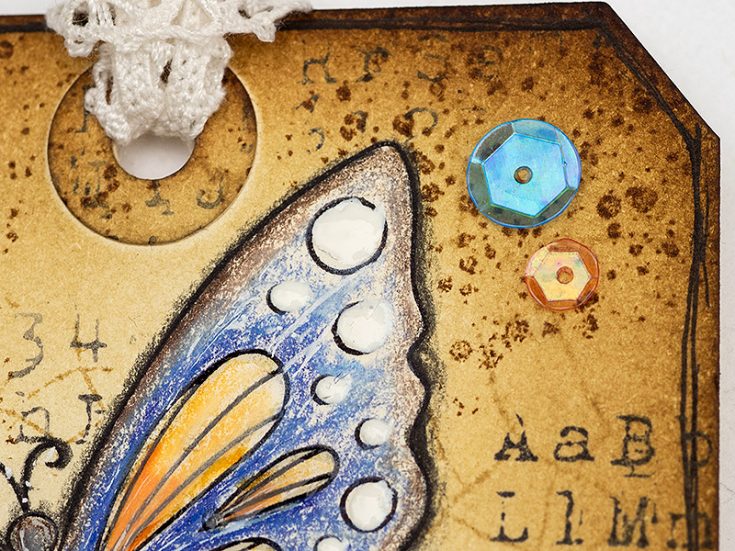
Finally, I glued sequins to the tag, for a fun playful look.

Here you can see the shiny effect of the Glossy Accents and Enamel Accents better.
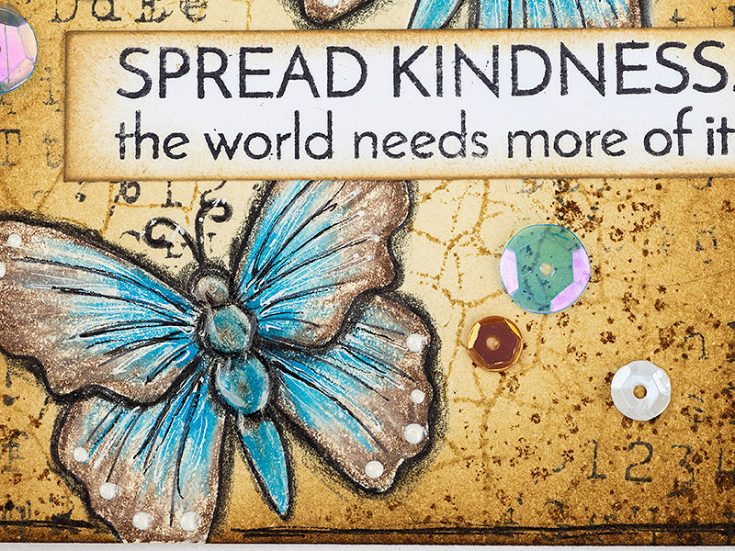
The coloring technique also works great for other images, such as flowers. The sentiment was stamped with the SSS Uplifting Thoughts set.
I hope this tutorial inspired you to color some butterflies (or something else) with colored pencils.
Thank you so much for looking! Happy crafting! – Anna-Karin
SUPPLIES:
|


Thanks so much for stopping by, and thanks to Anna-Karin for being our guest!

Blog Candy Alert!! Follow our blog via email and comment on this post for a chance to win special blog candy!
Watercoloring White Flowers with Kristina Werner – September 2019 Card Kit Inspiration
Hello, all! Kristina Werner here with some more inspiration using with September 2019 Card Kit! :)
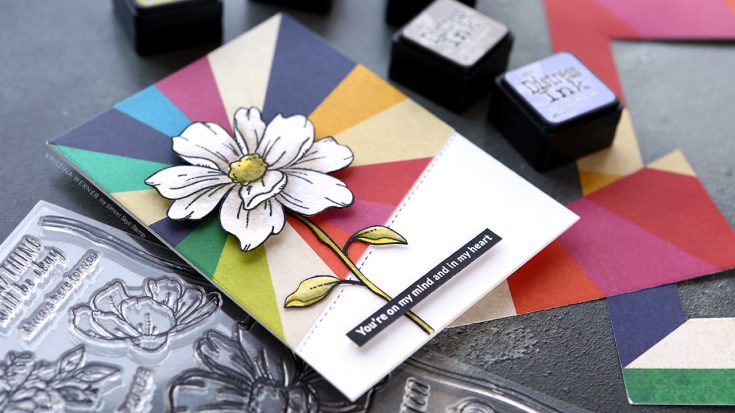
The large flowers in the Look For Rainbows stamp set from the kit are gorgeous! I decided to focus on just one of the flowers and watercolor it white.
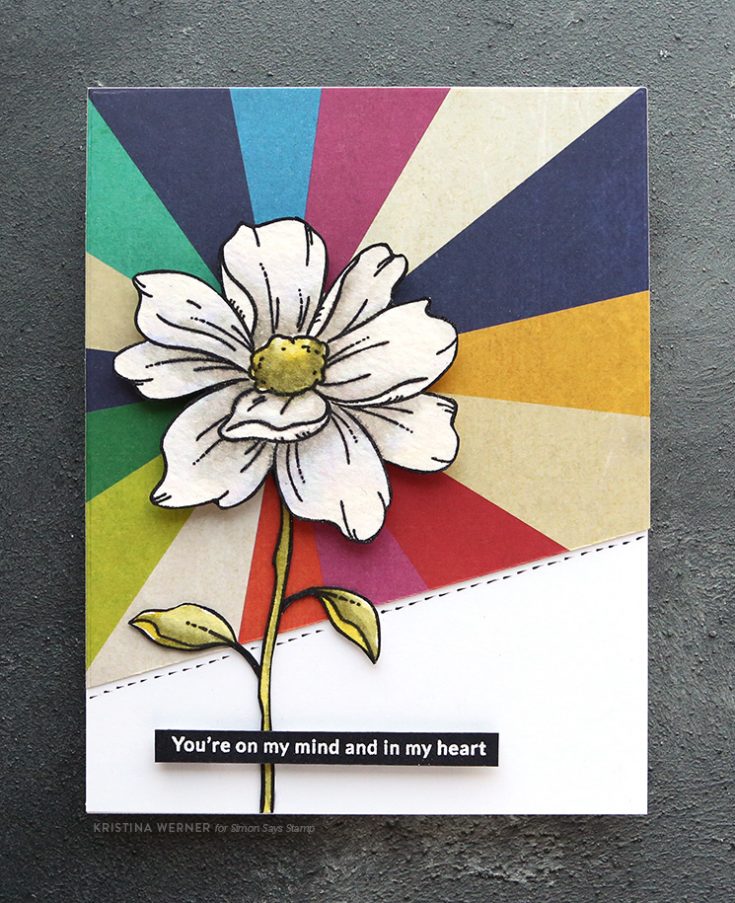
After stamping the flower, stem, and two leaves onto watercolor paper in waterproof black ink, I started painting the flower using two light shades of Distress Ink: Shaded Lilac and Pumice Stone. By keeping the shading very light, and most of the petals remaining white, this makes the flower look both white in color and with a bit of dimension.
To finished off the coloring, I used Mustard Seed for the center of the flower, and Crushed Olive, and Forest Moss for the stem and leaves.
I loved the idea of a white flower in front of a very colorful background, so I used a sheet of the patterned paper included in the kit. I cut it out with the A2 Layers dies from Waffle Flower and then cut off the bottom at an angle and adhered it to a white cardbase.
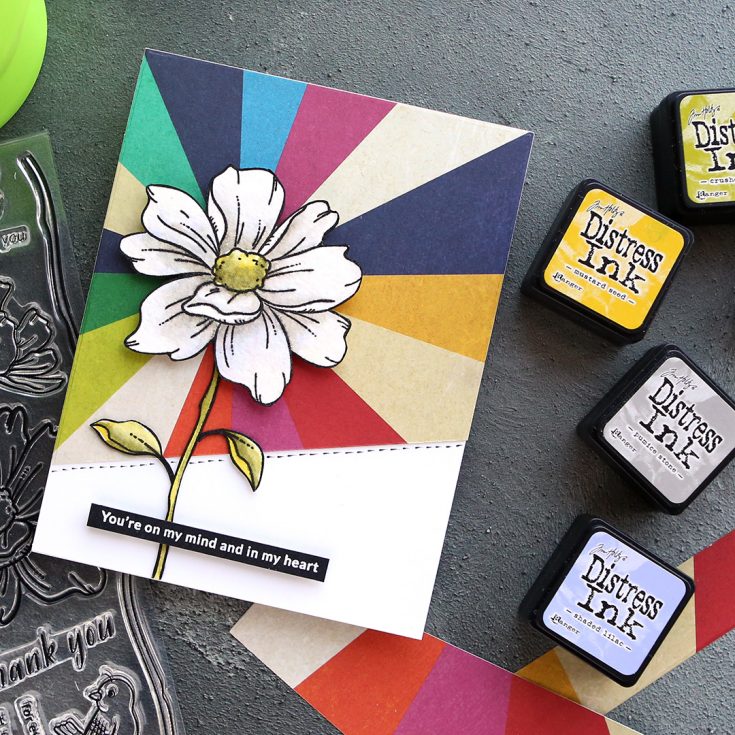
I adhered the watercolored flower and leaves to the card, and then added a stamped greeting from the stamp set.
Thanks for stopping by today! You can pick up the September 2019 Card Kit HERE, or subscribe to receive future kits HERE.
Supplies
|


