One Stamp Five Ways: Floral Mix Background
Hi friends! Happy Saturday and happy STAMPtember® eve! I hope you’re as excited as we are for all of the festivities starting tomorrow! Please join us in welcoming back special guest Suzy Plantamura with her popular One Stamp, Five Ways blog series! Read on for more info and enjoy!
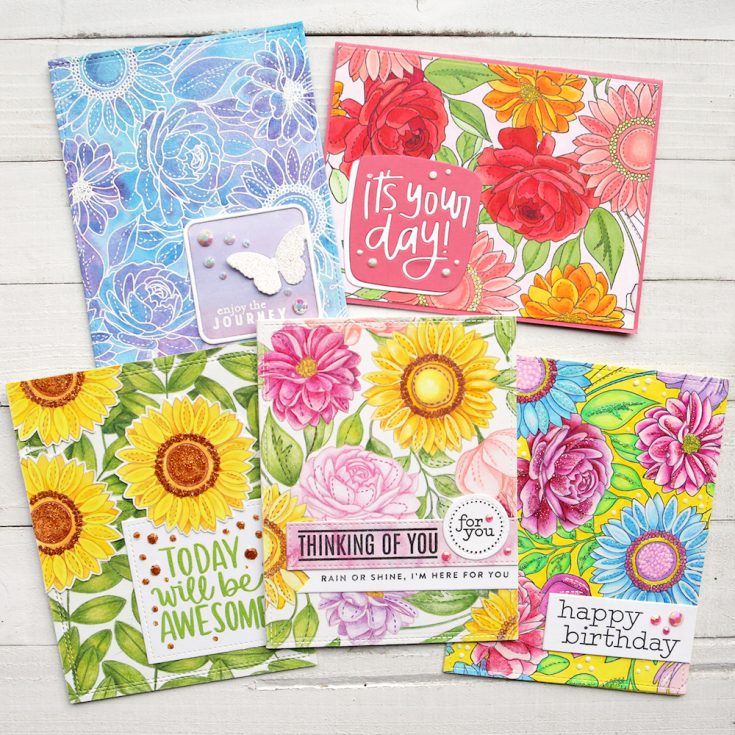
Today I have a “One Stamp, Five Ways” post for you using one of the gorgeous background stamps by Simon Says Stamp called Floral Mix Background. I love the series of stamps and now background stamps using these gorgeous florals with little dashed lines throughout.Not only are they super pretty, they are really fun to color too! I also used another stamp set for almost all of my greetings on these cards, so this is really a two stamp, five ways post!
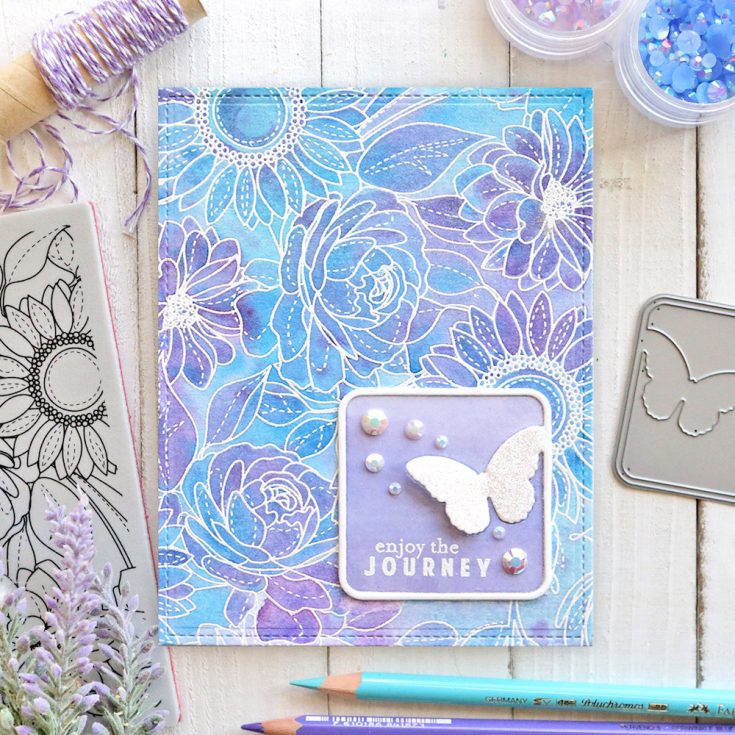
I stamped the Floral Mix Background stamp on Ranger Watercolor Paper with white embossing powder. I painted over the embossed stamp design with blue and purple watercolors using a wet on wet technique.
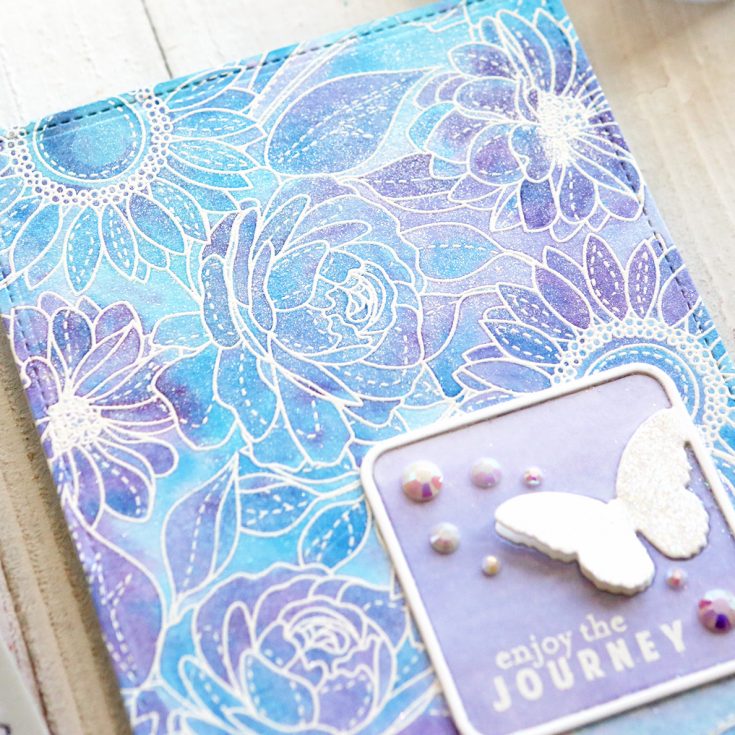
I then used a layer of Liquid Pixie Dust over the top of the paint. You can use it by itself for lots of sheen or you can mix it into your watercolors. I love this stuff! It’s like the glimmer pens inside a bottle! And this photo doesn’t even do it justice as it is so shimmery in person!
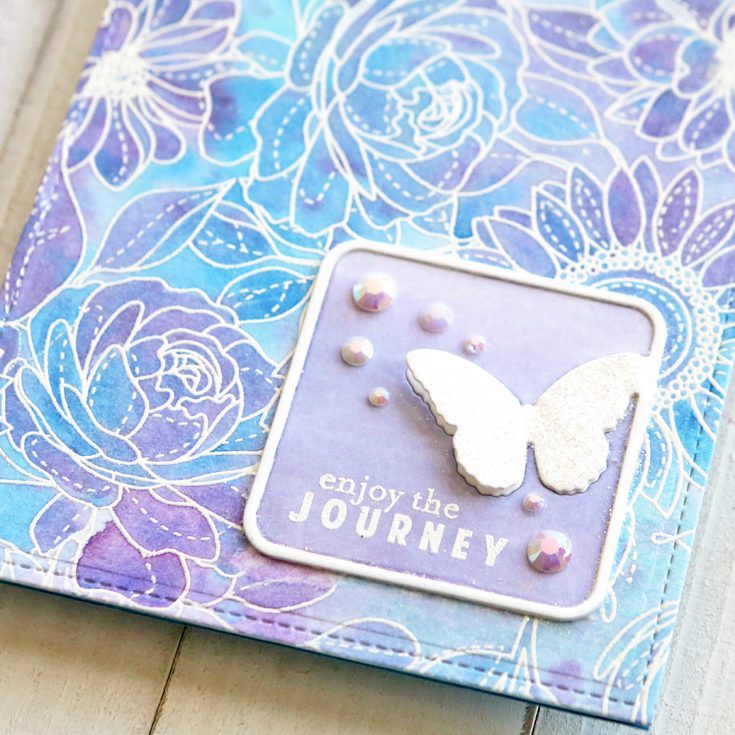
I die-cut the Peeking Butterfly Wafer Die out of white cardstock. I colored the inside piece with three colors of purple Copic Markers moving from light on top to darker on the bottom. I die-cut a second one and layered that over the first one turning up one of the butterfly wings. I covered the butterfly with Glossy Accents and white glitter. I added some white jewels.
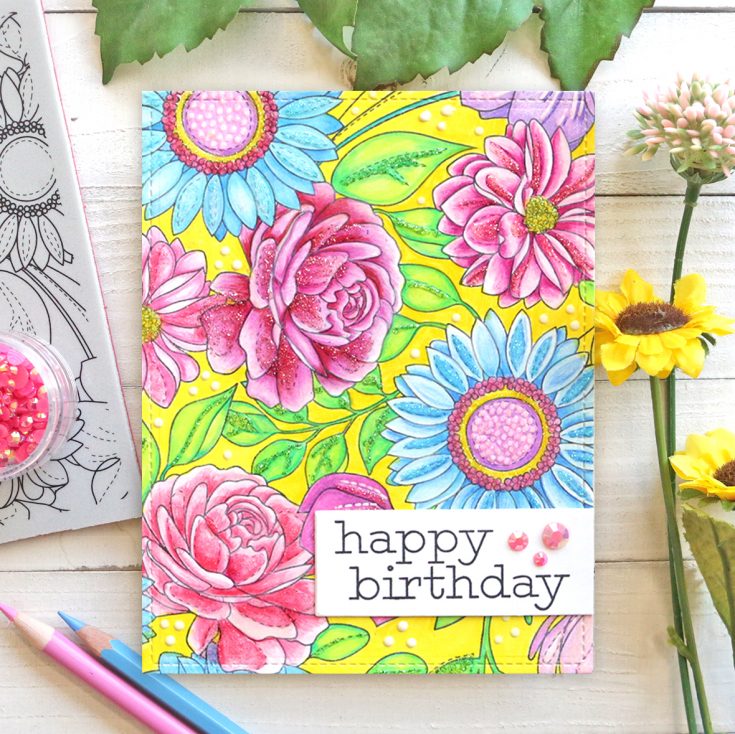
This time I stamped the Floral Mix Background stamp with black ink on white cardstock. I then colored it in with a very bright mix of colored pencils. Copic Markers would look good for this technique as well since they come in some very bright colors.
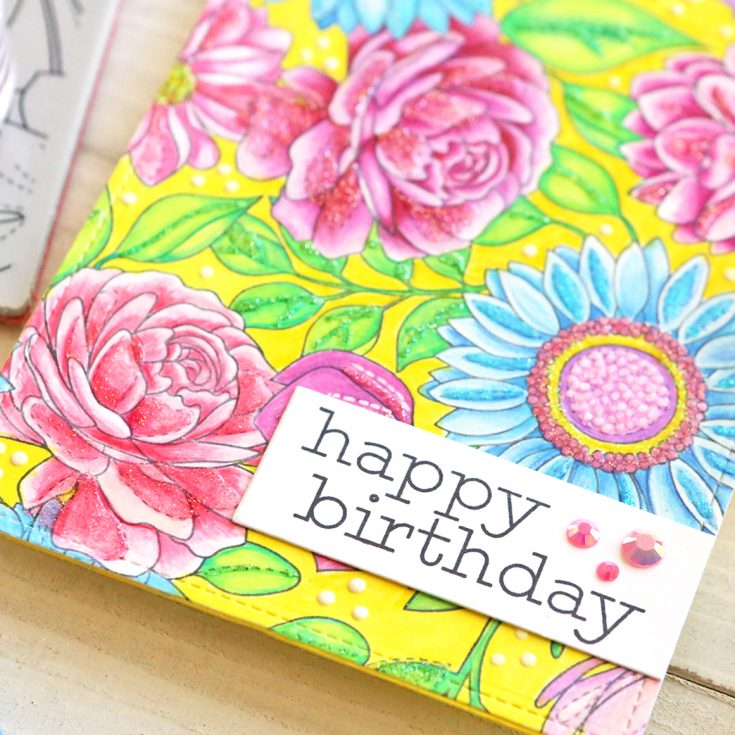
I stamped the“Happy Birthday” sentiment from the Greeting Mix 1 stamp set with black ink on a Sentiment Label Die. I layered that over the front of the card and trimmed off the right edge. I added some Watermelon Jewels on the right side.
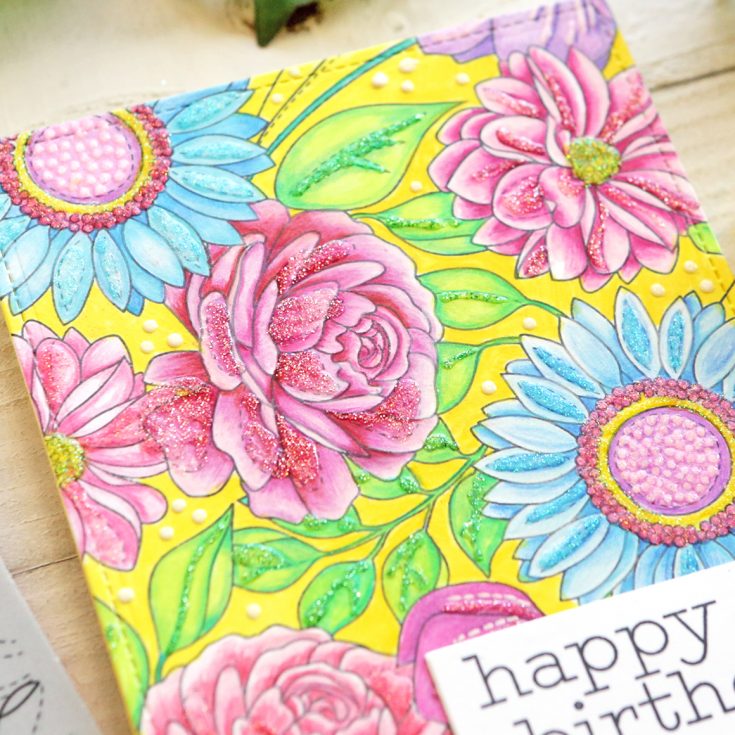
Last, I took this card up a notch by covering many of the colored areas with Tonic Nuvo Glitter Drops. They add so much sheen to this already bright card! I used Glossy White drops over the background.
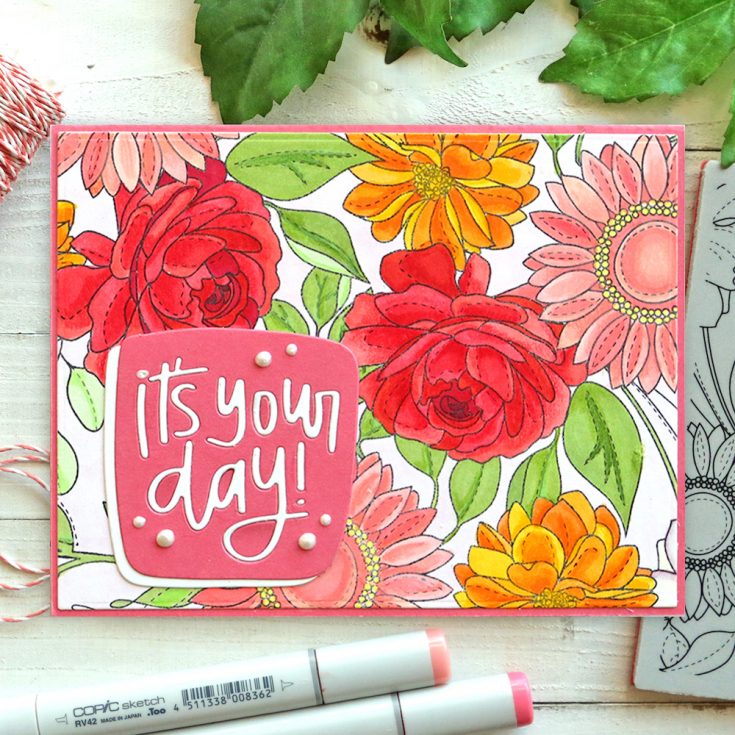
This time I stamped the Floral Background Stamp with black ink on white cardstock and colored it in with Copic Markers. I used colored pencils to add additional shading.
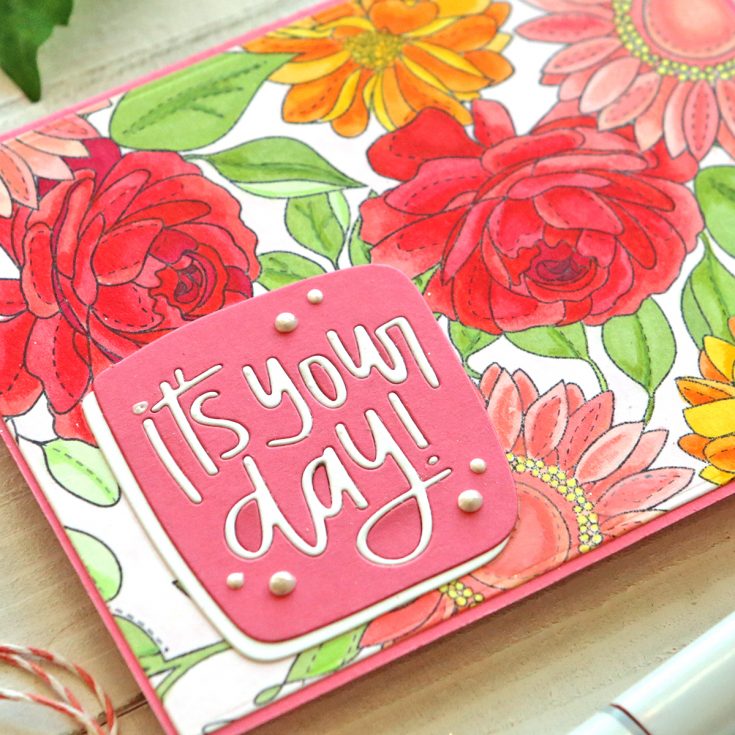
I die-cut the It’s Your Day Wafer Die out of Lawn Fawn Guava cardstock (my new favorite color) and white cardstock. I layered them on the front of the card using the white inside the letters. I added some Glossy White Nuvo Drops around the die.
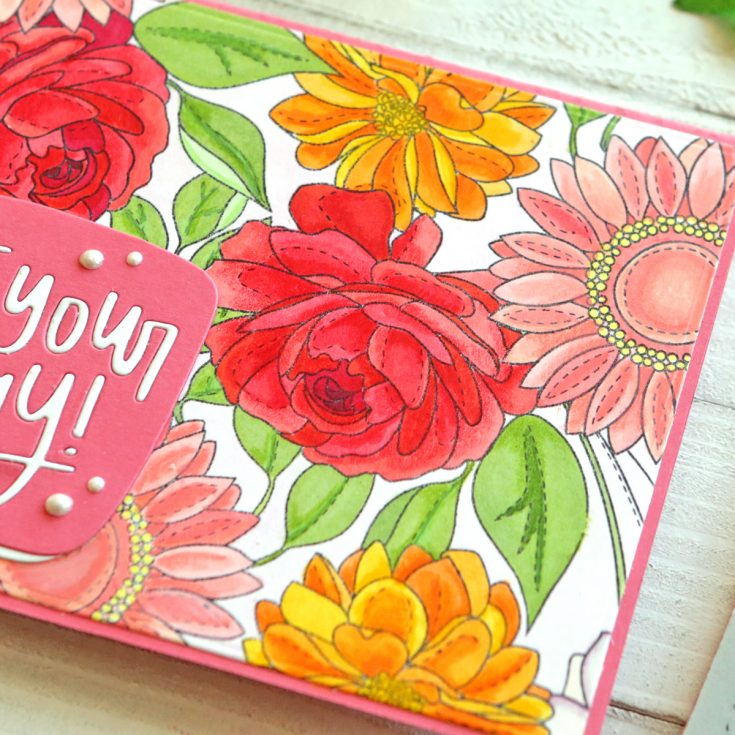
This just shows a close up of the flowers, but no more directions here! My daughter colored this with Copics for me, so she shades a little different than I do. I think she does a beautiful job and I always appreciate her help!
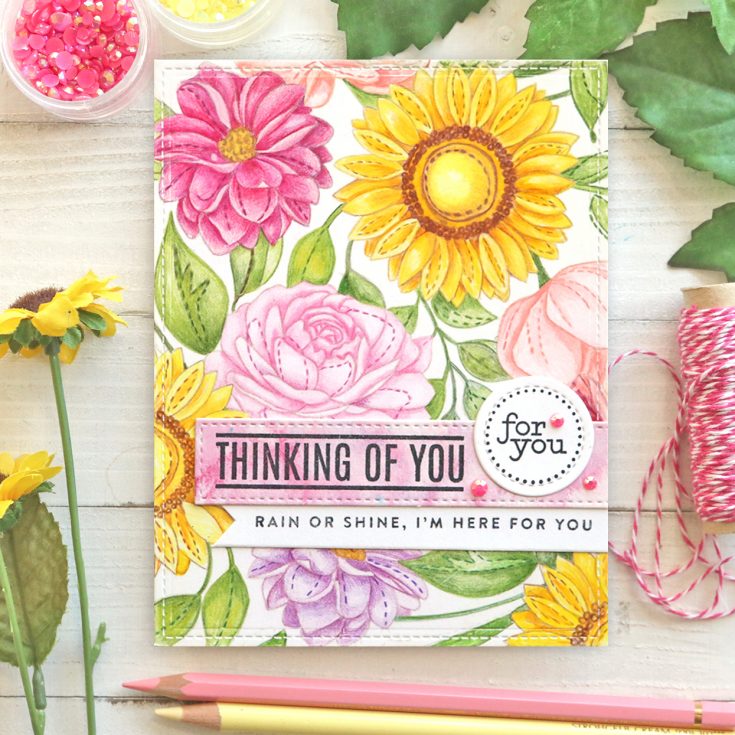
This time I wanted a no-line stamping look, so I stamped the Floral Background Stamp with a light color of ink on white cardstock. I colored the flowers in with colored pencils.
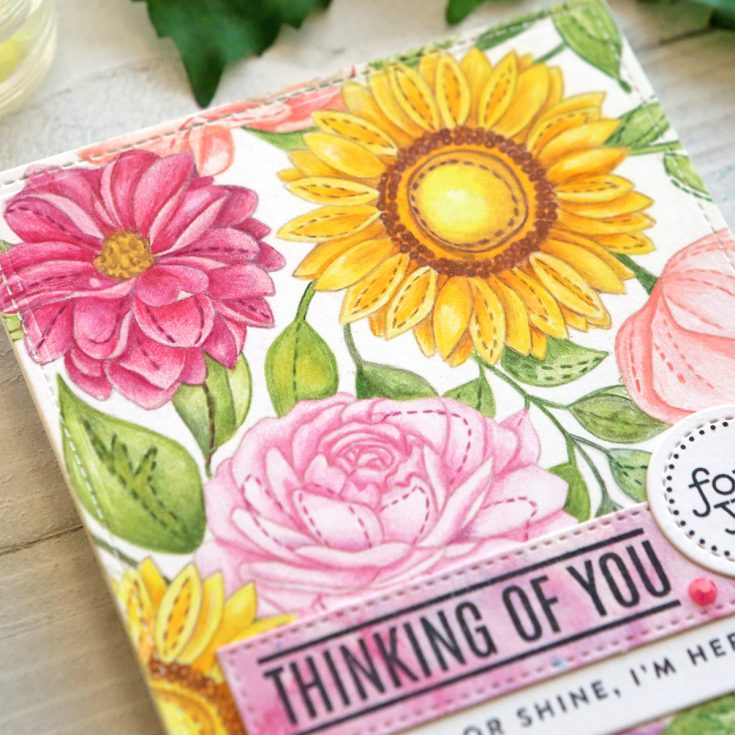
I used darker shades of the pencils to add the little dashed lines over the flowers and leaves. I have no idea why that one green leaf has a brown dashed line – Imust have been tired!
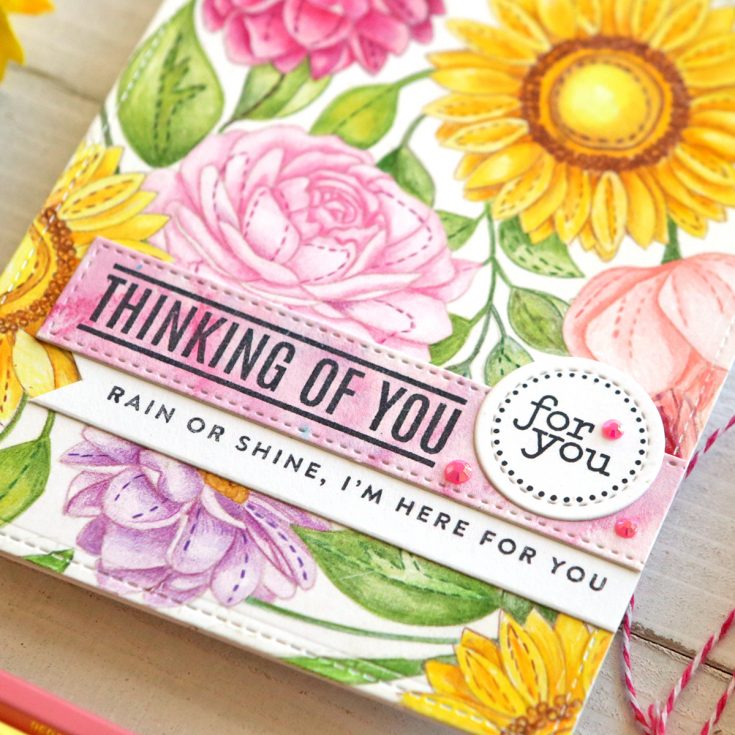
I layered three different sentiments from the Greetings Mix 1 stamp set. I stamped the largest one in black ink on a watercolored banner. Then I stamped the smaller text on a white banner using the Sentiment Label dies. I stamped the last one on a small circle die. I added some Watermelon jewels to finish the card.
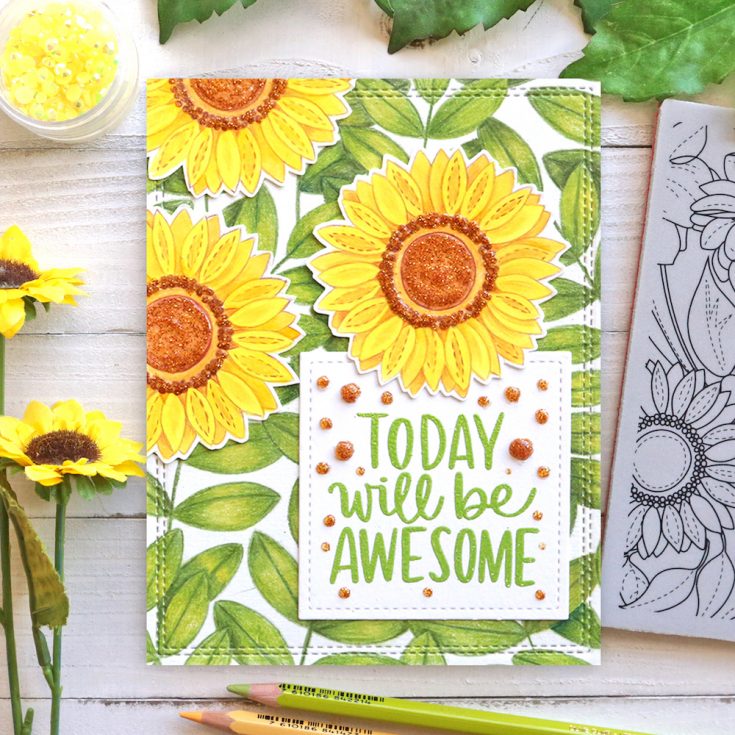
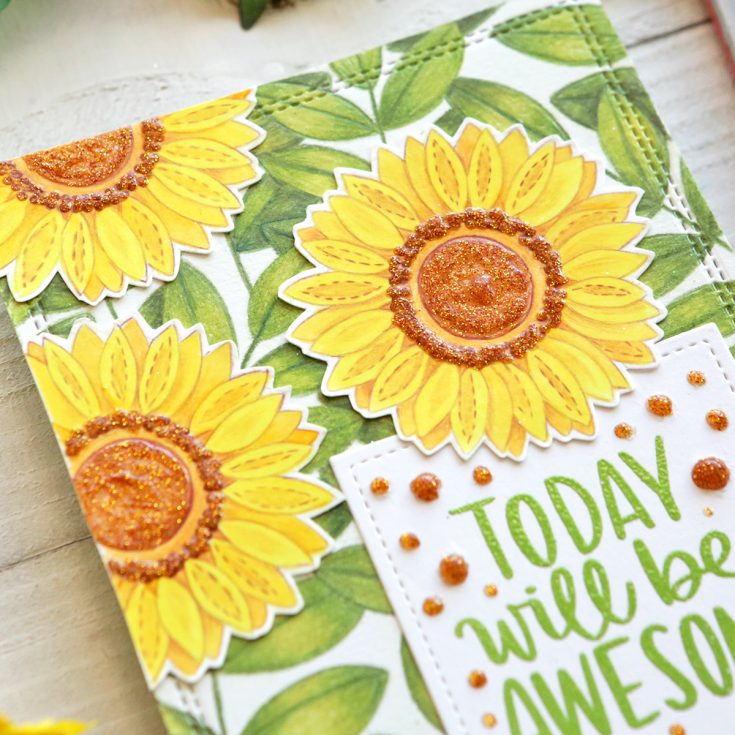
For this card, I started by stamping the Outline Leaves background stamp on white cardstock with a light color of ink and then I colored the leaves in with colored pencils. I thought I would try cutting some of the flowers out of this stamped image and these leaves were perfect for a background for the flowers.
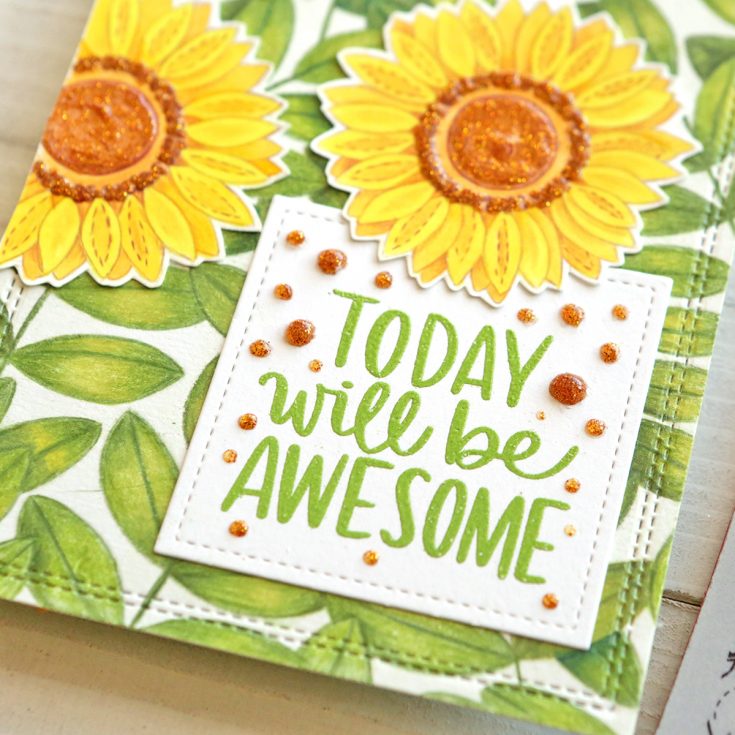
I stamped a sentiment from the Greetings Mix 1 stamp set with Leaf Green embossing powder on a stitched square die. I attached that to the front of the card and used some Golden Sunset Glitter Nuvo Drops.
I stamped the full Floral Mix Background Stamp on white cardstock with a light color of ink and I colored in just the three sunflower stamps with colored pencils. Ithen cut them out. Because I used a light color of ink, the lines of the otherflowers didn’t show up very much and I used a white Uniball gel pen to cover up the ink that did show. I used Golden Sunset Glitter Nuvo Drops to decorate the inside of the flowers.
Thanks so much for visiting the SSS blog today. I always enjoy sharing these “one stamp, five ways” posts with you. I hope you are motivated to pull out one of your stamp sets and try to come up with five ways to use it! Happy crafting friends! -Suzy
SUPPLIES:
|


Thanks so much for stopping by and thanks to Suzy for being our guest!

Blog Candy Alert!! Follow our blog via email and comment on this post for a chance to win special blog candy!
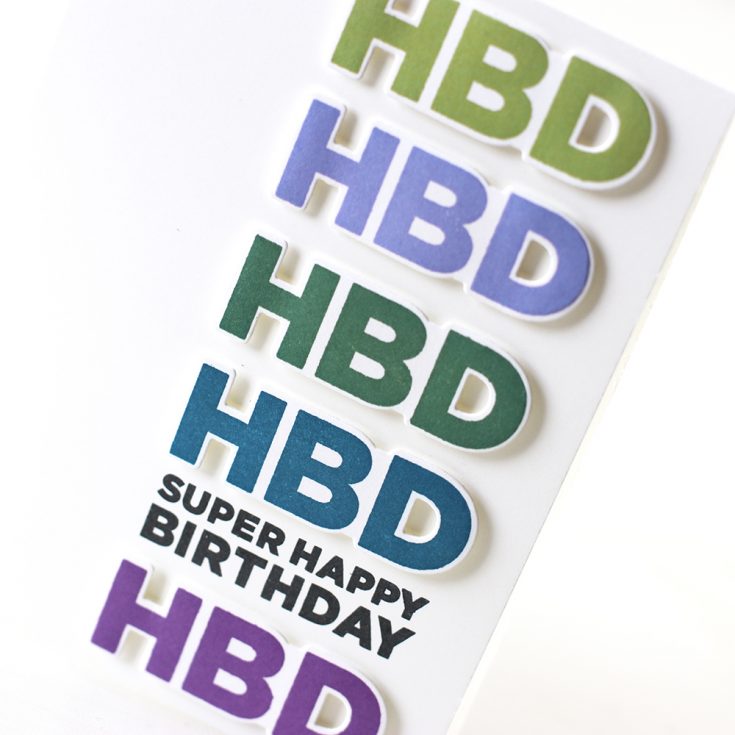
Color Coordinates: Bold and Beautiful!

Welcome everyone to another edition of my Color Coordinates series. I’m starting to look at bolder colors as we start to inch into fall. One-color I like to introduce into my fall line up is Purple! I’ve paired Simon Says Stamp Deep Purple and Hydrangea with some blue and green tones of Deep Sea, Evergreen, and Willow.
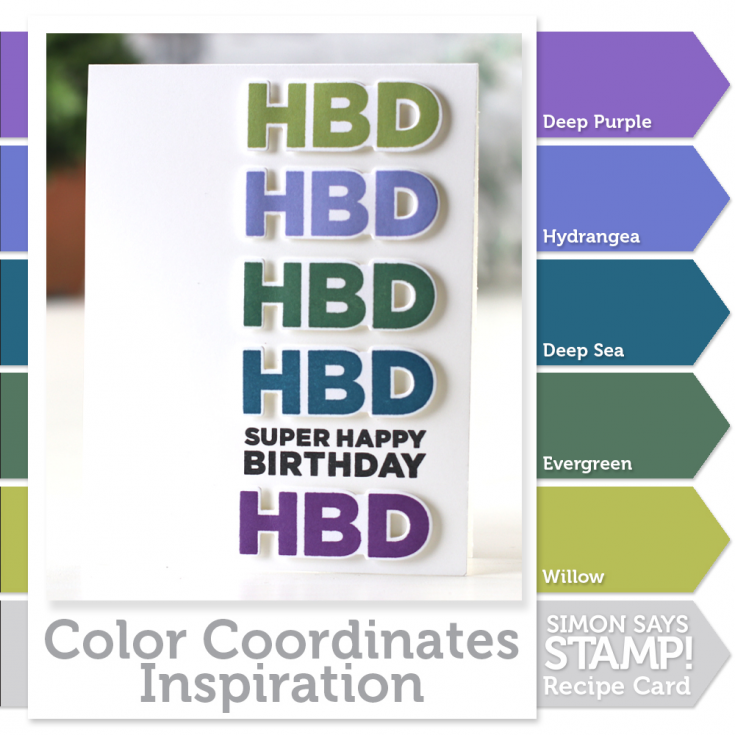
This is a card for my son, I think it’s manly, bold. and well… beautiful! I’ve used a repeating stamp image HBD from the Cathy Zielski Stop Drop Party stamp set for a clean and simple look while showing off a range of colors.
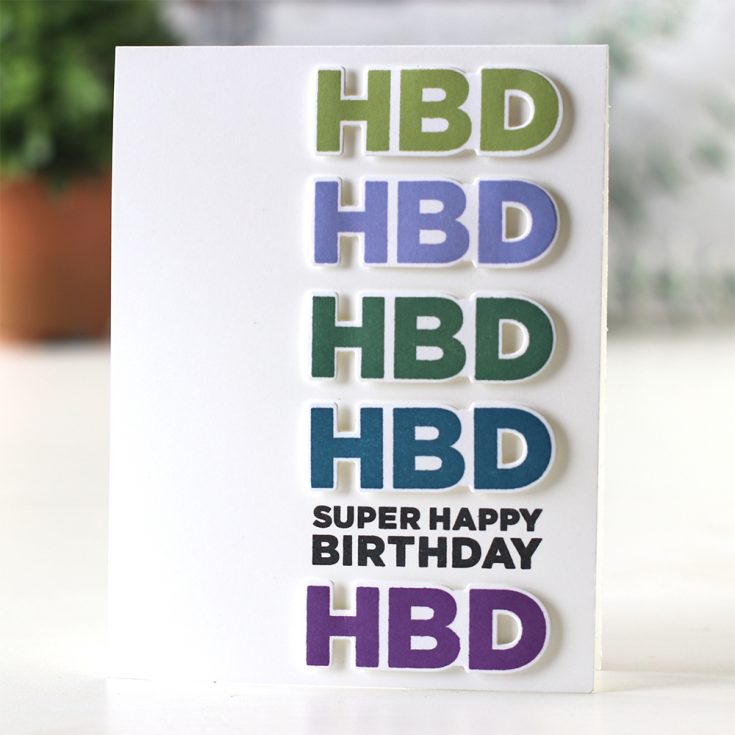
Each image was stamped twice for maximum boldness, using a Misti to keep the stamp in place. I just love our inks for their quality of softening into the paper leaving a creamy but crisp finish.
If you are interested in printing out the Color Coordinates and creating a swatch book, I have the downloadable templates available below.
- Book template and past Color Coordinates
- May 2018
- July 2018
- August 2018
- October 2018
- January 2019
- March 2019
- April 2019
- May 2019
- June 2019
- July 2019
- August 2019

Blog Candy Alert!! Follow our blog via email and comment on this post for a chance to win special blog candy!
Thanks for stopping by!!
|


A very special Facebook Live group Q&A!
In preparation of LOTS of STAMPtember® excitement we flew in some of our designers (Kristina Werner, Shari Carroll, Nina-Marie Trapani, and Cathy Zielske) and social coordinator (Susan Opel) to have a LIVE Q&A with Simon Says Stamp owner Heidi Crowl!
If you missed the live feed be sure to check out the playback!!
STAY tuned for STAMPtember® fun starting on September 1st at 12 AM ET!


